How To Use Your Mainsheet Traveler (The Right Way)
The mainsheet traveler is one of those things it pays off to master as it can add knots to your speed. In this article you will learn how to use it well so that you leave others in the dust. Or waves. You get my point.
So how to use your mainsheet traveler?
- When close-hauled, use the mainsheet traveler to keep the boom centered
- Use the mainsheet traveler to pull the boom down to tighten the mainsail
- Reduce the boat's heel by lowering the traveler


On this page:
How to use the mainsheet traveler, what is a mainsheet traveller, a valuable helper.
Look, I get that tweaking your sails with all those ropes and rollers and telltales and whatnot can get a bit daunting at first. But luckily, the mainsheet traveler is not a complicated matter to understand, since its use is relatively straightforward. And it really can help you sail much faster and easier. So let's go through the points above in detail.
Before we get into the specifics of the use, let's close our eyes and shed a tear in respectful silence for all the unused main travelers. You see, sadly, it is one of the most underused parts of the whole sailing rig, especially on charter cruisers.
More often than not, you see sailors lock the traveler in the central position at the beginning of their stay on board and not move it during the whole journey. That is unless they want to reposition the boom so that the swimwear that is drying on it doesn't drip into the cockpit.
Heart wrecking, I know.
Though sailing without using the main traveler is possible, you are robbing yourself of speed, comfort and, believe it or not, you are actually doing more work than you would have to do if you took advantage of this thing.
So why is this? What good does it do to move these travelers around? As mentioned:
1. Use The Traveller To Center The Boom When Close Hauled
Especially when going upwind (or close-hauled), you want to make sure your sails are in the correct position. Going into the wind is one of those points of sail that require quite a bit of attention as if you don't get the sails right, you just won't go.
As for your boom, it needs to stay centered in such a situation. While traveling upwind, there will be quite a lot of force exerted on the mainsail by the apparent wind, pushing it away from the wind direction, which could mess up your set up. Since the connection between the traveler and boom are flexible ropes, you might need to move the traveler slightly upwind to keep the boom centered.
So keep playing with it until the boom is nicely set in the middle and tighten the ropes so that it doesn't move around.
If you want to learn more about sailing into the wind , I've written a 7-step guide on how to do it effectively. You can read it here .
2. Use The Traveller To Pull The Boom Down To Tighten The Mainsail
Especially when the wind gusts a lot, you might want to keep the sail more firm so that it doesn't 'belly out' since that would often mean a loss of power.
During those moments it pays off to pull the boom down to make sure the sail holds its form even if you are getting punched by the Anemoi themselves.
Fun fact, Anemoi are the Greek gods of wind. I thought it was Poseidon but upon googling him to find whether you write two 's' or just one, I found out he only takes care of the sea. Winds are not his department.
Anyway, to those of you thinking 'but man, pulling the boom down, that's what the boom vang is for!' yes, you are right, but boom vang works better when sailing downwind and thus the boom is wide open. On the other hand, when going upwind, when the boom is more centered, doing this with the mainsheet traveler ropes is easier and more effective.
3. Lower The Traveller To Reduce The Boat's Heel
This is a big one. The main traveler can save you tons of work and time.
A heeling boat is an inevitable part of sailing, and it looks hella cool, (or at least I'd like to think so) but once you go over a certain point, you are losing power and speed. So to reduce the risk of that or to provide your crew with a bit of comfort - since it is quite tricky to cook or use the heads when the boat is sideways - if you find it heeling too much, let the traveler out a bit.
This will reduce heeling and the weather helm. To those who haven't heard about this before - weather helm is the tendency of boats to turn into the wind and is a result of too much heeling. While you can still keep your direction, to do that, you have to steer more, thus there is more drag on the rudder, which slows your boat down quite significantly.
So that was speed - now let's explain where exactly are you saving energy.
Use the traveler instead of reefing
Using the traveler this way is much easier and faster than depowering. If the wind gets too rough, instead of reefing, you can let the traveler out. This of course does not go all the way and you will likely need to reef eventually, but the main traveler can buy you some time before you have to.
This is valuable especially in cases when there is a chance of the wind slowing down soon, thus a chance you would have to reef and then open the whole sail up soon after.
Let's make sure we all understand what this piece of equipment is. Look at a picture of most sailboats and you will find a bunch of ropes and shackles and blocks that go from the boom down, connecting it with the boat. They are usually connected either to the roof of the salon or back of the cockpit, mostly depending on the size of the boat. At the bottom, they are joined to a wheely thing that can travel horizontally left and right on a rail, taking the boom with it.
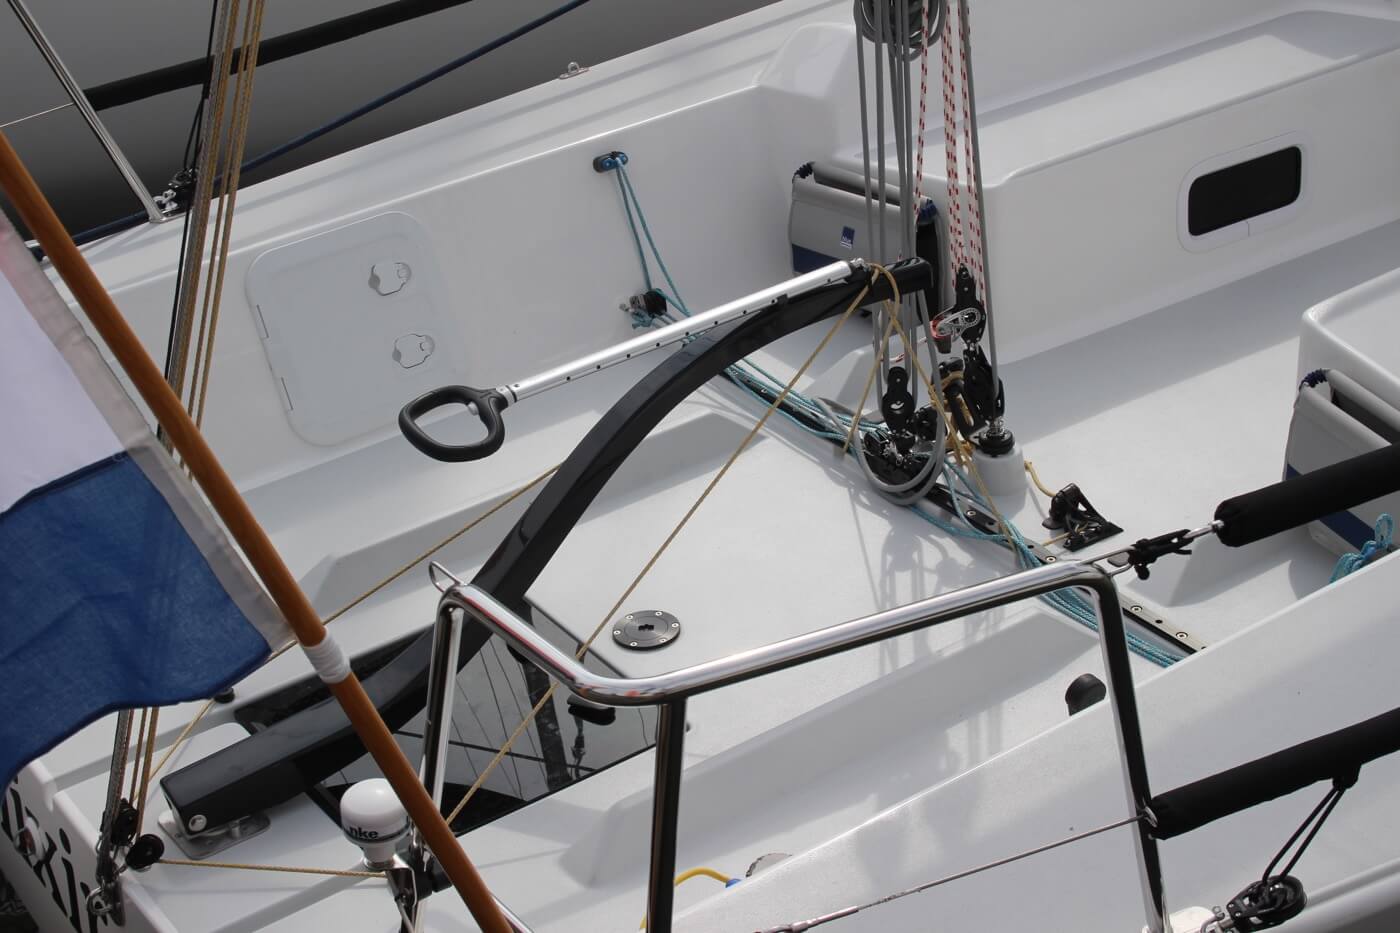
Sometimes there is not a wheely thing, but two roller systems, connecting the boom with the left and the right side of the boat. Tightening the left one and loosening the right one will bring the boom to the left and vice versa. Thus it serves the same purpose, it just takes up a bit more space.
These systems come in a variety of forms and alternatives, and sometimes there is nothing at all and the boom is simply locked in a central position. Usually, though there is something , all with the same purpose - to position the boom and lock it in place.

So you see, it isn't at all complicated. Once you get on a boat to test this out, you will find that operating the main traveler is rather intuitive, most of the time very simple, regardless of what system is in place. It is not a complicated piece so it should be relatively straightforward how to manipulate with it, even without a manual. And as apparent, it can make your journey quite a bit more effective and fun.
It is exactly this type of little skills you can have that make all the difference between a weekend cruiser and a sailor. Don't get me wrong, there is nothing wrong with leisure sailing even if you are a bit lazy about it. After all, sailing is about fun, passion for the seas and boats - that should be on top of the hierarchy.
That being said, I strongly encourage anyone half interested in sailing to learn as much as possible about operating a sailboat. Most sailors use perhaps one-third of the boat's equipment, the bare minimum that makes their vessel move. And while the basic setup is not that complicated, this should only be good news for those without many skills, since they can go and sail even if they are in a relatively early stage of their learning process.
But once you are familiar with the basics, knowing how to trim correctly, shape the sails in the right way and select the proper course adds a lot even to a leisure cruise and most importantly can save your boat and keep you safer when the seas get rough. Which will happen sooner or later?
In short, there should not be a single rope on board that you don't know the function of and aren't using unless that is your deliberate choice. Luckily enough, these days the internet is full of articles and videos about sailing and you can learn quite a lot from the comfort of your home. This site is an example of this. So go ahead, skim through the Improve Sailing guides and become the best you can be.
To cite Sir Francis Bacon, “Knowledge is power.” In our case, knowledge is speed, comfort, and safety.
Fair winds and safe travels to you all!

DAVID DONNELLY
Thank you for all your efforts in putting these materials together. For a neophyte like myself, I have found the information to be not too complex, but with lots of links to explain matters more fully. Much appreciated and, again, thank you.
Leave a comment
You may also like, how to sail into the wind (in 7 simple steps).
Sailing into the wind seems like Poseidon's magic, but once you learn how to set up your sails and hold the correct course, you can do it. This article explains the …

What is the Ideal Wind Speed for Sailing?
Own your first boat within a year on any budget.
A sailboat doesn't have to be expensive if you know what you're doing. If you want to learn how to make your sailing dream reality within a year, leave your email and I'll send you free updates . I don't like spam - I will only send helpful content.
Ready to Own Your First Boat?
Just tell us the best email address to send your tips to:
What is a Sailboat Sheet?

Last Updated by
Daniel Wade
June 15, 2022
A sailboat sheet is a rope or line used to pull the sail in and out. Sailors use sheets to control the speed of the boat and the trim of the sails.
Using the term "sheet" to describe a rope seems counterintuitive. As a result, the term is often confused with the sail itself. Sailboat sheets are connected to one corner of the sail (clew) or boom and control its lateral position. Sheets are an integral part of sailboat rigging.
Table of contents
A sailboat sheet is a rope or line connected to the clew of a sail (in the bottom corner) or the boom. From the boom or clew, the sheet often runs down to a series of blocks and winches on the deck. Sailors control the sheets from these winches and blocks.
The mainsheet controls the lateral movement of the boom and the mainsail. This is often the most important sheet onboard a sailboat. It's also the closest, as the boom hangs over the cockpit of the sailboat.
The jib sheet controls the front triangular sail. It runs across the length of the deck and often includes two separate lines. When changing direction, sailors release the cleat and winch, securing one side of the jib sheet, and engage the other, allowing the jib to swing to the other side.
Basic Sailboat Sheet Rigging
Small sailing dinghies use the simplest forms of sheet rigging. In many cases, the sheet of a small sailboat is simply a section of rope hanging from the boom, which the sailor holds on to and pulls in and out.
Other small vessels have a simple block system mounted to a fixed point on the deck, which allows the operator to tether the sheet in place. Small boats often avoid these systems as they're sensitive to minute wind changes.
Block and Tackle
The mainsheet feeds through a complex system of blocks (pulleys), cleats, and winches. These rigging systems allow the boom to swing to either side, which is especially useful when tacking quickly. Here are two common types of mainsheet rigging, otherwise known as 'tackle' systems.
Gun tackle is one of the simplest block and tackle systems used on sailboats. It requires only two blocks, which are usually positioned towards the end of the boom on the stern of the vessel.
Gun Tackle only utilizes two sections of rope in the blocks, which provides the lowest level of force reduction. As a result, this block and tackle system is typically found on smaller sailboats where the size of the sail plan requires less effort to manage.
Luff Tackle
Luff tackle is much more common on cruising sailboats , and it's still fairly simple to operate. Luff tackle is easier to pull (requires less force) than gun tackle, as it includes three sections of rope instead of two. Remember, each section of rope reduces the force required to pull in the sheet.
The main disadvantage to luff tackle (and other high-ratio block and tackle systems) is increased sheet length. Longer lines increase the chances of tangling, which can be a nightmare at sea. However, a properly-rigged sailboat and a trained crew can reduce the chances of fouling up the mainsheet.
Mainsheet Travellers
Travelers are extremely useful for trimming the sail. The system allows sailors to adjust the "twist" of the mainsail , which helps control the speed more precisely. The mainsheet block mounts to the sliding traveler and moves side to side.
Mainsheet Bridle vs. Mainsheet Traveller
A bridle is a simple alternative to a traveler, and it comes in many configurations. A standard dinghy-style bridle feeds the mainsheet through two deck-mounted blocks, which allows the operator to center the boom. Other vessels use a single block on a sliding rail, which serves the same purpose.
Travelers are more complex, but they offer superior power and trim control on larger boats. The primary advantage of a traveler is the ability to precisely adjust the twist of the sail, which is especially important in windy and stormy conditions.
Sailboat jib sheets utilize more than one section of rope or line. Instead of a single line connected to the boom, the jib uses one line on either side of the sail. Jib sheets connect to the jib through a clew located at the bottom corner of the canvas.
The jib sheet works in a similar way to the mainsheet. Tightening one side of the sheet pulls the bottom corner of the jib in that direction and helps control the boat. When one side of the jib sheet is taught, the other side is loosened.
The jib sheet utilizes two separate sections of the rope that run along the port and starboard side of the deck. The advantage of using two lines is that there's no need to unwrap the sheet from the mast when changing direction.
The sheets travel from the clew of the jib to a set of blocks towards the bow of the boat. From there, the lines often run through a set of cam cleats and to their respective winches.
When changing direction to the wind, sailors loosen one section of the jib sheet and release tension from the cleat and the winch. Then, they feed the opposite line into the cam cleat and tighten the winch. This process prepares the jib to switch sides.
Sailboat Sheet Winches
Sailboats utilize winches for the mainsheet and the jib sheet. Winches allow sailors to increase and decrease line tension by winding around a cammed drum. Winches include a removable winding crank or a motor.
The cam inside the winch works like a socket wrench or a bicycle sprocket, allowing sailors to wind against pressure and lock one direction of travel. Sailors can switch the direction of the cam for winding and unwinding.
Manual Winches
Manual winches are common on sailboats of all sizes. These winches are wound manually using a removable crank or 'key,' which fits into the top of the drum. Manual winches are sometimes difficult to wind by hand, especially in windy conditions.
Power Winches
High-end modern sailboats often utilize motorized winches. These electrified systems allow sailors to wind heavier loads. Additionally, electric winches can be controlled from a protected pilothouse. Advanced electric winch systems allow the sail to be trimmed without stepping foot on deck.
Best Line for Sailboat Sheets
Sailboat sheets control the speed of the boat, so it's essential to choose a durable and long-lasting line material. It's also necessary to quickly replace aged and frayed sheet lines, as degraded lines can snap, tangle, and bind up without warning. Here are the best materials for sailboat sheet rigging.
Polyester Sheet Line
Polyester is an affordable and robust material for sailboat sheets. It's extremely common on all kinds of sailboats. Polyester is ideal because it's strong, resists decay, and it doesn't stretch easily. Polyester line is a trusted go-to for typical day-sailing activities.
Polyester has a few disadvantages. For one, it absorbs water readily and breaks more easily than high-strength lines. It's fine for most leisure sailing activities, but better alternatives exist for serious cruising.
Aramid (Kevlar) Sheet Line
Aramid (Kevlar) line is a high-strength alternative to polyester, and it's ideal for marine applications, including sailboat sheets. Kevlar line consists of tightly woven strands of ultra-strong aramid fiber, which is highly resistant to heat, weather, stretching and fraying. Aramid line is trusted onboard serious cruising sailboats all over the world.
Kevlar is stronger than polyester, sheds water better, and stretches less. But strength comes at a cost—kevlar lines aren't as flexible as polyester, and they tend to become brittle when exposed to the sun for too long.
HMPE Sheet Line
HMPE (High Modulus Synthetic Fiber) is a space-age material that solves most of the problems caused by polyester and aramid sheet lines. HMPE is a premium woven fiber material that is (quite literally) one of the strongest synthetic fibers available to sailors. It doesn't stretch, and it's highly resistant to weather and wear.
HMPE is the material of choice for competitive sailboats and blue water vessels. The primary downside of HMPE lines is cost, as this fiber is quite expensive when compared to relatively affordable aramid and dirt-cheap polyester.
Related Articles
I've personally had thousands of questions about sailing and sailboats over the years. As I learn and experience sailing, and the community, I share the answers that work and make sense to me, here on Life of Sailing.
by this author
Sailboat Parts
Learn About Sailboats
Most Recent

What Does "Sailing By The Lee" Mean?
October 3, 2023

The Best Sailing Schools And Programs: Reviews & Ratings
September 26, 2023
Important Legal Info
Lifeofsailing.com is a participant in the Amazon Services LLC Associates Program, an affiliate advertising program designed to provide a means for sites to earn advertising fees by advertising and linking to Amazon. This site also participates in other affiliate programs and is compensated for referring traffic and business to these companies.
Similar Posts

Affordable Sailboats You Can Build at Home
September 13, 2023

Best Small Sailboat Ornaments
September 12, 2023

Discover the Magic of Hydrofoil Sailboats
December 11, 2023
Popular Posts

Best Liveaboard Catamaran Sailboats
December 28, 2023

Can a Novice Sail Around the World?
Elizabeth O'Malley

4 Best Electric Outboard Motors

How Long Did It Take The Vikings To Sail To England?

10 Best Sailboat Brands (And Why)
December 20, 2023

7 Best Places To Liveaboard A Sailboat
Get the best sailing content.
Top Rated Posts
Lifeofsailing.com is a participant in the Amazon Services LLC Associates Program, an affiliate advertising program designed to provide a means for sites to earn advertising fees by advertising and linking to Amazon. This site also participates in other affiliate programs and is compensated for referring traffic and business to these companies. (866) 342-SAIL
© 2024 Life of Sailing Email: [email protected] Address: 11816 Inwood Rd #3024 Dallas, TX 75244 Disclaimer Privacy Policy
Mainsheet Management Tips

Does your mainsheet get knotted up at the most inconvenient time? Do you find it difficult to keep your boom out while going downwind? Do your feet get tangled up in your mainsheet while you are trying to tack? Here are some ideas that might help.
Mainsheet selection
First, repurpose or throw away your old, fuzzy, heavy mainsheet. Replace it with either a 6- or 7-millimeter Rooster or equivalent mainsheet. The 6-millimeter Rooster yellow is used by most of the World Cup and Olympians in all conditions. It is perfect for light winds and will allow you to keep your boom out while going downwind in light winds. Heavier mainsheets tend to pull your boom in and make the sail collapse in lighter wind.

For heavier wind conditions, I like the 7-millimeter Rooster black because it puts less strain on my hands. Your mainsheet should be at least 44 feet long. DO NOT CUT IT SHORTER!
Mainsheet preparation and installation
Put your mainsheet in the washing machine and run it through a cycle or two to wash the shine off the mainsheet. This will make it less slippery and easier to grip. Al Sargent goes a few steps further and suggests, “When I first get a Rooster mainsheet, I like to wash it on extra hot to get out all the slippery coatings. Then I like to run it through sandpaper, maybe 100 grit, a few times so that it’s slightly fuzzy and thus easier to grip. This extends the wind range in which I can use the thinner, yellow 6mm Rooster mainsheet.” He also suggests tossing your mainsheet into the wash regularly to ensure that it’s free of salt or grime that can make it stiffer.
I like to put two figure-eight knots about a foot apart at the cockpit end of the mainsheet. The knots prevent the mainsheet from running out through the mainsheet block. Not having the mainsheet attached allows me to throw the trailing end of the mainsheet into the water and drag it behind the boat to remove twists. I can also adjust the second knot to shorten the mainsheet in very high winds to prevent me from accidently letting out too much mainsheet which can cause an immediate death roll. When the wind gets up beyond 15 knots, I generally move the second knot up the mainsheet so that there is at least 3 feet between the knots. When the wind is light, I move the knot back down the mainsheet so that there is about 1 foot between the knots.

As an alternative, some people like to attach their mainsheet to the stern end of their hiking strap. There are some advantages and disadvantages to this approach. I will leave it up to you which system you prefer.
In between races and/or at the beginning of each starting sequence, get all of the kinks and twists out of your mainsheet. Carefully stack your mainsheet slack into the back of your cockpit. By doing this you will at least have one time during the race when your mainsheet is perfectly organized.
You should be using your mainsheet to control your sail shape. This is a dynamic process. You are continually sheeting in and out, even if it is only an inch or two. Consequently, don’t cleat your mainsheet into the deck cleats. If fact, get rid of the deck cleats. The vast majority of the top sailors don’t use them at all.
Before you begin a tack, make sure that you free up an arm’s length of mainsheet and lay it on the deck or on your lap. This will ensure that you are not stepping on or getting tangled in the mainsheet during your tack. Even better, free up an arm’s length of mainsheet after every tack. This will ensure that you are always ready to tack at a moment’s notice.

Clearing the mainsheet after a tacking in a Laser ILCA dinghy
Windward Mark Rounding
Free up a couple of arm lengths of mainsheet and lay them on the deck as you approach the windward mark. As you make the turn, raise your sheet hand with sheet in it high above your head and then drive your hand with the sheet toward the mainsheet block and then let the rest of the mainsheet slide through your hand. Do not loose contact with the mainsheet.
Downwind sail trimming is also a dynamic process. You should be constantly trimming to find the precise by-the-lee angle that gives your sail the most power. This is constantly changing as your boat speeds up or slows down and as you change your sailing angle to achieve best VMG.
Leeward Mark Rounding
This is where you mess up your mainsheet the most. As you round the leeward mark you need to sheet in just as fast as you possibly can at the appropriate moment. You can practice building your speed and managing where your mainsheet lands in the cockpit on dry land in your boat with a partner. Start by sheeting in a fully extended sail and boom in slow motion to ensure that your hands and arms are moving correctly. Slowly build up your speed while maintaining correct form. With just a few days of practice you will increase your speed and improve your mainsheet management significantly.
Mainsheet Storage
When you put your boat away, don’t coil up and tie up your mainsheet. Or worse yet, don’t just pile it up into a tangled mess in your cockpit. Instead, lay it out flat on your deck from bow to stern and let it dry straight, with no kinks or knots. I maintain that if you let your mainsheet live most of its life straight, untwisted and untangled that it will be more likely to stay that way during a race. So far, I’ve had pretty good results with this approach.
If you have to coil up your mainsheet, Al Sargent and Tom Vollbrecht both recommend using a butterfly coil. This a technique that rock climbers use to coil up their ropes so they don’t have kinks: https://www.petzl.com/US/en/Sport/How-to-coil-the-rope-?ActivityName=Multi-pitch-climbing
Good luck and sail fast, UNTANGLED!

Paul has a Ph.D. in human performance technology. He works with the ISA coaches to analyze, break down and effectively teach the cutting-edge techniques of the world’s top Laser sailors to ISA clients using powerful instructional strategies and technologies.
3 Responses to “Mainsheet Management Tips”
August 15, 2020 at 4:36 pm , Dejan said:
Hi Paul, happy to read your article because it gave a lot advice for problems I meet in “daily life”.
Can you be so kind to clarify: I like to put two figure-eight knots about a foot apart at the cockpit end of the mainsheet. Are those two knuts beside each other or?
Thanks for nice assistance in La Cruz
Best regards Dejan
August 17, 2020 at 10:42 am , Al Sargent said:
Thanks for the post! Some other ideas for mainsheet management:
1) When you do have to coil up your mainsheet, use a butterfly coil. This a technique that rock climbers use to coil up their ropes so they don’t have kinks: https://www.petzl.com/US/en/Sport/How-to-coil-the-rope-?ActivityName=Multi-pitch-climbing
2) When I first get a Rooster mainsheet, I like to wash it on extra hot to get out all the slippery coatings. Then I like to run it through sandpaper, maybe 100 grit, a few times so that it’s slightly fuzzy and thus easier to grip. This extends the wind range in which I can use the thinner, yellow 6mm Rooster mainsheet.
3) Toss your mainsheet into the wash regularly to ensure that it’s free of salt or grime that can make it stiffer.
Hope this helps.
November 05, 2020 at 5:48 am , Tad Gruchalla-Wesierski said:
Good article Paul! I’ve also been told that on tacking it’s good to have the mainsheet at the back of the cockpit but threaded between your legs. That way when you change sides on a tack it stays between your legs. When I’ve tried this I end up getting my feet caught in the bag of snakes. In fact my feet are prone to getting caught like that no matter what I do. So I try to stack the mainsheet at the front of the cockpit so it is clear of my feet on tacking. On windward mark roundings I sometimes get it knotted up which leads to a bad rounding as you might suppose. Any thoughts?
Leave a Reply
You must be logged in to post a comment.
Send Us a Quick Message
We're not online to chat, but send us a message below, or use our booking form to reserve your spot now.
- LEARN ONLINE
- Virtual Coaching
- Clinic Dates
Yachting Monthly
- Digital edition

Easy ways to power up your mainsheet
- Duncan Kent
- May 7, 2021
The mainsheet is the most worked item of deck gear, so it's vital to choose the right system and set it up correctly for your boat

Making tweaks to your mainsheet system can prevent breakages and wear to fittings. Credit: Graham Snook
New production yachts often come with systems that have been designed more for convenience while moored than with a sensible engineering solution in mind, resulting in significant loads placed on the boom, kicker, boom-end fittings, mainsheet tackle and crew.

Duncan Kent is a technical writer for marine publications and websites
Making a few tweaks to how your mainsheet system is set up makes handling easier for you and prevents breakages and wear to your fittings.
Keeping complex sail control mechanisms away from vulnerable areas of the boat is paramount, which is why cruising boatbuilders often position the mainsheet up on the coachroof ahead of the main hatch garage.
Though this effectively keeps it ‘out of the way’, it’s often not ideal from an engineering point of view in that it invariably means the mainsheet is attached halfway along the boom, when best mechanical advantage is offered at the aft end.
When connected further forward on the boom, the load on the mainsheet is greatly increased, so too the amount of human effort required to operate it.
If it really must be on the coachroof, then it should be mounted directly under the first leech reefing point, giving you the same mechanical advantage when the wind is up and you’re reefed .
Mainsheet blocks
The key to any sail control system is to keep friction to a minimum, which means the dimensions of the blocks, sheaves and lines are all important, as well as the type of bearings they have.
In principle, you should choose a sheave diameter of at least six times the diameter of the sheet, within the safe working load of the system.
Upgrading the line to one with superior strength, such as Dyneema, and lower stretch can result in you being able to drop a couple of sizes in line diameter, reducing costs, effort and wear.
The type of bearing a block has makes an enormous difference to the friction in any high-load tackle.
Standard plain bearing models are strong, but hard to turn, whereas ball-race and roller types require far less effort.
However, though ball-race bearings reduce friction, they also reduce the working load capacity as Delrin balls (most common) can distort under load long before a plain metal bearing would.
For this reason, the more popular choice for larger yachts are blocks with roller bearings, that have the low-friction of the balls, but the load capacity of plain bearings.
Specialist Rutgerson supplies a range that’s even maintenance-free, thanks to clever ‘roll- links’ between the rollers that keep out dirt and salt.
Mechanical advantage
A 6:1 tackle theoretically reduces sheet loads to 1/6th, but in real terms it’s closer to a quarter due to the friction in the block bearings.
Upwind the average load on the mainsheet for a 35ft cruising yacht with the mainsheet attached at the boom end is said to be around 150kg in 16 knots of apparent wind.
This would result in an actual hand load of roughly 37kg (including friction) if you were to sheet her hard in at this point with a 6:1 tackle, dropping to a more manageable 15-20kg in 12 knots apparent wind.
Whilst it’s useful to have an idea of how these items are rated, most manufacturers will recommend which size line and block you should use for your set-up.

Overhead mainsheet tracks retain the mainsheet’s mechanical advantage while keeping the track out of the cockpit. Credit: Graham Snook/Yachting Monthly
You can make the main easier to sheet in by increasing the mechanical advantage via an additional purchase (more turning blocks) or, if possible, moving the attachment point further towards the end of the boom.
Remember, though, that the more parts a tackle has, the more line is required, which, when close-hauled, has to go somewhere in the cockpit!
Alternatively, you could use a two-speed, double-ended tackle such as Harken’s self-contained system.
Pulling on both lines sheets it in quickly but requires more effort, whereas pulling just on one line doubles the mechanical advantage, halving the effort needed.
This method uses far less line than a traditional multi- way block arrangement and doesn’t introduce dangerous ‘flying’ blocks where a ‘fine trim’ block is positioned halfway up the mainsheet – just about at head level when tacking.
A widespread problem with any mainsheet system that incorporates a cam cleat can be difficulty with releasing the sheet under load.
Many folk don’t realise that on almost all blocks with a cam cleat attached the lead angle can be adjusted to suit the set-up, which can make life a whole lot easier and avoid you having to use your foot on the sheet to release it.
Sit in the cockpit where you normally would when sailing upwind and check that the cam cleat is in line with or just above where your hands are.
Twist can also be a problem on multi-part mainsheets due to the natural twist in the line, often exacerbated by having two swivels or the line being incorrectly reeved.
The former is simply cured by ensuring there is only one swivel, which is attached to the traveller end so that the lead angle can be changed easily when changing tack.
Some blocks, such as those from Selden, have lockable swivels.
Continues below…

How to reef to sail safely through any weather
Pete Goss delivers his masterclass on when to reef, and explains why it is critical to keeping control of your…

Mainsail furling systems: an expert guide
Some sailors swear by mainsail furling systems, others swear at them. Graham Snook looks at way to keep your furling…

How to repair a sail – video guide
Knowing how to patch up a sail can get you home safely, extend your cruise and save you money. Rob…

Rope, rigging & deck gear: how to choose the right rope
Rope continues to develop every year. We take a look at the plethora of options on the market
Reeving is an art form in itself and is by no means obvious.
Very often a multi-part tackle is mis- reeved causing two parts of the sheet to chafe against each other creating friction and the whole set-up to end up twisted.
Correct reeving (if in doubt ask the supplier) eliminates crossed lines and ensures load is balanced evenly across all of the sheaves.
Finally, some mainsheet tackles have a ratchet sheave, although they don’t really help much on a cruising yacht.
They do relieve some sheet load, but a larger mainsheet tackle needs a quick- release jammer to be safe and the faceted V-grooved rope channel simply puts extra wear on the sheet.
Sail control: Getting the most from your mainsail
The traveller.
- The traveller is one of the most important aspects of mainsail trim, yet I have been on numerous yachts where the traveller has been ignored all its life. Not knowing its purpose, many owners leave it fixed permanently in the centre. On one boat I sailed it was even screwed down!
- The reason for having the mainsheet attached to a traveller on a track is to enable it to be used to control the position of the boom under sail. Letting the traveller run down the track ‘spills’ the wind in the mainsail and reduces heeling momentum instantly, without affecting the shape or trim of the mainsail itself. When the gust has gone through all you need do is haul it back up the track to put the power back on, knowing the sail will be set as before.
- If you have an old boat with spring- release locking pins on the traveller, I would advise you modify it or replace it with a purpose-made system. If this isn’t possible, then you’ll need to rely much more on the kicker (see above) for controlling the sail shape when sheeting in and out.
The mainsheet track
- The position of the track is also important. The closer to the mast the mainsheet is attached to the boom, the shorter the track needs to be (as the outboard end of the boom moves in a much wider arc than the inboard end). However, mounting it ahead of a spray hood makes it extremely difficult to adjust the position of the traveller in a hurry.
- Tracks that are mounted overhead on a gantry, like those on the Hunter Legend range of yachts offer something of a compromise. To my mind their good points – long track right across the boat, mainsheet attached at the end of the boom, tackle kept well clear of the cockpit – are somewhat negated by the need for another turning block in the traveller adjusters, increasing friction and making them harder to adjust quickly.
- It makes sense to have the mainsheet track within reach of the helmsman with the mainsheet tackle as close to vertical below the boom end as possible. In some cases, especially on smaller boats, this will mean the mainsheet track is in the cockpit and can restrict access when not sailing. It is possible to install a removable track mounted across the centre of the cockpit well, for example, but quickly detached in port or at anchor to free up the space for relaxing. UK deck gear specialist, Barton produces a range of these for yachts right up to 36ft LOA, complete with traveller adjustment blocks mounted on the end-stops.
- Sometimes (particularly on coachroof- mounted tracks) the track has been ‘contoured’ to suit the curved cabin top. I’d strongly recommend replacing it with a straight, flat piece of track. A curved track encourages the traveller to remain in the centre. If you force it to the end using a powerful adjuster tackle it will simply pull the boom down.

The kicker is almost as important as the sheet for controlling the mainsail. Credit: Graham Snook
- The kicker (aka vang) is almost as important as the sheet for controlling the mainsail but is often ignored. The kicker’s primary purpose is to keep the boom from rising up when the mainsheet is eased. It is especially vital if you have a single-point mainsheet fixing or a bridle, rather than a track and traveller, as the former allow the boom to lift as soon as the
- mainsheet is freed.
- Because of the extreme loads it has to undergo, the non-boom end of the kicker should ideally be attached to a reinforced pad eye on the deck or to a stout collar around the mast, rather than a simple, riveted mast fitting.
- A gas-sprung or hydraulic kicker enables you to do away with the topping lift as, when the kicker is released, the spring-loaded vang pushes the boom upwards. It’s sensible to put the main halyard on the boom end to act as a topping lift when leaving the boat to take the permanent load off the spring.
Safety first
- Mainsheet tackles, tracks and travellers, kickers and boom fittings are all subjected to massive loads in heavy conditions, but should the yacht undergo an accidental gybe these loads can increase tenfold. For this reason, it can pay dividends to fit a boom brake of sorts. These ‘adjustable preventers’ not only allow for more control during an intentional gybe, but also stop the boom crashing over and possibly taking the rig down in the event of an accidental gybe. There are several on the market, including the Scott Boomlock, Wichard’s Gyb’Easy, Walder Boombrake, which can really offer peace of mind, particularly when sailing dead downwind.
Leech control

Leach control is important for gust response, adapting to conditions and preventing excessive heel. Credit: Graham Snook
Jeremy White of Elvstrom Sails shares his tips
- Traditionally you’re taught to pull in the mainsheet until you get the desired amount of twist (and so power in the sail), then take the slack out of the kicker, which will lock in that twist setting.
- The problem with mainsheet systems located forward on the boom, is you can’t get the leech tension you need. In this situation you’re forced to use the kicker alone to shape the leech. It is rare you are able to get as much tension via the kicker as you are via the mainsheet without using a winch and when cruising few of us are likely to do this.
- That is not to say it is always a negative outcome. The bonus to plenty of mechanical advantage is that when you ease the main, the leech remains tight which, in turn, gives more finite control. However, I often think the twist that develops in a mainsail when easing a mainsheet with less load in the kicker functions as a very effective safety valve. Racing sailors might want to have very specific control if someone is constantly trimming, but being able to lose a lot of power quickly by easing a small amount of sheet does have its appeal.
- If you are using your traveller then your leech will keep the same shape as you let the traveller down to depower in a gust anyway, so using this most of the time, there is no harm in being set up with less kicker than desirable as this will act as a macro adjustment in a really big gust.
Power up your purchase
- Consider an upgrade. Make sure your traveller is able to move easily while under load, and if possible can be adjusted from the helm. Consider upgrading your mainsheet track. Moving this to the cockpit will increase sail control and you can fit a removable track. At the same time, adding a purchase to adjust the traveller under load will also make sail adjustment much easier.
- Keep a clean sheet. Ensure your mainsheet system is free of twists, is correctly reeved and has the right rope and sheave sizes. Any unwanted friction in the system results in more effort for the crew, so make sure your mainsheet is reeved through the blocks correctly. You can also lock the top set of blocks so they can’t swivel, which will help keep the twists out.
- Here’s the kicker. Use your kicker. This is increasingly vital on those boats without a traveller or on those boats with a mainsheet system located mid-way down the boom. The kicker controls leech twist and gives you better control of power in gusty conditions and downwind.
- Increase the power . Move the adjustment point of the mainsheet further aft along the boom if possible, or add more purchase to your mainsheet system, or opt for a speed-sheet system to reduce sheeting loads. Consider adding more purchase to your kicker system too, to give you more control over the leech shape, though you may need to reinforce or change its mast attachment point. Adjust the angle of your cam cleat to make cleating and uncleating easier.
- Block busters. Get the blocks and cleats set up correctly to reduce friction and make it easier to use. Ratchet blocks are generally unnecessary on cruising boats and add friction, so get rid of these if you have them. Check the bearings of the blocks run freely under load – they may need replacing. Just washing the blocks out with fresh water and spraying with dry lubricant can work wonders with friction.
German mainsheets

German mainsheets that run to the end of the boom offer good control and minimise rope in the cockpit, but the sheet needs working. Credit: Graham Snook
The double-ended, or single-piece mainsheet has become known colloquially as the ‘German’ mainsheet.
Often the sheet will come back to a pair of primary winches, one either side of the cockpit.
With this system a crewmember can sit on the windward side with full access to the traveller and mainsheet winch.
It is a workable solution too for shorthanded sailing on dual-helm yachts, in that the helmsman can control the mainsheet from either helm.
A key disadvantage is that often you end up with all the sheet on one side, unless you constantly even out their use as you go.
To counter this, splicing the ends together makes a continuous loop, but this does make it harder to neatly coil and tidy away.
Increasingly these systems return to a cabin-top winch.
Though this does free up cockpit space, and means there is no mainsheet to catch an unwary crewmember in a gybe, it significantly reduces ease of use and accessibility significantly.
Enjoyed reading Easy ways to power up your mainsheet?
A subscription to Yachting Monthly magazine costs around 40% less than the cover price .
Print and digital editions are available through Magazines Direct – where you can also find the latest deals .
YM is packed with information to help you get the most from your time on the water.
- Take your seamanship to the next level with tips, advice and skills from our experts
- Impartial in-depth reviews of the latest yachts and equipment
- Cruising guides to help you reach those dream destinations
Follow us on Facebook , Twitter and Instagram.
By Product Categories
Small Boat Blocks
Big Boat Blocks
Complementary Hardware
Travelers & Genoa Leads
Mainsail Handling
Headsail Handling
Mooring Solutions
Spare Parts
Accessories
Harken Canvas
Fly Soft-Attach Blocks
Carbo Air Blocks
Small Boat Classic
Flip-Flop Small Boat
GP Catamaran Ceramic Mainsheet Systems
Protexit™ Exit Blocks
Through-Deck
Wire High-Strength
Dinghy Vang
Small Boat Deck Organizers
Midrange Classic
Midrange Deck Organizers
Zircon Blocks
Element Blocks
Black Magic Air Blocks
Cruising ESP Blocks
Megayacht Blocks
Stainless Steel Blocks
Black Magic Air Runners
FlatWinder Powered Blocks
Mastbase Blocks
Over-the-Top
Crossover Blocks
Big Boat Deck Organizers
Cam Cleats & Kits
Cam Cleat Accessories
Cam Cleat Bases
Stand-Up Bases
Deck Organizers
Spinnaker Pole Cars
Soft Attachments
Fixed Padeyes
Removable Padeyes
Bolt-Down Fairleads
Grand Prix Jib Leads
Halyard Tensioners
Tiller Extensions
Peter's Desk Drawer
Dinghy Jib Leads
Crossbow Pivoting Self-Tacking Jib Traveler
13 mm Micro
22 mm Small Boat
27 mm Midrange
32 mm Big Boat
Windward Sheeting
42 mm Mini-Maxi
T-Track Genoa Lead
Access Rail System
13 mm AA Battcar System
22 mm A Battcar System
27 mm B Battcar System
32 mm C Battcar System
18 mm Switch Battcar System
26 mm Switch Battcar System
26 mm Trysail Switch
32 mm Switch Battcar System
32 mm Trysail Switch
40 mm Switch Battcar System
40 mm Trysail Switch System
Furling Mainsail Outhaul Systems
Single Line Reefing
Harken Vang-Master
Carbo Racing Foil
Small Boat Furling
Small Boat Underdeck
Reflex Furling
MKIV Jib Reefing & Furling
MKIV Underdeck Jib Reefing & Furling
Furling Accessories
Powered Furling
MKIV Ocean Furling
SnubbAir (Not a Winch)
Grand Prix Winches
Air Winches
Circuit Breakers
Analog Switches
Digital System Switch
Aluminum, Chrome & Bronze Winch Handles
Carbo OneTouch Locking Winch Handle
Service Kits
CLR Mooring Winches
Electric Captive Reel Winches
Hydraulic Captive Reel Winches
UniPower Radial
Single-Acting Integral Backstay Adjuster
Single-Acting Cylinders
Locking Cylinders
Double-Pull Cylinders
Grand Prix Cylinders
Hydraulic Cylinder Rod End Blocks
Hydraulic Cylinder End Fittings
Control Valves
Control Manifolds
Control Panels
Compact Control Panel
Rotary Pumps
Hydraulic Pump Handles
Power Systems
Repair Kits
Ball Bearings
Block Spare Parts
Traveler Cars
Furling Spare Parts
Winch Spare Parts
Winch Service Kits
Blockheads Gear
Promo & Gifts
Marine Grip
harkengear.com
Jeep/Truck tops
Garage storage
One-design Covers
Boat accessories
Canvas bags
By Type of Sailing
Dinghy / One-Design
Offshore Racing
Coastal / Day Cruising
Bluewater Cruising
Megayachts / Custom
Service Guide
Tech/Service
deck layouts
Data Sheets (SDS)
How to choose
System diagrams
Calculators
Reeving diagrams
Traveler Purchase Selection Guide
How to Choose
Testimonials
Hoister Videos
Request a Quote
Request Samples
Fabric details
Cover Styles
Canvas Videos
Contract Services
Materials and Components
Our Equipment
Contract Cut-and-Sew Project Spotlight
- Harken at the front
- Safety & Rescue
Support / Selection tools / System diagrams
Mainsheet Systems
Mainsheets are simple hardware systems, but are among the most important as they are in almost constant use.
Typical boat length: Small Boat: 22' - 28' (6.7 - 8.5 m) Midrange: 29' - 34' (8.8 - 10.4 m) Big Boat: 35' - 42' (10.7 - 12.8 m)
This 4:1 tackle is the most common system on boats under 8.5 m (28 ft).

6:1 Reeved Right Angle
Boats with mainsails to 35 m² (375 ft²) often use a 6:1 system.

8:1 Beachcat
This 8:1 purchase handles high mainsheet loads on Beachcats up to 6 m (20 ft).

4:1 Swivel Base
Position the swivel base block off the traveler car to allow mainsail adjustment without dragging the car to windward in light air. To avoid tightening the leech, curve the track ends up.

4:1/16:1 Gross/Fine
This powerful gross-trim/fine-tune cascading system allows crew to use the 4:1 gross-trim for most trimming and the 16:1 fine-tune for precise adjustments.

4:1/16:1 Double-ended Fine Tune
This 4:1/16:1 system uses a dinghy-like double-ended tackle that locates the sheet ends on the cockpit sides.

6:1/24:1 Gross/Fine
This 6:1/24:1 cascading system is used on boats with end-boom sheeting and mains as large as 25.5 m² (275 ft²) and end-boom sheeting.

6:1/24:1 Cascaded
This 6:1/24:1 system is used on boats with mains as large as 25.5 m² (275 ft²) and end-boom sheeting.

7:1/28:1 Gross/Fine
This gross trim/fine tune system is found on racing multihulls where it is desirable to split the gross trim from the fine tune. Placing the fine tune in the boom provides a very clean system that the trimmer can get a hold of and put his weight into it. The powerful cascading fine tune portion is used to haul the boom in that last little bit.

4:1 with Dedicated Winch
This system moves the traveler over the companionway to clean up the cockpit. A favorite on cruising boats.

5:1 with Dedicated Winch
This system is popular on cruising boats with cabintop travelers. The sheet leads forward to the gooseneck and then down and back to a winch on the aft edge of the cabintop.

2:1 with Dedicated Winches
This simple double-ended system lets the mainsheet run freely through the blocks which allows the traveler car to move easily. The trimmer makes sail adjustments from the high side.

Admiral's Cup 2:1 with Dedicated Winch
In this system, the traveler is independent of the mainsheet so it rolls freely. The sheet leads forward along the boom before it turns down and aft to winches. Used on race boats like the Farr® 40.
Farr is a registered trademark of Bruce K Farr.

3:1 with Dedicated Winch
Many large boats use this simple 3:1 system. A block on deck turns the sheet to a winch.

Product Categories
- United States
- New Zealand
- United Kingdom
- New Sailboats
- Sailboats 21-30ft
- Sailboats 31-35ft
- Sailboats 36-40ft
- Sailboats Over 40ft
- Sailboats Under 21feet
- used_sailboats
- Apps and Computer Programs
- Communications
- Fishfinders
- Handheld Electronics
- Plotters MFDS Rradar
- Wind, Speed & Depth Instruments
- Anchoring Mooring
- Running Rigging
- Sails Canvas
- Standing Rigging
- Diesel Engines
- Off Grid Energy
- Cleaning Waxing
- DIY Projects
- Repair, Tools & Materials
- Spare Parts
- Tools & Gadgets
- Cabin Comfort
- Ventilation
- Footwear Apparel
- Foul Weather Gear
- Mailport & PS Advisor
- Inside Practical Sailor Blog
- Activate My Web Access
- Reset Password
- Customer Service

- Free Newsletter
Ericson 34-2 Finds Sweet Spot

How to Sell Your Boat

Cal 2-46: A Venerable Lapworth Design Brought Up to Date

Rhumb Lines: Show Highlights from Annapolis

Solar Panels: Go Rigid If You have the Space…

Leaping Into Lithium

The Importance of Sea State in Weather Planning

Do-it-yourself Electrical System Survey and Inspection

When Should We Retire Dyneema Stays and Running Rigging?

Rethinking MOB Prevention

Top-notch Wind Indicators

The Everlasting Multihull Trampoline

What Your Boat and the Baltimore Super Container Ship May Have…

Check Your Shorepower System for Hidden Dangers

DIY survey of boat solar and wind turbine systems

What’s Involved in Setting Up a Lithium Battery System?

The Scraper-only Approach to Bottom Paint Removal

Can You Recoat Dyneema?

How to Handle the Head

The Day Sailor’s First-Aid Kit

Choosing and Securing Seat Cushions

Cockpit Drains on Race Boats

Re-sealing the Seams on Waterproof Fabrics

Safer Sailing: Add Leg Loops to Your Harness

Waxing and Polishing Your Boat

Reducing Engine Room Noise

Tricks and Tips to Forming Do-it-yourself Rigging Terminals

Marine Toilet Maintenance Tips

Learning to Live with Plastic Boat Bits
- Sails, Rigging & Deck Gear
Midsize Mainsheet Traveler Test
Considerable evolution has taken place since our last traveler test. now, antal stands out for ergonomic design, functionality, and attention to detail, but lewmar is our choice due to its pricing..

A dozen years ago, in the July 1993 issue, PS reported on mainsheet traveler systems. Though we’ve kept up with developments in this realm during the interim, we haven’t offered a comprehensive evaluation of these important sailhandling systems since then. The time has come.
Properly installed and functioning mainsheet travelers are versatile devices, offering sailors a number of key advantages over simple mainsheet rigs traditionally used aboard sailing craft. These newer systems permit you to sheet to windward in light air to enhance your vessel’s pointing ability; they allow you to depower the sail in puffy conditions without touching the mainsheet; and they enable the mainsheet to be substituted for a vang when sailing upwind.
In that earlier article, we listed four reasons why mainsheet traveler systems are so appealing: “almost frictionless cars,” “modular system components that let you lead the mainsheet and control lines in virtually any configuration,” “installation so simple even a child can do it,” and, “almost unbelievably low prices.” Those observations also apply to today’s mainsheet travelers, and equipment evolution in the intervening years has rendered the bulk of these products even more efficient.
What We Tested PS gathered products from five of the six companies most recognized for fabricating or selling this kind of sailhandling equipment for midsized boats in the U.S.—Antal Marine (represented in the U.S. by Euro Marine Trading), Harken Yacht Equipment, Lewmar, Ronstan, and Schaefer Marine. The sixth, Garhauer Marine, opted not to send us a traveler because the company is in the process of introducing a new system that wasn’t available in time for our test. (We’ll evaluate that in a future issue.) Two other companies were considered—Frederiksen (now part Ronstan), which did send a car and track for a smaller size boat, and Rutgerson, of Sweden, which wasn’t able to provide products in time for our test. (We’ll also examine that later.)
From each company we requested a section of track, a car appropriate for that track on a sailboat 34 to 36 feet LOA, and equipment for a 4:1 control line. The track, we told them, should be four feet long and would have to span a 28-inch opening (as in a cockpit footwell or companionway application), unsupported. We will note here that those travelers set forward for mid-boom or three-quarter-boom mainsheet arrangements are thought to be subjected to greater loads than those set up for boom-end sheeting. Each of the manufacturers whose products we tested offer guidelines for various applications, including working load limits, and buyers should take care to purchase a system rated for their intended application.
Test Methodology For this test, instead of fitting our specimens to an actual boat, we built a jig to evaluate several parameters. We initially wanted to quantify how much force would be required to move the car along its track if the attached 4:1 mainsheet were under a 400-lb. load. We also wanted to know how much each manufacturer’s track would flex in this application. We also closely examined each unit with the following areas in mind: electrical isolation, sliding smoothness, track strength, flexibility of mounting, car control, mainsheet block attachment and support, center of effort angle (see sidebar), instructions, form and fit, and cost.
Each traveler system was secured to a 2 x 6 board on our jig using four points of attachment. We used a varying array of fasteners as required by the design of the track (some require countersunk machine screws and some hex-head bolts).
For our initial experiments regarding side force, we mounted a spare track and traveler car at the top of our jig and attached a Dillon dynamometer to it. The mainsheet purchase from the car and track under test was led up to the dynamometer. We put the mainsheet under a load of 400 lbs. and led the 1:1 traveler control line outside the jig via a hole bored in its side to a spring scale (see photo at right). Then, by way of repeated pulls, we quantified the force necessary to pull the car along the track. We learned early on that the force required, given this configuration, was almost inconsequential. In most instances it didn’t exceed 12 lbs. to start the car rolling, and once rolling, the force required to pull it was much less than that. This, we surmised, is a testament to the engineered efficiency of the bearing systems used in these travelers.
Then, using the dynamometer, we led the mainsheet to a point 16 feet above the traveler and forward by about three feet. This, we felt, would simulate the force vector, (but not the exact force) exerted on a traveler car with the mainsail let out on a close reach, essentially introducing a torsional component to the load. We then resumed our pull tests using the spring scale and learned that for all but one of the units we tested, there was little difference in the force required to move the car along the track.
To gauge track deflection under load, we led the mainsheet to a fixed point on the upper support of the jig, and using the dynamometer to measure, we again applied 400 lbs. of upward force with the purchase system. Using digital calipers, we gauged the deflection, first measuring the position of the tracks when unloaded and then when under load.
As a final evaluation, we attempted to determine smoothness by sliding each car back and forth on its track by hand through multiple cycles. Using this method we determined a ranking for that car and track assembly that seemed most smooth, and judged all others against it. This aspect of our test relates more to elegance of design than function, but a product that works more fluidly is likely to function well for a longer period of time than one that’s susceptible to binding or increased friction.
What We Tested Antal Marine’s 4113 traveler car ($652 including toggle) is milled from aluminum that is hardcoat anodized. The 4510 track ($140) is anodized as well. The system is rated for boats up to 36 feet LOA. Interestingly, we noted that this car represented the lone product in our test that is assembled with its aluminum parts isolated from its stainless parts by way of nylon bushings or washers. Galvanic corrosion with these products can occur when the anodized layer is compromised (through scratching, or cracking, which might be brought about by over-tightening a stainless fastener). This is a small, but important aspect, indicative of Antal’s attention to detail.
This car is also the only one in our test that utilizes two races of ball bearings to resist friction along the track. The lower layer bearings are Torlon balls, where the highest loading exists. The top bearings are Delrin. The car rides along the track with the bearings making contact with the track in two grooves. The lower groove with the Torlon balls sustains the upward forces, while the top groove with the Delrin bearings comes into play with side or torsional loads. This car prevailed in our smoothness test, principally because the second layer of bearings allows it to roll with minimal friction when under a torsional load. An additional feature we like is the fact that the car’s end caps are engineered in such a way as to keep the car on the track should the ball bearings fail.
The company engineers the system with an access port on each side of the car so that the bearings can be removed from the races and replaced simply by backing out a stainless Philips head machine screw. Three cars in our test allow the user to remove the bearings without taking the car off the track, and this one is the easiest. We think that facilitating this operation will promote better maintenance over time.
The toggle attaching the mainsheet block is fashioned from a bent stainless steel plate that surrounds a thick phenolic rubber bushing, which controls and buffers the fore and aft movement of the support. This toggle plate is connected to the car by way of a 7/16″ stainless steel pin. The car was fitted with double blocks for the control line (4740 $147 each).
Antal offers either plunger stops for this system, or 1:1, 2:1, 3:1 or 4:1 stackable control sheaves. Additionally, cam cleats can be mounted either at the track ends, or on the car carriage itself. The 4250 control sheaves ($184 each) Antal supplied are milled from aluminum and hardcoat anodized. They mount on a rectangular channel that fits over the track and has a soft but resilient urethane pad (4280 $11 each) to cushion the impact between car and end piece. On top is a broad aluminum plate with holes bored in it for the servo cam cleat (4410 $77 each) to be positioned at one of three angles. The only drawback of this assembly is that the channel piece has two lengths of stainless steel threaded rod set in it for securing to the boat, but these can’t easily be removed.
In our tests, the Antal track experienced the greatest deflection, but we acknowledge that it’s not meant to run unsupported across any expanse, and should be fastened every four inches via the pre-drilled holes. Euro Marine Trading told us the track should be installed with a support member like a stout section of teak to aid it in spanning any space.
Euro Marine Trading didn’t send any instructions with its traveler system because the company doesn’t ordinarily sell direct to the end user, but usually supplies its travelers to riggers for installation. Nonetheless, there’s nothing complicated about installing this system except that the cars are shipped on a short piece of loading track and installers must be careful to slide them onto the track without losing the bearings, because they are not captive. This system, with all its parts, can be purchased whole for $900.
Harken Yacht Equipment in Pewaukee, WI, offered its 1618 high beam track ($108) with a 1627 car and toggle ($196.30), and 1633 double sheave control end fitting with cam cleat ($265 each). These parts are rated for use on boats up to 34 feet. The track, car, and end fittings are all milled from aluminum that is thereafter hardcoat anodized. The track comes with eight rectangular washers (Harken calls them “bolt slides”) intended to fit over 1/4″ mounting bolts and slide into a channel in the bottom of the track (see photo pg. 14). The advantage of this approach is that the fasteners can be placed wherever it’s most convenient and appropriate, but Harken recommends spacing them no less than 4″ apart, with two on either side close to where the span begins.
The car rides along the track on recirculating Torlon ball bearings that are held captive by twin stainless steel clips so that the car may be removed from the track without worrying about the balls dropping out. The clips are made from 17-7 stainless that is heat-treated to improve strength. Having captive ball bearings is a handy feature for installation and we think it would enhance maintenance as well. With the car removed from the track, the bearings can be snapped out of the races one at a time if they require replacement, and new ones snapped back in. Harken’s car is the only one among those we tested that is engineered in this way.
To achieve the least friction, the Torlon balls bear on grooves in either side of the track. Harken’s advertising touts the car’s low-profile design, which means that the pivot point of the toggle attachment isn’t far above the surface of the track where the bearings sit. In fact, Harken’s car has the lowest center of effort angle (see sidebar) of all those PS tested, which means that it has a very efficient load transfer under side loading. This takes place when the boom is anywhere off centerline.
Though Harken’s car has end caps that will tend to keep it on the track should the bearings fail, these are not as large or as close-fitting as those on the Antal and Lewmar cars.
The 1627 car is fitted with a stout, stainless steel toggle to both support and connect the mainsheet blocks. This toggle is investment cast from stainless rather than bent out of a plate, but not unlike the Antal toggle, it surrounds a durable urethane support bushing that also limits and buffers the fore and aft travel of the toggle. The toggle has “ears” on either side which are formed to accept stainless steel clevis pins where control blocks (2638 $49.80 each) can be attached. Harken claims that attaching the controls to the toggle instead of the car reduces the loads on the car.
Harken’s 1618 track experienced the least deflection of all the ones tested, though it was essentially in line with that measured on Lewmar and Schaefer’s tracks. This track lacks the holes that would enable it to be fitted with pin-stop controls, though the company does offer those for this size traveler. It also offers single or double sheave control ends fabricated from its patented Carbo material, or single or double sheave controls built of stainless sides. These control units sit on an anodized aluminum base and mount with a single screw fastened to the track, so there’s no need to bore additional holes in the boat.

Harken also accompanies its products with detailed diagramed illustrations that enable DIY owners to install the equipment without confusion. And Harken is one of two companies that also sells its traveler system in kit form (car, control blocks, and end fittings), minus the track. The system we tested lists for $933.90.
Lewmar is revising its mainsheet traveler systems, and the new system is described by the company as an amalgam of the old Ocean and Racing systems, which are still available. The company sent us its track 29162315 ($114) and 29432300 car ($212), fitted with two double control line sheaves 29172012 ($65), and two end fittings 29472836 ($129 each). Each end fitting consists of an anodized aluminum base with two nylon sheaves, a Ronstan cam cleat, and a cast stainless becket. All these parts are rated for use on boats up to 36 feet.
The car body and end fittings are milled from aluminum and thereafter hardcoat anodized. The track is extruded and mounts in the same way as Harken’s, with 3/8 hex-head bolts meant to slide into a channel in the bottom of the track. Lewmar specifies mounting the bolts on 4″ centers, with at least three mounted on either side of the span. The bolts are to be mounted with washers underneath their heads, and washers should also be set underneath the track for each bolt. No fasteners were supplied, but the equipment arrived with the car already on the track and the end fittings in place as well.
Measuring 3.43″ wide by 1.56″ tall by 8.25″ long, Lewmar’ car is the largest one we tested. It’s nonetheless a low-profile car, which utilizes recirculating Torlon ball bearings that ride in grooves on either side of the track. The body of the car is complemented by twin tubes that contain the ball bearings as they rotate back toward the track, and twin end caps, which can be removed to service the balls. These end caps are also milled from aluminum alloy. On top of the car, six holes are tapped to accept the bolts that thread through the control sheaves and affix them to the car. The outermost holes on either end of the car are fitted with stainless inserts so that galvanic corrosion will not seize the bolts over time. PS wondered why the other two holes hadn’t been treated in the same manner. Lewmar does coat the bolt ends with a synthetic lubricant before assembly as a protective measure against seizing. The control sheaves themselves are made of a hard nylon and turn on bushings rather than bearings.
The mainsheet attaches to the car by way of a stout stainless steel D shackle contained by a pin held captive inside the car. (Lewmar also offers a forged stainless steel toggle not unlike the one on the Harken car.) The shackle articulates fore and aft, and twin urethane pads attached to the car keep the shackle from banging into and damaging the aluminum.
Lewmar accessories include friction stops that can be used on this track, which are activated by a winch handle. However, most sailors would likely opt for traveler controls with multiple part purchases, and for that reason the company offers one or two-sheave control end fittings, either with or without cam cleats. These fittings mount to the track by way of stainless steel Allen-head bolts that thread through holes tapped into the end fitting and simply tighten on the top of the track to lock the fitting in place. Lewmar treats them with Loctite to ensure that they won’t release. These bolts also serve as the axle for the sheaves’ bushings and to lock the cam cleats in place. Collectively, these end fittings represent engineering that uses the fewest number of parts for a number of functions.
Lewmar also sells its traveler system in kit form, with three sizes offered to accommodate boats up to 44 feet. The kit includes a different car and end controls from the one we tested, and because it’s intended for retrofits, no track is included. The system we tested sells for $669.
Ronstan provided its RC 12204 Series 22 low-profile car ($140), along with its RC 1224 Series 22 high-profile track ($93), which is rated for boats up to 33 feet. The company also sent its 12284 end fittings ($95 each). These have a single sheave and no cam cleats. Ronstan does offer double-sheave fittings—the RC00411 control sheave ($54 each)— with the option of a stainless steel arm, fairlead, and cam cleats, RC00421 ($72 each). We used all of that to calculate the price shown in our chart.
This is the lone track that we tested which didn’t come with pre-drilled mounting holes. Ronstan has other tracks that are pre-drilled, but feels that spanning applications require a degree of customization regarding the location of the mounting holes, and thus leaves the drilling up to the installer. The lack of holes also enhances the strength of the track for spanning purposes. Having the flexibility to drill your own holes can be an advantage for custom installations, but because properly countersinking a hole and getting it in the right location requires care and the precision of a drill press, we feel Ronstan’s strategy will have limited appeal for DIY owners. Ronstan also manufactures a high-profile track (no. 1225) for spanning greater distances.
Ronstan’s car and end fittings are milled from aluminum alloy and then hardcoat anodized. Like the majority of its competitors, the car also operates on recirculating Torlon ball bearings. Alloy end caps are screwed to each end of the car with stainless fasteners. The company claims these can be removed to service the ball bearings without having to remove the car from the track, but it’s not easy to do. Though these end caps would also tend to keep the car on the track if the bearings were to fail, they aren’t as beefy as those on the Lewmar and Antal cars, nor do they fit as closely to the track as the ones on those cars.
This car had the lowest profile of all those we tested—at just 1.01 inches high—and is also the lightest one at 8.1 oz. Like most of the other cars in our test, it’s versatile in that any of several control line attachments can be made. On either side of the mainsheet attachment shackle are tapped holes where a single or double control block could be attached. The mainsheet is attached to the car by way of a stout stainless steel shackle that pivots on a pin inside the car. This shackle articulates fore and aft, but there is no provision to keep it from hitting the side of the car. However, Ronstan does offer a stand-up spring kit to resolve this issue.
Ronstan’s end fittings fit over the track, and are pre-drilled for countersunk fasteners. Mounted atop by way of stainless bolts and nuts are alloy sheaves that turn on Torlon ball bearings, all kept in place by stainless plates. The inboard end of the fittings have urethane knobs installed that protrude out to accept the impact of the car should it slide all the way to the end unimpeded.
The system we tested sells for $675.
Schaefer’s traveler system arrived fully assembled, complete with two 12′ sections of 3/8″ braided control line. We’ll state right up front that this system is overbuilt for our test due to the fact that it’s rated for boats up to 45 feet in boom-end applications (up to 42 feet for mid-boom applications). The 72-92 ball bearing car with double stacked Delrin sheaves ($471.75) that is the heart of this system, is rated for a safe working load of 3,750 lbs., almost 1,500 pounds more than the other beefiest car in our test. Admittedly, this system is an apple among oranges for comparison purposes, but Schaefer’s next size down is only suitable for boats up to 27 feet long.
Schaefer’s 42-84 track ($180.75) was also the beefiest in our test. Fashioned from extruded aluminum alloy that is hardcoat anodized, it measures 1.5″ high by 1.5″ wide, and a four foot section weighs 4 lbs., 12 oz. This track, which is treated with a Teflon coating to reduce friction and wear, deflected fractionally more than Harken or Lewmar’s tracks, which are both similar in size. Schaefer’s track has countersunk holes (for 1/4″ fasteners) on 4″ centers. It also came with two 74-91 track end stops ($20.35 each), a 74-83 double control with cam ($120.60) and a 74-84 double control with cam ($120.60). A 78-49 stand-up adapter to connect the mainsheet is optional ($76.25).
Schaefer’s car, which is milled from aluminum alloy that is also hardcoat anodized, is almost 5.5″ long and weighs 2 lbs. 8 oz., making it the true heavyweight of our test group. Three stainless steel wheels are affixed on either of its inside surfaces. These wheels, which rotate around stainless axles on stainless steel ball bearings, run along the upper and lower ledges of the track as the car moves. The mainsheet connects to the car by way of a stand-up, spring-loaded adapter through which a clevis pin is inserted. (This piece we didn’t request, thus didn’t test.) The mainsheet can also connect to that same clevis pin, which pierces holes bored in the apex of a stout triangular bracket that is bolted to the top of the car with three stainless bolts. The outermost of these same fasteners are used to support the sheaves on the car for the traveler control system. The body of the car is not engineered (as are the others we tested) to remain on the track in case the axles or bearings fail, but in over 20 years of making this design, Schaefer says there’s never been a failure.
For traveler controls, Schaefer offers a combination of options including a dead-end bail, a single sheave, or a double sheave. These are mounted on track ends that fit over the track and are fastened to it by way of stainless machine screws that are threaded into holes tapped into the track. The track ends provided to us for our test had no buffering system, so car and end fitting will meet metal-to-metal, which isn’t a desirable arrangement.
The control sheaves are made of Delrin. Sandwiched between stainless steel plates, they roll on Torlon ball bearings. The track end controls include similar options, with the sheave-cam combination pre-drilled, allowing three different cam positions.
Though we deemed Schaefer’s car and track system nearly bulletproof, it does have one limitation. Two factors affect torsional loading: the width of the track, and the height of the car’s center of effort, defined as the pivot point of the cars toggle or shackle. Schaefer has a wide track and the highest center of effort angle (see sidebar) in our test. This means that when the boom is off centerline with the force vector extending along the mainsheet being other than vertical, Schaefer’s traveler system will experience higher torsional loads than its competitors.
The Schaefer system we tested retails for $934.40. Add the stand-up adapter ($76.25), and it totals $1,010.65
Conclusions All of the products we evaluated appear to be well-engineered and suited to the task of controlling the mainsheet orientation on a mid-size sailboat. We found their overall functionality and load capacities to be more than acceptable, and didn’t discover any flaws in concept or workmanship. That said, several of the products stood out from the others due to their engineering. Schaefer Marine’s wheel-bearing car appears to take the old-school approach, eschewing ball bearings in horizontal races and beefing up the car material. At its narrowest, the aluminum car is nearly a third of an inch thick (.323″), and on the sides, where the wheels are affixed, it’s almost a half inch (.414″). From a visual perspective, its engineering seems almost crude alongside its competitors, but there’s a lot to be said for the reliability of a stout, simple device when you’re well offshore in big winds and waves. And Schaefer likes to point out that Torlon bearings do degrade over time, whereas stainless ones last much longer.
Each of the other cars and tracks appear to be the products of complex engineering. In the case of Antal Marine’s car, this is evident in the use of two races of ball bearings. This car took top honors in our two car smoothness tests. With Harken’s car, advanced engineering has resulted in captive ball bearings and the lowest car center of effort angle in our test. Lewmar’s car is also highly engineered and thoughtfully assembled. And Ronstan’s car has achieved its minimal profile—it is the smallest one we tested—through improved engineering. However, we felt that Ronstan’s decision to have the installer drill his or her own holes in this track was more a drawback than an advantage. These holes must be precision drilled, and once they’re done, the track’s anodized surface is compromised.
Overall, we like the advanced engineering of Harken’s car and we applaud the company for including diagramed instructions with its products. The bullet-proof fabrication of Schaefer’s system is also appealing, but we cannot overlook that it has the highest car center of effort angle in our test, no buffer to withstand impact between car and end fitting, and the highest price.
Antal would be our No. 1 choice save for its price. For those sailors who want elegant engineering, a fractionally smoother car, and better corrosion resistance—and don’t mind paying a premium for all that—this is the choice. Harken’s would rank second. For the rest of us, it’s hard to resist Lewmar’s more accessible price. Lewmar builds a car that is also elegantly engineered, though it is quite long, which lessens the amount of distance it can move the mainsheet. Still, at $230 less than Antal’s system, we think we can live with a little less efficiency.
Also With This Article “Value Guide: Mainsheet Travelers” “Center of Effort”
Contacts • Antal Marine (Euro Marine Trading), 401/849-0060, www.euromarinetrading.com • Harken Yacht Equipment, 262/691-3320, www.harken.com • Lewmar Inc., 800/362-7212, www.lewmar.com • Ronstan, 727/545-1911, www.ronstan.com • Schaefer Marine, 508/995-9511, www.schaefermarine.com
RELATED ARTICLES MORE FROM AUTHOR
Leave a reply cancel reply.
Log in to leave a comment
Latest Videos

What’s The Best Vinyl Window Cleaner for Your Boat?

40-Footer Boat Tours – With Some Big Surprises! | Boat Tour

Electrical Do’s and Don’ts

Bahamas Travel Advisory: Cause for Concern?
- Privacy Policy
- Do Not Sell My Personal Information
- Online Account Activation
- Privacy Manager
Updating a classic fiberglass cruising yacht.
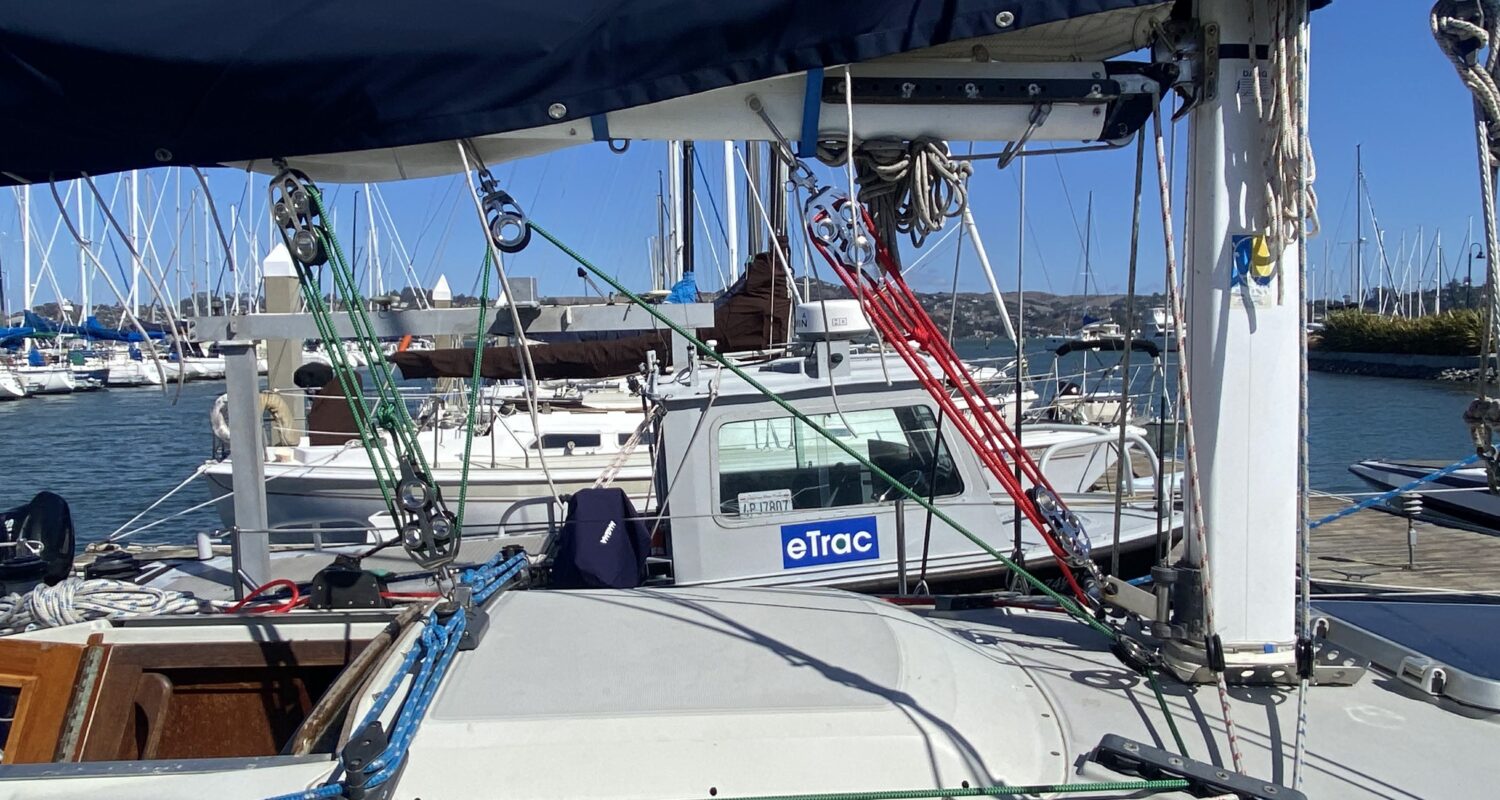
How to update mid-boom sheeting
TLDR: I replaced and subtly reconfigured the lines for my mainsheet and boom vang, as well as replacing almost all of the blocks on my deck. Doing so makes the boat more fun to sail. Total budget @$900, of which the majority was new Garhauer hardware.
Introduction
When I bought my boat, the selling broker suggested that I take off the lines and wash them with fabric softener. This seemed like a good idea, so I did just that and the lines felt fine – better – whatever, but I didn’t have much context for what a sail control line should feel like. Adjusting the lines on the boats we used for my ASA Sailing classes lessons, was terrible. Several days we sailed a C&C 30 or 31 or something and cranking in the main sheet pre-gybe was miserable.
It doesn’t have to be so bad. After working in several areas of sail controls, my boat is now much more pleasant to work with.
Mainsheet Revision
A brief digression for the uninitiated: The mainsheet is the rope that controls the position of the boom of the mainsail relative to the direction of the wind. There is a second device called a traveler, connected to the main sheet blocks (pulleys) that also helps to keep the boom positioned side-to-side where the sailor intends.
There are several ways to locate the traveler and mainsheet in a sailboat.
Transom-mounted traveller & mainsheet
A simple method is to put the ropes at the trailing tip of the boom. This would have the traveler mounted on the transom, at the back edge of the boat. Small racing dinghies are frequently rigged this way. (In the picture below, the red rope connects to the rear tip of the boom).

The advantage of this position is that the guy pulling the rope has a lot of leverage over the strength of the wind because the attachment point at the end of the boom means it is at the end of a long lever. A disadvantage is that a long line must be used to accommodate the swing of the radius tip of the boom. A second disadvantage for a typical cruising sailboat is that the traveler and mainsheet lines would obstruct much of the cockpit. In my Ericson 32-200 the sheets would interfere with steering.
Bridgedeck Traveler
An alternative to the stern transom-mount is to move the traveller and mainsheet one step forward in the boat and mount them on the “bridge deck.” “Bridge Deck” is quite a nautical way of describing the bench seat in front of the cabin entrance (companionway).

The advantage of this arrangement is the ease of access to the ropes while in the cockpit, and a connection point that is fairly far aft/back on the boom to provide adequate leverage to pull against the wind. The disadvantages of the bridgedeck mount is that access to the cabin is now made difficult by the placement of the lines, and the traveller itself becomes a tripping hazard on the way in and out of the cabin.
Cabintop Mid-Boom Sheeting
A common arrangement for cruising boats like mine is to place the traveler on top of the cabin, forward of the companionway, and to connect the line to the middle of the boom, (hence mid-boom sheeting). Access to the companionway is kept clear, and it is possible to have dodger installed aft of the sheets.

The disadvantage of this arrangement is that as the connection point on the boom moves forward, more force must be used to pull on the ropes to move the boom up into the wind. The problem is exacerbated in the design of my 32-200 which has a “recessed companionway” wherein the companionway is moved forward, leaving even less room between the mainsheet connection on the boom and the mast. It means pulling on a short lever.

My inherited mainsheet rigging looked like this:

In order to get more pull or leverage I wanted to consolidate the rear and middle sheaves (pulleys) on the rearmost mount to make moving the boom easier.
Harken, a maker of sailing accessories, has a mainsheet loading calculator with which one can input some dimensions of his mainsail and boom and to calculate how much force will be required to move the sail. I played with it a little bit, but ultimately decided that I wasn’t planning to drill new holes in my boom so I should try a rig with new lines and hardware.
In a thread on the Ericson Yachts forum, I found a helpful discussion from other owners who have addressed similar problems.
Ropes/Lines
I bought ⅜” nominal New England Ropes Sta-Set double-braid from defender.com. It was $0.80 per foot. I think my old rope might have been 7/16” wide, or possibly just salty and swollen 3/8ths. The trade-off with the diameter of the line is that fat lines are easier in the hand, but run through sheaves less easily. New rope is lovely and supple.
I thought I would put eye splices in the double-braid for elegance and neatness. I had eye-spliced a lot of single-braid dyneema for my lifelines. How hard could double braid be? I already had a set of fids for splicing.
It turns out, putting an eye splice in a double braid line is a huge pain in the rear. I tried multiple times and kept losing part of the rope from the fid, etc. etc. Defender charges $19 to put an eye splice in a double-braid line of this diameter. I would make this choice in the future for sure and save myself some frustration. I tied bowlines instead.
Blocks/Pulleys
My boat came with what I think are original Lewmar sheaves from 1990. I am sure they were top shelf at the time. They are solid plastic (delrin?) sheaves that encircle stainless steel axles.
New school blocks have ball bearings to decrease friction. It’s all ball bearings these days. All of the major manufacturers (Harken, Schaeffer, Lewmar, Ronstan) make a version of this type. After positive reviews of the manufacturer from other Ericson owners, (as well as a tacit endorsement one from my Youtube sailing heros, Sam Holmes) I chose Garhauer blocks.
I purchased the Garhauer items from Whale Point Marine/Ace Hardware in Point Richmond California. Ask for Jay. The turn-around time on orders from Garhauer is not great (2-3 weeks) but you may be able to get a decent break from MSRP if you are nice and order several items at one time through Whale Point.
For the opposing fiddle blocks for the main and vang, I purchased the Garhauer 40 series blocks. These are somewhat larger than the Lewmar fiddle blocks I was replacing, but the size relates to the minimum diameter of the smaller of the two sheaves in the fiddle block. If one chooses a smaller Garhauer 30 series, the lines will rub on one another if two fiddle blocks are set directly opposite one another, as in my implementations.
At the same time I replaced my mainsheet and blocks I replaced my boom vang and accompanying blocks. The inherited vang set up was like the mainsheet, composed of salty line and experienced Lewmar blocks.

The new line and block configuration looks like this:

The new fresh 3/8th” line and the new ball bearing blocks make a huge difference in the ease of use of the mainsheet. The slippery quality of the line does mean that one needs to put 3 turns on the cabin top winch in to get adequate friction if winching is necessary, but I have found that with the lighter lines, and better blocks I am able to adjust the boom position manually much easier than with the set-up I had before. I need to use the winch on the mainsheet less frequently.
I also replaced the turning blocks around the base of my mast that serve the halyards, reefing lines, and allow the vang and mainsheet to be led to the cockpit. When I climb up the mast using my Mastclimber , I rely on the main halyard and related tackle for my safety. If that halyard goes through a dainty block and it or the shackle snapped, I could fall and hurt myself. Hence, I purchased a turning block with a very generously-sized shackle for a margin of error when I am hoisting myself with my own petard.

I also continued replacing my old Lewmar gear, including new turning blocks for my jib furling line led aft:

Of all these improvements, I would offer that if one is sailing an experienced cruising yacht with worn rigging, replacing a tired mainsheet line with new rope is a huge return on spending to make a boat easier and thus more fun to sail.
The blocks and sheaves matter, yes, and all the improvements in efficiency matter in aggregate. Keeping the winches clean and lubricated matters too . But if one only has $40-50 to spend to make your boat more fun to sail, there is no question that the mainsheet line is a good item to keep fresh and new.
Similar Posts

Rebuilding an Edson Wheel Brake

Rehabbing a 1983 Dilly boat trailer for a Coronado 15

What line should I use for the mainsheet?

Dear Boat Doctor,
I recently bought a Passport 47, and it’s in really good shape but a bit of the running rigging is tired. I need to replace the mainsheet and I have questions on the running backstays. First off, what type of line should I use for the mainsheet? It is just regular double braid now and the guy at the chandlery suggested Dyneema, so I am not sure what to use. Second, the boat has running backstays, do I need to use those all the time? They are made of wire and hard to handle, they tend to rub on my nice new mainsail too. Can you shed some light on this?
John Peterson
Beaufort, North Carolina
Running rigging is the transmission mechanism for energy from the sails to your boat. You want that energy to transfer to the boat, not be absorbed and spent stretching the rigging. On the other hand, it has to handle well and be affordable. With line, basically the more you spend, the less elasticity you get, and in running rigging elasticity is almost always bad. But the level of inelasticity required is a direct function of the loaded length of the rigging. A halyard, being long, needs to be very inelastic, a mainsheet, being relatively short, can handle a bit of elasticity.
With all that said, I’d recommend a Dacron single braid like New England Ropes Regatta Braid ( www.neropes.com ) for your mainsheet. It is inelastic enough for the application and is very nice to handle.
On your boat the running backs are only used to stabilize the mast when you are flying the staysail. You will setup the weather running back to oppose the force that the staysail is imparting on the mast, the staysail wants to pull the mast forward and to leeward, the runner pulls the mast aft and to weather. You certainly can set the running anytime you like, but it is only required when you fly your staysail.
I totally agree with your assessment of wire runners, they are heavy, hard to stow and the lazy one chafes the main. There is a better way! We need to revisit that elasticity discussion above, we have long loaded length and we need very low elasticity, meaning we need a high-tech line that is going to cost a little bit. I think heat-treated Dyneema is a great material for runners, Dyneema itself is very low stretch and the heat treating makes it even better. The material is very light and won’t chafe the main, a big win. Take a look at Hampidjan’s Dynex Dux or New England Ropes STS-HSR; either would work well.
Also in Boat Doctor
- How do I stop my mast from leaking?
- How should I rig a preventer?
- Tachometer troubles and lazy jack mounting questions
- Do I need to add running backstays?
- What’s with the sour smell on my boat?
- Why is there water in the bilge when I run the engine?
- How do I make sure my VHF works properly?
- How do I fix my hot water system?
- What gear do we need for night passages?
Also from Bob Pingel
- Splicing Dyneema
- Installing a boiler for cold-weather sailing
Mainsheet Traveller Systems: A Comprehensive Guide
by Emma Sullivan | Aug 3, 2023 | Sailboat Gear and Equipment

==Short answer mainsheet traveller systems:== A mainsheet traveler system is a device used in sailing to control the position of the mainsail. It consists of a track and car mechanism that allows for easy adjustment and trimming of the sail. This system helps improve boat performance by allowing sailors to fine-tune the mainsail’s angle and shape.
How Mainsheet Traveller Systems Enhance Sailboat Performance
Sailors constantly seek new ways to enhance their sailboat’s performance, and one proven method is through the utilization of mainsheet traveller systems. These ingenious mechanisms provide an array of benefits, from improved sailing efficiency to increased boat stability. In this blog post, we will delve into the details of how mainsheet traveller systems can truly elevate your sailing experience.
To understand the significance of mainsheet traveller systems, let’s first clarify their function. The mainsheet traveller refers to a track or rail that runs across the cockpit or deck of a sailboat, spanning from side to side. Its purpose is to assist in controlling the position and tension of the mainsheet – the line that controls the boom and main sail.
One key advantage offered by mainsheet traveller systems is enhanced boat aerodynamics. By allowing easy adjustment of the mainsheet’s angle, sailors can finely tune their sails’ shape according to wind conditions. This flexibility helps minimize drag and optimizes sailing performance by reducing heeling (the leaning effect) caused by excessive wind pressure on one side of the boat .
Moreover, these systems contribute to improving overall sail control . Mainsheet travellers allow for fine-tuning adjustments that enable sailors to find their sweet spot – a delicate balance between power and speed. With precise control over leech tension and twist angles, sailors can maximize their boat’s upwind performance while maximizing efficiency downwind as well.
Another notable benefit provided by mainsheet travellers is increased responsiveness and maneuverability on a sailboat. By adjusting the position of the boom laterally through this system, sailors can manipulate both angle of attack and camber effectively – two vital elements affecting superior maneuvering ability during tacks (turns) or jibes (gybes).
Additionally, mainsheet travellers aid in maintaining optimal weight distribution on board. As winds change intensity or direction throughout a sailing excursion (which often happens), having control over where exactly you position your load becomes pivotal. Mainsheet traveller systems enable sailors to distribute the weight, whether crew members or gear, in a way that counterbalances the forces acting on the boat, enhancing stability and safety.
Furthermore, mainsheet traveller systems promote crew comfort by allowing sailors to optimize their seating arrangement: sitting closer to windward during upwind sailing or shifting to more comfortable positions downwind. This adaptability enhances overall endurance for extended voyages and races.
Now, while discussing mainsheet travellers and sailboat performance, we cannot overlook the critical aspect of safety. With an adjustable mainsheet traveller system, sailors maintain continuous control over the boom position, ensuring that they can quickly depower their sails in sudden gusts or adverse conditions. Ultimately, this reduces the risk of capsizing or losing control of the boat – both heavy concerns for any sailor.
In conclusion, mainsheet traveller systems present a gamut of advantages that undeniably enhance sailboat performance. From improved aerodynamics and sail control to heightened maneuverability and stability, these mechanisms are an invaluable addition to any sailor’s arsenal. So next time you hit the open waters seeking that extra edge in your sailing experience, do not forget to consider incorporating a mainsheet traveller system – it might just be the missing piece to unlock your boat’s true potential!
Step by Step Guide: Setting up Mainsheet Traveller Systems on Your Boat
Ah, the joy of sailing! The wind in your hair, the waves beneath your feet, and the thrill of navigating through unknown waters . As any seasoned sailor knows, having control over your boat’s mainsheet is vital for smooth sailing . And that’s where a mainsheet traveller system comes into play.
If you’re new to the nautical world or just looking to upgrade your boating skills, fear not! We’ve got you covered with this step-by-step guide on setting up mainsheet traveller systems on your boat. So hop on board and let’s dive into it!
Step 1: Assessing Your Boat
Before diving headfirst into installing a mainsheet traveller system, take some time to assess your boat. Consider factors like the size of your vessel, its rigging setup, and even how you plan to use it. This assessment will help determine the type of traveller system that best suits your needs.
Step 2: Choosing the Right System
Now that you’re aware of your boat’s unique characteristics, it’s time to choose a suitable mainsheet traveller system. There are several options available, from simple track systems to more advanced ball-bearing car setups. Consult with sailing professionals or experienced sailors to select one that perfectly fits both your boat and budget.
Step 3: Identifying Mounting Points
Once you have your chosen mainsheet traveller system at hand, carefully identify where exactly it’ll be mounted on your boat. Ideally, find strategic locations near the cockpit area which will provide easy access for adjustments while maintaining balance within the vessel.
Step 4: Preparing for Installation
With mounting points determined, prepare for installation by gathering all necessary tools – trusty wrenches, screwdrivers of various sizes, measuring tape – ahead of time. A well-equipped sailor is a successful sailor!
Step 5: Installing Track and Car
Let the installation begin! Start by mounting the track securely on your boat ‘s deck or coach roof, ensuring it’s straight and properly aligned with your selected mounting points. Then, attach the car – the sliding element that holds your mainsheet – onto the track, making sure it moves smoothly from one end to another.
Step 6: Rigging and Adjusting
With the skeleton of your mainsheet traveller system in place, it’s time to rig and adjust everything for optimal performance. Attach blocks or cleats at appropriate positions along the track, allowing you to control tension and angle adjustments effortlessly. Take into account factors like weather conditions and sail trim preferences that influence your rigging choices.
Step 7: Testing It Out!
Congratulations are in order as you’ve successfully set up your mainsheet traveller system! But before hitting open waters, put your creation to the test. Hoist those sails high, feel the wind against your face, and experiment with various settings. Make sure everything operates smoothly while providing you with maximum control over sail shape and boat handling .
A Mainsail Traveller System – Smooth Sailing Guaranteed!
There you have it – a detailed step-by-step guide on setting up mainsheet traveller systems on your beloved boat. With this impressive addition in place, you’ll experience smoother sailing trips than ever before.
Remember though, practice makes perfect. Spend some time honing your newfound skills on calmer waters before tackling more challenging voyages. And always consult experts for additional advice specific to your vessel and sailing goals.
Now go forth, brave sailor! Set up that mainsheet traveller system with finesse and embark on an exhilarating adventure where air meets sea. Happy sailing!
FAQ: Common Questions about Mainsheet Traveller Systems Answered
Title: Demystifying Mainsheet Traveller Systems: Addressing Common Questions
Introduction: As sailing enthusiasts, we understand the importance of having a comprehensive understanding of essential sailing equipment. In this blog post, we will tackle some frequently asked questions and shed light on mainsheet traveller systems. Whether you’re a seasoned sailor seeking clarification or a novice eager to learn, this article is here to provide detailed professional insights with a touch of wit and cleverness.
1. What is a mainsheet traveller system? A mainsheet traveller system refers to a track-mounted device on sailboats used to control the position and tension of the mainsail’s sheet (line). It allows for fine-tuning the sail’s angle in relation to the wind , optimizing performance and balance.
2. Why should I consider using a mainsheet traveller system? Using a mainsheet traveller system offers several advantages. It allows sailors to change the shape of the mainsail effectively, improving boat stability by helping to control heeling (leaning) and weather helm (a tendency for the boat to turn upwind). Additionally, it evenly distributes load across the vessel while reducing stress on blocks and hardware.
3. What are the components of a typical mainsheet traveller system? A standard mainsheet traveller system consists of three primary components:
– Track: The track is typically mounted on deck or atop a coach-roof. It provides an adjustable path along which the traveller car moves horizontally. – Traveller Car: The car attaches to the sailboat’s sheet block(s) and slides along the track horizontally during adjustment. It may include additional features like cam cleats for convenient line management. – Control Lines: These lines connect from various points on the traveler car to appropriate locations aboard your vessel, such as winches or cleats. They enable controlled movement of the traveler car.
4. How does one adjust a mainsheet traveller system while sailing? Adjusting your mainsheet traveller system while sailing involves a multifaceted approach. In most cases, it is best to ease the mainsheet before shifting the traveler car. Once the traveler is adjusted, trim the mainsheet accordingly to achieve optimal sail shape and performance for prevailing wind conditions.
5. What are the different types of mainsheet traveller systems available? Mainsheet traveller systems generally fall into two main categories: end-mounted and mid-boom.
– End-Mounted Travellers: These systems feature tracks mounted on either side of your vessel’s cockpit, near the stern. They are favored by racers due to their potential for allowing a wide range of fine-tuning adjustments. – Mid-Boom Travellers: These systems place the track along the boom’s centerline or slightly forward. They offer convenience in terms of cockpit layout, making them popular among cruisers and recreational sailors.
6. Are mainsheet traveller systems suitable for all sailboat sizes? Yes, mainsheet travellers can be found in various sizes to accommodate different sailboats. Smaller vessels may implement narrower tracks with less load-bearing capacity, while larger boats typically require wider tracks capable of handling greater loads.
Conclusion: We hope that this comprehensive FAQ has provided you with valuable insights regarding mainsheet traveller systems. Understanding their functionality and benefits allows you to optimize sail shape effortlessly, leading to enhanced boat stability and improved overall performance on the water. So hoist those sails high and confidently conquer new horizons!
Mastering Mainsheet Traveller Systems for Smooth Sailing
When it comes to sailing, one of the key elements that can make or break your performance is the mainsheet traveller system. This complex mechanism plays a crucial role in controlling the mainsail and can greatly affect your boat ‘s speed, maneuverability, and overall stability. Therefore, mastering this system is essential for smooth sailing and achieving optimal performance on the water .
The mainsheet traveller system is designed to control the position of the mainsail across the boat. It consists of various components such as tracks, cars, blocks, and control lines, all working together to allow for easy adjustment of the sail’s angle. This adjustability is particularly important in different wind conditions as it enables you to adapt your sail trim for maximum efficiency .
To master this system effectively, it’s crucial to have a deep understanding of its components and their functions. The main component is the traveller track, which runs across the cockpit or deck just forward of the helm station. The traveller car slides along this track and carries the mainsheet attachment point. By moving this car back and forth along the track using control lines known as traveler control lines, you can adjust both leeward and windward positions of your mainsail rapidly.
Properly adjusting your mainsheet traveller requires a combination of skill and intuition. You need to be aware of how changes in wind direction and intensity impact your boat ‘s balance and responsiveness. By keeping an eye on tell-tales (small ribbons attached to sails to indicate airflow) located near your sail edges or listening carefully for slight changes in sound from your rigging when trimming properly using traveller controls becomes second nature.
One technique that seasoned sailors use is known as “fine-tuning.” Fine-tuning involves making small adjustments to the position of the mainsheet traveler while simultaneously trimming or easing out on other control lines like halyards or jib sheets. This allows for minute changes in sail shape which can help optimize lift or reduce drag depending on the specific conditions you’re facing. Not only does fine-tuning improve your boat’s performance, but it also gives you an edge when racing against competitors.
However, mastering the mainsheet traveller system goes beyond just knowing how to adjust it during sailing. Proper maintenance and care are equally vital to ensure its smooth operation. Regularly inspecting the track for wear, replacing worn-out bearings or sliders, and lubricating all moving parts are essential steps to keep your traveller functioning at its best. Additionally, make sure that control lines are properly calibrated and securely fastened to avoid any unexpected malfunctions while underway.
While mastering the mainsheet traveller system may seem like a daunting task at first, with practice and experience, it becomes second nature. Being able to make quick adjustments on the fly and fine-tune your sail trim can significantly enhance your sailing performance . So, take the time to understand your vessel’s specific setup, invest in proper maintenance and training sessions if necessary, and soon enough, you’ll be effortlessly maneuvering your boat with the confidence of a seasoned sailor. Happy sailing!
Exploring the Benefits of Mainsheet Traveller Systems on Different Sailing Vessels
Introduction:
In the world of sailing, even a small tweak in equipment can make a significant difference to the performance of a vessel. One such piece of gear that has gained considerable attention is the mainsheet traveller system. A mainsheet traveller allows sailors to control the angle and tension of their mainsail, resulting in improved sailing efficiency and maneuverability. In this blog post, we will explore the benefits of mainsheet traveller systems on different types of sailing vessels.
1. Enhanced Sail Control:
The primary advantage of using a mainsheet traveller system is that it provides enhanced sail control. Traditional fixed-point mainsheets restrict movement options, limiting the ability to fine-tune sail trim during changing wind conditions. With a traveller system , sailors can easily adjust the angle and tension of their mainsail by moving it along a track mounted across the cockpit or deck.
This increased sail control allows sailors to optimize their boat ‘s performance by adjusting the shape and power distribution of the sail according to wind strength and direction. By utilizing different points along the traveller track, sailors can modify their sail’s position relative to the boat’s longitudinal axis, ensuring optimal lift and reducing drag for improved speed and efficiency.
2. Tamed Fore and Aft Movement:
Another benefit offered by mainsheet travellers is taming fore and aft movement caused by gusts or swells. When sailing upwind or close-hauled, aggressive gusts may cause the bow or stern to pitch up or down abruptly, impacting stability and potentially leading to accidents like broaching.
By allowing lateral adjustment of force through sheeting movement via a traveller system, sudden changes in power distribution can be mitigated effectively. Sailors can quickly move the centre point of effort (POE) laterally by adjusting the mainsail position on the traveler track, effectively recentering pressure over more stable areas on larger boats or countering dynamic movements caused by heavy seas on smaller ones.
3. Optimal Weight Distribution:
A mainsheet traveller system also contributes to optimal weight distribution on a sailing vessel. This is particularly important in high-performance boats, where any excess weight carried too far aft or forward can adversely affect speed, stability, and overall performance.
By utilizing the full length of the traveller track, sailors can easily adjust the position of their mainsail to maintain an ideal balance between windward and leeward forces acting on the boat’s hull. This allows for better control over sail shape and reduces the need for excessive rudder movements. Optimized weight distribution aids in reducing drag and minimizing resistance as well.
4. Improved Crew Safety:
In addition to performance benefits, mainsheet travellers significantly contribute to crew safety onboard sailing vessels. Fixed-point attachments can sometimes lead to severe accidents when a loaded mainsheet gets suddenly released or jams during trimming maneuvers.
Mainsheet travellers offer a safer alternative by allowing sailors to move away from dangerous areas while adjusting sails . The ability to fine-tune sail trim from positions away from boom-end hazards or the risk of accidental jibes considerably reduces crew exposure to potential injury-causing events.
Conclusion:
Mainsheet traveller systems are undoubtedly valuable additions to any sailing vessel, offering enhanced sail control, taming fore and aft movement, optimizing weight distribution, and improving crew safety. Whether you’re cruising leisurely or racing competitively, investing in a quality mainsheet traveller system can have a profound impact on your overall sailing experience. So why limit yourself? Explore the various options available today and unlock the true potential of your sailing adventures !
Troubleshooting Tips for Improving the Functionality of Your Mainsheet Traveller System
When it comes to sailing, the mainsheet traveller system is an integral part of your boat’s rigging. It allows you to control and adjust the position of the mainsail, ensuring optimal performance on the water . However, like any mechanical system, problems can arise that hinder its functionality. In this blog post, we will provide you with some troubleshooting tips to improve the functionality of your mainsheet traveller system.
1. Inspect for Wear and Tear: Before diving into more complex troubleshooting steps, start by inspecting your mainsheet traveller system for any signs of wear and tear. Look out for frayed lines, rusty components, or misaligned tracks. If you spot any issues, address them promptly as they can affect the overall performance.
2. Lubricate Moving Parts: Over time, dirt and debris can accumulate within the moving parts of your mainsheet traveller system, leading to stiffness or restricted movement. Regularly lubricating these components with a marine-grade lubricant will help maintain smooth operation and prevent unnecessary strain on the system.
3. Check Sheaves and Blocks: The sheaves and blocks in your mainsheet traveller play a crucial role in distributing load evenly along the lines. Ensure that these components are in good condition and rotate freely without any binding or resistance. Replace or repair any worn-out sheaves or blocks to avoid undue stress on the lines.
4. Tension Control Lines Properly: Improper tension in control lines can cause unpredictable movements or difficulty adjusting the position of your mainsail effectively. Take the time to properly adjust and tension all control lines according to manufacturer guidelines or seek professional advice if unsure.
5. Evaluate Track Alignment: It is essential for the track of your mainsheet traveller system to be aligned correctly with respect to your boat’s centerline and sail plan geometry. Misalignment can lead to excessive friction during sheeting operations or uneven distribution of load across the traveler car. Make sure that your traveller track is properly aligned and adjust if necessary.
6. Optimize Sheet Angle: The angle at which your mainsheet is led through the traveler blocks can significantly impact sail trim and overall performance. Experiment with different sheeting angles to find the optimal setting for your sails in various wind conditions. Adjusting the position of the blocks or using fairleads may be necessary to achieve an ideal sheeting angle.
7. Regularly Inspect Traveller Car: The traveller car is where the mainsheet attaches, allowing for smooth movement along the traveler track. Check for any signs of damage, such as cracks or wear on the car’s wheels or bearings. If needed, replace worn components to ensure effortless operation.
8. Seek Professional Help if Needed: If troubleshooting your mainsheet traveller system proves challenging or you cannot identify and resolve issues on your own, don’t hesitate to seek professional assistance from a marine rigging specialist or sailmaker. They have the expertise and experience to diagnose complex problems and provide appropriate solutions.
Remember that maintaining a well-functioning mainsheet traveller system requires regular inspection, preventive maintenance, and prompt attention to any issues that arise. By following these troubleshooting tips, you’ll be well on your way to improving functionality and enjoying smoother sailing experiences with precise control over your mainsail!
Recent Posts

- Sailboat Gear and Equipment
- Sailboat Lifestyle
- Sailboat Maintenance
- Sailboat Racing
- Sailboat Tips and Tricks
- Sailboat Types
- Sailing Adventures
- Sailing Destinations
- Sailing Safety
- Sailing Techniques
- Forums New posts Unanswered threads Register Top Posts Email
- What's new New posts New Posts (legacy) Latest activity New media
- Media New media New comments
- Boat Info Downloads Weekly Quiz Topic FAQ 10000boatnames.com
- Classifieds Sell Your Boat Used Gear for Sale
- Parts General Marine Parts Hunter Beneteau Catalina MacGregor Oday
- Help Terms of Use Monday Mail Subscribe Monday Mail Unsubscribe

Main sheet rigging
- Thread starter SeaDogRun
- Start date Aug 20, 2021
- Catalina Owner Forums
- Mid-Size Boats

I'm not versed in Catalinas but that mainsheet system seems overly complicated. While it gets good marks for distributing the load of the mainsheet over the boom, I can't help but think there must be a way that conforms with the KISS principle. And I think mid boom sheeting imparts higher loads on the boom. That's a hefty boom so I wonder why not an end of boom type setup near the helm. You don't want a traveler back there? So don't have one. There must be a better way.
It is beefier than the ones I’ve seen on similar Catalinas. I also think that keeping it simple is always the way to go. May be in the market to dumb it back down to original.

Looks like it has the same purchase as the diagram, just using some different style blocks. Also, the diagram shows the mainsheet routed back the cockpit and your system uses a becket on the block to hold the sheet, instead of a rope clutch or clam cleat. This adds to the “heft” or complexity of that block. It also looks like the aft-most block is “twisted”, or the line is twisted (so it crosses itself, which can add to friction). Greg

The simple answer is that some one decided they didn't like the original set up and decided to improve it with this design. For instance running the sheet to the mast and back to the cockpit, would only be necessary if you had a dodger in the way, or you wanted to route the sheet back along the side. But the boat isn't that big. So using a cam cleat that you can operate while sitting on the bench is a good solution. It makes for a more positive connection to the mainsheet than adding more blocks. Leave it like it is. If you want to get rid of the twists... set the blocks so they they don't swivel. You're going to find many things differing from the old manual. Over the years there have been many documented owner improvements made to this and other popular production boats. You can set your boat up anyway you like, so if you go sailing and don't like the way something is working... change it for crying out loud.... and then let people see what you've done. That's probably what a previous owner did with this set up... he wanted a more positive connection to his mainsheet. The factory diagram will not give you that.
I am new to this form and I cannot tell you how much I appreciate all of your opinions and wisdom. Unfortunately for you, I’ll probably have more questions as time goes on. Thank y’all all very much!

- You have a bowline tied in the line to hold it on the block. I would change that to an eye splice. The knot for the bowline could hang up and in a gybe confusion. I know it might be rare, but changing to the eye splice would alleviate the possibility. The eye splice gets attached to the block by removing the bolt that is holding the padeye to the block.
- Your line (with the bowline) from the bottom block to the first boom block crosses the return line. It happens because you ran the line over the sheave and then back. If you go around that boom block sheave from beneath and up and around, you will remove that crossover and any chance of added friction.
Thank you! This is very helpful.

This routing is just a variation on the original, and as John said, change those two items and it should be just fine.
Here's a couple of shots of ours, it's also a 6:1, but with the block setup, it can be either a 6:1 or 3:1, and there's nothing wrong with mid boom sheeting, everything on a sailboat is a compromise, and Gerry designed the fleet to have as little "junk" in the cockpit as possible, so what you see is lines and controls up front. The tradeoff is that while you have tons of free space, you have to hoof it up front to control the sail. meriachee.wordpress.com/2019/06/27/track-this/
jssailem said: <snip> You have a bowline tied in the line to hold it on the block. I would change that to an eye splice. The knot for the bowline could hang up and in a gybe confusion. I know it might be rare, but changing to the eye splice would alleviate the possibility. The eye splice gets attached to the block by removing the bolt that is holding the padeye to the block. Click to expand

- This site uses cookies to help personalise content, tailor your experience and to keep you logged in if you register. By continuing to use this site, you are consenting to our use of cookies. Accept Learn more…
IMAGES
VIDEO
COMMENTS
Mainsheet rigging refers to the setup and configuration of the line system used to control the mainsail on a sailboat. It typically involves a combination of blocks, lines, and hardware that allow for efficient adjustment of the mainsail's angle and tension. The rigging is crucial for proper sail trim and performance during sailing maneuvers.
The mainsheet traditionally runs from both sides of the boom (the horizontal spar along the bottom of the sail) through various pulleys and blocks, ultimately leading to a traveler system located near the stern or back end of the boat. ... Sailing jargon aside, what's truly fascinating is how sailors manipulate this rope with skill and ...
A mainsheet is a line connected to the boom which allows a sailor to control the speed of a boat. The jib sheet attaches to the clew of the jib, and controls it. The jib has a sheet on each side, only one of which (the leeward one) will be in use at one time. The spinnaker sheet attaches to the clew (s) of the spinnaker, if carried.
Sheets - 'Sheet' is simply the nautical term for lines or ropes that are used to set the angle of the sail. Mainsheet - The line, or sheet, that is used to set the angle of the mainsail. The mainsheet is attached to the Mainsheet traveler. More on that under hardware. Jib Sheet - The jib mostly comes with two sheets: one on each side of the ...
The mainsheet rigging diagram is a visual representation that outlines the setup and configuration of the mainsheet system on a sailboat. It typically includes details such as the location of blocks, cleats, and other hardware, as well as the path that the mainsheet follows. This diagram helps sailors understand and follow correct rigging ...
After all, sailing is about fun, passion for the seas and boats - that should be on top of the hierarchy. That being said, I strongly encourage anyone half interested in sailing to learn as much as possible about operating a sailboat. Most sailors use perhaps one-third of the boat's equipment, the bare minimum that makes their vessel move.
A sailboat sheet is a rope or line connected to the clew of a sail (in the bottom corner) or the boom. From the boom or clew, the sheet often runs down to a series of blocks and winches on the deck. Sailors control the sheets from these winches and blocks. Mainsheet. The mainsheet controls the lateral movement of the boom and the mainsail.
Short answer mainsheet traveler rigging: Mainsheet traveler rigging is a system used in sailing to control the position of the mainsail sheet. It typically consists of a track mounted on the deck or coachroof, a sliding car, and a control line. By adjusting the car's position along the track, sailors can fine-tune the sail's angle.
Carefully stack your mainsheet slack into the back of your cockpit. By doing this you will at least have one time during the race when your mainsheet is perfectly organized. Upwind. You should be using your mainsheet to control your sail shape. This is a dynamic process. You are continually sheeting in and out, even if it is only an inch or two.
The mainsheet traveler is a horizontal track that the mainsheet is attached to through a series of blocks. The traveler enables you to adjust and lock the boom at an angle and also plays a critical part in trimming the mainsail. Most cruising sailboats have their traveler attached to the top of the coachroof in front of the spray hood.
A common argument for twin sheets is safety since the most powerful sail on the boat is also the most dangerous, but a traveler used correctly is just as safe. A boom brake can help control a jibe, but it is not the same as having a mainsheet that will set and hold.
The right mainsheet solution depends upon your own sailing preference, but a few general principles reign true. The farther forward on the boom the mainsheet is attached, the more of a downward effect (vang-like) sheeting elicits. The resulting elimination of twist may or may not be desirable, but its part and parcel of the trimming process.
Finally, some mainsheet tackles have a ratchet sheave, although they don't really help much on a cruising yacht. They do relieve some sheet load, but a larger mainsheet tackle needs a quick- release jammer to be safe and the faceted V-grooved rope channel simply puts extra wear on the sheet. Sail control: Getting the most from your mainsail
2:1 with Dedicated Winches. This simple double-ended system lets the mainsheet run freely through the blocks which allows the traveler car to move easily. The trimmer makes sail adjustments from the high side. DiagramRef. Description. Small Boat Part No. Midrange Part No. Big Boat Part No. A.
Midsize Mainsheet Traveler Test. Considerable evolution has taken place since our last traveler test. Now, Antal stands out for ergonomic design, functionality, and attention to detail, but Lewmar is our choice due to its pricing. A dozen years ago, in the July 1993 issue, PS reported on mainsheet traveler systems.
Transom-mounted traveller & mainsheet. A simple method is to put the ropes at the trailing tip of the boom. This would have the traveler mounted on the transom, at the back edge of the boat. Small racing dinghies are frequently rigged this way. (In the picture below, the red rope connects to the rear tip of the boom).
Lee Montes shows how to Install a Mainsheet Block on a Sunfish Sailboat. This easy installation video shows you from start to finish, what you need, how to ...
With line, basically the more you spend, the less elasticity you get, and in running rigging elasticity is almost always bad. But the level of inelasticity required is a direct function of the loaded length of the rigging. A halyard, being long, needs to be very inelastic, a mainsheet, being relatively short, can handle a bit of elasticity.
==Short answer mainsheet traveller systems:== A mainsheet traveler system is a device used in sailing to control the position of the mainsail. It consists of a track and car mechanism that allows for easy adjustment and trimming of the sail. This system helps improve boat performance by allowing sailors to fine-tune the mainsail's angle and
I have a hard time imagining sailing a 34' boat without being able to keep the mainsheet on a dedicated winch. Having the mainsheet go thru the clutch is sort of a stylistic formality in the sense there are few circumstances where you want to use a clutch on the mainsheet, and normally you want that clutch open.
In contrary with a genoa sheet low elongation is less important. The main sheet runs through blocks with a gear ratio, for example a 1:4 purchase. This damps the effect of rope tension and elongation on sail trim. A double braided rope with a core of polyester or core of SK38 Dyneema ® fibres is a good choice for a mainsheet.
With my C-30 and the C-387 my primary upwind to broad reach main sail control is the traveler. (Particularly on the C-30). The mainsheet is more of a set-and-forget once twist is the way I liked it. Being able to dump the mainsheet quickly (what you're setup gives) is a nice feature.
The mainsheet is a line used to adjust the sail angle to the wind and control the speed of the boat. It can be found attached to the boom or the mainsail clew. It also affects the twist when you sail close to the wind. The mainsheets exert a larger force on the leech of the sail than the kicker. This happens when the boom is right above it.