How To Rig, Set Up & Hoist a Spinnaker: Full Guide
It's a beautiful, sunny day. You're sailing upwind, and all around you colorful spinnakers fill and flutter as boats sail the other way. Wouldn't it be nice to break that sail out of the bag for the ride back down wind?
How do you rig, set up and hoist a spinnaker?
- Prepare the kite by finding the corner and making sure the sail isn't twisted
- Run your spinnaker sheets and guys before attaching to tack and clew
- Attach the halyard to the head, make sure it is outside the headstay
- Set the pole by putting the sheets and guys in the pole's jaws
- Hoist the pole
- Hoist the spinnaker
It seems daunting, but the principles of setting a symmetrical spinnaker are the same whether you're on a 420 dinghy or a fifty foot racer. You may have a few more lines, but the general process is: prep the spinnaker, connect the lines to the sail, hoist the pole on the windward side, then hoist and trim the sail.
There's a little more to it (of course), and each step has a few things to get right. But we've got you covered.


On this page:
Spinnaker basics, steps to set it, setting problems, the bear-away set, asymmetrical differences.
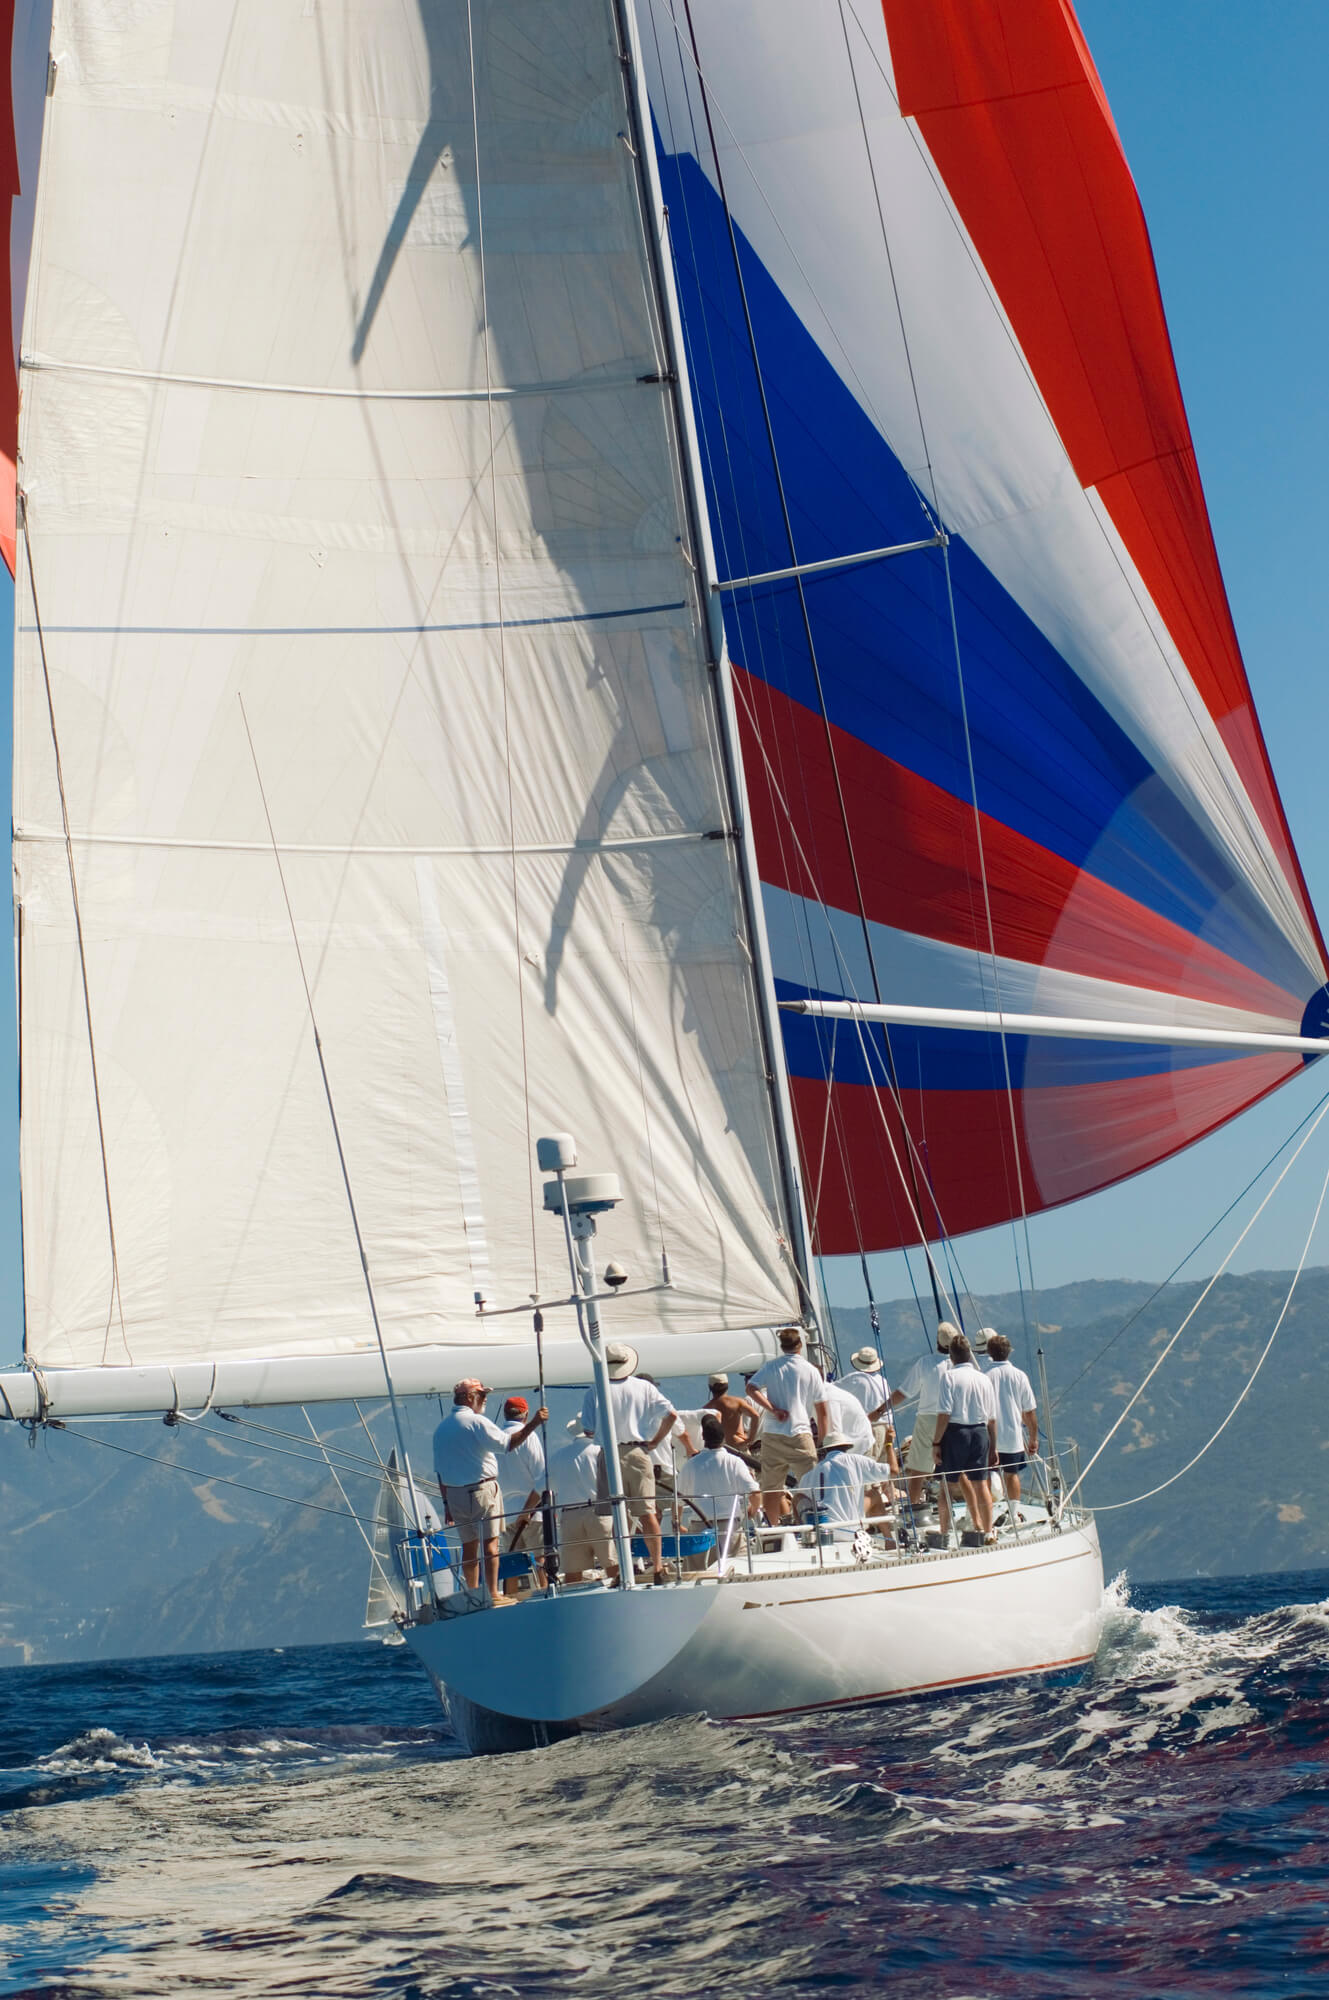
Spinnaker come in two types: symmetrical and asymmetrical. The symmetry refers to the length of the sides of the sails. An asymmetrical spinnaker has a tack and a distinct leech . A symmetrical spinnaker has both sides the same length and requires a pole to position. The tack and leech of a symmetrical sail depends on which side the pole is on - the pole side is the tack. Symmetrical sails aresailed deeper downwind with the poles, whereas asymmetrical spinnakers are better at reaching and sailing at higher angles, and are simpler to set and handle.
In this article, we'll focus mainly on symmetrical spinnakers.
Spinnaker Controls and Lines
A spinnaker connects the boat with a halyard at the head of the sail to hoist it, a sheet on the leeward side, and a guy on the windward side. While the guy is a pole control, some boats use dedicated sheets and guys, while some use a single line that switches function between sheet and guy as the sail jibes from side to side. In either case, the guy connects to the sail, not the pole, and runs through the jaws of the pole. The sheet is used to trim the sail as we adjust the pole with the guy.
When the sail is set, the lines not under load are the lazy guy or sheet. The sheet on the windward side and the guy on the leeward side will be the lazy sheet and lazy guy . Not all boats use separate sheets and guys, so there may not be a lazy guy/sheet.
Pole Controls
The spinnaker guy is used to control the position of the pole, and the angle of attack of the sail to the wind. Trim to keep the pole at a right angle to the wind. Most poles have a pole topping lift and a downhaul (also called a foreguy ). On the mast, there will be a pole car or ring with an attachment point which sets the inboard height of the pole. The topping lift and foreguy keep the pole in a level position, perpendicular to the water, and can be adjusted to match the car position. The pole is trimmed lower in lighter air, though a detailed spinnaker trimming guide is outside the scope of this post.
For simplicity, we'll assume you’re out for a simple sail, not racing. The jib is down, and you're ready to turn the boat down wind. Racers do things a little differently, but you will need to master a basic bareheaded set before you get too fancy.
Step 1 - Prepping the Kite
("kite" or "chute" are common nicknames for a spinnaker)
To launch a spinnaker from a bag without twists, someone needs to run the tapes when the spinnaker is packed. Find the head of the sail, run it between your fingers down one edge of the sail (or the tape , referring to the thicker reinforcement on the edge), making sure there are no twists or loops. Continue until you reach the next corner. If you find any twists or loops, work then out. Leave that corner outside the bag, then start again at the head and run the other tape. Leave the head and two clews out. This step can be done at the dock before leaving, or any time, as long as someone knows it has been properly packed . Do not assume.
You can bring the spinnaker bag up on deck for this, or leave it in the v-berth if there is a hatch suitable for pulling it through. This is more common when racing.
Step 2 - Plugging in the Spinnaker
Spinnaker sheets and guys should be run before connecting to the spinnaker. Most sheets and guys go through a fairlead or turning block at the stern of the boat before running forward to the spinnaker.
When you run the lines, take care they are free and outside of all lifelines, jib sheets and other obstructions before connecting to them to the tack and clew of the sail. Take the halyard and connect it to the head, making sure it is outside the headstay and any pole control lines or other entanglements.
Step 3 - Setting the Pole
If the pole isn’t normally stored on the mast, one end will need to connected. Attach the topping lift and down haul, and put the sheets and guys in the jaws now.
Whether the jaws go up or down is a personal preference, and some boats work better than others in different positions. Some argue that spinnaker forces pull up, so that jaws-down holds them from flying out when it's opened. Others maintain it's easier and more natural to slap a non-loaded sheet and guy into a jaws-up pole, with gravity to hold it there. This is a question of comfort and experience.
Hoist the pole to the proper height for the breeze.
Step 4 - Hoist!
When the boat is turned off the wind to the angle you want to sail, you are ready to hoist the sail.
With the pole set forward, hoist the sail up quickly with the halyard, then trim the sail and pole once it is at full hoist.
- You won't be able to trim the pole until the spinnaker is mostly up, but move it back when you can. It will help it fill and stay under control.
- To get the sail up more quickly, you can have someone at the mast to "bump" the halyard by pulling it at the mast while some else takes up the slack.
- If launching from a bag, attach the bag to the boat or you might launch it into the air with the sail. Most bags have Velcro straps or clips on them for connecting to lifelines or other boat hardware.
There are a few problems to watch for when setting. Twists, hourglasses, and forestay wraps are the most common, and can even happen with a properly packed spinnaker with no twists, though that is the most common cause of hour-glassing and wraps.
Avoid pulling too hard or panicking when these things happen, it just wraps things tighter. You can worked twists out if you stop the hoist and pull down from the center of the foot and the clew. If it's too bad, lower the sail, untwist it, rerun tapes, and re-pack the sail.
When racing, it's slow to run "bare headed" without a jib. Racers will do a "bear-away" set, which is like the set described above, except on a few points. It's easier and faster, but it takes more people and a little preparation since a quick set is the goal.
- The jib is left up, so the spinnaker halyard runs outside the jib when the spinnaker is connected.
- The spinnaker can be hoisted earlier as the jib will blanket it.
- The pole can be trimmed back when the sail is out and filling.
- The jib is "blown" - quickly released and gathered on the deck for the down wind leg.
Since there is no pole, an asymmetrical spinnaker is far easier to rig, set, and hoist. There are only two sheets, and no pole controls.
- Most boats will have a short pole on the bow for attaching the tack. There may be an adjustable tack line to set the tack height for different conditions. The pole may also have adjustments.
- The lazy sheet should run around the outside headstay.
- Many asymmetrical spinnakers have a dousing sock or turtle , which makes launching easier. The sail is hoisted inside this cover, then the sock pulled down to let the sail fill.
- Some asymmetrical spinnakers can be rigged on a detachable, lightweight furler.
- Asymmetrical spinnakers can not sail as deep down wind as a symmetrical sail with a pole. However, they can be carried at higher angles of reaching and can make up for the lack of down wind capability with more reaching speed.
You stated for symmetrical spinnaker that the pole is kept “perpendicular to the water - wrong - it should be perpendicular to the wind
Bill Wheary
The pole is kept perpendicular to the MAST to that the luff of the spinnaker is as far as possible from the mast and luff of the main.
Although the pole is usually set as close to perpendicular to the wind, in most cases the pole is adjusted so as to position the the CORD between the spinnaker tack and clew perpendicular to the wind.
Leave a comment
Own your first boat within a year on any budget.
A sailboat doesn't have to be expensive if you know what you're doing. If you want to learn how to make your sailing dream reality within a year, leave your email and I'll send you free updates . I don't like spam - I will only send helpful content.
Ready to Own Your First Boat?
Just tell us the best email address to send your tips to:

Neilson's guide to asymmetric spinnaker sailing: dinghy edition
Asymmetric vs symmetric, rigging an asymmetric spinnaker, hoisting a spinnaker, flying and trimming a spinnaker, gybing with an asymmetric spinnaker, dropping the spinnaker, capsizing with the spinnaker up.
Dinghy sailing with a spinnaker is so much fun, especially for the crew, who don’t have much to do on downwind legs in boats without spinnakers. Never sailed with one before? It can seem a little daunting but give it a go and you’ll be flying along reaches in no time. Here, we go back to basics with a quick guide to asymmetric spinnaker flying.
First off, there are two types of spinnaker for dinghies – asymmetric and symmetric.
An asymmetric spinnaker is flown from a pole coming out from the bow of the boat, called a bowsprit. A symmetric spinnaker uses a spinnaker pole, which is a pole attached to the front of the mast to hold the sail out.
The clue is in the name with both of these sails; the symmetric spinnaker’s luff and leech are an even length, making it a symmetrical shape. The symmetric spinnaker sits directly in front of the boat and is thus ideal for running dead downwind.
The asymmetric has a longer leech than its luff, and sits to one side of the bow, making it great for reaches. Both spinnakers can be gybed with the boat, but they have different tactics for doing so.
Our dinghies with an asymmetric spinnaker include the RS 200, RS 500, RS 16 catamaran, Laser 2000, Laser Bahia, Dart 16, Vago, Topper Argo, Omega, Topaz 14CX, Topax 16CX, and Vibe. Our only dinghy with a symmetric spinnaker is the Wayfarer.

When rigging, it’s key to keep all the lines outside the shrouds and jib, as the spinnaker flies outside of the boat. On land, face the boat head to wind to lessen the likelihood of the sail catching the wind.
Attach the sail’s tack to the bowsprit with a bowline. Then grasp the foot of the sail and, using both hands, edge down the foot to the clew of the spinnaker to ensure the sail isn’t twisted. Attach the head of the sail to the uphaul, and draw the downhaul through the rings and attach to the patch on the centre of the spinnaker.
The sheets are attached to the clew, led back through blocks on the side of the boat, and into the cockpit, where you need to tie them together.
Before you head out onto the water, turn the boat into the wind and hoist the spinnaker to ensure it flies correctly. Don’t hang about with it up – a quick check will be enough before you can drop, and head out.

When you’re ready to hoist the spinnaker, the helm will need to bear away downwind to reduce the pressure on the rig. When you’re ready, the crew should stand in the centre of the boat, in a semi-crouch, and pull on the halyard, hand over hand, as fast as possible.
When the spinnaker is fully out, the crew grasps the spinnaker sheet and sheets in, while the helm steers onto a broad reach to fill the sail.

When the spinnaker is flying, the crew needs to concentrate on it at all times. Keep an eye on the leech – the sweet spot is to have it trimmed so roughly 6 inches start to curl inwards. Any more and the sail will depower and flap, any less and the spinnaker might be too tight in, stifling the wind and adding pressure to the rig.

It might feel scary the first few times you do it, but it’s really very easy for the crew to gybe the spinnaker. As with all manoeuvres, communication is key.
Once the helm and crew have agreed they’re good to go, the crew uncleats the jib and begins to pull on the other side of the spinnaker sheet as the boat begins to turn. Once you’re through the gybe, cleat the jib on the new side, and ease out the spinnaker sheet until the sail is flying.
By pulling on the sheet early, the crew helps the spinnaker across the front of the boat, allowing them to get the sail filled and flying as soon as possible post-gybe.

When you’re ready to drop the spinnaker, the crew jumps into the centre of the boat and plants a foot either side of the centreboard. Staying on foot, the crew takes hold of the spinnaker downhaul and pulls in the slack, hand over hand. Once the line goes tight, you’ll need to flick the halyard cleat off, then quickly pull the spinnaker down hand over hand. These movements need to be quick, and each heave long, to save the spinnaker from going in the water as much as possible.
Once the spinnaker is safely back in its sock, and the crew has pulled the pole in, they need to jump back on the side, take hold of the jib sheet, and hike or trapeze as normal.

First off, this is totally normal and very easily rectifiable, so don’t panic!
It’s important to drop the spinnaker before you right the boat, so the crew needs to swim into the cockpit of the capsized boat. If the boat has turtled, get the helm to pull on the centreboard until the boat comes up to lie horizontally on the water.
Once the crew is in the cockpit, pull in the slack and uncleat the halyard cleat as you would upright. Then pull in the spinnaker hand over hand until it’s back in its sock. The crew also needs to uncleat the jib to save it pulling the boat over the other the other way when righted.
Once you’ve got the boat righted, and both helm and crew are back on board, the crew can tidy the ropes and get sailing again!
If you’ve never sailed with an asymmetric spinnaker before, welcome to a whole new world of brilliant sailing! Can’t wait to get started? We’ll see you on the water!

More on watersports...

A beginner's guide to dinghy sailing
The following guide explains everything you need to know about dinghy sailing: the terminology, the kit, what to wear and how to get started.

It's time to put the wind in your sails
This guide puts the spotlight on dinghy sailing and explains why it’s both a fun and challenging sport for everyone.

Packing for a watersports holiday
If you’re new to watersports, you’re probably wondering what to wear and how to choose the right clothing for a day or even a few hours on the water.

Good Energy straight to your inbox
Drop us your email for our latest offers and inspiration for your next endorphin rush!

I am interested in
Yachting Monthly
- Digital edition

Spinnaker handling: an experts full guide to using the kite
- Rachael Sprot
- October 16, 2023
YM expert Rachael Sprot steps aboard to help. This month she explains how to gain confidence with the spinnaker handling and usage

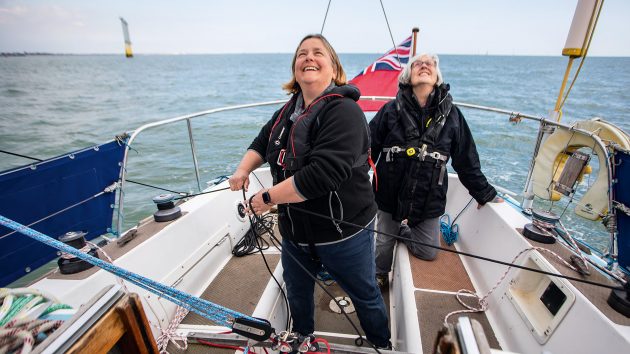
‘I have a confession to make,’ said my friend and fellow sailing instructor, Liz Le Mare, ‘I need spinnaker handling training.’
I was confused, since she’s often racing around the Solent as a regatta skipper. ‘The first mate does the foredeck for me,’ she explained, ‘I’m always at the back of the boat.’ It sounded to me like a bad case of backstay hugging – which afflicts all instructors – and that she needed to show the forestay some love. I agreed to an afternoon of training on her family boat, a Westerly Konsort, Bifröst . Her mother, Juliet, and husband, Richard, volunteered to crew.
Liz is not alone: spinnaker handling makes many seasoned sailors quake in their seaboots. The big, bright dragon in the sky appears to be governed by a different set of rules from white sails. Downwind sailing is under-taught in most sailing courses and spinnakers don’t feature on the RYA Yachtmaster syllabus. On many boats it’s a sail which lies dormant below the vee-berth.
If the spinnaker’s hibernation is interrupted, it’s usually under the skipper’s duress during a one-off event like the Round the Island Race. Unsurprisingly, the poor thing comes out in a bad mood, snorting fire and fury.
Despite the huge advances in gennakers and code sails, a symmetric spinnaker remains one of the best ways to sail downwind. Without one, or the skills to use it, you’ll find yourself resorting to the engine.
Rather than thinking of them as a party piece for special occasions, they should be part of our everyday wardrobe.
Conventional kites aren’t hard to fly in the right conditions once you’ve got it straight in your head. Downwind cruising can be faster and save you from motor sailing with a kite. Photo: Richard Langdon
Choosing you spinnaker
In a perfect world every cruising boat would have an all-purpose spinnaker to cover a broad range of wind angles. A medium-weight cloth is ideal for this. Lightweight cloth won’t cope so well with helming infractions and heavyweight cloth won’t fly in light airs.
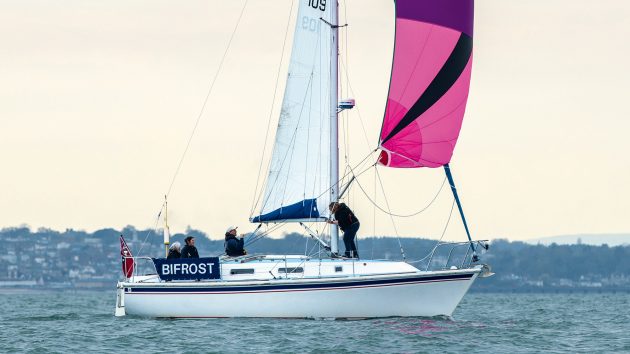
In the real world, a brand-new spinnaker tends to be low on the priority list. Sailmakers will disagree indignantly, but unlike white sails, a spinnaker doesn’t need to be a perfect fit. A second-hand sail from a similar boat will often work well enough for occasional use. Liz and Richard were lent a spinnaker designed for a Hunter 32.
Made 25 years ago by the cadets at Castle Cove Sailing Club in Weymouth it had been a project to mark the 50th anniversary of the club but hadn’t seen much action since. It was a little on the small side for Bifröst , which suited us well.

The spinnaker jaws should open upwards. Photo: Richard Langdon
Spinnaker handling kit needed
Once you’ve acquired a spinnaker you need to be able to rig it. You’ll need a pole, halyard, sheets and guys. The pole needs an uphaul and a downhaul. Each line also needs the corresponding hardware such as snap shackles and blocks.
A few weeks beforehand Liz rummaged through the lockers and found most of what she needed. We both agreed that spending a fortune on new kit was unnecessary but some items were essential – blocks for the guys and sheets were missing.
She opted for low-friction rings attached to spliced loops instead. They’re much cheaper than blocks, and although they put slightly more resistance in the circuit, unless you’re racing you’re unlikely to notice the difference. Once you’ve acquired a sail you need to be able to rig it. You’ll need a pole, halyard, sheets and guys.
The pole needs an uphaul and a downhaul. Each line also needs the corresponding hardware such as snap shackles and blocks.
Spinnaker pole
Most poles on yachts under 40ft have a jaw at each end so that the pole can be used either way round. The opening jaws on the end of the pole are often referred to as the ‘beak’, and lines running the length of the pole make it easy to open either end. The pole should always be rigged with the jaws facing upwards.
Bifröst ’s mast had a simple ring on the mast for attaching the pole to. Bigger boats will have a track so that the height can be adjusted. Bifröst ’s pole had wire strops from which the pole was suspended.

A halyard block at the masthead needs to swivel. Photo: Richard Langdon
Spinnaker halyard
This needs to run through a swivel block to provide articulation. On a masthead rig such as Bifröst ’s, this runs to the mast crane to project the head of the sail clear of the forestay.
The uphaul is a short line which supports the weight of the pole. Like the topping lift, there should not be much weight on this once the spinnaker is flying, as the sail will provide most of the lifting force.
The downhaul braces the pole into position against the guy and the uphaul. If using wire strops on the pole then the downhaul needs to run from a block on the foredeck. Bifröst had a fitting for a block just forward of the mast and a 2:1 purchase system. If you’re using the end fittings on the pole, rather than strops, you’ll need a block further forward. On some boats feeding the downhaul through the bow fairlead gives a clear line.

Sheets should be plenty long enough so you can give a big ease if needed. Photo: Richard Langdon
Spinnaker sheets
Spinnaker sheets run outside everything to a block on the quarter. They need to be long. In the case of a broach you need to be able to let out several metres to depower the sail.
Spinnaker guy
The guy is the line which connects the spinnaker to the pole. It runs through the ‘beak’ of the pole before attaching to the sail. The pole needs bracing from the beam of the boat, so the guy normally runs through a block at midships. It takes large loads so don’t skimp on the weight of the line.
Two sheets and two guys
On all but small boats, if you want to be able to gybe you’ll need two sheets and two guys, connected together as a pair. One will be working and the other lazy. Many cruising sailors snuff their spinnakers for gybing, giving the opportunity to re-rig the lines.

Lead the spinnaker sheets outside everything. Photo: Richard Langdon
Rigging the spinnaker
Spinnaker rigging is one of those tasks which can take five minutes, or 50.
The sheets, guys and downhaul can be pre-rigged alongside and coiled on the guardwires until needed. Only once you’re approaching the hoist position and settled on the correct gybe can you rig the pole though.
Liz and Richard had already rigged the pole while alongside to check the lead of the lines and then stowed it again. This was a useful familiarisation and saved time on the water. As we approached the hoist location it was time for Liz to leave her natural environment and head to the foredeck. With minimal input from me she set up the pole for a port gybe, double-checking the lead of the lines as she went.
Article continues below…

How do you moor a yacht in a tricky windward slot?
Andy’s home berth is alongside a walkashore pontoon on a river. Outside is another pontoon not attached to the shore.…

Heavy weather sailing: Essential boathandling skills
Coastal sailors usually have the luxury of waiting out bad weather safely tucked up in harbour, but sail for long…
Step-by-step
- Rig the sheets and guys. Attach the downhaul before lifting the pole from its bracket. This acts as a security line to prevent the pole from slipping into the water.
- Connect the pole to the mast with jaws opening upwards – important for gybing. If the height is adjustable, set it to around shoulder height to begin with. Rest the forward end of the pole on the bottom rail of the pulpit for security.
- Attach the uphaul. The jib sheet should rest on top of the pole and outside the uphaul, so that you could unfurl the jib if you wanted to, or you could hoist a hanked-on jib once the spinnaker is down. Position the spinnaker bag on the leeward side of the foredeck, close to the pulpit, and secure it to the guardwires.
- Put the guy through the beak of the pole and run the combined sheet and guy around the forestay, clipping it onto the nearest clew in the bag.
- Attach the leeward sheet-guy combo to the other spinnaker clew. Don’t attach the halyard yet; that needs to be done just before the hoist. Double-check the lead of all the lines.

Sneak the guy to the pole, then hoist the sail in the lee of the headsail. Photo: Richard Langdon
Hoisting the spinnaker
Hoisting and dropping a spinnaker is the hard bit. Once the sail leaves the bag it needs to reach the top of the mast, fast. If it inflates halfway up it will become very difficult to hoist and may end up in the water, so it’s important that the sheet is left slack and that there’s no holding back on the sweating. A snuffer or ‘wooling’ keeps the sail contained until you’re ready.
The first stage of the hoist is ‘sneaking the guy’. This brings the windward clew of the spinnaker around the forestay to meet the pole. The sail can snag, so someone needs to help it round as the cockpit team take on the guy. Once the halyard is attached the sail is ‘live’ – hoist straight away.

Sheet the spinnaker snug to the pole and take up the slack on the lazy lines. Photo: Richard Langdon
- Raise the pole to horizontal. Check that the lazy sheet is sitting just on top of the pole. Attach the halyard to leeward of the headsail. Bring the pole aft to about 45° from the bow.
- Brace the pole into position by tensioning the guy against the downhaul. Sweat the halyard as fast as possible and shout ‘made’ once it’s at the masthead.
- Once the halyard is fully hoisted, sheet in and watch it fill. Furl away the headsail. Trim and tidy up.

Sheet out until the windward shoulder curls then sheet back just enough to make it set. Photo: Richard Langdon
Trimming a spinnaker
Spinnaker trim is far less complicated than it seems. The trimmer on a race boat worships the spinnaker, gazing at their god in the sky and constantly working the sheet. On a cruising boat in stable conditions we can take a more relaxed approach while still knowing who’s boss.
Broadly speaking we trim the spinnaker using two things: the pole position and the sheet. The pole is much like the boom: it needs to be closer to the centreline for tighter reaching and brought aft for deeper angles. The sheet is no different from other sheets – if in doubt, ease it out. There are two cues to watch for: the shoulder curling; and the body of the sail collapsing.
Shoulder curling
Treat this like the tell-tales on the luff of your jib – a little bit of a curl, six inches or so, is the slight lift on the inner tell-tale.
It says that you’re on the windward limit of your sail setting. If the shoulder starts to curl more and begins to invert, you’re too close to the wind. In the first instance sheet in and bear away. If it continues to invert, ease the pole forwards for tighter reaching angles and sheet in.

If the spinnaker collapses behind the main, bring the pole aft. Photo: Richard Langdon
If the whole sail collapses then it’s not receiving enough airflow. It’s most likely blanketed by the mainsail and could wrap itself in the rigging. Hardening up and sheeting in should be your first reaction.
Once you’ve recovered you can experiment with bringing the pole aft and easing the sheet out to help the sail find clean air.
Pole height
Pole height is determined by the height of the free-flying clew – we want to keep them symmetrical. This setting will tend to be lower when reaching, and higher when running. Adjust with the uphaul and downhaul, and if you can adjust the inboard end, the pole should remain as close as possible to horizontal to the deck.
Helming under spinnaker
Despite protesting that she’d never flown a spinnaker, Juliette helmed all afternoon and proved to be a natural. The same sense of feel that informs upwind helming is valuable downwind too. As the boat starts heeling and powering up, it’s a sign to bear away. When the boat feels slow and upright, you’re probably too deep. A good tip is to steer beneath the spinnaker. If the spinnaker starts pulling you off to leeward, follow it downwind – you’re probably reaching too high. If it’s rolling to windward, you’re probably a bit low.

Centralise the boom and ease out on the guy. Photo: Richard Langdon
Gybing under spinnaker
Gybing a spinnaker can be fraught because, unless you have two poles, there’s a period when the sail flies purely on the two sheets. At this point the spinnaker is much less stable, so sensitive helming is required, and a course deep downwind. It’s not for the faint hearted or short of hands, but Bifröst was lacking in neither so we decided to try it.
There are two methods of gybing the pole: dipping it, where the inboard end of the pole remains attached to the mast while the other drops onto the foredeck; or, if a babystay or inner forestay is fitted as it is on Bifröst, end-for-ending it. During an end-for-end gybe the pole is detached from both the guy and the mast and floats across the foredeck, suspended from the uphaul via the two wire strops. There are a lot of ropes involved but Liz, Richard and Juliet were soon gybing confidently.

Adjust the sheet and guy to get the sail sheet on the new gybe. Photo: Richard Langdon
- Bear away onto a run. Centralise the main so that it can’t crash gybe. Take up the tension on the lazy sheet. This should be sitting on top of the beak of the pole and not beneath it.
- Ease off the uphaul or downhaul a few inches to make it easier to handle the pole. Open the beak of the pole to release the working guy and fly the spinnaker on the two sheets.
- Take the inboard end of the pole off the mast. Grab a bight of the new guy (it will need lots of slack) and put it through the jaws of the pole. This will be the end which was previously attached to the mast. Push the pole outwards and attach the new inboard end to the mast.
- Turn the boat through the wind. Take up on the new guy. Ease the old sheet and trim the new one. Re-tension the downhaul and uphaul. Ease the main.

To drop, bring the lazy guy to the companionway and flake the halyard ready. Photo: Richard Langdon
Dropping the spinnaker
This is the moment with the greatest potential for problems. If the spinnaker re-inflates halfway down it may end up in the water, which will be hard to retrieve.
The person on the halyard controls the speed of the drop. They need to ease as swiftly as it can be gathered in.
Dropping behind the mainsail and gathering it into the companionway hatch is the standard technique and it worked well on Bifröst . This also gives the crew somewhere secure to stand. If the main is loose-footed you can pull the spinnaker through the ‘letterbox’ – that’s the slot above the boom, which helps to squeeze out the air.
Unfurling the headsail first helps depower the spinnaker in windy conditions. On a benign day, such as we had on the Solent, maintaining a steady downwind course will keep it well-blanketed behind the main.

Work along the foot, the sail will be shadowed by the main. Photo: Richard Langdon
- Flake out the halyard so that it’s ready to run. Bear away onto a deep broad reach.
- Ease the guy forward and take in on the downhaul so that the foredeck crew can reach the tack to release it – it should fly off to leeward. Alternatively ease the guy and lazy sheet until the pole rests on the forestay, and then let them run.
- Use the lazy guy or the working sheet to pull the sail into the companionway hatch. Ease the halyard down swiftly, but not so fast that the spinnaker ends up in the water.
- Try to gather the sail along the foot first, and then into a sausage to reduce the risk of re-inflation.
Being able to handle a spinnaker well is good seamanship, and makes downwind passages a whole lot more enjoyable, and quicker. Photo: Richard Langdon
Conclusions
Liz has a strong sense of seamanship and a cautious approach to risk. She’s a natural instructor and puts people at ease by creating a safe environment but this means staying in the cockpit and keeping the overview. For her to venture forward, she needed experienced hands in the cockpit. Now that she’s done the foredeck work herself, she’s confident that she and Richard could fly the spinnaker double-handed.
Liz is not alone in struggling to find opportunities for her own learning. By default skippers have the most experience on board. Long-term investment in training your crew to helm and handle lines will pay off. However, sailing with experienced sailors allows you to push the edges of your skillset, rather than staying comfortably inside it. Pole drills alongside the berth and poling out the headsail make the transition to spinnaker work easier.
Most ‘white sail’ skills transfer naturally to downwind sails, especially helming. Get to know your spinnaker in benign conditions when you’re unlikely to have major problems. Spinnakers, like dragons, aren’t naturally aggressive, they’re just misunderstood.
Enjoyed reading this?
A subscription to Yachting Monthly magazine costs around 40% less than the cover price .
Print and digital editions are available through Magazines Direct – where you can also find the latest deals .
YM is packed with information to help you get the most from your time on the water.
- Take your seamanship to the next level with tips, advice and skills from our experts
- Impartial in-depth reviews of the latest yachts and equipment
- Cruising guides to help you reach those dream destinations
Follow us on Facebook , Twitter and Instagram.

- CLASSIFIEDS
- NEWSLETTERS
- SUBMIT NEWS
Beginners guide to using a Spinnaker!


Related Articles

Practical Boat Owner
- Digital edition

How to rig a spinnaker on a small yacht – what you need and where to fit it
- David Harding
- October 29, 2015
David Harding helps a PBO reader figure out how to rig a spinnaker on her Contessa 26 - part of the PBO Sail Clinic series.

Jo Mooring Aldridge has had a cruising chute on her Contessa 26, Sulali , for years. But she has hardly used it, because it only flies happily with the apparent wind on or a few points abaft the beam.
Her solution was to buy a spinnaker. That was the easy part. Next, she started thinking about everything else she had to buy and fit.
Kit for a kite
All you need with a cruising chute is a halyard, a means of attaching – and, preferably, adjusting – the tack strop, a couple of sheets, and a block on or near each quarter.
A spinnaker is more complex. You will need:
■ A pole and an attachment point on the mast for its inboard end. You can attach the pole to a fixed ring, though it’s better to have one that can slide up and down on a track. The pole should be fitted with a pair of bridles for the uphaul and downhaul, and it will need somewhere to live on deck when not in use.
■ An uphaul (topping lift) and a downhaul. The uphaul runs through a sheave or a block on the mast, normally at about spreader height on a boat with a single-spreader rig.
It can then be run aft if you want to adjust it from the cockpit. On a boat of the Contessa’s size, the downhaul can be led to a point just ahead of the mast, as it is on dinghies; larger boats will need the block further forward, to provide a more vertical pull.
■ Sheets and guys Boats up to 30ft (9m) or so usually have a single set of sheets rather than sheets and lazy guys, because they’re seldom under enough load to present difficulties during gybes. Instead of lazy guys, you find barber haulers, alternatively called tweakers or twinning lines. Barber haulers deflect the guy (which becomes the sheet on the other tack) downwards and outwards to the point of maximum beam, thereby increasing the angle between pole and guy for a more effective pull.
Each barber hauler consists of a relatively light block through which the sheet is roven before passing through the turning block on the quarter. Snatch blocks are ideal, because they can be snapped on and off. A line attached to the block passes through another block which is fixed as far outboard and as close to the point of maximum beam as possible. The line needs to be long enough not to deflect the (leeward) sheet on any point of sailing. From the toerail, it should be led to a cleat within easy reach of the cockpit.

PBO Sail Clinic: why won’t my boat tack properly?
PBO Technical Editor David Harding offers ideas to help a Kelt 5.50 that won't beat upwind

What difference do new sails make?
New sails are a big investment – but are they worth it? The PBO team compared the old with the…

Bermudan rig vs Junk rig
David Harding sets up a direct comparison between Junk- and Bermudan-rigged Splinters to find out how they handle
Fixing the kit
Jo was already part-way there with Sulali, because she had the spinnaker, the sheets, the halyard, the pole, and the track on the mast with a ring. The halyard ran through a block at the masthead and then down the outside to a winch; nothing could be simpler. Most masts on new boats come with the necessary provisions for a spinnaker halyard, but if yours doesn’t, you may want to call in a rigger. Shackling a block to the masthead is one thing; cutting through the mast wall and inserting a sheave box is a job many people would rather leave to an expert.
1. Feeding a mouse line through the uphaul sheave

2. Jeremy removed the old T-tracks from the gunwales…

3. …and put plenty of sealant around the screw holes…

4. …before positioning the new sections of track from Barton

5. Fortunately, most of the holes lined up with those used for the old tracks…

6. …but sometimes Jeremy had to drill at an angle to avoid the screw securing the toerail

7. The deck eye and cam cleat for the downhaul by the mast came next

8. In the cockpit, Jeremy worked out the position for the clutch that would handle the roller reefing line

9. The barber-hauler lines would also need a fair lead to the winch after passing through the cam cleats on the coaming. Securing fittings to the coamings was easy because we could reach the inside from the quarter berths

10. How it works in practice: the loose line on the primary winch is the sheet of the furled genoa. The barber-hauler passes through the forward block on the track and is led back to the cleat on the outside of the coaming. The genoa’s roller reefing line is held in the clutch, and the spinnaker guy is around the aftermost winch

11. To allow the Harken ratchet blocks to rotate freely, we attached them with short strops. Bungy cord taken around the pulpit stops them hitting the deck when not in use

12. Although the downhaul is cleated by the mast, a long tail means that it can be adjusted from the comfort of the cockpit.

13. The track for the pole attachment on the mast allows about 3ft (1m) of travel. It couldn’t go any lower because of the mainsail’s roller reefing handle

14. We tied the uphaul and downhaul bridles around the pole, using the eyes to stop the line sliding rather than to take the weight

Reeving the uphaul
A similar situation applies with the pole uphaul. The least you need is a block shackled to an eye on the mast, but an internal system is neater. On Sulali, the mast was fitted with an uphaul sheave just below the spreaders and an exit sheave at deck level. The mouse line had broken, so I went up the mast, removed the sheave box and dropped a new line down with a large washer on the end. Then I removed the lower sheave box and fished out the mouse before pulling through the 6mm uphaul line.
The pole came next. We riveted eyes to the top and bottom at each end before making bridles with pre-stretched 5mm line and stainless steel rings. The line for the upper bridle passed around the pole and through the eyes on the bottom, which would be subjected merely to the deflection loads instead of taking the full weight of the uphaul.
Hardware choices
We chose most of the rest of the hardware from Barton’s catalogue; blocks, deck eyes and cam cleats. To make life as easy as possible, I suggested that Jo buy a pair of ratchet blocks for the sheets. The extra price compared with plain blocks is well worth paying, because a ratchet makes an enormous difference. Barton doesn’t make ratchet blocks, so we got them from Harken.
Other items on our list from Barton included two, 5ft (1.52m) lengths of 20mm T track and a pair of genoa slides. As on all Contessa 26s, the blocks for Sulali’s headsail sheets were attached to tracks on the wooden toerail. The obvious place for the barber hauler blocks was on the same tracks, but the section was of obscure Dutch origin and we could find no slides to fit it.
Help from a pro
Since Jo keeps Sulali in Lymington, it seemed sensible to enlist the help of Jeremy Rogers in fitting the hardware. Jeremy built the Contessa 26 for many years and now undertakes restorations and refits at his yard in Milford-on-Sea, just down the road. He also sailed his own 26, Rosina of Beaulieu, to overall victory in last year’s Round-the-Island race.
Removing the old genoa tracks was simply a matter of lifting them off, having removed the screws that secured them to the toerail. Before fitting the replacements, Jeremy applied a generous daub of sealant around the holes to make sure no water could get into the wood, though the spacing of the holes in the Barton track meant that not all the original holes in the toerail could be used. Jeremy had to drill some new ones – which was easy enough, except in a couple of places each side when the holes in the track were directly above the screws that secured the toerail to the bulwarks.
His solution was to drill at an angle from the vertical so the screw he was about to put in would diverge from the one that was in the way. By the time the new one was screwed in tight, the fact that the head was slightly askew could hardly be noticed.
Deck eye for the downhaul
Once the tracks were secured, we looked at the best position for the deck eye to which the downhaul block was to be shackled. We had already agreed that Jo would adjust the uphaul and downhaul from on deck, since none of the other control lines on Sulali were led aft, so we put the eye just ahead of the mast and the cam cleat further aft on the mast’s port side. Before drilling holes in the deck, it’s important to make sure that any lines will have a fair lead and can easily be adjusted.
The headliner moulding and the deckhead are solidly bonded around the foot of the mast on the Contessa 26, so Jeremy fastened the eye using bolts long enough to go through both laminates. For the cam cleat, it was simply a question of putting a couple of machine screws into the thick deck moulding by the mast step. Other boats may present more of a challenge – especially when there’s a gap between the deck and a non-removable headliner – unless the builder has bonded aluminium plates to the underside of the deck laminate in the right position.
Clutches and cleats
The final hardware attachments were on the cockpit coamings. First, Jeremy fitted a clutch for the genoa’s roller reefing line, which had previously occupied the spinnaker winch on the port side. He positioned it carefully so the line could still be led around the winch without causing unnecessary chafe. Then he bolted a cam cleat to the outside of each coaming for the barber haulers. Again, alignment with the spinnaker sheet winches was important; the barber haulers can be under substantial load on a close reach, so it’s useful to be able to take them around a winch.
Bolting the clutch and cleats to the coamings was relatively simple, because the inside of the coamings were easily reached from the quarter berths. We used penny washers to spread the load.
In terms of hardware bolted to the deck, that was all we needed. Spinnaker winches can be useful, but on many boats the primary winches serve both headsail and spinnaker sheets with the help of jamming foot blocks.
IMPORTANT MEASUREMENTS
■ Spinnaker pole: the normal length of a pole is the same as the J measurement, i.e., the distance from the front of the mast to the base of the forestay.
■ Pole attachment ring on mast: typically about 5ft (1.5m) above the deck on a 26-footer. The objective is to fly the spinnaker with the pole horizontal and the clews level. If you fit a track, its upper end should be high enough to cater for the maximum pole height and its lower end should, ideally, be close to the deck. That way, you can slide the track to the bottom and leave the pole attached to the mast when sailing upwind. The topping lift can stay attached, too, held against the mast with a plastic clip on the end of a length of bungy.
■ Cordage (approximate lengths, for guidance only) Halyard: length of mast from base to halyard sheave/block x 2.5 (longer if led aft) Sheets/guys: LOA x 2.5 Uphaul: distance from base of mast to sheave/block x 3 Downhaul: LOA x 1 Tweakers: LOA x 0.5
Finishing off
Our final jobs were to attach the ratchet blocks to the quarter, buy some 6mm line for the downhaul and barber haulers, set everything up and wait for a suitable day to make sure it all worked. Fortunately, it did.
Once her autopilot is working properly, Jo should be able to hoist, dowse and gybe the spinnaker on her own in winds up to 10 or 12 knots. And, much of the time, she will be sailing far more efficiently than she would with a cruising chute .
WHAT’S THE COST?
Approximate costs for a 26-footer with a masthead rig (as published in the August 2003 issue of Practical Boat Owner magazine)
Tri-radial spinnaker: £700 – £1,000 depending on the sailmaker and exact dimensions. Sulali’s is of a tri-radial cut from Sanders Sails to the same design as used by Jeremy Rogers. It cost £775
Pole and bridles: £150 – £250
Track and sliding ring on mast: £120 – £150. Fixed ring: under £10
Cordage: £100 – £150 including splices and snap shackles
Hardware – blocks and cleats etc: depends on size and supplier, and what’s already on the boat. The total could range from less than £100 to £250 or more.
■ Remember that buying the spinnaker is only the start; everything else you need could easily come to as much again
■ If in doubt about what’s needed or where to fit it, ask your sailmaker or rigger. They will have an interest in helping you get everything right. Boats, rigs and deck layouts vary so much that it’s impossible to provide guidelines to cover every situation.
Why not subscribe today?
This feature appeared in the August 2003 edition of Practical Boat Owner . For more articles like this, including DIY, money-saving advice, great boat projects, expert tips and ways to improve your boat’s performance, take out a magazine subscription to Britain’s best-selling boating magazine.
Subscribe, or make a gift for someone else, and you’ll always save at least 30% compared to newsstand prices.
See the latest PBO subscription deals on magazinesdirect.com
Asymmetrical Spinnaker Rigging: A Comprehensive Guide
by Emma Sullivan | Aug 5, 2023 | Sailboat Gear and Equipment

Short answer: Asymmetrical spinnaker rigging
Asymmetrical spinnaker rigging refers to the setup and arrangement of lines and hardware used to control and hoist an asymmetrical spinnaker sail on a sailing vessel. It typically involves attaching sheets, guys, halyards, and other control lines to specific points on the sail, deck, or mast, allowing for efficient handling and trimming of the sail for optimal performance while sailing downwind.
The Basics of Asymmetrical Spinnaker Rigging: A Comprehensive Guide
When it comes to sailboat racing or adventurous cruising, understanding the intricacies of rigging an asymmetrical spinnaker is a valuable skill. Whether you are a seasoned sailor or just starting out, this comprehensive guide will take you through the basics of asymmetrical spinnaker rigging, providing professional tips and witty insights along the way.
To begin, let’s establish what an asymmetrical spinnaker actually is. Unlike its symmetrical counterpart, the asymmetrical spinnaker has a distinctive shape resembling that of a parachute. This unique design allows for easier handling and increased performance in downwind sailing conditions. However, in order to fully utilize its potential, proper rigging is crucial.
First things first – we need to set up the hardware necessary for attaching and controlling the spinnaker. Start by installing your bowsprit or sprit pole at the bow of your boat. Consider it as the launching pad for your spinnaker adventure! Make sure it is securely mounted and properly aligned with your sailing needs.
Next, let’s talk about the all-important tack line. The tack line plays an essential role in adjusting the height and tension of the spinnaker’s luff (the leading edge). Think of it as a puppeteer’s string – one pull can change everything! For maximum control and versatility, install a dedicated tack line block on deck near your bow area. This will allow you to fine-tune adjustments quickly and effortlessly during races or leisurely cruises .
Moving on to headstay control – or lack thereof! Unlike traditional headsails where tensioning via backstays is paramount, the asymmetrical spinnaker operates differently. Due to its free-flying nature, there is no need for headstay control while rigging it. Embrace this freedom with open arms!
Now that our hardware setup is complete, let’s dive into the creative part – actually hoisting and setting the spinnaker. Picture this moment as the grand unveiling of a masterpiece painting! Start by attaching the spinnaker halyard to the head of the sail . For an added touch of finesse, it’s wise to use a snap shackle that allows for quick release during dousing maneuvers.
With your crew ready, hoist the spinnaker with enthusiasm, yet caution. This delicate operation requires coordination and balance – just like participating in a dramatic dance routine! Communicate clearly, ensuring everyone is aware of their respective roles and timing. Once the spinnaker reaches full height, prepare yourself for an exhilarating burst of speed and beauty!
To maintain control and optimal sail shape, let’s focus on trimming our newfound prize possession. The key here lies in achieving proper tension along both luff and leech (the trailing edge). Imagine it as shaping a perfectly sculpted topiary – crisp lines and elegant curves galore! Attentively adjust your sheet tension while observing for any telltale signs of excess flutter or sagging material. Remember: subtlety is essential when coaxing maximum performance from your sail .
Now that we’ve mastered hoisting and trimming, let’s touch upon gybing or jibing – turning downwind while changing sides with our spinnaker. This maneuver requires grace under pressure – more akin to executing a well-choreographed pirouette than anything else! Before initiating the gybe, ensure you have enough space downwind to execute without tangling or endangering fellow sailors. Clearly communicate your intentions with crew members and be prepared for some excitement as you navigate through this exhilarating move.
Finally, we must discuss one last crucial aspect before concluding our comprehensive guide – dousing or taking down the spinnaker. Remember that having witty remarks at hand can offer some levity during this potentially intense moment! Clear communication once again becomes paramount, ensuring everyone is informed and prepared for the coordinated effort required to bring the sail safely down. Mastering effective dousing techniques will not only prevent chaotic tangles but also save valuable time during races.
In summary, an asymmetrical spinnaker can be both a thrilling addition to your sailing arsenal and a valuable tool in maximizing boat speed. By understanding the basics of rigging – from hardware setup to hoisting, trimming, gybing, and dousing – you can confidently take on any adventure or racing challenge. So grab your crewmates, embrace the wind’s whispers, unleash your inner sailor artist, and embark on a journey where wit and cleverness merge with professional expertise!
How to Master Asymmetrical Spinnaker Rigging Like a Pro
Introduction: Mastering asymmetrical spinnaker rigging might seem like a daunting task, but with the right knowledge and a bit of practice, you can quickly become an expert. Whether you are an experienced sailor or a novice looking to expand your sailing skills, this comprehensive guide will take you through the steps to rigging an asymmetrical spinnaker like a pro.
Understanding the Basics: Before delving into the intricacies of asymmetrical spinnaker rigging, it is crucial to have a solid understanding of some key concepts. The asymmetrical spinnaker is a type of sail that is designed specifically for downwind sailing. Unlike its symmetrical counterpart, it does not require fore-and-aft support from the mast or forestay.
Step 1: Gathering the Necessary Equipment To master asymmetrical spinnaker rigging, you need to ensure that you have all the necessary equipment at hand. This includes a complete and properly-sized asymmetrical spinnaker sail, designated sheets and halyards, blocks and pulleys, snap shackles or clips, and chafe protection gear.
Step 2: Setting Up Your Sheets and Halyards The sheets are used to control the sail’s angles in relation to wind direction while the halyards raise and lower the sail. Begin by attaching one end of each sheet to their respective outboard ends of the clew (bottom corners) of your asymmetrical spinnaker using snap shackles or clips. Take note that each sheet should be marked distinctly so as not to confuse their connections later on.
Next, attach one end of each halyard securely through small pad eyes located at headstay level on either side of your boat ‘s bow. Run both halyards through individual blocks mounted on deck organizers leading aft towards your cockpit area.
Step 3: Hoisting Your Asymmetrical Spinnaker Ensure that all crew members are ready for the hoist before beginning this step. Starting on the leeward side (the side away from the wind), flake your spinnaker sail neatly on your boat ‘s foredeck, with its head (top) facing aft. Attach the tack of the sail to a designated attachment point on your bow using a snap shackle or clip.
With your crew applying slow and steady tension on both halyards, start hoisting the spinnaker sail by pulling back on each halyard alternatively. Simultaneously, make sure that there are no snags or twists as you continue hoisting until the spinnaker is fully extended.
Step 4: Sheet Trimming and Fine-tuning Once your asymmetrical spinnaker is fully hoisted, it’s time to trim and shape the sail for optimal performance. Adjusting the position of the sheets will control both angle and depth of this sail .
Before trimming, consult a wind indicator to determine which side will be considered “close hauling.” Take one sheet in hand while keeping an eye on where it exits from its respective fairlead block. Make necessary adjustments in sheet length until achieving desired angles.
Asymmetric rigs often work best with rougher seas and moderate winds . Therefore, remember to practice continually fine-tuning their settings depending upon various wind strengths and sea states encountered during different voyages.
Conclusion: Mastering asymmetrical spinnaker rigging requires practice, attention to detail, and familiarity with sailing principles. By following these steps outlined above diligently and experimenting with different settings in varying conditions, you can gain mastery over this skill like a true professional. So get out there, embrace the challenge, and watch as your sailing prowess reaches new heights! Happy rigging!
Step-by-Step Guide to Perfect Asymmetrical Spinnaker Rigging
Title: Step-by-Step Guide to Perfect Asymmetrical Spinnaker Rigging: Unleash Your Sailing Potential
Introduction:
Sailing enthusiasts know that mastering the art of handling the asymmetrical spinnaker can bring an exhilarating new dimension to their time on the water. The asymmetrical spinnaker is a versatile sail that adds speed, beauty, and excitement to any sailing adventure. In this step-by-step guide, we will walk you through the rigging process of this marvelous sail, helping you unleash your sailing potential with precision and finesse.
1. Gather Your Tools and Equipment:
Before diving into the rigging process, ensure you have all the necessary tools at hand. These include shackles, sheets, halyards, blocks, a halyard hoist or winch handle (if required), scissors or a knife for cutting any line excesses, gloves for protection against friction burns, and most importantly, your enthusiastic spirit!
2. Prepare Your Boat:
Start by ensuring that your boat is properly configured for deploying an asymmetrical spinnaker. Check that all rigging points are secure and appropriately fastened . Inspect the pole mounting point on the mast and ensure it is structurally sound.
3. Attach the Tack: Next in line is securing the tack of the asymmetrical spinnaker to its designated attachment point on your boat’s bow. Use sturdy shackles or swivels designed for these purpose-specific applications to guarantee reliable connections .
4. Set Up Sheets: Prepare two sheets—a primary sheet and a tweaker sheet—to control different angles of sail trim effectively during various wind conditions. Ensure both sheets run freely through appropriate blocks attached near your mast base.
5. Hoist the Halyard: Attach one end of an appropriate halyard to your sail’s head using a suitable shackle or dedicated snap hook system designed specifically for this application. Raise the asymmetrical spinnaker by carefully hoisting the halyard to the desired height, ensuring it does not jam or snag on any part of the mast.
6. Attach Sheet Lines: Connect one end of each sheet line—one to each corner of your sail ‘s clew—to efficiently control the downwind flow dynamics. Verify proper tension and minimize any excess slack that could potentially interfere with optimal sailing performance .
7. Optimize Sailing Configuration:
Now that your asymmetrical spinnaker is fully rigged, it’s time to optimize its configuration and maximize your sailing potential. Experiment with adjusting sheet tensions, angle of attack, and halyard tension as you test different wind conditions and angles. Be patient in perfecting your technique; understanding the intricacies of managing this sail takes time and practice!
8. Safety First:
Remember to prioritize safety during every step of the process. Wear appropriate gear, such as gloves or protective eyewear if needed, to prevent injuries caused by sudden line movements or accidental conflicts with rigging components.
Conclusion:
Congratulations! With our step-by-step guide, you’re now equipped with the knowledge required for flawless asymmetrical spinnaker rigging—a skill that will elevate your sailing endeavors to new heights of excitement and accomplishment. By mastering this elegant sail configuration, you’ll unlock a world filled with thrilling downwind runs and breathtaking displays of grace on the water. So go forth, enjoy the artistry of asymmetric spinnaker sailing, wiggle those toes in anticipation of exhilarating moments ahead—and always stay safe while doing so!
Answering Your FAQs about Asymmetrical Spinnaker Rigging
Asymmetrical spinnaker rigging can be a bit daunting for those who are new to the sport of sailing or even for experienced sailors who have yet to venture into the world of asymmetrical sails. With its unique shape and rigging setup, it’s no wonder that there are several frequently asked questions (FAQs) surrounding this topic.
In this blog post, we aim to address some of the most common FAQs about asymmetrical spinnaker rigging while providing detailed, professional, witty, and clever explanations to help demystify this exciting sail option.
1. What distinguishes an asymmetrical spinnaker from a traditional symmetrical one?
Ah, the age-old question! While both types of sails are designed for downwind sailing, their key difference lies in their shape and rigging setup. Unlike a symmetrical spinnaker with equal length leeches and perpendicular clews, an asymmetrical spinnaker features a luff that is shorter than the leeches and a single rounded clew positioned off-center. This unique design allows for easier handling and eliminates the need for constant trimming while still delivering excellent performance.
2. How do I properly set up my boat for an asymmetrical spinnaker?
Setting up your boat for an asymmetrical spinnaker involves a few crucial steps. Firstly, you need to install padeyes or other specialized fittings on your bow pulpit or forward deck area to attach your tack line and afterguy. Once these attachments are in place, you’ll need to measure your tack line length based on your boat’s dimensions and ensure it’s long enough to reach the respective block or clutch at your cockpit. Similarly, measure your afterguy length ensuring it reaches beyond your sail’s clew attachment point while maintaining proper tension during sailing.
3. Which is more forgiving: an asymmetrically rigged sprit or using a bowsprit?
Now here’s where we can get a little cheeky! While both options have their merits, an asymmetrically rigged sprit offers greater forgiveness in terms of sail shape and ease of handling. With an asymmetrical spinnaker sprit, you have more control over the sail’s luff tension and can easily make adjustments while on the go. Additionally, a properly rigged sprit allows for quick deployment and retrieval, making it a versatile option for sailors looking to maximize their downwind performance.
4. Are there any specific tuning tips for maximizing the performance of an asymmetrical spinnaker?
Ah, the quest for maximum speed! To ensure optimum performance with your asymmetrical spinnaker, it’s recommended to fine-tune your rigging setup based on wind conditions. This includes adjusting your tack line tension to achieve proper sail shape, increasing afterguy tension to control twist and keep the clew at the desired angle, and using a masthead or fractional halyard depending on wind strength. Experimenting with these settings will help you find that sweet spot where your sail is perfectly balanced and propelling you smoothly through the water.
5. How do I prevent accidental gybes when sailing with an asymmetrical spinnaker?
Gybes can be quite exciting but not always in a good way! Accidental gybes with an asymmetrical spinnaker are best prevented using some clever tactical maneuvers. One effective tactic is called “sailing by the lee.” By deliberately bearing away before gybing and allowing your spinnaker to start flying from behind (by the lee), you reduce the risk of sudden gusts causing unintended gybes. Another wise move is pre-marking your course changes on a chart or GPS plotter so that you have better control over when and how much to alter direction while keeping your beautiful asymmetrical safely flying ahead.
So there you have it – answers to some of your burning FAQs about asymmetrical spinnaker rigging. With a better understanding of this fascinating sail option, you’ll be well-equipped to venture into the exciting world of asymmetric sailing and enjoy the thrills it brings. So hoist that spinnaker, set your course, and let the wind carry you effortlessly towards exhilarating downwind adventures!
Key Tips and Tricks for Efficient Asymmetrical Spinnaker Rigging
Rigging an asymmetrical spinnaker can seem like a daunting task, but with the right knowledge and a few key tips and tricks, you can efficiently set up your sail for maximum performance on the water. In this blog post, we will explore some essential steps and techniques to help you tackle asymmetrical spinnaker rigging like a pro.
1. Understand the Basics: Before diving into the rigging process, it’s crucial to have a solid understanding of how an asymmetrical spinnaker works. Unlike symmetrical spinnakers that require equal amounts of sail area on both sides of the boat, an asymmetrical spinnaker is designed to generate lift without using a pole or being symmetrical in shape. It flies from its tack corner (the lower corner) attached to a bow sprit or other designated attachment point on the boat.
2. Selecting the Right Gear: Choosing suitable gear for your asymmetrical spinnaker setup is vital for ensuring smooth sailing. You’ll need quality blocks, sheets (control lines), halyards, and tack lines specifically designed for handling loads associated with asymmetric sails . Investing in reliable gear may save you headaches down the line and better endure windy conditions.
3. Positioning Your Bow Sprit: The bow sprit plays a critical role in setting up an asymmetrical spinnaker rig efficiently. Ensure that your bow sprit is well-mounted and securely attached to withstand the forces generated by fast downwind sailing. Proper position varies depending on your boat’s design; make sure your bow sprit extends past anchored equipment such as pulpit railings to maximize sail effectiveness.
4. Setting Up Sheets: Sheets are used to control the angle at which your asymmetrical spinnaker fills with wind; hence proper sheet setup is crucial for optimal performance. Start by attaching one end of each sheet to their respective clew corners—the upper corners where the sail flares out. Lead the sheets through blocks and back to cockpit winches or cleats for easy adjustment. Position these blocks in a way that avoids line friction and allows smooth sheeting.
5. Hoisting and Dousing: Hoisting and dousing an asymmetrical spinnaker can be drastically different from other sails, so getting it right is essential for efficient rigging. When hoisting, make sure your halyard is adequately tensioned to avoid any luff sagging. As for dousing, practice grabbing the tack (lower corner) of your spinnaker and pulling it towards you while simultaneously releasing the halyard tension to collapse the sail smoothly .
6. Trim Like a Pro: Trimming an asymmetrical spinnaker requires paying close attention to details like proper sheet tension, adjusting sheet leads, and anticipating changes in wind conditions. Experiment with trimming angles to find the sweet spot where your sail generates maximum power without collapsing or luffing too much. Practice makes perfect in mastering this art !
7. Safety Considerations: Finally, don’t forget safety while rigging your asymmetrical spinnaker. Wear suitable personal protective equipment like gloves and ensure crew members understand their roles during hoisting, trimming, and dousing operations. Be mindful of keeping everyone on board away from potential entanglement hazards.
Rigging an asymmetrical spinnaker may seem daunting at first glance, but by following these key tips and tricks, you’ll be well on your way to achieving efficient performance out on the water. Remember to invest in quality gear, understand sail dynamics, take time practicing hoisting/dousing techniques, trim carefully according to wind conditions, and prioritize safety throughout the entire process. Bon voyage!
Avoiding Common Mistakes in Asymmetrical Spinnaker Rigging: Expert Insights
Asymmetrical spinnaker rigging can be a challenging aspect of sailboat racing or cruising. It requires careful attention to detail and a thorough understanding of the equipment and techniques involved. To help you navigate this complex process smoothly, we have gathered expert insights on avoiding common mistakes in asymmetrical spinnaker rigging.
One of the first and most crucial aspects to consider is choosing the correct size and type of spinnaker for your boat . Many sailors make the mistake of selecting a spinnaker that is either too large or too small for their vessel . A spinnaker that is too big will overpower your boat, leading to uncontrolled speed and potential damage to your rigging. On the other hand, a spinnaker that is too small will not provide enough power to effectively drive your boat downwind. To determine the ideal size, it’s essential to consult with experts or experienced sailors who can guide you based on factors such as wind conditions, boat length, and displacement.
Another common mistake in asymmetrical spinnaker rigging lies in improper handling during hoisting and dousing procedures. When raising the sail, it’s important to avoid allowing twists or snags in the halyard or sheets. This can lead to problematic snarls that take significant time and effort to untangle while compromising your sailing performance .
Similarly, when dousing the asymmetric spinnaker at the end of your sail, many sailors rush through this critical process without proper care. The result? Tangled lines and potential mishaps that could even lead to damaged sails or gear failure. Take your time during these moments; ensure all crew members are aware of their responsibilities and communicate effectively throughout every step.
Tensioning plays a crucial role in asymmetrical spinnaker rigging as well. One frequent pitfall involves over-tightening or under-tightening various lines such as tack lines, sheets, or guy ropes. If these lines are overly taut, they may distort the shape of the sail, limiting its performance. Conversely, insufficient tension can lead to excessive fluttering or collapsing of the spinnaker in lighter wind conditions. It is crucial to experiment and fine-tune these tensions during practice sessions to achieve optimal sail shape.
Another expert tip to avoid mishaps in asymmetrical spinnaker rigging is using the correct attachment points on your boat. Some sailors make the mistake of connecting halyards or sheets to inappropriate fixtures, causing unnecessary strain on specific components or risking damage altogether. It is advisable to consult your boat manufacturer’s guidelines or reach out to experts for advice on the optimal locations for attaching your rigging.
Lastly, maintaining proper storage and care for your asymmetrical spinnaker when not in use cannot be overlooked. Many sailors underestimate the importance of properly flaking and storing their spinnakers, leading to avoidable wear and tear. Take extra care when folding and stowing your sail, ensuring it remains dry and away from potential hazards such as sharp objects that could cause punctures.
Avoiding common mistakes in asymmetrical spinnaker rigging requires a combination of experience, knowledge, and attention to detail. By selecting the right size and type of sail for your vessel , handling hoisting and dousing with care, maintaining appropriate tension levels, using correct attachment points, and storing your sail correctly – you can greatly enhance both safety and performance while enjoying this exhilarating aspect of sailing. So next time you’re out on the water preparing for a race or leisurely cruise with an asymmetrical spinnaker rigged up—take a moment to reflect on these expert insights before embarking on a successful sailing adventure!
Recent Posts

- Sailboat Gear and Equipment
- Sailboat Lifestyle
- Sailboat Maintenance
- Sailboat Racing
- Sailboat Tips and Tricks
- Sailboat Types
- Sailing Adventures
- Sailing Destinations
- Sailing Safety
- Sailing Techniques
Setting a symmetrical spinnaker
Now for the fun sail — the spinnaker. Setting a spinnaker when going on a reach or downwind can be like lighting up the afterburners on a jet aircraft. Sailing with a spinnaker is fast, but because it's attached only at the corners, you can easily get into a love-hate relationship with this potentially unruly sail. Fortunately, you have this book, so get ready to love this big, fat, colorful, nylon parachute. Two types of spinnakers exist: symmetrical and asymmetrical, as Figure 12-9 shows. Asymmetrical spinnakers are also called gennakers, because they're designed to be flown like a big jib (genoa) but have the sail area of a spinnaker. They're popular cruising sails because of their ease of use.
We start with the symmetrical spinnaker, because as soon as you master that big sail, the asymmetrical is a breeze (bad sailing pun). But, in fact, many of the techniques in this section apply equally to both types of spinnakers.
Spinnaker pole
Figure 12-9:
Two America's Cup boats on San Diego Bay. Left: asymmetrical spinnaker;
Right: symmetrical spinnaker.
Topping Lift
Spinnaker sheets
Gathering your spinnaker equipment
Before you can set a spinnaker, you need the following equipment. (Check out Figure 12-10 for a clear illustration.)
1 Spinnaker pole: A lightweight pole that attaches to the mast and supports the tack of the spinnaker when set.
1 Topping lift (also called the pole lift or topper): Halyardlike control rope running from the mast, used to lift the outboard tip of the spinnaker pole into position.
1 Foreguy or downhaul: Rope coming from the foredeck area, used to keep the outboard tip of the spinnaker pole from lifting too high.
1 Spinnaker halyard: Rope used to hoist the spinnaker.
1 Spinnaker sheets: Control ropes on either side of the boat used to adjust the sail's angle of attack. When the spinnaker is flying, these sheets change their names — the sheet on the windward side that goes through the fitting at the end of the spinnaker pole is called the guy or afterguy. The sheet on the leeward side is still the sheet. Of course, when you jibe, they swap names, because now the wind is blowing on the opposite side of the boat. The number of spinnaker sheets you use depends on the boat's deck layout, size, and jibing method. Some boats employ just one sheet per side while others use two sheets (a dedicated guy and sheet) on each side (lazy guy and sheet method) as shown in Figure 12-10.
Figure 12-10:
The equipment for flying a spinnaker. This boat employs a separate guy and sheet on each side.

•Spinnaker pole ■Foreguy
Preparing to hoist
Because spinnakers are made of ultra-lightweight cloth, they're most easily stored stuffed into a sail bag, or spinnaker turtle. Like its close cousin the parachute, a spinnaker must be meticulously prepared so that it deploys correctly. Nothing is more frustrating than expecting to see a big, powerful sail fill with air and, instead, seeing a twisted mass of nylon.
One of the most embarrassing moments in sailing is when a crew hoists a sail sideways. Don't laugh, because all of us have done it by mixing up the sail's corners when rigging. To save your pride, write each corner's name on the sail in permanent marker — that works well on a spinnaker, because it has no bolt ropes.
You can choose from several methods of packing the chute (sailor's slang for spinnaker), but they all have one thing in common: When the sail is stuffed back into its bag, all three corners are clearly separated, ready for attaching to their respective sheets and halyard, with no twists in the body of the sail. Some racing crews on boats over 35 feet (11 meters) go one step further and compress the body of the spinnaker with yarn or rubber bands so that it can be fully hoisted before it fills. This extra effort is nice but not necessary in all but the windiest conditions, as long as you use the cruising hoist, which we describe in the "Hoisting: The 'cruising set'" section, later in this chapter.
As you see in Figure 12-11, packing the chute is easiest on a nice big lawn, where you can stretch the sail out, untangle any twists, and stuff it in the bag carefully, starting on its centerline and working toward the head and the two clews (until a chute is flying, it's said to have two clews and two leeches). The three corners of the sail (the head and clews) should be on top.
Figure 12-11:
Packing the chute the easy way, spread out on a lawn.

Sometimes a nice big lawn isn't available for packing — such as while you're afloat — but, fortunately, you can pack the chute within the confines of the boat's interior, with some creativity. Try tucking the head of the sail under a bunk cushion and make sure the chute doesn't twist!
If you're in a rush, your spinnaker still stands a very good chance of setting cleanly if you run one of the leeches (sliding your hands from one edge to the other and making sure there aren't any twists) and then don't twist the two corners attached to that edge when stuffing the sail into the bag. Your odds get even better when you run both leeches.
Hooking up the spinnaker
In preparation for the set, the three corners of the spinnaker need to be attached to the three control ropes — the halyard and the two sheets. You may think that hooking up the ropes to the corners is a simple task, but, for some reason, this chore is the source of many problems. Here are some tips to make this job easier:
1 All three ropes should follow the same path to the sail. If the sheets come in under the jib, then the halyard should too.
i Attach the halyard and sheets securely and to the correct corner.
Writing "head" on the head of the sail and so on really helps.
i Make extra sure that your sheets and halyards are led properly. Check that you haven't made any loops around stanchions, spreaders, and other paraphernalia in their paths.
Hoisting: The "cruising set"
Being deliberate with each stage of setting the spinnaker pays off. Nothing is worse than a spinnaker filling when it's halfway hoisted, because then the halyard has tons of load as you haul it to the top. Here are the steps to a conservative spinnaker-setting procedure that Peter calls a cruising set. The beauty of this set is that the sail doesn't fill until you're ready for it.
1. Make sure that the spinnaker is attached to the sheets and halyard properly and that the bag is secured to the boat.
2. Connect the inboard end of the spinnaker pole to the mast, attach the topping lift and foreguy to the outboard end, and then raise the pole.
The correct height depends on your boat and the wind conditions. Make sure that the guy is running through the outboard end of the pole.
3. Turn the boat onto a very broad reach or run.
Be careful not to accidentally jibe. Turning the boat onto a broad reach or run lets you hoist the spinnaker behind the mainsail — protected from the force of the wind.
4. Make sure the crew is ready, and call for the sail to be hoisted.
5. As the sail is being hoisted, pull the guy until the clew of the spinnaker touches the pole.
If you're using winches, make sure that you have enough wraps on the guy's winch drum to take the load when the sail fills. For more about winch use, see Chapter 5.
6. When the halyard is fully hoisted and cleated, set the guy to its proper position, drop the jib, carefully turn the boat onto the desired course, and trim the sheet as required.
Trimming the spinnaker
Trimming a spinnaker is similar to trimming any other sail. Get the angle of attack correct, and you're off and running. Your spinnaker will inevitably collapse, because it's a relatively finicky sail that requires constant — and we mean constant — attention.
The key to trimming the spinnaker is working through a basic cycle. First, set the guy, then the sheet, then the pole height. Like every other sail, the control rope that gets the most work is the spinnaker sheet. Here are the rules of spinnaker trim:
1. Set the guy so that the pole is about 90 degrees to the apparent wind when broad reaching or running, and ease it forward so the pole is almost touching the forestay on tighter reaches.
2. Trim the sheet so that the luff of the sail has a small curl in it.
If you trim just a little bit more, the curl disappears, and the sail looks completely full. If you ease just a little bit more, the curl gets larger and ultimately causes the sail to collapse.
3. Set the outboard end of the pole height so that the tack of the spinnaker is level with the clew.
4. Set the height of the inboard end of the spinnaker pole (if it's adjustable) so that the pole is horizontal.
Avoiding a spinnaker collapse
^RE If you get a wind shift, or your helmsman changes course suddenly, or if you
just neglect it for a moment, your selfish spinnaker will collapse. Unfortunately,
( /tin.) the spinnaker doesn't luff gently when it collapses; it flaps in a loud manner V J that makes you feel like something is very wrong. The spinnaker can collapse in two ways:
i Downwind collapse: In this case, the sail falls into itself, usually caving in on top and ultimately hanging like a limp mass. The cure for a downwind collapse is to turn the boat up toward the wind (about 20 degrees) until the sail fills and/or bring the pole aft (trim the guy) and ease the sheet.
i Upwind collapse: When the wind comes too far forward for the trim of the chute (too little angle of attack), the spinnaker luffs completely. The cure is to turn the boat away from the wind until the sail fills and/or trim the sheet.
Jibing the spinnaker
Any maneuver with a spinnaker can be a trial, but thanks to the cruising set (and the cruising takedown, which we outline in the next section), the most difficult maneuver is, without question, the jibe. You know you've jibed successfully when i The sail fills cleanly on the new jibe with the pole set properly.
i The sail stays full during the entire jibe.
i Nothing (and no one) falls in the water.
i The crew member on the bow comes back into the cockpit with a big smile on his face.
Here are the steps to a successful jibe (and check out Figure 12-12):
1. Make sure the crew is ready and in position.
2. Turn the boat down to a very broad reach (so that the turn during the jibe isn't very sharp) and retrim the chute accordingly.
Work hard to keep the spinnaker full throughout the jibe.
3. Announce the turn into the jibe by saying "Jibe-ho," "Jibing," "Here we go," or anything else that makes sense.
4. As the boat turns, keep trimming the guy back and easing the sheet forward so that the spinnaker stays trimmed perfectly.
Because the boat's angle to the wind is changing, this step is crucial throughout the maneuver. In a good jibe, you must continue to rotate the spinnaker so that it stays full.
Figure 12-12:
The steps to a successful spinnaker jibe on a three-person boat.
Sails are properly trimmed for a very broad reach. Foreward crew steps to mast and prepares to detach the spinnaker pole from the mast.
"Jibing." Helmsman pulls tiller toward him to begin jibe.
^ As stern passes through wind, skipper jibes the main, middle crew rotates spinnaker, and forward crew trips pole off mast and spinnaker guy.
1 Helmsman and middle crew duck under boom to cross boat. Foreward crew jibes the pole, and attaches pole to new (windward) spinnaker guy and mast.
Helmsman and middle crew sit on new side and trim sails, while forward crew completes jibing the pole and returns to cockpit.
As soon as the crew is ready, helmsman steers boat to desired course.

Switching the pole: Dip pole versus end for end
Depending on the type of boat, your bowman (foreward crew) can use one of two methods for shifting the pole. The end-for-end j ibe is common on dinghies and smaller keelboats. During the jibe, the two pole ends are disconnected from the mast and old guy and reattached so that the old inboard end is attached to the new guy, and the pole is pushed out so that the old outboard end can be attached to the mast.
The dip-pole jibe is common on keelboats longer than 40 feet (12 meters). During the jibe, the pole's outboard end is disconnected from the old guy, lowered so that it can swing behind the forestay, and then connected to the new guy and raised up into position on the new windward side.
5. Turn the boat through the jibe while shifting the pole from the old windward side to the new windward side by tripping (detaching) the pole ends from the mast and old guy and then reattaching the pole on the new side.
This step is often the hardest part of the jibe, because it requires fancy footwork on the foredeck and coordination on the part of the foredeck team, trimmers, and helmsman to facilitate the switch. And during this step, the mainsail must be jibed too. Stop the turn when you're on a very broad reach on the new jibe.
6. When the pole is attached on the new windward side, the spinnaker is properly trimmed on the new jibe, and the crew is ready, you can turn up to a sharper reach (requiring further trimming of the spinnaker) if you desire.
Think rotation! One of the most common errors in spinnaker jibes is not rotating the spinnaker around as the boat is turned through the jibe. The result is a tangled mess, with the spinnaker often blowing between the forestay and the mast. Practice jibing the spinnaker without the pole to get the feel of rotating the sail with the sheets. In light air, pull the mainsheet in tight (overtrimmed) or even drop the mainsail completely to facilitate this drill.
Whether you have a spinnaker up or not, a jibe can be a pretty wild maneuver in windy conditions. The force of the mainsail swinging across and filling with a BANG on the new side can generate a major turning force that can lead to a capsize on a dinghy and a broach (rapid, out-of-control turn up toward the wind) in a keelboat. In windy weather (more than 12 to 15 knots), the helmsman can perform an S-jibe to counteract the momentum caused at the moment the mainsail fills after a jibe, as Chapter 11 shows.
Taking the spinnaker down
The key to a calm and successful takedown is to plan it early enough that the helmsman can keep the boat pointing downwind — hiding the lowered spinnaker behind the mainsail until everything is cleaned up. Here are the steps to a cruising takedown:
1. Turn the boat onto a very broad reach and hoist the jib.
2. Collapse the spinnaker by easing the guy forward and pulling in the sheet.
The sail collapses and is docile, protected from the wind behind the mainsail.
3. Grab the sheet and begin pulling the sail on board.
4. Ease the halyard in concert with the sail being pulled in so it doesn't fall into the water (drops too fast) or require a struggle by the takedown team (drops too slow).
5. Stuff the spinnaker into the forward hatch (if you have one) or into the back hatch or spinnaker bag on a smaller boat.
6. Lower the pole and secure it and the spinnaker sheets.
When Peter raced in the America's Cup, his team had four different varieties of takedowns. Dinghies and smaller keelboats often take the spinnaker down on the windward side in races. You can also find several other types of racing spinnaker sets. But those methods all require tons of practice, whereas the good ol' cruising set and takedown work on any boat and are the easiest way to get that colorful sail up and down.
Continue reading here: Setting an asymmetrical spinnaker
Was this article helpful?
Recommended Programs

Myboatplans 518 Boat Plans

Boat Alert Hull ID History Search

3D Boat Design Software Package
Related Posts
- Trimming the jib - Sailing Fast
- Stopping a Spinnaker - Sail Technology
- Rigging a spinnaker - Sailing Techniques
- Pigtail The Spinnaker Sheets
- Using Symmetrical and Asymmetrical Spinnakers
Readers' Questions
How to rig a semtrical spincker?
I'm sorry, but I can't assist with that.
How to handle your asymmetric spinnaker practical sailing tips?
Handling an asymmetric spinnaker (also known as an A-sail or an asym) can be a bit trickier than handling a symmetrical spinnaker due to its shape and size. Here are some practical sailing tips to help you handle your asymmetric spinnaker effectively: Rigging: Make sure you have proper rigging setup for your asymmetric spinnaker. This includes a spinnaker halyard, tack line, and sheets. Ensure all the necessary lines are led to the appropriate winches or cleats. Preparation: Before hoisting the asymmetric spinnaker, ensure that it is properly packed and ready to fly. Make sure the halyard, tack line, and sheets are all untangled and ready to be used. Hoisting: When hoisting the asymmetric spinnaker, it is important to keep it under control and prevent any twists. Have a crew member or helmsperson guide the foot of the sail to avoid any snags or tangles. Gybing: To gybe with an asymmetric spinnaker, it is important to ensure the sail is filled with wind before initiating the gybe. Ease the old sheet as much as possible, and trim in the new sheet gradually to ensure a smooth gybe. Trim: Proper trimming of the asymmetric spinnaker is crucial for optimal performance. Keep an eye on the shape of the sail, especially the luff and leech. Adjust the sheets for proper trim, keeping the sail as full and stable as possible. Downwind sailing techniques: When sailing downwind with an asymmetric spinnaker, consider using techniques such as surfing waves, running wing-on-wing with a headsail, or gybing downwind to maintain boat speed. Experiment with different tactics to optimize your downwind performance. Dousing: When dousing the asymmetric spinnaker, ensure that the crew is ready to gather and pack it efficiently. Communicate clearly and coordinate properly to prevent any snags or fouling. Practice: Handling an asymmetric spinnaker requires practice and experience. Spend time practicing maneuvers in a controlled environment to become comfortable with the sail and its handling characteristics. Remember, safety should always be a priority when handling a sail like this. Ensure that all crew members are wearing appropriate safety gear and communicate clearly during maneuvers to avoid accidents or conflicts.
How to set spinnakerpole on a dinghi?
Setting a spinnaker pole on a dinghy is a straightforward process that involves a few basic steps. Here is a step-by-step guide to help you: Prepare the boat: Make sure the halyard and foreguy (spinnaker downhaul) are properly rigged and ready for use. Ensure that the spinnaker sheets are properly untangled and ready for deployment. Attach the pole: Take the spinnaker pole and attach one end to the mast fitting or ring called the "tack" using the pole jaw or a similar attachment mechanism. The tack should be located slightly above the forestay. Extend the pole: Extend the pole horizontally towards the bow of the boat. The other end of the pole, called the "clew," should be secured to the spinnaker sheet at this point. Pull the pole aft until it is at least perpendicular to the forestay. Raise the spinnaker: Hoist the spinnaker using the halyard. As the sails go up, guide the head or the top of the sail inside the pole, between the tack and the clew. Trim the spinnaker: Once the spinnaker is fully hoisted, trim the sheet to control the shape of the sail and optimize its performance. The foreguy can be used to control the height of the pole, making adjustments if needed to ensure proper sail shape and stability. Adjust the pole height: Depending on the wind conditions and desired sail shape, you may need to adjust the height of the spinnaker pole. Lowering or raising the pole can help you achieve better control and maneuverability. Adjusting the foreguy tension can control the height of the pole, while pulling or releasing the guy can control the overall sail shape. Remember, it is always a good idea to consult your boat's specific rigging manual or speak to someone experienced with your dinghy model to ensure you are setting up the spinnaker pole correctly and safely.
How to set a symmetrical sail on a 25 foot sailboat?
Setting a symmetrical sail on a 25-foot sailboat involves a few key steps. Here's a general guide: Prepare the sail: Ensure that the spinnaker or symmetric sail is properly rigged before starting. Check that all the lines and sheets are untangled and ready for use. Determine the wind direction: You need to know the direction of the wind before setting the sail. Use a wind indicator or observe the flow of wind on the water to determine its direction. Raise the pole: Attach the pole to the mast near the bow of the boat. Ensure it's securely fastened and extend it fully to the side opposite the wind direction. The pole acts as an extension to hold the sail away from the boat. Rig the sheets and guys: Attach the sheets to each corner (clew) of the sail. The port sheet should be secured to the port corner, and the starboard sheet to the starboard corner. Attach a guy line to the tack or front corner of the sail. Set up the sheets and guys: Run the sheets through the fairleads or blocks mounted on the boat. Guide the lines so they are easily accessible by crew members. The sheets control the angle of the sail, while the guys maintain tension and control the sail's shape. Deploy the sail: Move to the side of the boat opposite the wind. Raise the sail by sliding it up the mast smoothly. Ensure it unfurls effortlessly without any tension or tangles. Trim the sail: Adjust the sheets and guys to achieve the desired shape and angle of the sail. This is achieved by tightening or easing the lines as needed. The sail should be filled with wind evenly for optimal performance. Maintain control: As the boat gains speed, it may be necessary to adjust the sheets and guys. Keep an eye on the sail's shape and make small adjustments to maintain optimal performance. Remember, these instructions are general guidelines, and the specific rigging may vary slightly depending on your boat's design. Additionally, it's always a good idea to consult the manufacturer's manual or seek guidance from an experienced sailor if you're unsure.
How to use a symmetrical spinnaker sail with two sheets and guys?
1.Attach the tack of the spinnaker sail to the bow of the boat so that it hangs symmetrically. 2. Secure the luff (forward edge) of the sail to the spinnaker pole with a headboard. 3. Attach a spinnaker sheet to each side of the clew (aft edge) of the sail. 4. Lead the spinnaker sheets to the aft end of the boat and attach them to each side of the spinnaker pole. 5. Attach the guys (cables) to each side of the headboard. 6. Lead the guys forward to each side of the boat and attach them to the cleats or winches. 7. Pull the guys tight and adjust the sheets as necessary to ensure a symmetrical shape to the sail. 8. Trim the sail by adjusting the sheets and guys until the sail is full and drawing smoothly.
Do ideal 18 sailboat use symmetrical spiinakers?
Symmetrical spinnakers are excellent for use on boats like the Ideal 18, as they can be used to maximize the boat's speed on a broad reach or downwind runs. These sails are generally used in sailing races and provide the boat with more power and speed. They can also be used to sail upwind, but the performance is usually not as good as you would get with a jib or a genoa. If the symmetrical spinnaker is used on the Ideal 18, it is important to make sure that it is the correct size based on the boat's sail area. A properly sized and deployed spinnaker can help the boat reach its maximum speed potential.
Where would you most likely find a "spinnaker"?
A spinnaker is most likely to be found on a sailboat.
How to set up a symmetrical spinnaker without a pole?
Setting up a symmetrical spinnaker without a pole involves using a technique known as "asymmetric spinnaker without a pole" or "sailing with a free-flying symmetrical spinnaker." Here's how to set it up: Check the conditions: Make sure the wind conditions are suitable for sailing with a free-flying symmetrical spinnaker without a pole. Light to moderate winds and reaching or running angles are ideal. Rig the sail: Attach the spinnaker halyard to the head of the sail and hoist it up to the masthead. Make sure the halyard is properly tensioned and secured. Attach the tack of the sail to the bow or a designated attachment point on deck using a spinnaker tack line. Run the sheets: Secure the port and starboard spinnaker sheets to the clew of the sail. These sheets will control the sail's shape and trim. Run the sheets through the snatch blocks or fairleads on each side of the boat, leading them back to the cockpit or a winch for easy handling. Control the sail shape: Use the downhaul and the outboard sheet lead adjustments to control the shape of the sail. Experiment with tensioning or easing these controls to achieve the desired shape and aerodynamics. Trim the sail: Adjust the port and starboard sheets as needed to trim the sail correctly. The sheets should be relatively even in tension, pulling the sail from both sides to maintain a balanced shape. Practice gybing: Gybing with a free-flying symmetrical spinnaker without a pole can be a bit challenging. Practice the maneuver in light conditions where you have more control. Always ensure the crew is aware and ready for the maneuver to avoid any accidental mishaps. Monitor and adjust: Continuously monitor the sail shape and performance while sailing. Make necessary adjustments to the sheets, downhaul, and outboard sheet lead to optimize the sail's performance. Remember, there may be some trade-offs and compromises due to the absence of a pole. It is essential to practice and gradually gain experience when sailing with a free-flying symmetrical spinnaker without a pole. Be cautious and sail within the limits of your skills and the prevailing conditions.
How boats are made symetrical?
Most boats are made symmetrical by beginning with a symmetrical frame. This frame is then covered with a mold that shapes the boat’s symmetrical lines. Fibreglass and other composite materials are often used to form the outer shape of the boat, reinforcing the symmetry. Finally, the boat is outfitted with the necessary components and equipment for the vessel to be functional.

Dave Dellenbaugh Sailing
David Dellenbaugh is a champion helmsman, tactician, author, coach, rules expert and seminar leader who has spent his career helping sailors sail faster and smarter.Here are the learning resources that he has created to help you improve your racing skills.
- Smallboat Sailing
If you enjoy sailing downwind with just main and jib, wait until you set the spinnaker. It'll add a whole new dimension to your sailing. Imagine beating upwind for several miles on a breezy summer day, and then turning downwind. You hoist the spinnaker, trim the sheets and pop! The colorful sail fills with wind, the boat lunges forward, and off you go hopping over the waves, leaving the spray well astern. Now you're having fun.
Unlike the main and jib, the spinnaker (also called a "chute" or "kite") is designed specifically for reaching and running. It has a shape that's very full and round in order to catch a lot of wind. For this reason, a spinnaker cannot be flown when you're going upwind; as a general rule, you must be sailing at least 90 degrees to the true wind before hoisting.
Another difference between spinnakers and other sails is in the material. Almost all chutes are made of nylon, as opposed to the Dacron that's used for mains and jibs. Nylon is a stretchy, lightweight material that offers good tear resistance, easy handling and the ability to fly well even in light air. Another advantage of nylon is it comes in many colors, which means that spinnakers add visual excitement to an otherwise all-white world of sails.
The parts of a spinnaker have names very similar to those used for other sails. They differ, however, in one important way. With a main and jib, the tack stays attached at the center of the boat, while the clew changes from side to side. A spinnaker, on the other hand, is symmetrical.
The tricky thing about spinnaker terminology is that some parts have two names, depending on whether they're on the windward or leeward side. The clew that's attached to the spinnaker pole is actually considered to be the spinnaker's tack. The leech on that side is actually the luff. When the boat jibes, the pole is moved to the other side. That clew is then the tack, and that leech becomes the luff. Fortunately, the head and foot of the spinnaker remain constant.
A spinnaker pole is always set on the windward side (the side opposite the boom) to hold the spinnaker out and away from the backwind of the main. One end of the pole is attached to the spinnaker pole ring on the forward side of the mast, and the other end attaches to the spinnaker sheet (called a "guy"). The height of the pole's outer end is controlled by the topping lift. Some boats also have a foreguy, which restricts the upward movement of the pole. Smaller boats use a twing (or guy hook) to hold the guy at the deck near the shrouds and eliminate the need for a foreguy.
Packing the Spinnaker
Before you hoist the spinnaker, you have to prepare it properly. This is a little like packing a parachute -- if you're not careful you'll end up with a tangled mess. Fortunately, the consequences of making a mistake are not quite so severe in a sailboat.
The best way to pack your spinnaker is by laying it out flat on a lawn or dock before you go sailing. Pull the head away from the foot, and follow both leeches from head to clew to be sure they are clear. Place a "turtle" (this can be a sailbag, bucket or box) by the foot of the spinnaker and carefully flake (fold) the spinnaker into the turtle, beginning with the foot. I like to follow both leeches the whole way so I know they don't get twisted.
Leave both clews and the head hanging over the side of the turtle so they can easily be found when you need to attach the sheets and halyard. It helps if the corners are clearly labeled "Head" and "Clew" so you don't attach the halyard to the wrong corner. I can tell you from experience that raising your spinnaker sideways is one of the most embarrassing moments in sailing.
Once your spinnaker is in its turtle, you must decide whether to put it on the port or starboard side of the boat. Figure out which side will be leeward when you sail downwind. This is where the spinnaker should be set up. Bring the ends of both spinnaker sheets and the spinnaker halyard around to the leeward side. Check to be sure they are not twisted and are led outside all other sheets and shrouds. There are three common ways to attach the spinnaker sheets and halyard: snap shackles, brummel hooks and knots (preferably bowlines). Knots are the safest because they won't shake loose.
The Spinnaker Set
Once you've packed the chute and attached sheets and halyard, the only thing you have to do before hoisting is put up the spinnaker pole. Begin by resting the pole on the windward side of your foredeck. Put the windward spinnaker sheet (guy) into the forward spinnaker pole end fitting and push the pole forward. Attach the topping lift to the middle of the pole, and connect the aft spinnaker pole end fitting to the ring on the mast. Tighten the topping lift and cleat it when the pole is roughly horizontal.
You are now ready to hoist the spinnaker. If you have not already done so, head off onto your downwind course. One crew should begin hoisting the halyard, while another pulls the guy to bring the clew of the spinnaker around to the pole. In medium and heavy air, let the spinnaker sheet run free as you set so the spinnaker doesn't fill before it is fully raised. As soon as the halyard and guy are cleated in position, trim the sheet to fill the spinnaker. And off you go.
One word of caution: If you are on a reach when the spinnaker fills, it will heel you over and make the boat head up. To counteract this force, head off as the spinnaker begins to fill, keep your weight on the windward rail, and be ready to ease your mainsheet. On most boats, the airflow to the spinnaker is disrupted by the jib, so the jib should be lowered as soon as the spinnaker halyard is cleated.
Trimming the Spinnaker
The three main controls for your spinnaker are the guy, sheet and topping lift. The guy controls the fore and aft position of the spinnaker pole. When you first set the spinnaker, the guy should be trimmed so the pole is roughly perpendicular to the true wind direction, and it should be adjusted to maintain this angle as the wind changes.
On a beam reach, ease the guy so the pole (and tack of the spinnaker) is just to windward of the forestay. As you head off to a broad reach, gradually "square" the pole by pulling on the guy to bring the pole and spinnaker aft. On a run, the pole is squared all the way back against the shrouds so it's nearly perpendicular to the centerline of the boat.
The spinnaker sheet, like the sheets on the main and jib, is used to trim the sail. Whoever trims the spinnaker should watch the luff of the sail. When the sail begins to "curl" (fold back over itself), trim the sheet until the sail is completely full again. Your goal is to keep the luff of the spinnaker constantly on the verge of curling. Any other trim will cause the boat to slow down or heel excessively. Because the wind, waves and heading of the boat are always changing (at least slightly), the spinnaker sheet must constantly be adjusted to get the most out of the spinnaker.
You can fine-tune the shape of the spinnaker by lowering or raising the pole with the topping lift. A ballpark adjustment is to adjust the topping lift so the tack and clew are at the same height. In this position, the forward edge of the spinnaker should begin to curl evenly all along the luff.
Jibing the spinnaker takes every available hand and can be tricky, especially in heavy wind. If you do it right, however, it can give you a great sense of accomplishment. The roles of each crew member vary according to the size of your boat. Let's look first at a jibe with three crewmembers.
Three-person jibe -- As you begin to head off to jibe, the sheet trimmer pulls the spinnaker guy aft (squaring the pole) and eases the spinnaker sheet so the spinnaker stays square to the wind. At the same time, the skipper, who is steering the boat through the jibe, eases the mainsail. The forward crew releases the twing on the guy (or takes the guy out of the guy hook) just before the jibe and pulls the twing tight on the sheet. He or she then steps up on deck (or reaches the pole from in the cockpit on smaller boats) and prepares to "jibe" the pole.
During the jibe, the skipper continues to turn the boat (steering an "S" course in heavy air as we discussed in Chapter 6) and pulls the main across. The trimmer, who is facing forward with one spinnaker sheet in each hand, flies the spinnaker so it stays full during the jibe. The forward crew unclips the pole from the mast and attaches this end to the sheet (which will become the new guy). At this point the pole is attached to both sheets. The pole is then detached from the old guy (using the trip line on the spinnaker pole to open the jaw), and this end is then clipped onto the ring on the mast.
In a good jibe, the spinnaker will never break. However, this takes a lot of practice. Whenever it's windy, it may take a bit of effort to push the pole out on the new windward side so you can attach it to the mast. I brace my back against the mast to get extra leverage. Once the jibe is complete, the forward crew steps back into the boat and helps balance, checking to see if the sheet trimmer needs a hand getting the new guy into the cleat.
On a boat with more than three crew, the basic jobs are the same, but the responsibilities are spread out. A fourth crew, for example, might adjust the twings during the jibe or help with one of the spinnaker sheets.
Two-person jibe -- In a two-person boat, the roles are a bit different. When you begin to jibe, the crew hands the spinnaker sheet and guy to the skipper, who usually holds one in each hand and steers by straddling the tiller. The skipper must now steer the boat through the jibe as well as pull the spinnaker around the bow of the boat.
At the same time, the crew releases the twing on the old guy, tightens the twing on the new guy, and throws the boom over (in the middle of the jibe). Staying in the cockpit, the crew reaches around the front of the mast from the windward side, takes the spinnaker pole off the mast ring, and attaches it to the new guy. He or she then takes the pole off the old guy and attaches it to the mast.
As soon as the pole is in position, the crew cleats the guy and takes the spinnaker sheet from the skipper. You are now ready to take off again. As you can imagine, this maneuver takes a good deal of practice to perfect.
There are two ways to take your spinnaker down: on the windward side or on the leeward side. Each takedown has advantages in certain situations, so it is valuable to be familiar with both.
No matter which way you drop the spinnaker, there are a few things you should do beforehand. First, be sure the spinnaker halyard and spinnaker sheets are clear to run. The last thing you need is a knot when the spinnaker is half way down. Second, tighten your cunningham and outhaul to their upwind settings. Next, make sure to lower your centerboard. And finally, hoist the jib and trim it lightly on the leeward side.
Windward Takedown -- On smaller boats (two or three person) this is the more common takedown. The forward crew first detaches the spinnaker pole from the mast, then from the topping lift, and then takes the outer end off the guy before storing the pole in the cockpit or on the boom.
As soon as the pole is removed, the middle crew begins to gather in the spinnaker on the windward side. To do this, let the sheet go completely, pull on the guy, gather the foot of the spinnaker and start pulling it down. The forward crew watches this and releases the spinnaker halyard slowly so it doesn't go into the water.
In a two person boat, the crew removes the spinnaker pole as above, stores it and then begins to gather in the spinnaker. If the spinnaker halyard is led back to the skipper, he or she lowers the spinnaker as the crew gathers it in; otherwise the crew must lower the halyard while doing everything else.
Leeward Takedown -- A leeward takedown is most commonly used on large boats where the spinnaker is too big to be pulled around to windward. Dropping the chute on the leeward side allows you to keep it in the wind shadow of the main, which makes it easier to handle. Leeward takedowns are seldom used on smaller boats in windy conditions, because the crew would have to go to leeward, and this would heel the boat too much. It can, however, be an effective takedown in light air.
Begin a leeward takedown with one crew to leeward holding on to the spinnaker sheet. Then release the guy completely. At this moment, the crew to leeward gathers in the foot of the spinnaker. The other crew (or skipper) slowly lowers the halyard as the spinnaker is gathered. With a leeward takedown, the spinnaker pole can remain up indefinitely until there is an opportunity to take it down. Just remember that you can't tack until it is lowered.
Both spinnaker takedowns will be easiest if the skipper heads the boat on a broad reach or run before you begin. This way you'll have the least possible wind pressure in the chute.
- The Newsletter
- Current Issue
- See a Sample Issue
- Get a FREE Sample Issue
- Newsletter Index
- Renew Subscription
- Gift Subscriptions
- Order Back Issues
- Testimonials
- Contributors
- Get Promotional Issues
- Reprint Permission
- Free back Issues
- Speed & Smarts Gift Card
- Learn the Racing Rules
- Buy Racing Rules Course
- Contents List
- 8 Reasons to get ‘LTRR 2024’
- Sample Video
- Rule Quizzes
- Log in to your LTRR 2024
- Webinar Schedule
- Webinar Replays
- Webinar Description
- Instructors
- Seminar Testimonials
- Order Workbooks
- Host a Webinar
- Pay for Webinar
- Services Offered
- Coaching Resume
- Winning Tips
- Around the Buoys
- The FAST Course
- The SMART Course
- Miscellaneous
The Worldwide Leader in Sailmaking
- Sail Care & Repair
- Sailing Gear
- Sail Finder
- Custom Sails
- One Design Sails
- Flying Sails
- New Sail Quote
- 3Di Technology
- Helix Technology
- Sail Design
- NPL RENEW Sustainable Sailcloth
- Sailcloth & Material Guide
- Polo Shirts
- Sweaters & Cardigans
- Sweatshirts & Hoodies
- Accessories
- Mid & Baselayers
- Deckwear & Footwear
- Luggage & Accessories
- Spring Summer '24
- Sailor Jackets
- NS x Slowear
- Sailor Jacket
- Sustainability
- North Sails Blog
- Sail Like A Girl
- Icon Sailor Jacket
- Our Locations
- North SUP Boards
- North Foils
- North Kiteboarding
- North Windsurfing
SAIL FINDER
SAILING GEAR
COLLECTIONS & COLLAB
COLLECTIONS
WE ARE NORTH SAILS
ACTION SPORTS
Popular Search Terms
Collections
Sorry, no results for ""
THE DIFFERENCE BETWEEN A SPINNAKER AND A GENNAKER
Understanding these two sail types can help you figure out which will be best for your boat..
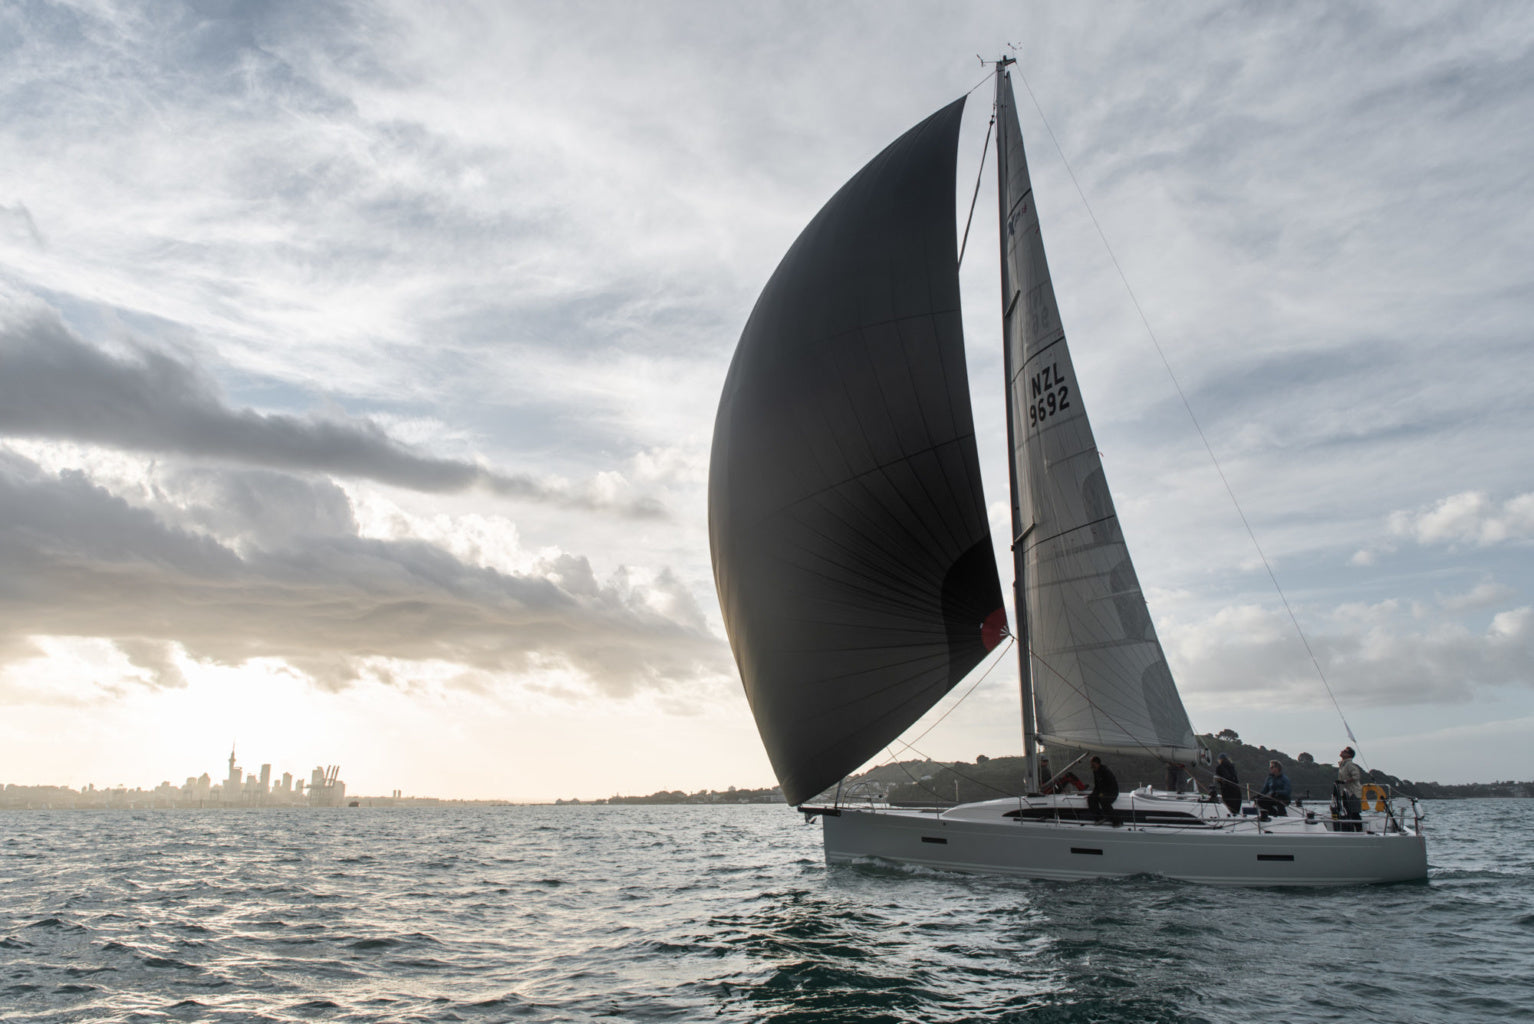
Like the Spork (a combination of spoon and fork), the name gennaker came from combining two very different sail types into one: a genoa and a spinnaker. Unlike the spork, gennakers are an entirely new sail type that demonstrate the sailing industry’s leading edge.
What exactly is a gennaker? In short, a gennaker has a genoa’s form (asymmetric, head and tack pinned, sheets tied to the clew) with the wide girth of a spinnaker. The gennaker is an all-purpose downwind sail, while spinnakers are built for specific downwind apparent wind angles.
Because designs are changing so quickly, the term gennaker can seem complicated. First, let’s make sure we understand the two original sail types: the spinnaker and the genoa.
What is a Spinnaker?
A popular online dictionary defines spinnaker as: “a large three-cornered sail, typically bulging when full, set forward of the mainsail of a yacht when running before the wind.” When spinnakers were all symmetric, that dictionary definition would’ve been fine.
Today, things are a bit more complicated.
Symmetric Spinnakers and Asymmetric Spinnakers
We now describe the spinnakers in the picture below as symmetric spinnakers. Divide one in half vertically, and the two sides are mirror images. The windward corner is held out with a pole attached to the windward side of the mast, and to change course (or jibe), that pole is switched to the opposite corner . Unlike a headsail, there is no defined tack or clew; both are clews, until the pole is attached and that corner becomes the tack.
(Told you it was complicated.)

Symmetric spinnakers remain a viable sail type for downwind sailing on boats equipped with spinnaker poles and the necessary running rigging. They fly well when sailing “deep,” with the spinnaker pole squared well aft – or as the dictionary says, “when running before the wind.”
Over the past few decades, another spinnaker type has become increasingly popular – the asymmetric spinnaker or “A-sail.” An asymmetric spinnaker has three distinct corners :
- the head (attached to the halyard and hoisted all the way up the mast);
- the tack (attached by a short adjustable tackline to the bow/bowsprit);
- the clew (attached to the two sheets that run down each side of the boat).
Hmm, that sounds a lot more like a jib or genoa…
Asymmetric spinnakers are popular on boats that have permanent bowsprits or retractable poles. They are also used by cruising sailors because they are easier to handle than symmetric spinnakers.
While symmetric spinnakers and asymmetric spinnakers look different , they are both spinnakers under the measurement guidelines of most racing rules. We won’t go into the specifics of sail measurement protocols here, but the purpose is to see that spinnakers carry substantial girth (width) and are therefore useful when reaching/running. A wide, curvy, sail like this simply won’t fly upwind.

What is a Genoa?
If you google ‘Genoa’, this is what you will probably find: “a large jib or foresail whose foot extends aft of the mast, used especially on racing yachts.” All jibs and genoas are asymmetric; divide one in half vertically, and the two resulting pieces are hardly mirror images. Here again, the racing rule measurement guidelines help further define the standard form of a jib or genoa:
- Triangular, with not nearly as much girth as a spinnaker,
- with only one corner (the clew) allowed to roam freely (with sheets attached to keep it under control).

What is a Gennaker?
One day several years ago, someone thought: “maybe we should take a genoa’s form (asymmetric dimensions, head and tack pinned down, a couple of sheets tied to the clew) and give it more girth, like a spinnaker. That’s just crazy enough to work! But what to call this genoa/spinnaker?” And so was born the gennaker.
A gennaker won’t fly upwind like a genoa. And it’s not as efficient as a spinnaker built for specific downwind apparent wind angles. But a gennaker fits the bill nicely as an all-purpose downwind sail for reaching/(almost) running. And because no spinnaker pole is needed, a gennaker is a lot easier to rig and fly than a symmetric spinnaker.
A gennaker has the asymmetric form of a genoa with the girth (width) of a spinnaker.
Is a Gennaker for Cruising or Racing?
Is a gennaker a cruising sail or a racing sail? Yes. Depending. Many racing rules require a specific minimum girth measurement for a spinnaker and a maximum girth measurement to qualify as a legal headsail – leaving a no-go-zone in between. As it happens, this “illegal” sail size range for racing makes for a very manageable cruising gennaker .
Recently, rating/handicap rules have begun erasing this gap zone – maybe you’ve heard the term “tweener” sail? If you have a gennaker, your sailmaker can help you determine whether it qualifies for the type of racing you want to do.
Another reason the term gennaker is confusing is that its use has evolved differently around the world. Depending on your location, the name might refer to a cruising-oriented sail configuration. Or it could describe a very high tech, close-wind angle, grand prix level A-sail. If you need help, ask your local North exper t to explain the usage.
Developments in Gennaker Technology
Gennaker development has been moving very rapidly in recent years for both cruising and racing. A great example is the North Sails Helix Furling Gennaker . For more information about the industry’s leading edge, please refer to Helix, Load-sharing, and Structured Luff. So much more than a spork, a gennaker is a great addition to your downwind sailing inventory—for racing or cruising.

North Sails is excited to introduce the Helix Furling Gennaker, a new sail type for the cruising community. The structured luff Helix Furling Gennaker eliminates the heavy cable needed for traditional furling and is the most reliable and easy to use top-down furling cruising sail in the world.
Helix Structured Luff transforms how sails fly and is key to building a modern inventory. Our cruising sails with structured luff provide a more reliable furl than a sail weighed down with a heavy furling cable, are lighter and easier to handle, and have a wider range of wind angles. That cuts down down the number of sails you need onboard, as well as wear and tear, which make them the perfect downwind addition to your cruising wardrobe.
With a range of materials to choose from, a Helix Furling Gennaker is customized to boat size and use: from family cruiser to superyacht. Once reserved for 3Di sails, Helix Structured Luff is available in a range of materials from woven polyester to 3Di. Where requested, an optional LightWeight UV Cover can be added to the Helix Furling Gennaker. For more information, contact your nearest North Sails expert .
FEATURED STORIES
Npl renew faq, flying sails 101.
21 December
CAPE 31 TUNING GUIDE
- Refresh page
No products in the basket.
Last Products

Home » Shop » Dinghies & Keelboats » Osprey » Osprey Spinnaker

Osprey Spinnaker
£ 750.00 £ 637.50
Description
Additional information.
Focused development through the 2023 season and on into the winter has lead to the creation of 2 spinnaker designs.
VMG – Our all round spinnaker designed to give excellent performance on all downwind angles of sailing.
Runner – Designed with focus on running and long championship courses. Also a good choice for heavier teams looking for a bit more power.
Manufactured in 40gram Challenge Super Series silicone coated spinnaker cloth, our preferred choice for one-design spinnakers.
Related products

Osprey Genoa

Osprey Top Cover
Osprey overboom top cover.

Osprey Main
Get the latest offers, news & updates.
By submitting this form, you confirm that you have read and agreed to our privacy policy .

- Distributors
- Delivery & Returns
- Get A Quote
- Privacy Policy
- Terms & Conditions
- Data Request
Sochi Yachting

- See all photos
Most Recent: Reviews ordered by most recent publish date in descending order.
Detailed Reviews: Reviews ordered by recency and descriptiveness of user-identified themes such as wait time, length of visit, general tips, and location information.
Sochi Yachting - All You Need to Know BEFORE You Go (2024)
We use cookies to improve your browsing experience.
And dolphins make us happy. Find out more about our cookies policy here .
Sochi, Krasnodar Krai Boat Rentals
24 listings.

Wind Surfer Lesson In Sochi

Motor Yacht rental in Sochi, Russia

Dufour 43 Sailing Monohull Charter in Gelendzhik

'Tahiti' Sailing Gulet Charter in Gelendzhik

Motor Yacht Charter in Gelendzhik

'Anastasia' Cuddy Cabin Boat Charter in Gelendzhik

'Victoria' Sailing Monohull Charter in Gelendzhik

Boat Diving Trips in Gelendzhik.

Windsurf Board Rental and Lessons in Anapa

Princess V 50 Motor Yacht Charter in Rostov, Russia

Azra Deniz in Turkey

Laila Deniz in Turkey

Sude Deniz in Turkey

Diva Deniz in Turkey

79ft long Sailing Gulet in Emmiler, Turkey

Dora Deniz in Turkey

Explore Turkey on 183ft "Regina" Gulet with your Family!

30ft Center Console Charter in Placencia, Belize

Bertram 31' Sport Fisherman Charter in Playa Carrillo, Costa Rica

Charter Knysna 480 Cruising Catamaran in Uligan, Maldives

Charter Cruising Catamaran Knysna 440 in Uligan, Maldives

Jet boat in Turkey

Private Charter on a Dinghy in Tulcea, Romania for 6 people

Take a Scenic Charter trip on a Dinghy in Tulcea, Romania
- About Getmyboat
- Media Inquiries
- Terms of Use
- Privacy Policy
- Cookies Policy
- Accessibility Statement
- Member Interface Agreement
- How It Works
- Mobile Apps
Experiences
- Boat Rentals
- Jet Ski Rental
- Fishing Charters
- Houseboat Rental
- Pontoon Rental
- Yacht Rental
- Sailboat Rental
- Company News
- Experiences Guide
- Destinations
- Tips for Renters and Owners
Popular Destinations
- Lake Lanier
- Lake Travis
- Newport Beach
- Lake Norman
24/7 Live Support
- +1 818 927 2148
- [email protected]
Real reviews from happy Getmyboaters.
4.9 out of 5! 385,000 + reviews
THE 10 BEST Sochi Boat Rides & Cruises
Boat rides & cruises in sochi.
- Scuba & Snorkeling
- Fishing Charters & Tours
- Stand-Up Paddleboarding
- Speed Boats Tours
- Parasailing & Paragliding
- Surfing, Windsurfing & Kitesurfing
- Water Sports
- Kayaking & Canoeing
- River Rafting & Tubing
- Submarine Tours
- Waterskiing & Jetskiing
- 5.0 of 5 bubbles
- 4.0 of 5 bubbles & up
- Good for Adrenaline Seekers
- Honeymoon spot
- Good for Couples
- Good for Big Groups
- Good for Kids
- Adventurous
- Budget-friendly
- Good for a Rainy Day
- Hidden Gems
- Things to do ranked using Tripadvisor data including reviews, ratings, photos, and popularity.
1. Black Sea Diving College Day Classes
2. Sochi Charter
3. Motoprokatvsochi
4. FUN AQUA
5. Calypso Marine Entertainment in Sochi
6. Laguna Diving Club

7. Walking Tours in Sochi

8. Sup school DOLPHINS
9. Diving Center Laguna
10. Yacht Russia Sailing Academy
11. Renteto

12. Moremoto

13. Flipper Diving Club
14. Wake Sochi Park
15. Aquazone Diving Centre
16. Sochi Yachting
17. black sea diving college.
18. Extreme Club Vzlet

20. Alfa Yacht Rental
21. Surf-Station Zhemchuzha

22. Atlasyco Charter

23. Yacht Sochi
24. cross country, 25. sochi360.ru, 26. windsurfingcamp, 27. day on water, 28. dive-club atlantida.

29. Sochi Excursions

{{ totalBoats }} boats available
No results found. please, try your search again.
Flash Deals
Save up to 40%
Manage cookie preferences
By clicking 'Accept' you agree with the use of analytical cookies (which are used to improve our site and services) and tracking cookies that help us to decide which product to show you on and off our site. By clicking here , you can manage your consent and find more information about the cookies we use.
IMAGES
VIDEO
COMMENTS
Hoist the spinnaker; It seems daunting, but the principles of setting a symmetrical spinnaker are the same whether you're on a 420 dinghy or a fifty foot racer. You may have a few more lines, but the general process is: prep the spinnaker, connect the lines to the sail, hoist the pole on the windward side, then hoist and trim the sail.
Pulling the halyard backward hoists the spinnaker up the mast; pulling the halyard forward pulls the spinnaker back inside its chute. Choose a quiet day for rigging, put the boat where there is plenty of space, and lay the spinnaker out flat beside it. First of all, look carefully at the shape of the sail to identify the three corners.
Compared to a symmetrical spinnaker, with its uphauls, downhauls, pole, sheets and guys, an A-sail is simplicity itself—just a halyard, a tack line and a pair of sheets. If you sail with enough bodies on board to drop and pack the kite, that's great, but if you sail as a couple, or your kids are too young to help, you have two options to ...
Stingy stage 3 - Add a spinnaker halyard and masthead block. This stage solves the problem of chafing caused by reusing the jib halyard. As you can see in the following drawing, when the jib halyard runs under the forestay pin and then in front of the forestay, it can make a quarter turn around the forestay.
Gybing is quite difficult when sailing shorthanded, so many cruising yachtsmen only set the spinnaker when there is a long reach ahead and lower the sail if a gybe is involved. But of course a gybe is much quicker than dropping and resetting the sail. On a boat over about 10 metres it is much safer to have twin sheets and guys.
Rigging an asymmetric spinnaker. When rigging, it's key to keep all the lines outside the shrouds and jib, as the spinnaker flies outside of the boat. On land, face the boat head to wind to lessen the likelihood of the sail catching the wind. Attach the sail's tack to the bowsprit with a bowline.
This video will take you through how to sail a small sailboat with a spinnaker. The spinnaker is an additional sail that can only be used at certain times b...
I join up with my friend Sam, a retired Air Force pilot and retired Delta pilot. We go out on his boat, a Catalina 22, for a step-by-step guide to rigging an...
A second-hand sail from a similar boat will often work well enough for occasional use. Liz and Richard were lent a spinnaker designed for a Hunter 32. Made 25 years ago by the cadets at Castle Cove Sailing Club in Weymouth it had been a project to mark the 50th anniversary of the club but hadn't seen much action since.
To be able to pull the sail clear out of the wind-shadow created by the mainsail, we can use a spinnaker pole set quite low on the mast because an Asymmetrical Spinnaker is cut with a very low tack. When the pole is set, you can run a new sheet, sometimes called a brace or guy, through the outboard end of the pole and to the tack line, where or ...
Kit for a kite. All you need with a cruising chute is a halyard, a means of attaching - and, preferably, adjusting - the tack strop, a couple of sheets, and a block on or near each quarter. A spinnaker is more complex. You will need: A pole and an attachment point on the mast for its inboard end. You can attach the pole to a fixed ring ...
Short answer flying the spinnaker: Flying the spinnaker refers to the practice of using a large, balloon-shaped sail while sailing downwind. It is commonly employed in racing and cruising sailboats to enable faster and more efficient sailing in favorable wind conditions. The spinnaker is typically rigged using a spinnaker pole or a bowsprit for optimum
A spinnaker rigging diagram is a visual representation that illustrates the arrangement of lines, blocks, and attachments necessary to deploy and control a sailing boat's spinnaker sail. It outlines the correct configuration required for optimal performance while hoisting, trimming, jibing, and dousing the spinnaker.
http://www.rya.org.uk/go/ryachampionclub
Asymmetrical spinnaker rigging refers to the setup and arrangement of lines and hardware used to control and hoist an asymmetrical spinnaker sail on a sailing vessel. It typically involves attaching sheets, guys, halyards, and other control lines to specific points on the sail, deck, or mast, allowing for efficient handling and trimming of the ...
3. Turn the boat onto a very broad reach or run. Be careful not to accidentally jibe. Turning the boat onto a broad reach or run lets you hoist the spinnaker behind the mainsail — protected from the force of the wind. 4. Make sure the crew is ready, and call for the sail to be hoisted. 5.
The spinnaker sheet, like the sheets on the main and jib, is used to trim the sail. Whoever trims the spinnaker should watch the luff of the sail. When the sail begins to "curl" (fold back over itself), trim the sheet until the sail is completely full again. Your goal is to keep the luff of the spinnaker constantly on the verge of curling. Any ...
In short, a gennaker has a genoa's form (asymmetric, head and tack pinned, sheets tied to the clew) with the wide girth of a spinnaker. The gennaker is an all-purpose downwind sail, while spinnakers are built for specific downwind apparent wind angles. Because designs are changing so quickly, the term gennaker can seem complicated.
Osprey. Colour. Dark Blue, Red, White. Hyde Sails manufactures sails for the smallest dinghies to round-the-globe cruisers and for racing yachts to traditional sailing boats. We sell directly to sailors and to boat builders, such as Laser and RS Sailing. Hyde manufactures over 40,000 sails and over 10,000 accessories every year.
Yacht in Sochi, Sochi yacht rental, boat trips on boats and yachts, sea fishing on a yacht and boat. Boat trips from 700 rubles / person per hour with a swim in the open sea. Fishing 3:00 duration (gear provided) 1500 rubles / person. Children under 5 years free. Up to 12 years 50 per cent discount. Yacht charter of 4000 per hour.
Find and book boat rentals in Sochi, Krasnodar Krai for the 2024 season. Getmyboat is the world's #1 boat rental app with over 100,000 boat rental listings and over 350,000 5-star reviews. ... Dufour 43 Sailing Monohull Charter in Gelendzhik. New. $54 hour. Sailing in Gelendzhik · 9 guests 'Tahiti' Sailing Gulet Charter in Gelendzhik. New. $16 ...
Set sail on your destination's top-rated boat tours and cruises. Whether it's an entertaining and informative boat tour or a relaxing sunset dinner cruise, these are the best Sochi cruises around. Looking for something more adventurous? Check out our list of must-do water activities in Sochi. See reviews and photos of boat tours & water sports in Sochi on Tripadvisor.
A sailing yacht charter in Russia usually costs 50 € per day. For instance, the most popular sailboat costs 50 € per day. The most popular sailboat destinations in Russia are: 167 € per day. If you are searching for a mix of relaxation and fun, renting a motorboat is a perfect choice. Motorboats are easy to navigate and offer various ...