- BOAT OF THE YEAR
- Newsletters
- Sailboat Reviews
- Boating Safety
- Sailing Totem
- Charter Resources
- Destinations
- Galley Recipes
- Living Aboard
- Sails and Rigging
- Maintenance
- Best Marine Electronics & Technology

Adding Solar Power to a Sailboat
- By Emily Fagan
- Updated: October 18, 2019

During our nearly four-year cruise of Mexico, my husband, Mark, and I lived almost exclusively on 555 watts of solar power charging a 640-amp-hour house battery bank. We anchored out virtually every night aboard our 2008 Hunter 44DS, Groovy , and relied on the sun for power. During one 10-week stretch, while we waited for a replacement engine alternator to arrive, our boat’s solar panels were our sole source of power. We had no backup charging system to turn to, and yet we lived and sailed comfortably the entire time. Mounting solar panels on a sailboat was not difficult, but a few key decisions made a huge difference in how effective our panels were.
A solar-power installation on a sailboat is made up of two independent systems: one system to charge the batteries, and another system to provide 120-volt AC power for household appliances. In the charging system, the solar panels convert sunlight into electrical current and deliver it to the batteries via a solar charge controller. Similar to a voltage regulator, the charge controller acts as a gatekeeper to protect the batteries from receiving more current than they need as they are being charged. In the AC power system, an inverter or inverter/charger converts the 12-volt DC power in the battery into 120 volts AC whenever it is turned on.
Panel Positioning and Wiring Considerations
One of the biggest challenges for sailors installing solar power on a sailboat is finding a place on the boat where the panels will be shaded as little as possible. Just a few square inches of shade on one panel can render that panel all but inoperable. Unfortunately, between the mast, radome, spreaders and boom, shadows cross the deck all day long, especially as the boat swings back and forth at anchor.
What’s worse, if the panels are wired in series rather than in parallel, this little bit of shade can shut down the entire solar-panel array. When we installed solar power on Groovy , we had already lived exclusively on solar power in an RV for over two years. Our RV solar panels had been wired in series, and we had witnessed the array shutting down current production when just half of one panel was shaded.
Choosing whether to wire the panels in series or parallel on a boat affects the wire gauge required, which is why many solar-power installers lean toward wiring the panels in series. Panels wired in series can be wired all the way to the solar charge controller with a thinner-gauge wire than those wired in parallel. This is because the voltage of panels wired in series is additive, while the current remains constant, so the current flowing is just that of a single panel. In contrast, the current flowing from panels that are wired in parallel is additive, while the voltage across them is not. This means that in a parallel installation, the current going to the charge controller is several times higher and requires much thicker cable to avoid any voltage loss over the length of the wire.
Not only is thinner-gauge wire less expensive, but it is also more supple and easier to work with, making the job of snaking it in and around various crevices in the boat and connecting it to the solar charge controller much less of a struggle. Thus the choice between series and parallel wiring boils down to a trade-off between system performance, expense and ease of solar system installation.
Luckily, the size of the wire can be reduced if higher-voltage solar panels are chosen. Since watts are determined by multiplying volts by amps, a higher-voltage panel that generates the same watts as a lower-voltage panel will produce less current. Therefore, selecting nominal 24-volt panels instead of 12-volt panels allows for the use of thinner wire sizes no matter how they are wired.

Our Marine Solar Panel Design Choices
In our installation, we decided to mount three 185-watt, 24-volt (nominal) Kyocera solar panels high above the cockpit, well aft of the boom, as far away as possible from potential shade. Our Hunter came with a big, solid stainless-steel arch, and we turned to Alejandro Ulloa, a brilliant metal fabricator at Baja Naval Boatyard in Ensenada, Mexico, to build a polished stainless-steel solar-panel arch extension onto the existing structure. He designed the arch extension with integrated telescoping davits to hoist our dinghy as well as support the solar panels. These davits were strong enough — and the lines and blocks had enough purchase — that either of us could lift our light Porta-Bote dinghy with its 6-horsepower outboard without a winch.
We spaced the panels about a half-inch apart and wired them in parallel. Using two twin-lead wires, we snaked the three positive leads and one common ground down through the inside of the arch tubes so they wouldn’t be visible, and placed wire loom over the exposed wires under the panels.
The junction points for the three parallel panels were on positive and negative bus bars inside a combiner box, all mounted in a cockpit lazarette. Inside the combiner box, we installed three breakers, one for each panel. This gave us the ability to shut off any or all of the panels if we needed to (we never did).
We mounted a Xantrex solar charge controller (model XW MPPT 60-150) in a hanging locker, as close to the batteries as possible, in a spot where it was easy to monitor and program. We ran twin-lead wire from the combiner box to the charge controller and from there to the batteries.
Our boat came with three new 12-volt Mastervolt 4D AGM house batteries, all wired in parallel, for a total of 480 amp-hours of capacity. We wanted a bigger house battery bank, and because it is best for the age, type and size of the batteries to be matched, we added a fourth new Mastervolt 4D AGM house battery, which brought our total to 640 amp-hours. Our batteries were installed at the lowest point in the hull, below the floorboards, and they ran the length of the saloon, from just forward of the companionway stairs to just aft of the V-berth stateroom door.
The best way to charge a bank of batteries that are wired in parallel is to span the entire battery bank with the leads coming from the charge controller. We did this by connecting the positive lead from the charge controller to the positive terminal of the first battery in the bank, and the negative lead from the charge controller to the negative terminal of the last battery. By spanning the entire bank, the batteries were charged equally rather than having the charging current focused on just the first battery in the bank.
We feel that AGM batteries are superior to wet cell (flooded) batteries because they can be installed in any orientation, don’t require maintenance, can’t spill (even in a capsize), and charge more quickly. Our Mastervolt batteries, like almost all AGM batteries on the market, are dual-purpose, combining the very different characteristics of both deep-cycle and start batteries. Our batteries work well, but if we were doing an installation from scratch today, we would consider the new Trojan Reliant AGM batteries. These batteries are engineered strictly for deep-cycle use and have been optimized to provide consistent current and maximize battery life.
Our boat came with a Xantrex Freedom 2,500-watt inverter/charger wired into the boat’s AC wiring system with a transfer switch. The inverter/charger performed two functions. While the boat was disconnected from shore power, it converted the batteries’ 12-volt DC power into 120-volt AC power, allowing us to operate 120-volt appliances, like our microwave. When the boat was connected to shore power, it charged the batteries.
Because this inverter/charger was a modified-sine-wave inverter, mimicking AC current with a stair-stepped square wave, we also had a 600-watt pure-sine-wave inverter to power our potentially more sensitive electronic devices. We chose Exeltech because its inverters produce an electrical signal that is clean enough to power medical equipment, and they are NASA’s choice for both the Russian and American sides of the International Space Station. For simplicity, rather than wiring the inverter into the cabin’s AC wiring, we plugged ordinary household power strips into the AC outlets on the inverter and plugged our appliances into the power strips. Like the charge controller, the inverter must be located as close to the batteries as possible. Ours was under a settee.

Shade’s Impact on Sailboat Solar Panels
Once our solar installation was completed on our sailboat, we closely observed the effects of shade on our solar-panel array. We were often anchored in an orientation that put the panels in full sun. Just as often, however, we were angled in such a way that shade from the mast and boom covered portions of our panels. It was fascinating to monitor the solar charge controller’s LCD display whenever the sun was forward of the beam — the current from the panels to the batteries fluctuated up and down as we swung at anchor.
Taking notes one morning, we noticed that the charging current was repeatedly creeping up and down between 9.5 and 24.5 amps as the boat moved to and fro. When the entire solar-panel array was in full sun, it generated 24.5 amps of current. When we moved so the mast shaded a portion of one panel, the array generated 15 amps. When it shaded portions of two panels and only one was in full sun, the array produced just 9.5 amps. Of course, it would have been preferable to see a steady 24.5 amps all morning, but this sure beat watching the current drop to zero whenever a shadow crossed a panel.
We discovered that shade makes a huge impact while sailing, too. Surprisingly, it is far worse to have the panels shaded by the sails than to have the panels in full sun but tilted away from its direct rays. One afternoon, we noticed that while we were on a tack that tilted the panels away from the sun, they generated 24.5 amps of current, whereas on a tack where the panels were tilted toward the sun but two of the three were partially shaded by the sails, the current dropped to a mere 10 amps.
Reflections On Our Solar Panel Installation
A wonderful and surprising side benefit of our large solar panels and arch system was that the setup created fabulous shade over the jumpseats at the stern end of the cockpit. Our metal fabricator, Alejandro, placed a support strut at hand-holding height, and sitting in those seats feels secure and comfortable while sailing, no matter the conditions.
After living on solar power for eight years of cruising and land-yacht travel, we’ve learned that you can never have too much solar power. Groovy’s 555 watts was enough to run all our household appliances as needed, including our nearly 4-cubic-foot DC refrigerator, two laptops, a TV/DVD player, and lights at night. However, it was not quite enough power to run all that plus our stand-alone 2.5-cubic-foot DC freezer during the short days and low sun angles of the winter months without supplemental charging from the engine alternator every few days. For the 10 weeks that we did not have a functioning alternator, our solution was to turn off the freezer, which enabled our batteries to reach full charge every afternoon.
Solar power made a world of difference in our cruise. Not only did it allow us to live comfortably and with ample electricity for weeks on end when our engine alternator went on the blink, but as a “set-it-and-forget-it” system, it also gave us the freedom to anchor out for as long as we wished without worrying about the batteries. In our eyes, the solar-panel arch enhanced the beauty and lines of our boat, giving her a sleek and clean appearance. It was true icing on the cake to discover that the panels and arch system also provided much-needed shade over the cockpit and helm from the hot tropical sunshine. If you are preparing for a cruise, consider turning to the sun for electricity and outfitting your sailboat with solar power.
The Installation:

Emily and Mark Fagan offer cruising tips and share their stories and photos on their website, roadslesstraveled.us . They are currently enjoying a land cruise across America aboard an RV.
- More: DIY Sailboat Projects , green sailing , How To , installations , Refits , Sail Green , solar , solar panel , Upgrades
- More How To

3 Clutch Sails For Peak Performance

It’s Time to Rethink Your Ditch Kit

8 Ways to Prevent Seasickness

How To De-Winterize Your Diesel Engine

Bitter End Expands Watersports Program

Sailboat Review: Tartan 455

Miracle in a Bowl

Cole Brauer Completes the Global Solo Challenge
- Digital Edition
- Customer Service
- Privacy Policy
- Email Newsletters
- Cruising World
- Sailing World
- Salt Water Sportsman
- Sport Fishing
- Wakeboarding
Yachting Monthly
- Digital edition

Sailing with solar power: A practical guide
- Duncan Kent
- November 13, 2020
The latest solar technology makes self-sufficient cruising much more achievable. Duncan Kent gives the lowdown on everything you need to get your boat sorted

SOLAR POWER ON BOARD
Solar power is fast becoming the most popular and economic method of keeping the batteries charged on a boat.
Particularly now that the efficiency of photovoltaic (PV) panels, charge controllers and batteries is improving every day.
Furthermore, the latest technology in regulators and charge controllers has brought about a noticeable increase in useable power output, so the problems of shading and non-alignment can be compensated for more easily.
Not only has PV equipment become more efficient and cost-effective, but many of the modern devices we want to use on a boat have become less power hungry.
This means it is now far easier to provide your entire yacht’s electrical needs, both 220Vac and 12/24Vdc, from natural energy resources – particularly solar power, even if you are planning on a fully electric boat .

Thinking carefully about how much power you need and how much your boat can accommodate is key to planning a solar array. Credit: Graham Snook
WHAT DO YOU NEED?
For instance, a boat with two new, good quality, deep-cycle house batteries of 100Ah each would supply 100Ah of energy to consume between charges, if you only use the recommended 50% of available charge between each charge cycle to protect the batteries.
From this you could run:
- a modern 12Vdc fridge (approx. 1.5Ah, or 36Ah over 24hrs),
- all LED lighting (say 20Ah per day),
- various small device chargers (20Ah)
- and a number of other items such as water pumps, TVs and stereos (25Ah/day)
- Totalling around 100Ah.
- For this you’d need 400W of solar capacity.
Of course, if you like to run a lot of AC devices off-grid such as hair dryers, microwaves, toasters and the like, then you’re going to need a DC/ AC inverter, which will take you to another level in power consumption terms.
But even then, with careful planning, solar could provide a large portion of the power you need before resorting to engine charging or a generator.
THE AVAILABLE SPACE
In practical terms, a modern 40ft monohull would have the space for around 1,200W of PV panels (cockpit arch, sprayhood top, deck), maybe 1,500W with the addition of a few portable panels for use at anchor.
The 1,200W of fixed position solar array could produce around 360Ah on a sunny summer’s day (zero shading) or more likely 250Ah on the average UK summer’s day.
So that’s enough for your 100Ah general DC consumption plus another 150Ah of AC consumption via the inverter.
Of course, to do this you’ll most likely need to increase your battery capacity to around 400-500Ah for maximum flexibility (you’ll need to store as much as possible during daylight hours), a typical figure for a 40-50ft offshore cruising yacht these days.

Get your solar charging right and you may never need to hook up to shore power
Typical daily inverter loads for a cruising yacht off grid might be:
- induction cooking plate (20min) 60Ah
- microwave (15min) 30Ah
- coffee maker (20mins) 25Ah
- hair dryer (5min) 15Ah
- laptop charger (2h) 10Ah
- or around 140Ah in total.
The trick is to monitor the batteries’ state of charge (SOC) at all times and vary your use of the inverter to suit.
For example, you might want to cook supper mid-afternoon, when solar is in abundance, and then reheat it in the evening when you want to eat it.
In some cases, when you’re cruising in warm climates such as the Med, you might end up with excess charge from your solar panels .
In this situation, many long-term cruisers devise a method of ‘dumping’ the extra energy by heating water for showers.
Do bear in mind if you’re planning to live aboard full time , then it’ll be a whole different story on cloudy days and during the winter, when inverter use might need to be knocked on the head entirely.
Continues below…

Eco friendly sailing: Best practice for green yachting
How easy is it to go eco friendly sailing? We look at the steps cruisers can take to minimise their…

How and where to go wild cruising in the UK
Planning to spend the night away from crowded waters can be truly rewarding but preparation is essential before you go…

Solar-powered boat crosses Atlantic
Then heads to UN climate conference
POWER DISCREPANCIES
There’s often confusion as to how much power you can harvest from a solar installation.
A PV panel is nearly always advertised stating its theoretical peak output power (Pw).
But in reality, on a yacht where there are limited areas in which to mount them, they will more likely produce a maximum of 60% of their peak output if mounted horizontally, increasing to 80% if tilted towards the sun and regularly adjusted.
The latter is rarely achievable on a boat, however, as even at anchor it can swing through an arc of 180° in wind or tidal shifts .

Flexible panels can be mounted on sprayhoods or awnings to add power when it’s needed at anchor or in harbour
INSTALLATION
Having trawled through hundreds of ‘deals’ to get the best price on the most efficient panels you can afford you now need to know how to install them to best fulfill your energy generation needs.
The output, even from the highest quality photo-voltaic array, will only be as good as the installation itself.
So following our guidelines should ensure you extract every last drop of energy from your investment.
PANEL MOUNTING
Sailing boats are not the ideal structure on which to mount wide, flat PV panels.
So before you go ahead and purchase what looks like the biggest and best, take a few minutes to decide on exactly where you can mount them, as this will affect what size and type of panels you should buy.
In many cases the first choice would be on an arch, davits or gantry aft, especially if you already have, or plan to fit one.

Dinghy davits, particularly on multihulls, can support a huge solar capacity
These allow a solid metal framework to be constructed that will be strong enough to take the heavier, more productive rigid PV panels.
You can also build in some form of adjuster to the framework that will allow the panels to be orientated towards the sun for the best performance.
With luck (or careful planning) a gantry will also keep them aft of the boom, thereby eliminating loss of output caused by boom shading.
The next most popular position for mounting the panels is on a cockpit sprayhood or bimini, although this will often mean using the flexible or semi-flexible panels, which are generally less efficient than the rigid ones for the same area.
ELEVATED MOUNTING
Alternatively, there are kits available for mounting panels onto lifelines, which can allow their elevation to be manually adjusted to a certain degree.

Pole-mounted panels can be used for maximum adjustability
Finally, panels can be fitted directly onto the deck by either gluing them down using mastic or attaching them onto a rigid support frame.
Once again you will probably need to use semi-flexible panels – especially if the deck surface is curved.
Rigid, glass-coated panels will obviously not be suitable for deck mounting in an area that is frequently walked over.
Don’t be tempted to drill through the panels, even along the edges, as this will invalidate the warranty and possibly damage the panel.

With solid panels, the ability to adjust the angle can add significantly to output
It might seem obvious, but the key to an efficient system is to avoid shading wherever possible.
It’s no good fitting expensive, high-efficiency PVs right under the boom as they’ll perform little better than the cheaper types.
Saying that, in good quality panels each cell will be isolated from the next by a series of diodes (one-way electrical valves), so that if one cell is shaded at least it won’t drag down the other cells within the same panel.
Older panels often didn’t have these, so the slightest partial shading caused the output of the entire panel to cease.
OVERHEATING
Another important factor that is often ignored when installing the panels is that of overheating.
If a PV panel gets too hot, which is quite likely if mounted directly onto a flat surface without an air gap behind, its output will drop quite noticeably.
To allow for some air circulation behind the panels it’s best to apply mastic adhesive in numerous large dabs.
This is best achieved by placing wooden spacer strips between the dabs until the mastic has completely cured, after which the spacers can be removed.
You might need some form of trim around one or more of the outside edges, though, if they are positioned where sheets and other lines might get caught under them.
Raising the panels up will also help water to drain off and thereby helping to avoid possible delamination from sitting in water for too long.
CHARGE CONTROL
A PV module cannot supply an electrical device directly due to the changeability of the sunlight, which in turns varies the current it can produce.
Therefore, it has to be connected to a battery, which stores and smooths its output.
Whatever the size of your solar array you will need to fit a regulator, or charge controller as they are now more commonly known, to the system in order to control the output and to help extract as much power from the panels as possible.
There are two types of PV charge controller.
The older designs, called Pulse Width Modulation (PWM) types, were fairly basic voltage regulators and simply output volts at just above battery level.
The latest controllers use Multi Power Point Tracking (MPPT) technology and can accept much higher input voltages (up to 240Vdc).
MPPT controllers can be up to 30% more efficient as they use the peak output of the panels to charge the batteries, even compensating for partial shading.
BEWARE FAKE GEAR
If you buy online do be careful to ensure you’re getting what you pay for.
There are a huge number of fake MPPTs out there, which are simply the much cheaper PWM dressed up with fake labels.
It’s hard to tell which is which, but the old adage of ‘if it looks too good to be true, it usually is’ makes good sense.
MPPT controllers are usually bigger and heavier than PWMs, but if in doubt call or email the supplier to discuss the pros and cons of their kit before buying.
If they’re not happy to chat and advise you then I would steer clear of their gear.
Some good MPPTs are made in China, but unless they have a UK supplier, I wouldn’t bother with them as you’ll have no follow-up advice.
To calculate what size controller you need simply divide the panel’s peak power in Watts (Wp) by the battery voltage, which will give you the maximum current (Amps) they could theoretically supply.
For example 240W/12V = 20A. Although it’s unlikely you’ll ever get near the peak output from any PV panel, it’s best to go for the maximum possible.

Induction cooking is now a reality on board, even without shore power
PV panels come with a short length of cable, usually around 1m long.
Some are supplied with MC4 connectors already attached but most only provide bare wires.
The latter can be easily extended using proper waterproof connections but thought must be given as to the current rating and voltage drop (usually max 3%) for the size of cable you intend to use.
If in doubt, bigger is better!
Panels can sometimes be ordered with the wiring on the back so that the cable can go straight below deck through a hole under the panel.

You may need to fit extra battery capacity if you want to run an inverter from solar charging
SERIES OR PARALLEL?
A commonly asked question is ‘should I wire my PV panels in series or in parallel?’
The simple answer is, if there’s any danger of frequent shading to one or more of the panels then install them in parallel.
If wired in series the shading of a single panel will drag down the output from all of the others in the same series.
PARALLEL IS PREFERRED
Most commonly, multiple panels are wired together in parallel to a single charge controller, with diodes protecting each panel from discharging the others should one become partially shaded.
With the advent of MPPT controllers, however, there can sometimes be a benefit to wiring two or more identical panels into a series bank, thereby presenting a higher voltage to the controller.
It’s worth noting that, like batteries, wiring PV panels in series increases the voltage only – the current capacity of the array remains the same as for a single panel.
‘Where’s the benefit of wiring them in series then?’ you might ask.
Well, the higher the voltage fed into the MPPT, the more consistent it will be with its output, which could, in some cases, prove more efficient than a parallel installation with PWM controllers.
It’s also likely to be necessary if you have a 24V domestic system.
SERIES WIRING
Series wiring is usually only done when the cable runs are long, as it helps negate the voltage drop caused by the resistance of the cable.
While a decent controller will have no problem handling the output from four or even five panels wired in series, it is often inappropriate for sailing yachts as shading just one of the panels will reduce the output of the entire series array.
If you need to do so in order to reduce cable runs then it’s best to split the panels between each side of the boat – a series bank on each side.
If you do this, then you would ideally fit a separate controller to each series PV bank and then connect their outputs together in parallel to the battery bank.
Note, however, that panels wired in series must all be the same types with an equal number of cells per panel.
Furthermore, the charge controller needs to be sized for the total of all panel voltages added together and the current rating of one individual panel.
Differently rated panels can be connected together in parallel but only if each panel has its own controller.
The outputs of the individual controllers can then be joined together to go to the battery bank.
BATTERY BANK QUESTION
Another frequently asked question is ‘Can I connect another charging source to the battery bank while the solar array is charging?’
The answer is yes.
Any decent PV controller will be protected against feedback from other charging sources.

Think carefully about where shade from mast, boom and rigging will fall. Credit: Graham Snook Photography
CABLE SIZE AND CONNECTORS
A frequent cause of reduced output from PV arrays is wiring that is too small.
The resistance of a wire conductor increases in direct proportion to its cross-sectional area, so go as big as is practicable for the least cable loss.
Each panel should be supplied with the correctly sized cables for its own maximum output.
But if you’re combining panels, either in parallel or in series, you will clearly need to rate the single feed cable to suit the maximum current available at theoretical peak solar output and to minimise voltage drop.
Likewise, the cable from the controller to the batteries should be sized to suit the controller’s maximum output current and protected with a fuse.
For outside it’s important to use exterior grade cable, which is double- insulated and UV-proof.
WEATHERPROOF CONNECTORS
And wherever possible use compatible weatherproof connectors (usually MC4) to those found on the panels rather than cutting off the plugs and hard-wiring them.
Field- assembly MC4 plugs are available, so you don’t have to drill large holes in the decks or bulkheads when feeding the cables through.
When joining more than one panel together try to use the approved multiway connectors; not only do they keep the wiring neat and tidy, but they also offer a greater contact area than budget terminal blocks.
If you have to use screw-type connectors make sure to fit proper ferrules to the wire first to avoid any stray wires in the multistrand shorting across the terminals.
When feeding a cable from above to below deck, try to go through an upright bulkhead where possible to minimise ‘pooling’ of water around the access hole.
Also, use a proper watertight deck seal that matches the cable you’re using.
If drilling through a cored deck you need to drill a larger hole first, fill it with epoxy resin and then drill the required size hole through the epoxy to ensure no water gets into the deck core.
Ideally, the charge controller should be mounted no further than 2m from the battery bank.
If you need to go further, you’ll require larger cabling to reduce the voltage drop.

A generous solar array will keep you self- sufficient indefinitely. Credit: Graham Snook Photography
CONTROLLER LOAD TERMINALS
There is often confusion over the ‘load’ output of a charge controller (often depicted by a light bulb) and what can safely be connected to these terminals.
Rarely explained in the manual, the load terminals should be pretty much ignored in a marine installation as the output on these terminals is usually very limited (10A max).
Some attach an LED light to them to indicate the controller is operating, but all your usual electrical loads should remain connected to the batteries with the battery terminals on the controller connected directly to that battery bank via a fuse.
It is possible, though, to control a high-current switching relay in certain conditions.

Parallel installation is more resilient to shading, but a series installation will increase peak charging outputs. A combination of the two offers some of the benefit of both
CIRCUIT MONITORING
Unlike most cheap PWMs, the majority of good quality MPPT charge controllers come with an alphanumeric LCD screen to let you know what is going on.
This can either be a remote display or simply one on the front of the box.
It’s obviously a lot better to have a proper numerical display than to rely on a few flashing LEDs to tell you when something’s not right.
So if your chosen controller doesn’t have one be sure to fit a battery monitor (the shunt type) into your solar circuit between the controller and the batteries.
It doesn’t have to be a very ‘smart’ monitor, just one that can display the voltage and current being supplied by the panels.
For smartphone addicts there are several wifi apps that will do the job remotely on your phone or tablet.
DEVICE PROTECTION
All good quality PV panels feature built-in diode protection between each cell to prevent a shaded cell from dragging down the productive ones.
In addition, there will be internal blocking diodes on the final output to protect the panel from polarity reversal and to ensure that the batteries can’t discharge back into the panel during the night.
The latter can be added externally, the former can’t, so check before you buy.
A fuse, rated just above the maximum current available, should be fitted between each panel and the charge controller.
Another fuse should then be installed between the charge controller’s output and the batteries.
In the case of multiple arrays, this second fuse will be rated higher than the individual panel fuses and should match the maximum current rating of the cable.
With this protection installed other charging devices can be connected in parallel at the battery, meaning the solar can be left connected even when you are hooked up to shore power and the battery charger is operating.
In some circumstances, however, this arrangement can affect the sensing of the battery by the charger, causing it to fall back into float mode.
If this becomes apparent it can be overcome by installing a manual/auto switch to disconnect the solar array when on shore power.

Check the flex of the solar panel is sufficient for your deck
EXCESS POWER DUMPING
A solar charge controller works by disconnecting the supply from the PV panels when the batteries are fully charged.
But for some full-time liveaboards in sunny climates that can be considered a waste, when the excess power could be put to good use – heating water, say.
This is commonly done using an inverter to supply AC power to the heating element.
Alternatively, you can now buy a 12Vdc element for your calorifier (hot water tank) and supply this directly from your battery bank.
Both of these methods would require a voltage sensitive relay (VSR) to disconnect the element should the battery voltage drop below a pre-set level.
Don’t expect boiling hot water, as there will probably only be enough spare power to take the chill off it before your battery bank reaches its lower threshold voltage.
A 600W/12V element will draw some 50A, from the batteries, whereas a 1kW AC element run through an inverter will need close to 100A.

A small, semi-flexible panel will be sufficient for keeping batteries trickle charged, but not for heavy use
RIGID, FLEXIBLE, OR SEMI FLEXIBLE?
Despite massive recent improvements in semi-flexible panels in recent years, the solid glass panels still offer a higher power density.
That said, they are heavier, more awkward to mount and can’t be walked on, so unless you have a dedicated gantry aft, you’re better off choosing the more rugged semi-flexibles.
Modules incorporating monocrystalline cells also have a better output than those with polycrystalline cells (that’s cells made from a single slice of silicon as opposed to layers of smaller pieces).
Output voltage also depends on the number of cells on the panel.
In the past this has commonly been 32, but now some 36 and even 40 cell panels are available.
That said, they’re larger, of course, so an array of interconnected smaller panels might be a better solution.
Module efficiency is now more often around the 20% mark, as opposed to 12-15% for older models and semi- flexible (up to 20° bend) are usually better than flexible (up to 180° bend).

A rigid panel is more efficient, but less robust
There are a huge number of panels on the market, but many use the same cells.
Sunpower Maxeon cells are exceptionally good, as are the Panasonic HIT range and LG, but they are pricey.
If the maker is offering a 25-year guarantee instead of a 3-5 year one, you can be pretty confident they’re good.
When it comes to charge controllers it’s definitely worth paying a little more for a decent MPPT.
A cheap PWM might be okay just to keep a small starter battery charged with a 30W panel, but the MPPT will give you much more when it comes to heavy service.
Victron are probably top of the range, while cheaper brands like MakeSkyBlue and EPever are also good value – but treat imports of unclear origin with care.
ABOUT THE AUTHOR

Duncan Kent has been evaluating and reviewing yachts and marine equipment for the past 30 years
Enjoyed reading this?
A subscription to Yachting Monthly magazine costs around 40% less than the cover price .
Print and digital editions are available through Magazines Direct – where you can also find the latest deals .
YM is packed with information to help you get the most from your time on the water.
- Take your seamanship to the next level with tips, advice and skills from our experts
- Impartial in-depth reviews of the latest yachts and equipment
- Cruising guides to help you reach those dream destinations
Follow us on Facebook , Twitter and Instagram.
Service Locator
- Angler Endorsement
- Boat Towing Coverage
- Mechanical Breakdown
- Insurance Requirements in Mexico
- Agreed Hull Value
- Actual Cash Value
- Liability Only
- Insurance Payment Options
- Claims Information
- Towing Service Agreement
- Membership Plans
- Boat Show Tickets
- BoatUS Boats For Sale
- Membership Payment Options
- Consumer Affairs
- Boat Documentation Requirements
- Installation Instructions
- Shipping & Handling Information
- Contact Boat Lettering
- End User Agreement
- Frequently Asked Questions
- Vessel Documentation
- BoatUS Foundation
- Government Affairs
- Powercruisers
- Buying & Selling Advice
- Maintenance
- Tow Vehicles
- Make & Create
- Makeovers & Refitting
- Accessories
- Electronics
- Skills, Tips, Tools
- Spring Preparation
- Winterization
- Boaters’ Rights
- Environment & Clean Water
- Boat Safety
- Navigational Hazards
- Personal Safety
- Batteries & Onboard Power
- Motors, Engines, Propulsion
- Best Day on the Water
- Books & Movies
- Communication & Etiquette
- Contests & Sweepstakes
- Colleges & Tech Schools
- Food, Drink, Entertainment
- New To Boating
- Travel & Destinations
- Watersports
- Anchors & Anchoring
- Boat Handling
- ← Technology
What You Need To Know About Boat Solar Panels
Advertisement
Sunshine and boats are a natural together, so why not use all that free energy? Here’s the lowdown on solar panel selection and installation

I first embraced the idea of solar power while up a pole (literally) in the Atlantic Intracoastal Waterway replacing dead batteries. It was the early 1980s, and I was maintaining buoys, beacons, and other such Aids To Navigation (ATON) for the U.S. Coast Guard, replacing massive, nonrechargeable batteries with rechargeable solar-powered ones. The higher-ups said the solar rechargeables would last six years – twice as long as the one-shot batteries. As the deck-ape in charge of lugging all those batteries up and down the ladders, my back and I immediately appreciated the whole “free power from the sun” thing, a concept I continue to embrace.
The strategy behind s olar energy onboard is simple: A solar panel converts sunlight into electricity, after which wiring conducts it to your batteries for storage until needed. Solar panels are used to keep batteries or banks charged rather than to power equipment directly. This arrangement allows the panels to store generated power whenever produced, while providing a steady source of power to a piece of equipment even when the panel is producing no power.
While they do require an initial outlay, solar panels can easily pay for themselves in money saved and independence gained over their service life. They’re noiseless, have no moving parts, and they provide free electricity for years with minimal maintenance. Solar panels also have the benefit of being modular, letting you start small and add more as your power requirements increase.
The benefits of solar
Almost any boat can benefit from solar power. Whether at a slip, mooring, or on a trailer, boats can keep their batteries topped off without the need for external power. You can also use solar power to supplement or even replace other onboard charging sources, reducing or eliminating the need to run engines or generators to keep batteries topped off (a wasteful practice that burns fuel while wearing down the costliest pieces of equipment onboard).
While underway, it’s a plus to be able to recharge a dead battery in an emergency – say, to operate a VHF radio or navigation gear. While dockside, solar panels keep batteries charged and vital systems (such as bilge pumps) up and running without the need for shore power.

Just about any boat can benefit from solar power, whether it’s to keep batteries topped off or supplement other onboard charging sources.

Mount solar panels where they are exposed to maximum sunlight but do not interfere with operation of the vessel.

Bottom: Something as simple as the shadow of a line or shroud can reduce or halt output.
Types of panels
Solar panels contain photovoltaic cells – small silicon semiconductor devices that convert sunlight into electricity. Each cell generates between 0.45 and 0.5 volts, depending on exposure to direct sunlight. Cell size determines amperage, with a 3-inch cell producing roughly 2 amps, a 4-inch cell a little over 3 amps, and a 5-inch cell around 5 amps.
Construction-wise, the three main types of solar panels are monocrystalline, polycrystalline, and amorphous (or thin-film) technology.
Monocrystalline panels have been around the longest and remain the most popular. The panels are constructed of thin slices of crystal silicon (each cell is cut from a single crystal) housed in a rigid, aluminum frame and covered with tempered shatterproof glass. The panels have a uniform black, blue, or gray appearance and are generally quite rugged, although they can be cracked or broken if subjected to extreme abuse.
Monocrystalline panels have the longest service life of the three types. With a conversion efficiency of around 17%, they’re also the most efficient and have the highest electrical output per area, but they are also the most expensive.
Polycrystalline cells are sliced from a cast silicon block and have a shattered glass appearance. Built in much the same way as monocrystalline panels, they’re rectangular, giving the panel itself a tiled look. Their life span is similar to monocrystalline panels, and while their conversion efficiency is lower (by 14%), they’re also a bit less expensive.
Amorphous panels are made by placing a thin film of active silicon on a solid or flexible backing (such as stainless or aluminum sheeting) depending on whether the panel is to be rigid-framed and glass-fronted or flexible. Flexible amorphous panels, in which cells are sandwiched between rubber and polymer covers, are light and tough enough that you can walk on them and, in some cases, even roll them up for storage.
This type of solar panel is also better if shade is an issue. With crystalline panels, even the thin shadow of a rope or shroud across one cell can reduce or halt output of an entire module. Amorphous panels have “bypass” diodes that essentially turn off shaded cells and provide a current path around them. Some monocrystalline panels also have bypass diodes, but this feature comes at an increase in cost.
Amorphous panels are the least expensive of the three types, but their efficiency is also lower – around 8%, or roughly half that of a monocrystalline type. This lower output is somewhat mitigated in newer panels, however, which use three-layer construction. Each layer absorbs different colors of the solar spectrum, so the panel will deliver more power longer each day and during lower light conditions than the other two types.

The charge controller should be mounted below decks and as close to the battery as possible.

Follow manufacturer instructions for wire connections.
Planning the system
While factors such as cost, mounting options, and output are important, a successful installation depends on knowing what you want the system to accomplish. Is the goal to float-charge a single battery or supplement an overall vessel energy plan? Answering these questions up front will help determine the type, size, and number of panels required.
To understand the process better, let’s walk through the basic steps to determine power requirements and installation considerations for a single solar panel installation. While the example itself is simple, the steps are the same used to plan more complicated installations.
For our example, the goal is to install a solar panel to provide charging for a single 12-volt, 100-amp-hour wet-cell battery used to power an automatic anchor light on a moored vessel.
The first step is compiling a daily power consumption estimate to determine how much solar power is needed.
The daily self-discharge rate for a wet-cell battery is roughly 1%, meaning our 100-amp-hour battery requires one amp every 24 hours just to maintain the status quo. The anchor light draws 50 milliamps per hour of operation, and we’ll assume it operates 10 hours each night. Multiplying current draw (50 milliamps) by hours of daily operation (10) generates a daily energy expense of 500 milliamps or .5 amps.
This means our solar panel must meet a minimum daily energy tab of 1.5 amps – one amp of battery self-discharge rate plus .5 amps of power draw for the anchor light.
Next up is figuring out panel size and the best mounting location. For our example, let’s assume the panel will be a horizontal, fixed-mount installation. A 10-watt horizontally mounted panel should generate between 3- and 5-amp hours per day.
We’ll need at least 13 volts to fully charge our 12-volt battery. As most solar cells generate at least 0.45 volts, you’ll want a panel with a minimum of 33 cells, which should provide around 14.85 volts.
Keep in mind that’s the minimum needed, which may not be enough once you factor in a few cloudy days. Most panels are designed to generate between 15 and 20 volts to overcome problems like cloudy days or inherent electrical resistance within the panel or installation components. While this higher voltage lets you make up for less electrically productive days, it also means you’ll want to install a solar charge controller (voltage regulator) to avoid battery damage due to overcharging.
Attempts to plan a system that tries to use the output of the panel and capacity of the battery to prevent overcharging (and avoid the installation of a charge controller) is false economy and should not be done. The system will never meet its full output potential and, worst case, can damage the battery due to overcharging.
A word on ‘charge controller confliction’
If your vessel has multiple charging sources, such as solar panels and a wind turbine, a crucial but often overlooked consideration is “charge controller confliction.” In short, this is an issue where the charge controller for your solar panel and the charge controller for your wind turbine are internally adjusted to the same maximum charge voltage set point. This means they are constantly fighting each other to be the dominant power source, which results in diminished overall charging output and performance. An in-depth article on this issue can be found at missioncriticalenergy.com (in the website footer, click “Superwind Turbine Manuals & Technical Bulletins.” Under the header “Charge Controllers,” select the document “Resolving Charge Controller Confliction”).
While this article addresses charge controller confliction at remote, off-grid sites, the information provided is also applicable to vessel installations. — F.L.
Location and mounting
Solar panels should be mounted in a location where they are exposed to the maximum amount of sunlight but do not interfere with operation of the vessel or the movement of passengers and crew. Solar panels will typically be either fixed or mounted on some type of movable bracket that allows you to actively point the panel toward the sun for maximum output. Both methods have their pros and cons. Fixed panels (which are normally mounted horizontally) don’t produce as much power as a panel that can be adjusted to face the sun. The downside is that adjustable panels must be aimed throughout the day to maximize their output.

Use good quality, marine-grade heat shrink connectors (top) and liquid electrical tape (right) to create airtight, waterproof seals and reduce corrosion.

Installation
After choosing and mounting your panel, it’s time to connect it. The first thing you need to determine is the size (gauge) of the wiring to be used. Multiply your panel’s rated amp output by 1.25 (which adds a 25% safety factor). Then measure the length of the entire wiring run, panel to battery, and multiply by 2. Once you have these two numbers, refer to the American Boat and Yacht Council’s (ABYC) 3% voltage-drop table for wire size. Ancor Products offers a handy wire calculator on its website ( ancorproducts.com/resources ).
Always use good quality marine grade connectors and tinned, multi-stranded copper wire with vinyl sheathing. The wire will run from the solar panel to the charge controller first, then to the battery. Try to keep the wire run as short as possible, and if it transits an external deck or cabin house (it likely will), be sure to use an appropriate weatherproof deck fitting.
The charge controller should be mounted below decks and as close to the battery as possible. You’ll always want to follow the manufacturer’s instructions for connections, but in a typical installation you’ll connect the solar panel’s positive (red wire) lead to the charge controller’s positive input wire or terminal and the negative (black wire) lead to the charge controller’s negative input wire or terminal.
Next, connect the charge controller’s negative output to the battery negative terminal and the controller’s positive output to the battery’s positive terminal via an appropriately sized in-line fuse (or circuit breaker). ABYC recommends these be installed within 7 inches of connection to the battery or other point in the DC system. To reiterate, the installation of the charge controller can vary among models, so follow the manufacturer’s installation instructions.
Finally, ensure all connections are waterproof and secure any loose wire runs with wire ties and cable clamps for a neat installation. Then get ready to lean back and soak up some free sun.
Related Articles
The truth about ceramic coatings for boats.
Our editor investigates the marketing claims of consumer-grade ceramic coatings.
Fine-Tune Your Side Scan Fishfinder
Take your side-scanning fishfinder off auto mode, and you’ll be spotting your prey from afar in no time
DIY Boat Foam Decking
Closed-cell foam flooring helps make boating more comfortable. Here’s how to install it on your vessel
Click to explore related articles
Frank Lanier
Contributing Editor, BoatUS Magazine
Capt. Frank Lanier is a SAMS Accredited Marine Surveyor with more than 40 years of experience in the marine and diving industries. He’s also an author, public speaker, and multiple award-winning journalist whose articles on boat maintenance, repair, and seamanship appear regularly in numerous marine publications worldwide. He can be reached via his YouTube channel “Everything Boats with Capt. Frank Lanier” and website captfklanier.com.
BoatUS Magazine Is A Benefit Of BoatUS Membership
Membership Benefits Include:
Subscription to the print version of BoatUS Magazine
4% back on purchases from West Marine stores or online at WestMarine.com
Discounts on fuel, transient slips, repairs and more at over 1,200 businesses
Deals on cruises, charters, car rentals, hotel stays and more…
All for only $25/year!
We use cookies to enhance your visit to our website and to improve your experience. By continuing to use our website, you’re agreeing to our cookie policy.
- Forums New posts Unanswered threads Register Top Posts Email
- What's new New posts New Posts (legacy) Latest activity New media
- Media New media New comments
- Boat Info Downloads Weekly Quiz Topic FAQ 10000boatnames.com
- Classifieds Sell Your Boat Used Gear for Sale
- Parts General Marine Parts Hunter Beneteau Catalina MacGregor Oday
- Help Terms of Use Monday Mail Subscribe Monday Mail Unsubscribe
Solar Panel Mounting
- Thread starter Roy 845
- Start date Jan 28, 2021
- Forums for All Owners
- Ask All Sailors

I think you are correct to be concerned about the saltwater dunking. On deck or on an arch the panels get sprayed but not dunked. The panels are weather proof, but I doubt they will survive many submerges especially at speed. Another factor is sun angle, on the sides of the hull the sun will hit the panels at an oblique angle which will not provide much power.

dlochner said: Another factor is sun angle, on the sides of the hull the sun will hit the panels at an oblique angle which will not provide much power. Click to expand

Timm R Oday25
As an owner whose boat resides on a mooring all summer, I understand your concerns . We use a 20 watt solar panel mounted on the stern railing . It's completely out of the way all the time. It is held with quick clamp connectors that allow for easy tool less removal come fall . At 22' ,you are going to be hard press to have the space . We also have two group 31 batteries with a "Sun" brand controller . With led lights our electrical consumptions is minimal . The auto pilot is easily our biggest user of amps. With a 20 watt solar panel and a 8 horse outboard that puts maybe 2.5 amps back into the batteries ,we can easily stay out for a week .
Your equipment list does not tell us anything about the usage. The fact that you have a single battery and you seem to indicate that it keeps fully charge gives an indication that your usage is not that intensive, but in order to nail down your need it would be best if you conducted a Power Survey. Every unit or fixture on the list should indicate in a label how many Watts or Amps it consumes. Using the formula Amps= Watts / Volts list the number of Amps every unit uses. That unit will be assigned to the number of Amps drawn in one hour or (Ah). Deep cycle batteries are rated in Ah. The normal wet cell Group 24 will have about 90 -95 Ah and the Group 27 about 100-105 Ah. Prepare a template indicating 1) name of fixture 2) Number of Ah it is rated at, 3) Approximate time it is used in a 24 hour period, 4) Multiply Ah by hours or fractions of (a microwave oven may use 66 Ah but if only used for 3 minute to heat a cup of water then its use is 3/60 * 66 or 3.3 Ah. Estimate the usage for every item and calculate the Ah draw for each of them. 5) Add all the Ah calculated and you will have a very good idea of your actual daily usage. In order to extend the life of wet cell batteries they should not be drawn down to more than 50% of their capacity. In other words a 100 Ah battery should only be discharged to 50Ah before being recharged. If your usage survey exceeds the 50 Ah then you surely need a 2nd battery. The thing about battery health is that they should be charged to 100% every time after being used. A 100W panel considering efficiency losses renders about 7.5 Amps in optimum sunlight conditions. Given that you only have an average of 5 hours daily of good sun you can only replenish approximately 37 Ah per day. Since good sun conditions cannot be guaranteed day after day then you must use a weekly average which resembles the conditions in your area. Let's say you only have 4 days of good sun and 3 days of partly cloudy so you can get 148 Ah for those 4 days and perhaps 60 for the other 3 days for a weekly total of 208 Ah or a daily average of 30 Ah. Panels that are not pointed directly at the sun or at an angle will not deliver an optimum output. The placement of the panels should be in a location where it can catch the most optimum sunlight for the longest time. Check the resting voltage on your battery with a digital multimeter. With a battery at rest (no charge, no loads) for at least two hours a fully charged battery should have a voltage of 12.7V Anything less is undercharged. It is understandable that with a solar panel it may take 2-3+ days to attain full charge instead of 5 to 6 hours from a shore power charger and that is the sacrifice of battery life we make. If it is taking more than 2 to 3 days then the solar panel is not being adequately pointed or has lost efficiency. Consider the adequacy of the solar panel to charge two batteries.

My boat is on a mooring, I use a 160 watt flexible solar panel mounted on the cabin top under the boom. I drop the dodger and bimini when we race so they were not good options for mounting. Sure it's not ideal but it's not that bad. The boom only shades it if the boat is pointing directly at the sun which is rare. I used velcro fasteners- I don't like putting holes in my boat. I have had a little corrosion in the connectors hopefully some dielectric grease will fix that. The 160 watt is undersized for my bank, I need to add more for cruising - they'll go on the dodger next summer.

When we had our C30, it came with a semi-flexible solar panel( approx 15" x 48" +/-). When we left the boat for the week, the panel was put out on the cockpit seating. For sailing, the panel was stored below in the aft berth. The panel had sufficient wire run to allow placement, movement and storage. Worked well for 10 years. Toward the end, the seagulls caused a few dings from dropping shellfish.

TimFromLI said: I have had a little corrosion in the connectors hopefully some dielectric grease will fix that. Click to expand
Lear Chemical Research Corporation
RitSim said: When we had our C30, it came with a semi-flexible solar panel( approx 15" x 48" +/-). When we left the boat for the week, the panel was put out on the cockpit seating. For sailing, the panel was stored below in the aft berth. The panel had sufficient wire run to allow placement, movement and storage. Worked well for 10 years. Toward the end, the seagulls caused a few dings from dropping shellfish. Click to expand
- This site uses cookies to help personalise content, tailor your experience and to keep you logged in if you register. By continuing to use this site, you are consenting to our use of cookies. Accept Learn more…
Captain Curran's sailing blog
~ a collection of sailing adventures from Alaska to Cabo
October 6, 2014
Solar panels for boats: an easy installation guide., marine solar panel installation.
- I am writing the following instructions for boat people or RV campers.
- I describe a basic set up that provides a charge onto your 12 Volt DC battery bank.
- If you want to use this system to power your home, then you'll also need an inverter to switch the 12 Volt DC electricity to 110 Volt AC.
Ok, here's my simple DIY instructions for solar installation on a boat or an RV camper.
How to install solar panels for boats, step by step guide for installing a solar panel boat system, faq: what size panel should i get, faq: which brand of solar panel is best, faq: do i need a controller, faq: how did you mount your panel on your stern rail, faq: how do you wire up the panels/controller/battery, faq: how much will this whole solar panel project cost, solar power for boats price breakdown, okay - good luck with your marine solar panel installation , capt. curran, 60 comments:.
Heany - Don't hesitate, the beauty of this system is that there are no moving parts, which means maintenance is minimal.. turning photons to electrons
Good question - visit your local machine shop They should have barrels of aluminum flat panels You want 12-16 inch long, need to measure panel That's it Then drill holes and strap in on the rail Have fun!
Thanks Douglass - all the best..
Great information, thank you! Where did you purchase the white plastic rail mounts?
Hello Philip Magistro, I bought them at a boating store in Seattle - called Fisheries Supply - they may ship. But I would also check your local west marine - they are standard stern rail mounts - they fit lots of other stuff as well as solar panels. Good luck !
Excellent, glad it was helpful. I'm about to post a couple new photos of the system. Everything is still working great.
Two questions 1. Is a 30w panel large enough to trick charge two 12v batteries? 2. How large an in-line on the positive lead to the battery?
Hello - Yes, a 30watt panel is large enough to trickle charge 2 12 V batteries. That is the set up I have on my boat - it works great - even in mixed sun/cloud conditions. When you ask 'how large' an in-line on the pos. lead - I am assuming you're asking the guage. I can't give the exact guage that is suited for your set-up. But, I know that the reasonable range is between 10-14 awg. Hope that helps.. Cheers
Kevin Thanks. Great info! I was actually trying to ask type and size of fuse on the positive lead to the battery. Fingers! Cheers Bill Pierson
Thanks for a great post! I'll go with the Renogy 200 Watt kit. I know it's not as adventurous, but easier and faster. And time is money :)
Lucas, I hear ya. Time is money - best of luck with that kit. I think you've made a wise decision.... Kevin
Thanks a lot Kavin for your guidance on installing a solar panel on boat. As solar panels are the most effective and the best way of generating electricity these days so everybody wants to install a solar panel of their own. But installing a solar panel in the boat is little challenging. Thanks for sharing the step by step guidelines, it is definitely going to help the readers.
Great article. A few questions: The article explains how to hook it up to one battery. But I have a system with two house banks of two bateries each, as well as a starter battery. How do I ensure that the trickle charge gets to all give batteries? Or do you just hook it up to the starter battery? How does this system interact with my charger?
Mary, I have a similar battery bank - but the two are connected. I connect the leads of the solar panel to my house batteries. However, if they are not connected - then I would connect the leads of your solar panel to the starter battery.
Mary, I would get a MorningStar SunSaver Duo controller which can charge 2 batteries (or banks thereof) and set the 2 house banks in parallel on the controller's Batt1 and the Starter Battery on Batt2. This controller has the option to charge 90/10 or 50/50, 90/10 is best for this setup because the starting battery doesn't need much, just enough to top-it-off.
Hi Kevin, I purchased the Renogy 100w panel with controler. I like your plastic rail mounts. Where can I find those. I plan to mount this on the stern of my 73, 27' Catalina stern rail. Thanks, Chris
Chris, I got mine at a boat store in Seattle called Fishery Supplies. I just looked it up on their website. Here's the page for those rail clamps. https://www.fisheriessupply.com/sea-dog-line-removable-rail-mount-clamps-327199-1 Made by a company called Sea Dog. Good luck - Kevin
I have a 20 volt panel, single marine battery, with a controler working without problem for about 4 years. While motoring out of the marina the controler caught fire. I did not have a fuse installed as you described in your installation guide. Any idea what might have caused this? Barry
Barry Curran, That is an odd and unfortunate situation. I am not an expert on safeguarding circuits, however I can weigh in with my opinion. I do think that the installation of a circuit fuse would help prevent over-charge or over-heating happening within the circuit. I think - assuming the over-charge was happening throughout the circuit - that the fuse would have blown, thereby salvaging your controller. However, there is a chance that a diode or some other internal circuit on the controller was the weak link. In that case, I don't believe a downstream fuse would have helped save your controller. I would install a fuse and get yourself a new controller. Best of luck! Kevin Curran
Just an helpful clarification on the purpose and location of the fuse. The fuse is to protect the wire, and should be placed as close to the origination of the power source as possible which, in this case, is the positive lead near the solar panel. We're all use to hearing about locating the main fuse on a boat as close to the battery as possible; that's because that's where the power comes from. Also, the fuse should be sized based upon the length and gauge of the wire.
Thanks for that additional insight on the location of the fuse! Sorry I didn't see this comment earlier.
Thanks for sharing the helpful guide to install solar panels .
Thanks for sharing article solar installation on boats it is really informative.A Solar panel is typically a panel that absorbs solar energy and uses it as a source of energy to generate electricity. They are basically made up of solar cells or the photovoltaic cells that are arranged as a photovoltaic array making up the photovoltaic system.I know a place one of the best solar installation company provides best solar services and products that are not just economical, but also efficient with customized solutions to offer you the best from our vast range of affordable models...
Greetings, How lucky am I to have happened upon your easily understood blog. Stupid question: can I mount the solar panel flat on the deck of my Nonsuch sailboat? (I know: don’t step on it!). Will it be worthwhile? (It can’t go on the stern rail).
Yes, that can be done. If you have a bimini or any cover in your cockpit, that is probably a better location. But flat on the deck can work, you can create a border around it to prevent falling on it...
Thank you so much for your excellent blog. I am considering a solar system for my 28' Catalina sailboat. Battery question: Any problem using solar systems with AGM batteries? I have two, house and starter battery.
Hmmm, that's a good question. I have never heard of any issue with AGMs on a solar system. Any other readers here have comments?
Selecting the correct charger depends primarily on the design of your deep cycle battery, so the first thing you need to do is determine the construction type of your battery. TrollingBatteryAdvisor.com This is likely to prolong the life of each battery and save you money in the long run.
Great blog! Can I leave my solar panel attached to the battery while I'm drawing from the battery to run my trolling motor?
Anonymous, Yes, you certainly can. There is no issue with drawing from a battery that is being fed energy from a solar panel. Enjoy Captain Curran
Thanks for sharing this article here about the solar panels for boats . Your article is very informative and I will share it with my other friends as the information is really very useful. Keep sharing your excellent work.
Great to hear! Glad the post was helpful..
Thanks a lot, Captain Curran and co-Captain Jessica for a nice and informative article about "Marine solar panel installation". This article will surely help the sailor in the Sea. And using a solar panel in the mid-sea is a very nice idea as an alternative source of power. Best wishes from SolarPandit
Thank you very much, Captain Curran and co-Captain Jessica, for a very interesting and insightful post on "Marine solar panel installation." This article will undoubtedly assist the sailor at sea. Using a solar panel and in the middle of the sea as an alternate source of electricity is also a great idea.
Hello all, Great to see the article has been helpful for those putting panels on their boat. Don't hesitate to reach out with any questions. I changed the notification, so I should be pinged when someone asks a question. Fair winds!
The Renogy 30 Watt Solar Panel is an excellent choice for light energy users, while the 100 Watt Solar Panel is preferred for moderate energy users. And remember to use a suitable quality controller like the Morningstar SunSaver-10 to control the panel's charge and prevent over-charging the battery.
Their step-by-step guide for installing solar panels on boats is incredibly helpful, and I appreciate the personal touch of sharing their own experiences and the success they've had with their solar panel system. The detailed explanations, recommended products, and estimated costs make it easy for someone like me to envision completing this project over a weekend. I'm definitely inspired to take on this DIY installation and enjoy the freedom of generating my own energy while sailing.
I can’t really help but admire your article your topic is so adorable and nice.
Forbidden love in a mesmerizing supernatural universe. Anime like Devils Line
Captain Curran's guide to installing solar panels on boats is a real lifesaver! After following his easy-to-understand steps, I completed my own installation over a weekend, and now my boat's batteries are always topped off during my fishing trips in the Chesapeake Bay. No more worries about a dead battery spoiling the fun!
Hello Captain, Great article, thank you. Our vessel has (6) 6 volt golf cart batteries, a 2000 Watt inverter, plus a generator. I want to limit the generator recharge time by installing a 100 or 200 watt kit that you recommend. My question is can I just connect the pos. and neg. marine grade wires from the controller directly to my battery bank pos. and neg. Thanks, John
This article on installing solar panels for boats brought back memories of my own sailing adventures along the coast of California. I remember the frustration of being stranded due to a dead battery and the relief that came with finding a solution. Capt. Curran's step-by-step guide is not only practical but also reflects his passion for sustainable energy solutions, making it a valuable resource for fellow sailors.
Post a Comment
🚚 FREE US SHIPPING ON ORDERS OVER $25 🚚
The Complete Guide to Solar Panel Mounts for Boats (and Where to Position Them)

How many boaters invest hours researching solar panels? They go all wide-eyed at the shiny panels, marveling at their ingenuity, but how many consider the humble mounts those bright panels sit on?
Let's face facts: Solar panels get all the glory, but spare a thought for the mounts? A good mount can help you get the most out of your solar, increasing your capacity by up to 40 percent.
So maybe it's time for mounts to step out of the shadows of solar panels and into the sunlight (bad pun, I know). Seriously, let's give them some glory.
The type of mounts you have depends on what you want the solar to do and the space available. Is it to charge a cell phone or mobile GPS unit? Or is it to power your entire onboard needs when stationary?
The engine does the hard work when you're moving, so you only really need solar when you're moored up, right? To find out what solar mounts are right for you, we first need to discover what type of boater you are.
Are You a Liveaboard Boater?
Being a liveaboard boater is a different experience to being a leisure boater. You can't just plug-in to a marina or get into an SUV and tow the boat home at the first sign of a rain cloud. The boat is your home.
So power is something you need to manage carefully. And the right solar panel mounts for your boat are essential to optimize the performance of your solar panels.
Are You a Leisure Boater?
As a leisure boater, you'll have different priorities than a liveaboard, and your need to manage power is not so crucial. You'll watch for sunny weather and head out in the boat for a day or weekend excursion . So why do you need solar?
Coolers need power to chill their contents and cell phones need charging. But in the main, the boat engine will power the electrical equipment onboard, because there won't be long periods when you're not moving, unlike a liveaboard boater.
Liveaboard or not, if the sun's power reduces your costs, minimizes the engine's wear and tear and you can afford it, why not?
What Are the Best Boats for Solar Panel Mounts?

Pontoon Boats
It depends on the size and shape of your pontoon boat . Smaller vessels are designed to make the most of the available space, which means seating and guests take priority on the deck .
Newer models, like the Cypress Cay Sea breeze SL 250, have virtually no surface to put solar mounts. Some pontoons have living space.
The Canadian manufacturer South lands builds hybrid pontoon boats, but the average pontoon vessels are for day trips and fishing. Some pontoons have fixed canopies so solar mounts can fit the available flat surfaces .
If you're in the market for a pontoon boat, solar panels and how to mount them are way down on your list of priorities.
Yachts offer a multitude of opportunities to fit solar mounts. Pole mounts are popular with yacht owners, as are fixed and angled mounts . And because most yachts are seafaring, there's little to obstruct the sun's rays way out in the ocean.
In addition, yachts are designed to travel farther, making extended periods onboard inevitable. This means that choosing the right mount is crucial to achieving maximum input.
Canal Boats
A canal boat's design makes them ideal vessels to fit solar mounts. Their robust, steel roofs can withstand the most durable solar panel mounts. This means larger panels can be attached to increase onboard power input.
Because of their long shape, canal boats also allow various panel mount options too. In fact, the only solar panel mount that's unsuitable for a canal boat is the pole mount because of low canal bridge clearances.
Motor Cruisers
Motor cruisers, because of their shape, often have plenty of space for panel mounts to be fitted. With long flat roofs, most motor cruisers (even the mid-range ones) are excellent boats for fixed, angled and even pole mounts .
Featured Boat Care Product
Check Price on Amazon - Better Boat's exterior cleaning kit comes with everything you need to keep your boat clean and shiny from bow to stern. It comes with boat soap, a soap foam spray gun, two microfiber towels, a large sponge and a boat eraser.
The Best Ways to Fix Solar Panel Mounts to Your Boat
Glue adhesives.
There are numerous products available to bond panel mounts to any surface. If you choose this option, it's worth remembering there's some prep work before applying the glue.
Most manufacturers recommend cleaning the surface area before bonding, and some recommend lightly sanding the surface before applying adhesive.
I recommend this Sikaflex-252 White Polyurethane Adhesive The most significant advantage of this glue is that once dried, it can be sanded and painted. Oh, and when choosing adhesives, there's the small matter of no holes .
The fixing solution you choose depends on the boat you have and where it's used. Gluing solar mounts on a seafaring yacht may not be the best idea, especially if you're mid-Atlantic in force nine gales.
You want to know that the mounts are going to do their job and hold your solar panels in place. This Temco Z Bracket Stainless Steel Mount Kit (Available on Amazon) can be easily installed on solar panels. The stainless steel material means it'll never leave rust on your boat.
You're gonna need to bolt the mounts to the roof. Just make sure that when you've drilled the holes, you have enough marine-grade sealant to plug the gaps.
Panel Sizes Versus Types of Mounts for Your Boat
Some solar panel mounts aren't suitable for different-sized panels. The most robust by far is the fixed mount system. If you cruise a lot and don't mind the panels being permanently flat, then these mounts can handle whatever weight you throw at them.
If you want tilt and angled mounts, then you'll need to check with the manufacturer what the maximum load is. The general rule of thumb is: the larger the mount, the bigger the panel it will hold.
Panel weights 100 w or less will fit cheaper mounts. If you want panels over 100 w, check with the bracket manufacturer to see the maximum load weight.
The Best Way to Position Solar Panel Mounts on the Boat
Your first consideration is the obstructions that might hamper the performance of the panels. Get it wrong and all that hard-earned cash you shelled will be for nothing.
Putting a fixed mount for solar on a deck of a motor cruiser isn't any good if you then use a retractable canopy to shield you from the sun and it blocks the panel producing energy. You've just wasted hundreds of dollars.
Another consideration is the mount type, especially if you're stationary for long periods. Tracking the sun by tilting the panels when not moving will increase power input massively.
If you're mostly moving and rarely still, then flat is best. This position optimizes the sun's rays, drawing power in whichever position the boat sits.
Look at your own boat. Does it have large flat areas, preferably high up and unaffected by shadows or obstructions? If the answer is yes, then the next consideration is what type of solar panel mount is best for you.
The Different Types of Solar Panel Mounts for Boats

Fixed Mount
The HQST Z-Bracket is an excellent example of a fixed mount. It's lightweight and inexpensive. And I mean cheap!
It isn't complicated to fit, although it does require you to drill holes in whatever surface you attach it to. This bracket also enables you to mount the panel to many styles of vessels. The manufacturer even recommends them for RVs.
The other advantage of a fixed mount system is its ability to handle panel sizes from the smallest all the way up to 300w. While these look like a good option, it's worth remembering that if you need the flexibility of moving the panels to chase the sun, fixed mounts won't be for you.
On an ocean-going yacht or a pontoon boat (space permitting) on a lake, the fixed mount system would be worth considering. There'll be minimum obstructions, and while you're always moving, the flat fixed mounts will optimize the charge into the batteries.
There are other types of fixed-mount systems that don't require any drilling.
The Renogy Solar Panel Drill-Free Corner Bracket is a good choice if you don't want to drill holes in your boat roof. They aren't as cheap as the Z-Brackets, but primarily they do the same job.
If you own a boat with a fiberglass body, drilling into the roof simply isn't an option. So how are they fixed? Good old bonding adhesive like Sikaflex 252 (Available on Amazon) .
Adjustable Mounts
The Renogy Adjustable Tilt Mount Bracket mount enables the solar panel to be adjusted to directly face the sun, a feature commonly used when the boat is still.
For the liveaboard boater, the adjustable mount is crucial. By adjusting the angle of the panels, you can increase the input of energy by up to 40 percent.
This particular model can only support a maximum panel of 150w, and the adjustment angle does decrease depending on the size of the panels. So it's worth considering that the max 150w panel, while the most powerful, could give less performance with this bracket, because of the angle that it can be mounted.
What makes this mount different is that the brackets that attach to the roof of your boat are independent of each other, rather than on a long aluminum bracket joining them together.
It means the roof doesn't have to be completely flat. Canal boats would benefit from this type of bracket because they have slightly curved roofs.
The Link Solar Adjustable Rack Solar Panel Mount is another adjustable bracket, enabling the maximum performance of the panels.
It's a rack system, so it has a long strip bracket that attaches to the roof. The beauty of this system is the capacity it can handle.
If you invest in the 41-inch bracket, it'll take the weight of a 300w solar panel. It may cost more, but given that you'll probably only need two brackets if you're mounting 300w solar panels, it could still be a cost-effective choice.
Just remember where you're going to mount it. Because it's a rack system panel mount, it only fits on perfectly flat surfaces.
AM Solar 35mm Tilting Mount Okay, I'm a bit sneaky here. Technically, these mounts are for RVs. But if it attaches to RVs, it'll attach to your boat. They're light, compact and give vital adjustability to maximize the sun's power.
This mounting system's advantage is you'll avoid drilling holes in your roof. Each bracket has a VHB tape strip, which bonds to most surfaces. Fiberglass gives the best bond, but if it works for RVs, then metal surfaces will work too.
A word of caution: These brackets attach by drilling into the solar panel's side. This is the crucial bit: If you're piercing the side of your panel, there's a strong chance you'll invalidate the warranty.
It's worth checking before you do. AM Solar sells compatible panels with pre-drilled holes, which massively cuts down on your choices and ability to shop around for the best price.
Pole Mounts
Missouri Pole Mount
Let's start with a positive: This pole mount is 100% American. That's got to be a good thing, right?
Pole mounts are excellent for panels that can be raised up to avoid obstructions. They're also good for boats with limited solar panel mounting space.
Pole mounts are popular with yacht owners due to their maneuverability and height adjustment properties. This particular pole system can handle two 100w panels, so there's no need to compromise on the energy you create.
What We've Learned
All the solar panel mounts featured are value for money. What to consider is the panel size. Is it better to have two 300w panels, reducing the number of solar mounts? Or do you go for six 100w panels, increasing the mount's overall cost? That'll depend on your boat's available space.
By far, the easiest to use is the fixed flat system . Glue or bolt the brackets on and away you go. No fuss. But again, mounting space may be an issue, so this type of mount won't be for everyone.
The most efficient is the angled, adjustable mount . Liveaboards should consider this when buying solar. Increasing your panel's performance with the ability to angle towards the sun is vital if you're stationary for extended periods.
In winter, when the sun sits lower in the sky, you'll reap the benefits of angled mounting systems for sure.
To clean your solar panels, simply rinse with a boat hose and nozzle and swipe with a silicone squeegee . This is a quick task to do when you've got out the boat soap or hull cleaner for the rest of the vessel.
One Final Point

- choosing a selection results in a full page refresh
- New Sailboats
- Sailboats 21-30ft
- Sailboats 31-35ft
- Sailboats 36-40ft
- Sailboats Over 40ft
- Sailboats Under 21feet
- used_sailboats
- Apps and Computer Programs
- Communications
- Fishfinders
- Handheld Electronics
- Plotters MFDS Rradar
- Wind, Speed & Depth Instruments
- Anchoring Mooring
- Running Rigging
- Sails Canvas
- Standing Rigging
- Diesel Engines
- Off Grid Energy
- Cleaning Waxing
- DIY Projects
- Repair, Tools & Materials
- Spare Parts
- Tools & Gadgets
- Cabin Comfort
- Ventilation
- Footwear Apparel
- Foul Weather Gear
- Mailport & PS Advisor
- Inside Practical Sailor Blog
- Activate My Web Access
- Reset Password
- Pay My Bill
- Customer Service

- Free Newsletter
- Give a Gift
How to Sell Your Boat

Cal 2-46: A Venerable Lapworth Design Brought Up to Date

Rhumb Lines: Show Highlights from Annapolis

Open Transom Pros and Cons

Leaping Into Lithium

The Importance of Sea State in Weather Planning

Do-it-yourself Electrical System Survey and Inspection

Install a Standalone Sounder Without Drilling

Rethinking MOB Prevention

Top-notch Wind Indicators

The Everlasting Multihull Trampoline

In Search of the Snag-free Clew

What’s Involved in Setting Up a Lithium Battery System?

Reducing Engine Room Noise

Breaking Point: What Can Go Wrong With Your Yanmar?

Mildew-resistant Caulks for Boats

Can We Trust Plastic Boat Parts?

Repairing Molded Plastics

Mailport: Marine plywood, fuel additives, through bolt options, winch handle holders

The Day Sailor’s First-Aid Kit

Choosing and Securing Seat Cushions

Cockpit Drains on Race Boats

Rhumb Lines: Livin’ the Wharf Rat Life

Safer Sailing: Add Leg Loops to Your Harness

Resurrecting Slippery Boat Shoes

Tricks and Tips to Forming Do-it-yourself Rigging Terminals

Marine Toilet Maintenance Tips

Learning to Live with Plastic Boat Bits

The Ultimate Guide to Caring for Clear Plastic
- Boat Maintenance
Securing Your Solar Panels

The simplest mounting method for rigid panels is directly to the deck using z-brackets, studs, or glue-on brackets. If mounting to frame above davits or a Bimini top run -inch x 2-inch aluminum bar crosswise under the panel, attach it to the factory-supplied mounting holes, and then attach with rail clamps or brackets (photos 1 & 2) .
Flat panels. Use adjustable studs or spacers to avoid any torque on the panel (photo 3).
Correct mounting points. Frames are factory drilled for proper mounting points that will distribute the load when the boat moves vigorously. If holes are placed incorrectly excessive bending force can result. Alternatively, a supportive aluminum sub-frame can be added to provide additional support. This is particularly advisable for lower cost panels with light-weight frames (photo 4).
Torsional rigidity. Consider a picture frame; with the glass in place it seems reasonably firm, but remove the glass and most are as floppy as spaghetti. Because the panels are sealed to the glass, you don’t want to twist this. You must provide a frame that does not twist as the boat sails.
Frame must be stand-alone. Panel frames are not intended to hold the sides together. We cringe when we see panels with legs attached that apply spreading forces. Of course they delaminate. Bracket-only mounting is only acceptable to a rigid surface, such as a deck or hard top.
Guards. The glass must be protected from impact. However, the guards must not block any sunlight; even a few thin bars can reduce output by 20 percent or more.
Air gap. Panel output is reduced by high temperatures, so an air gap of a least 1-inch should be maintained. A junction box on the underside may also require clearance.
Removable. Though we have never had a failure, Murphy is watching. When we went to add a third panel, easy access to the mounting nuts was a plus.
Railing mounts. While not a favorite, as they must be retracted while docking and in heavy weather, they offer a shade-free setting and minimal weight.
Semi-Flexible panels
The instructions clearly state that regular flexing, even very minor, will result in reduced life of these panels. If mounted on a bimini or dodger the fabric must be firmly tensioned so that there is no pumping in the wind. Even top brands have been ruined by cloth flexing. The dodger must not twist. The panel may not be bent under a snow load.
No ridges. They may not cross ridges on the deck or be placed across a Bimini support bow. They are not suitable for mounting on arches unless continuous support is provided.
Foot traffic. Although some panels can be walked on, this does not mean they should be located where more than rare traffic is possible. Additionally, the instructions specifically state that panels subject to foot traffic be walked on must be firmly bonded to a rigid surface. The panel may not flex under foot in the most minute degree.
Velcro. Semi-rigid panels can mount directly to the Bimini using pockets closed using Velcro flaps, but this can shorten life with flexing. Flexible panels are even more vulnerable here (photo 5).
Screws. Seal all holes against water intrusion by over drilling and epoxy-sealing the core.
Bonding. Use a medium to high strength sealant on the perimeter, such as 3M 4200UV, Sika 295, or Locktite PL S40. Use a weaker bedding compound, such as Sudbury Elastomeric Sealant or Boatlife Caulk for the interior. Continuous bonding is only required if foot traffic is anticipated.
Size. While rigid panels maintain output, semi-flexible panel output will drop noticeably within five years. Plan for it.
3M Dual Lock. Though grommets are supplied, you may find a no-fastener mounting more convenient. These fasteners provides more than five years durability and 15 pounds per square inch pull-out strength.
RELATED ARTICLES MORE FROM AUTHOR
Leave a reply cancel reply.
Log in to leave a comment
Latest Videos

Island Packet 370: What You Should Know | Boat Review

How To Make Starlink Better On Your Boat | Interview

Catalina 380: What You Should Know | Boat Review
- Privacy Policy
- Do Not Sell My Personal Information
- Online Account Activation
- Privacy Manager

- Center Consoles
- Dual Consoles
- Motoryachts
- Sport Cruisers
- Tenders & Ribs
- U.S. Atlantic
- Engine Buyers Guide
- Electronics
How to Install a Solar Panel on Your Boat

Install a Solar Panel on Your Boat
Sunbathers delight here’s how to install a solar panel on your boat., types of solar panels, planning the system.

Recommended

Mark your 2016 cruising calendar with these regattas for a year’s worth of fun.

Best Boat Quotes
Don't miss it.

Celebrate the Water’s Elegance with Hinckley’s 30th Anniversary Picnic Boat

7 of the Best Available Navigation Apps for Boaters

Fort Lauderdale’s Exclusive Over-the-Water Estate: A Nautical Haven

The Bull Keeps Running. What Does The Strength Over the Last 60 to 120 Days Mean?

Marlow Yachts 62E: Custom Luxury Meets Seafaring Excellence

How To Make Surprisingly Delicious Minimalist Meals
- Privacy Policy

1591 E. Atlantic Blvd, 2nd Floor Pompano Beach, FL 33060 Office: +1 (954) 522-5515 Fax: +1 (954) 522-2260 Contact us: [email protected]
Email address
© 2024 Southern Boating Media

Installing Solar Panels on a Boat
Installing solar panels on a boat can be a cost-effective and environmentally friendly way to power your boats appliances whilst on the water. With the right equipment and knowledge, it is possible to install solar panels on your boat yourself, without the need for professional help.
In this blog post, we will provide a step-by-step guide for installing solar panels on your boat, including information on what equipment you will need, how to prepare your boat, and how to test and maintain your solar panel system.

Choosing the Right Solar Panels and Equipment for Your Boat
Before you begin installing solar panels on your boat, you will need to choose the right equipment .
Power Required
The first step is to determine how much power you will need to generate. This will depend on the size of your boat and the type of and number of appliances you will be running. You will also need to consider the amount of sunlight you will be exposed to and the amount of space you have available on your boat.
Once you have determined your power needs, you can choose the right solar panels and equipment.
Solar Panels
When it comes to solar panels, you will have a choice between polycrystalline and monocrystalline panels.
Polycrystalline panels are generally less expensive, but they are also less efficient.
Monocrystalline panels are more expensive, but they are more efficient and will generate more power per square foot.
You will also need to consider whether you want to install a solar panel that is Rigid to allow circulation behind the panels, or Flexible or Semi-Flexible panels to follow the contours of your boat.
Charge Controller, Inverter and Battery
In addition to solar panels, you will need to purchase an Inverter, charge controller , wiring, and a Lithium-ion battery bank . The charge controller will help regulate the power flowing into the batteries, while the wiring will connect the solar panels to the charge controller and the battery bank. The battery bank will store the power generated by the solar panels.
Preparing Your Boat for Solar Panel Installation
Preparing your boat for solar panel installation is an important step in the process, as it will ensure that the installation is done correctly and that the solar panels will be able to function efficiently.
There are several things to consider when preparing your boat for solar panel installation, including the location of the panels, the amount of sunlight the boat will receive and the amount of space available on the boat.
Determining the location for the solar panels is one of the first steps in preparing your boat for installation. The solar panels should be mounted on a surface that receives the most sunlight, such as the roof of the boat.
It’s also important to consider the location of other equipment and structures on your boat, such as antennas or vents, to ensure that the panels will not be in the way or obstructed.
The location of the panel should be such that the panel is not in the way of any other equipment or structures on your boat.
The amount of sunlight that the boat will receive is also an important consideration when preparing your boat for solar panel installation. The solar panels will generate more power when they receive more sunlight.
Therefore, it’s important to install the panels in a location that will receive maximum sunlight exposure. This will allow the solar panels to generate more power and reduce the need for external power sources.
The amount of space available on the boat is also an important consideration when preparing your boat for solar panel installation. The solar panels need to be installed in an area that is free from debris and that is large enough to accommodate the panels.
Additionally, the area should be free from potential shading, such as from overhead lines or nearby buildings when moored. This will ensure that the solar panels receive maximum sunlight exposure and that they are able to function efficiently.
By following these guidelines for preparing your boat for solar panel installation, you will be able to ensure that the installation is done correctly and that the solar panels will be able to function efficiently. This will allow you to enjoy the benefits of solar power on your boat for a long time to come.
Step-by-Step Guide for Mounting Solar Panels on Your Boat
Mounting the solar panels on your boat is an important step in the installation process. The panels need to be securely mounted and angled in the direction that receives the most sunlight in order to be effective. Here is a step-by-step guide for mounting solar panels on your boat:
Step 1: Determine the location for the solar panels.
The first step is to determine where on your boat the solar panels will be installed. Ideally, the panels should be mounted on the roof or on a surface that receives the most sunlight. You should also consider the location of other equipment and structures on your boat, such as antennas or vents, to ensure that the panels will not be in the way or obstructed.
Step 2: Measure and mark the mounting points.
Once you have determined the location for the solar panels, measure and mark the mounting points. This will ensure that the panels are installed in the correct position and at the correct angle.
Step 3: Install the brackets.
The next step is to install the brackets that will hold the solar panels in place. The brackets can be mounted using screws, bolts, or adhesive. It is important to ensure that the brackets are securely attached to the boat and that they are level.
Step 4: Install the solar panels.
With the brackets in place, you can now install the solar panels. The panels will typically come with pre-drilled holes that align with the brackets. Use the screws or bolts provided to attach the panels to the brackets.
Step 5: Adjust the angle of the panels.
Finally, adjust the angle of the panels to ensure that they are pointing in the direction that receives the most sunlight. This can typically be done by adjusting the angle of the brackets or by using an adjustable mount.
It is important to note that the solar panels should be installed in a way that allows for easy maintenance and cleaning. Additionally, it’s important to make sure that the panels are not in the way of any other equipment or structures on your boat. By following this step-by-step guide, you will be able to mount the solar panels on your boat securely, and at the right angle to ensure maximum efficiency.
Wiring and Connecting the Solar Panels to Your Boat’s Power System
Wiring and connecting the solar panels to your boat’s power system is an important step in the installation process.
This involves running the wiring from the panels to the charge controller and then from the charge controller to the battery bank. This will ensure that the power generated by the solar panels is properly regulated and stored.
Here are some important things to keep in mind when wiring and connecting your solar panels to your boat’s power system:
It is important to use marine-grade wiring, as it is designed to withstand the harsh conditions of a marine environment. This includes exposure to saltwater and UV rays. The wiring should be properly rated for the current and voltage of your system.
When running the wiring from the solar panels to the charge controller, it is important to use appropriate conduit or protective covering to protect the wiring from the elements. This can include PVC conduit, flexible conduit, or wire loom.
When connecting the solar panels to the charge controller, it is important to follow the manufacturer’s instructions and to make sure that the polarity is correct. The charge controller will regulate the power flowing into the batteries, so it is important to ensure that it is properly connected.
When running the wiring from the charge controller to the battery bank, it is important to use the correct size and type of wire . The wire should be properly rated for the current and voltage of your system. It is also important to use appropriate conduit or protective covering to protect the wiring from the elements.
Finally, it is important to properly ground the system to prevent electrical shock and damage to the equipment. This can typically be done by connecting the negative terminal of the battery bank to the boat’s ground.
By following these guidelines, you will be able to wire and connect your solar panels to your boat’s power system safely and effectively, ensuring that the power generated by the solar panels is properly regulated and stored.
Testing and Maintaining Your Solar Panel System
Testing and maintaining your solar array is an important step in ensuring that it continues to function at optimal levels. Proper testing and maintenance will ensure that the system is working properly, and that any issues are identified and resolved quickly.
Here are some important things to keep in mind when testing and maintaining your solar panel system:
Testing the system includes checking the voltage and current flowing through the system, as well as checking the battery charge level. These readings can be taken using a multimeter or other test equipment. If the readings are not within the expected range, it may indicate a problem with the system and further troubleshooting may be needed.
Regular cleaning of the solar panels is important to ensure that they are able to generate power efficiently. The panels should be cleaned of dirt, dust and bird droppings, which can reduce their effectiveness. A mild detergent and water can be used to clean the panels, and they should be wiped dry to prevent water spots.
Checking the wiring and connections is important to ensure that they are secure and not corroded. Loose connections or corroded terminals can cause the system to malfunction, and should be addressed immediately.
Checking the battery charge level is important to ensure that the battery bank is properly charged and that the batteries are not overcharged or undercharged. This can help prevent damage to the batteries and prolong their lifespan.
By following these guidelines for testing and maintaining your solar panel system, you can ensure that it is working properly, and that any issues are identified and resolved quickly. This will allow you to enjoy the benefits of solar power on your boat for a long time to come.
Troubleshooting Common Issues with DIY Solar Panel Installations on Boats
Troubleshooting common issues with DIY solar panel installations on boats is an important step in ensuring that the system is working correctly.
Despite your best efforts, you may encounter issues with your solar panel system that need to be addressed. Here are some common issues and troubleshooting tips:
- Low voltage or current: This can be caused by loose connections or damaged wiring. Check the wiring and connections to ensure that they are secure and not corroded. Additionally, check the charge controller to ensure that it is functioning correctly.
- Low battery charge level: This can be caused by a malfunctioning charge controller or a problem with the battery bank. Check the charge controller to ensure that it is functioning correctly and check the battery bank to ensure that the batteries are properly charged.
- Shading on the solar panels: This can occur if nearby buildings or other structures cast shadows on the panels, reducing their effectiveness. To resolve this issue, you may need to adjust the angle of the panels or move them to a different location on the boat.
- Faulty equipment: If the issue persists after checking the connections, wiring and charge controller, it may be necessary to replace faulty equipment.
It is important to note that these are common issues and there could be other issues specific to your solar panel system. It is always a good idea to consult the manufacturer’s manual, or an expert in the field, if you are unsure of how to troubleshoot the issue.
In conclusion, a DIY installation on a boat can be a cost-effective and environmentally friendly way to power your vessel while on the water. By choosing the right equipment and following a step-by-step guide, you can install solar panels on your boat yourself, without the need for professional help.
One of the main benefits of a DIY solar panel installation is cost savings. Installing solar panels on your boat can be a significant investment, but by doing it yourself, you can save money on labor costs. Additionally, a DIY installation can help you to better understand and maintain your solar panel system, which can save you money on future repairs and maintenance.
Another benefit of a DIY solar panel installation is independence from external power sources. By generating your own power, you will no longer have to rely on shore power or generators to power your boat. This can be especially beneficial for boaters who spend a lot of time on the water and want to be self-sufficient.
Finally, a DIY solar panel installation can have a reduced environmental impact. Solar energy is a clean, renewable energy source that does not produce any greenhouse gases or pollutants. By generating your own power, you can reduce your carbon footprint and do your part to help the environment.
Similar Posts

How To Live Off the Grid?
To live off the grid means a life of freedom, independent from the system, to become self-sufficient, living sustainably off the land and connected to nature and its seasons. However, off-grid living isn’t a lifestyle choice for the faint-hearted. It requires carefulplanning and preparation, and the right understanding of how to create systems that willprovide…

Why Solar-Powered Water Pumps are the Future of Irrigation
The future of farming looks bright, with the emergence of solar-powered water pumps set to revolutionize irrigation and the way we farm. Solar power is a clean and renewable energy source, so it will not only reduce our reliance on finite resources like fossil fuels, but also lower overall costs for farmers across the world….

10 Best Solar Powered Security Cameras 2024
Solar powered security cameras are becoming increasingly popular due to the many benefits they offer. They are environmentally friendly, cost-effective, and easy to install. Solar powered security cameras are the perfect way to keep an eye on your home or business while helping to protect the environment. Used in conjunction with sets of solar security…

11 Best MPPT Solar Charge Controllers 2023
MPPT Solar Charge Controllers – the unsung heroes of the solar power world. These devices might not be the first thing that comes to mind when you think about harnessing the power of the sun, but trust me, they are important. In short, a MPPT solar charge controller regulates the amount of energy that flows…

What is an Off Grid Solar System?
First we need to distinguish between the two main types of solar systems: off grid and grid tied. An off grid solar system is not connected to the power grid. This means that the home or business owner must generate all of their own power from solar panels. As the off grid solar system is…

6 Best Portable Solar Panels for RVs 2023
Portable solar panels have become an essential accessory for RVs in recent years. With the ability to provide renewable power on-the-go, solar panels allow RVers to stay off-grid for longer and reduce reliance on campsite electrical hookups. In this article, we’ll review the top portable solar panels for RVs in 2023 and discuss what to…
One Comment
- Pingback: 7 Best Solar Panels for Boats 2023 - Mark Green World
Comments are closed.

Adaptability
Our innovation gives you options
Options and choices
In general we use two basic options for mounting rigid solar panels – one gets you up and over the canvas, and the other is a bit leaner. We then adapt the basic concept to the boat in question.
You can read more about these basic models in our article in Marine Fabricator magazine . This will give you a good idea where to start in planning your solar panel project.
Please also see our page of advice and FAQs on adding solar panels in seven easy steps.
Once you have a basic mounting option in mind, you can choose what Gemini Marine Products you want to use to execute the build.
Option 1: Low and lean
We designed our saddle-type post and fork mounts with solar panels in mind. They give you easy, secure mounts for a solar panel frame that won’t draw attention to itself.
The saddle fittings bolt onto the top of the frame through the canvas of your bimini top or dodger. Rails running fore and aft create the base, and athwartship rails can augment the frame if needed. The entire installation can be made from off-the-shelf materials on the boat.
This option puts the entire rack up on the roof and largely hidden from view.

Option 2: Up and over
Alternatively you can use our sliding or split side mounts to create exterior side rails between your bimini’s end frames. Paired with a set of side-to-side bent rails, they go up and over the top to create the mounting platform.
This method does not touch the canvas and can be retrofitted without any fabric modifications. It provides good clearance and additional features such as a protective crash bar (think boom).

DIY Hybrids to meet your needs
You can of course mix and match our hardware and methods to create exactly what you need to suit your boat and the solar panels you’ve chosen.
Don’t take our word for it
The good folks at Abroad Reach Travel go through all the pros and cons of solar panel installation on boats, and when it comes to rigid panels, our rail mounts are right there on the shipping list .
Over at Tugnuts you’ll find lots of people using our mounts to install their solar panels . (Just search “Gemini” and see.
Easy enough for DIY. Strong enough for liveaboarders.
“ Easily executed .” – Tonya Ricketts and Captain Dave Pickering North East Canvas Products Association on using Gemini Marine Products for solar panel installation
Need a helping hand?
Use our DrillSteady for clean, easy drilling every time, even on a rocking boat.
Welcome to Gemini Marine Products
Privacy overview.
Enjoy fast, free delivery, exclusive deals, and award-winning movies & TV shows with Prime Try Prime and start saving today with fast, free delivery
Amazon Prime includes:
Fast, FREE Delivery is available to Prime members. To join, select "Try Amazon Prime and start saving today with Fast, FREE Delivery" below the Add to Cart button.
- Cardmembers earn 5% Back at Amazon.com with a Prime Credit Card.
- Unlimited Free Two-Day Delivery
- Streaming of thousands of movies and TV shows with limited ads on Prime Video.
- A Kindle book to borrow for free each month - with no due dates
- Listen to over 2 million songs and hundreds of playlists
- Unlimited photo storage with anywhere access
Important: Your credit card will NOT be charged when you start your free trial or if you cancel during the trial period. If you're happy with Amazon Prime, do nothing. At the end of the free trial, your membership will automatically upgrade to a monthly membership.
Return this item for free
Free returns are available for the shipping address you chose. You can return the item for any reason in new and unused condition: no shipping charges
- Go to your orders and start the return
- Select the return method
Image Unavailable

- To view this video download Flash Player

Solar Panel Mount Brackets, 32 in with Foldable Tilt Legs 0-90° Adjustable Solar Panel Tilt Mount Brackets Set Installed on Any Flat Surface for RV, Roof, Boat, Any Off-Grid Systems
Purchase options and add-ons, about this item.
- Adjustable: The tilt angle can be easily adjusted from 0-90°, and the solar panel tilt mount brackets can be optimally tilted to get the best sunlight in any season to effectively increase the power output.
- Easy To Assemble: Quickly assembled with stainless steel fasteners and precise holes, it can be easily folded when not in use and carried anywhere. One person can also easily install the solar panel tilt mount brackets set.
- No Rust and Excellent Corrosion Resistance: We make sure our adjustable solar panel tilt mount brackets works well in any weather conditions!
- Multi-Situation Application: The adjustable solar panel mount brackets is designed for off-grid solar systems on RVs, boats, motorhomes, sheds, trailers, yachts, flat roofs, floors, docks, walls, sheds, garages, and other non-roofed areas.
- After-Sales Service: BsBsBest provides 30 no reason return and exchange service for the products. Any product quality issue feel free to contact BsBsBest Customer Service Team through Amazon platform, we will give you a satisfactory answer.
Similar items that may deliver to you quickly

From the brand

Congrats on finding us!
BsBsBest is a manufacturer specialized in home decoration and outdoor garden tools.

To provide customers with high quality, durable and comfortable industrial-grade products is our service tenet.
WHY CHOOSE US?
●We focus on quality and build each product with care.
●We provide 365 days after-sales for our products.
●We focus on design and always grasp the design frontier.

Sliding Door Security Bars

Curtain rods

Garden tools

Garden decoration

Product Description

Videos for this product

Click to play video

BsBsBest Solar Panel Tilt Mount Brackets Long
BsBsBest-US
Product information
Warranty & support, looking for specific info, compare with similar items, customer reviews.
Customer Reviews, including Product Star Ratings help customers to learn more about the product and decide whether it is the right product for them.
To calculate the overall star rating and percentage breakdown by star, we don’t use a simple average. Instead, our system considers things like how recent a review is and if the reviewer bought the item on Amazon. It also analyzed reviews to verify trustworthiness.
No customer reviews
- Amazon Newsletter
- About Amazon
- Accessibility
- Sustainability
- Press Center
- Investor Relations
- Amazon Devices
- Amazon Science
- Start Selling with Amazon
- Sell apps on Amazon
- Supply to Amazon
- Protect & Build Your Brand
- Become an Affiliate
- Become a Delivery Driver
- Start a Package Delivery Business
- Advertise Your Products
- Self-Publish with Us
- Host an Amazon Hub
- › See More Ways to Make Money
- Amazon Visa
- Amazon Store Card
- Amazon Secured Card
- Amazon Business Card
- Shop with Points
- Credit Card Marketplace
- Reload Your Balance
- Amazon Currency Converter
- Your Account
- Your Orders
- Shipping Rates & Policies
- Amazon Prime
- Returns & Replacements
- Manage Your Content and Devices
- Recalls and Product Safety Alerts
- Conditions of Use
- Privacy Notice
- Your Ads Privacy Choices
- Phone: +90 (212) 875 19 08
- E-Mail: [email protected]
- Company Profile
- Company Policy
- Mission and Vision
- Certificates
- Aluminium Windows
- Aluminium Doors
- Aluminium Sliding Elements
- Aluminium Curtain Walls
- Aluminium Skylight Elements
- Aluminium Frames for Safety and Security
- Aluminium Conservatories
- Metal Panel Sheet Claddings
- Aluminium Entrance Frames
- Glass Structures
- Complementary Items
- Lightweight Steel Structures
- Human Resources OPEN
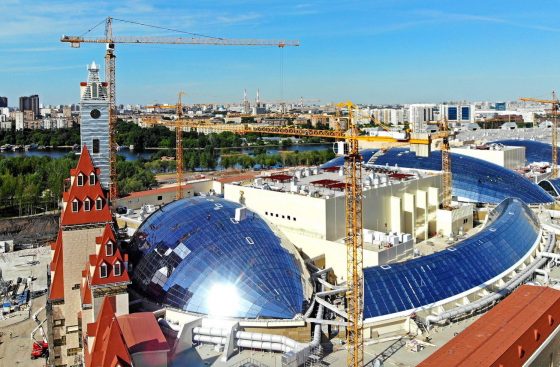
Project Description
Project name:, year of construction:.
- Popular Professionals
- Design & Planning
- Construction & Renovation
- Finishes & Fixtures
- Landscaping & Outdoor
- Systems & Appliances
- Interior Designers & Decorators
- Architects & Building Designers
- Design-Build Firms
- Kitchen & Bathroom Designers
- General Contractors
- Kitchen & Bathroom Remodelers
- Home Builders
- Roofing & Gutters
- Cabinets & Cabinetry
- Tile & Stone
- Hardwood Flooring Dealers
- Landscape Contractors
- Landscape Architects & Landscape Designers
- Home Stagers
- Swimming Pool Builders
- Lighting Designers and Suppliers
- 3D Rendering
- Sustainable Design
- Basement Design
- Architectural Design
- Universal Design
- Energy-Efficient Homes
- Multigenerational Homes
- House Plans
- Home Remodeling
- Home Additions
- Green Building
- Garage Building
- New Home Construction
- Basement Remodeling
- Stair & Railing Contractors
- Cabinetry & Cabinet Makers
- Roofing & Gutter Contractors
- Window Contractors
- Exterior & Siding Contractors
- Carpet Contractors
- Carpet Installation
- Flooring Contractors
- Wood Floor Refinishing
- Tile Installation
- Custom Countertops
- Quartz Countertops
- Cabinet Refinishing
- Custom Bathroom Vanities
- Finish Carpentry
- Cabinet Repair
- Custom Windows
- Window Treatment Services
- Window Repair
- Fireplace Contractors
- Paint & Wall Covering Dealers
- Door Contractors
- Glass & Shower Door Contractors
- Landscape Construction
- Land Clearing
- Garden & Landscape Supplies
- Deck & Patio Builders
- Deck Repair
- Patio Design
- Stone, Pavers, & Concrete
- Paver Installation
- Driveway & Paving Contractors
- Driveway Repair
- Asphalt Paving
- Garage Door Repair
- Fence Contractors
- Fence Installation
- Gate Repair
- Pergola Construction
- Spa & Pool Maintenance
- Swimming Pool Contractors
- Hot Tub Installation
- HVAC Contractors
- Electricians
- Appliance Services
- Solar Energy Contractors
- Outdoor Lighting Installation
- Landscape Lighting Installation
- Outdoor Lighting & Audio/Visual Specialists
- Home Theater & Home Automation Services
- Handyman Services
- Closet Designers
- Professional Organizers
- Furniture & Accessories Retailers
- Furniture Repair & Upholstery Services
- Specialty Contractors
- Color Consulting
- Wine Cellar Designers & Builders
- Home Inspection
- Custom Artists
- Columbus, OH Painters
- New York City, NY Landscapers
- San Diego, CA Bathroom Remodelers
- Minneapolis, MN Architects
- Portland, OR Tile Installers
- Kansas City, MO Flooring Contractors
- Denver, CO Countertop Installers
- San Francisco, CA New Home Builders
- Rugs & Decor
- Home Improvement
- Kitchen & Tabletop
- Bathroom Vanities
- Bathroom Vanity Lighting
- Bathroom Mirrors
- Bathroom Fixtures
- Nightstands & Bedside Tables
- Kitchen & Dining
- Bar Stools & Counter Stools
- Dining Chairs
- Dining Tables
- Buffets and Sideboards
- Kitchen Fixtures
- Wall Mirrors
- Living Room
- Armchairs & Accent Chairs
- Coffee & Accent Tables
- Sofas & Sectionals
- Media Storage
- Patio & Outdoor Furniture
- Outdoor Lighting
- Ceiling Lighting
- Chandeliers
- Pendant Lighting
- Wall Sconces
- Desks & Hutches
- Office Chairs
- View All Products
- Side & End Tables
- Console Tables
- Living Room Sets
- Chaise Lounges
- Ottomans & Poufs
- Bedroom Furniture
- Nightstands
- Bedroom Sets
- Dining Room Sets
- Sideboards & Buffets
- File Cabinets
- Room Dividers
- Furniture Sale
- Trending in Furniture
- View All Furniture
- Bath Vanities
- Single Vanities
- Double Vanities
- Small Vanities
- Transitional Vanities
- Modern Vanities
- Houzz Curated Vanities
- Best Selling Vanities
- Bathroom Vanity Mirrors
- Medicine Cabinets
- Bathroom Faucets
- Bathroom Sinks
- Shower Doors
- Showerheads & Body Sprays
- Bathroom Accessories
- Bathroom Storage
- Trending in Bath
- View All Bath
- How to Choose a Bathroom Vanity

- Patio Furniture
- Outdoor Dining Furniture
- Outdoor Lounge Furniture
- Outdoor Chairs
- Adirondack Chairs
- Outdoor Bar Furniture
- Outdoor Benches
- Wall Lights & Sconces
- Outdoor Flush-Mounts
- Landscape Lighting
- Outdoor Flood & Spot Lights
- Outdoor Decor
- Outdoor Rugs
- Outdoor Cushions & Pillows
- Patio Umbrellas
- Lawn & Garden
- Garden Statues & Yard Art
- Planters & Pots
- Outdoor Sale
- Trending in Outdoor
- View All Outdoor
- 8 x 10 Rugs
- 9 x 12 Rugs
- Hall & Stair Runners
- Home Decor & Accents
- Pillows & Throws
- Decorative Storage
- Faux Florals
- Wall Panels
- Window Treatments
- Curtain Rods
- Blackout Curtains
- Blinds & Shades
- Rugs & Decor Sale
- Trending in Rugs & Decor
- View All Rugs & Decor
- Pendant Lights
- Flush-Mounts
- Ceiling Fans
- Track Lighting
- Wall Lighting
- Swing Arm Wall Lights
- Display Lighting
- Table Lamps
- Floor Lamps
- Lamp Shades
- Lighting Sale
- Trending in Lighting
- View All Lighting
- Bathroom Remodel
- Kitchen Remodel
- Kitchen Faucets
- Kitchen Sinks
- Major Kitchen Appliances
- Cabinet Hardware
- Backsplash Tile
- Mosaic Tile
- Wall & Floor Tile
- Accent, Trim & Border Tile
- Whole House Remodel
- Heating & Cooling
- Building Materials
- Front Doors
- Interior Doors
- Home Improvement Sale
- Trending in Home Improvement
- View All Home Improvement
- Cups & Glassware
- Kitchen & Table Linens
- Kitchen Storage and Org
- Kitchen Islands & Carts
- Food Containers & Canisters
- Pantry & Cabinet Organizers
- Kitchen Appliances
- Gas & Electric Ranges
- Range Hoods & Vents
- Beer & Wine Refrigerators
- Small Kitchen Appliances
- Cookware & Bakeware
- Tools & Gadgets
- Kitchen & Tabletop Sale
- Trending in Kitchen & Tabletop
- View All Kitchen & Tabletop
- Storage & Organization
- Baby & Kids

- View all photos
- Dining Room
- Breakfast Nook
- Family Room
- Bed & Bath
- Powder Room
- Storage & Closet
- Outdoor Kitchen
- Bar & Wine
- Wine Cellar
- Home Office
- Popular Design Ideas
- Kitchen Backsplash
- Deck Railing
- Privacy Fence
- Small Closet
- Stories and Guides
- Popular Stories
- Renovation Cost Guides
- Fence Installation Cost Guide
- Window Installation Cost Guide
- Discussions
- Design Dilemmas
- Before & After
- Houzz Research
- View all pros
- View all services
- View all products
- View all sales
- Living Room Chairs
- Dining Room Furniture
- Coffee Tables
- Home Office Furniture
- Join as a Pro
- Interior Design Software
- Project Management
- Custom Website
- Lead Generation
- Invoicing & Billing
- Landscape Contractor Software
- General Contractor Software
- Remodeler Software
- Builder Software
- Roofer Software
- Architect Software
- Takeoff Software
- Lumber & Framing Takeoffs
- Steel Takeoffs
- Concrete Takeoffs
- Drywall Takeoffs
- Insulation Takeoffs
- Stories & Guides
- LATEST FROM HOUZZ
- HOUZZ DISCUSSIONS
- SHOP KITCHEN & DINING
- Kitchen & Dining Furniture
- Sinks & Faucets
- Kitchen Cabinets & Storage
- Knobs & Pulls
- Kitchen Knives
- KITCHEN PHOTOS
- FIND KITCHEN PROS
- Bath Accessories
- Bath Linens
- BATH PHOTOS
- FIND BATH PROS
- SHOP BEDROOM
- Beds & Headboards
- Bedroom Decor
- Closet Storage
- Bedroom Vanities
- BEDROOM PHOTOS
- Kids' Room
- FIND DESIGN PROS
- SHOP LIVING
- Fireplaces & Accessories
- LIVING PHOTOS
- SHOP OUTDOOR
- Pool & Spa
- Backyard Play
- OUTDOOR PHOTOS
- FIND LANDSCAPING PROS
- SHOP LIGHTING
- Bathroom & Vanity
- Flush Mounts
- Kitchen & Cabinet
- Outdoor Wall Lights
- Outdoor Hanging Lights
- Kids' Lighting
- Decorative Accents
- Artificial Flowers & Plants
- Decorative Objects
- Screens & Room Dividers
- Wall Shelves
- About Houzz
- Houzz Credit Cards
- Privacy & Notice
- Cookie Policy
- Your Privacy Choices
- Mobile Apps
- Copyright & Trademark
- For Professionals
- Houzz vs. Houzz Pro
- Houzz Pro vs. Ivy
- Houzz Pro Advertising Reviews
- Houzz Pro 3D Floor Planner Reviews
- Trade Program
- Buttons & Badges
- Your Orders
- Shipping & Delivery
- Return Policy
- Houzz Canada
- Review Professionals
- Suggested Professionals
- Accessibility
- Houzz Support
- COUNTRY COUNTRY
Solar Panel Installation Companies in Elektrostal'
Location (1).
- Use My Current Location
Popular Locations
- Albuquerque
- Cedar Rapids
- Grand Rapids
- Indianapolis
- Jacksonville
- Kansas City
- Little Rock
- Los Angeles
- Minneapolis
- New Orleans
- Oklahoma City
- Orange County
- Philadelphia
- Portland Maine
- Salt Lake City
- San Francisco
- San Luis Obispo
- Santa Barbara
- Washington D.C.
- Elektrostal', Moscow Oblast, Russia
Professional Category (1)
Project type.
- Reach out to the pro(s) you want, then share your vision to get the ball rolling.
- Request and compare quotes, then hire the Solar Energy Systems professional that perfectly fits your project and budget limits.
- Home Energy Audit
- Solar Panel Installation
- Solar Pool Heating
- Solar Water Heating
- Solar Panel Cleaning
- Solar Panel Repair
For large solar projects in Elektrostal', it is recommended to contact a local solar company that can handle the installation and maintenance of the solar panels. Local solar companies are well-versed with regional regulations and climate conditions, ensuring a smooth and efficient process.
For smaller projects, you have several options to buy solar panels:
- Purchase solar panels through certified solar companies that have deals from top manufacturers.
- Buy DIY kits available at home electronics online stores.
- Get solar panels directly from the manufacturers themselves.
Before making a decision, consider factors such as technology compatibility, features, and the expertise of installers. Researching different brands and dealers can help you make an informed choice for your solar panel purchase.
Here are questions you can ask solar contractors in Elektrostal':
- What types of solar panels do you offer, and do you have experience in installing solar equipment?
- Can you provide estimates for the number of solar panels needed, the overall costs, and the payback period?
- Are you properly licensed, insured, and do you have experienced in-house installers?
- Where do your solar products come from, and are they sourced from reputable suppliers?
- Which solar panel system is suitable for my needs - grid-tied or grid-tied with energy storage?
- What is your company’s track record, and do your technicians hold relevant certifications?
- What are the benefits of going solar, and is my roof suitable for solar panels in terms of sunlight exposure and available space?
Asking these questions will help you gather important information and choose the right solar company for your specific requirements.
Questions to ask potential solar panel companies:
Business services, connect with us.
IMAGES
VIDEO
COMMENTS
Another factor you'll need to consider is the size of your boat battery bank. In general, a 100Ah deep cycle battery will need 180 watts of solar to fully charge, assuming you have at least four hours of sunlight a day. Thus, if you have a 200Ah battery bank, you'll need at least 360 watts of solar. In this case, two 200-watt panels would ...
Mounting solar panels on a sailboat was not difficult, but a few key decisions made a huge difference in how effective our panels were. A solar-power installation on a sailboat is made up of two independent systems: one system to charge the batteries, and another system to provide 120-volt AC power for household appliances. In the charging ...
THE AVAILABLE SPACE. In practical terms, a modern 40ft monohull would have the space for around 1,200W of PV panels (cockpit arch, sprayhood top, deck), maybe 1,500W with the addition of a few portable panels for use at anchor. The 1,200W of fixed position solar array could produce around 360Ah on a sunny summer's day (zero shading) or more ...
Researching solar panels for the first time in 13 years, we discovered that much had changed. Panels produced higher output for their size, but larger panels were being manufactured to meet the ever-growing demands of boaters. Our usage had actually decreased over time as our three children grew up and moved off the boat, and the space allotted ...
A 10-watt horizontally mounted panel should generate between 3- and 5-amp hours per day. We'll need at least 13 volts to fully charge our 12-volt battery. As most solar cells generate at least 0.45 volts, you'll want a panel with a minimum of 33 cells, which should provide around 14.85 volts.
Do you want to install solar panels on your tiny sailboat, but don't know how? Watch this video to learn how to easily and affordably set up a solar system that can power your boat's electronics ...
TimFromLI. . Jan 7, 2014. 391. Beneteau 45F5 51551 Port Jefferson. Jan 28, 2021. #6. My boat is on a mooring, I use a 160 watt flexible solar panel mounted on the cabin top under the boom. I drop the dodger and bimini when we race so they were not good options for mounting.
Cruising World Editor at Large Tim Murphy visits West Marine to grab all of the supplies he needs to install a new set of solar panels on a Passport 40 in Po...
Step by step guide for installing a solar panel boat system. First I list a quick summary on how to put this together. Details will follow after these instructions. 1. Mount your panel on your stern rail (see photos/details below). 2. Attach marine grade copper wires to the panel.
The Renogy Adjustable Tilt Mount Bracket mount enables the solar panel to be adjusted to directly face the sun, a feature commonly used when the boat is still. For the liveaboard boater, the adjustable mount is crucial. By adjusting the angle of the panels, you can increase the input of energy by up to 40 percent.
Securing Your Solar Panels. The simplest mounting method for rigid panels is directly to the deck using z-brackets, studs, or glue-on brackets. If mounting to frame above davits or a Bimini top run -inch x 2-inch aluminum bar crosswise under the panel, attach it to the factory-supplied mounting holes, and then attach with rail clamps or ...
Top-of-pole Marine Solar Panel Mounting System - Solar Tracker. Our top-of-pole solar panel mounting system offers the best alternative for achieving maximum performance from your solar panel. Ideal for sailboats. The closer the panel is to being perpendicular to the rays of the sun the higher the performance.
A 10-watt panel should contribute between 3 and 5 amp hours per day. You'll need at least 13 volts to fully charge your 12-volt battery. As most solar cells generate at least 0.45 volts, you'll want a panel with at least 33 cells which should provide around 14.85 volts.
Step 1: Determine the location for the solar panels. Step 2: Measure and mark the mounting points. Step 3: Install the brackets. Step 4: Install the solar panels. Step 5: Adjust the angle of the panels. Wiring and Connecting the Solar Panels to Your Boat's Power System. Testing and Maintaining Your Solar Panel System.
Creating Facing Frame - 10:55 min. Installing Fasteners - 21:38 min. Patterning Solar Panels on Bimini - 30:36 min. Sewing Facing Frame to Bimini - 34:17 min. Creating Passage for Cables - 46:59 min. Installing Solar Panels on Bimini - 57:57 min. Materials List - 1:01:06 min. Shelter-Rite ® Vinyl Fabric (we used Black #1120121)
Sep 20, 2013. Finding a place to locate solar panels on a small boat is a challenge. We wanted our two 50-watt panels to be adjustable, but secure. Ultimately, we were able to meet both criteria by mounting them on the lifelines of Eurisko, our Creekmore 34. Our panels were not as wide as the distance between our top lifeline and the toerail ...
Option 1: Low and lean. We designed our saddle-type post and fork mounts with solar panels in mind. They give you easy, secure mounts for a solar panel frame that won't draw attention to itself. The saddle fittings bolt onto the top of the frame through the canvas of your bimini top or dodger. Rails running fore and aft create the base, and ...
Adjustable: The tilt angle can be easily adjusted from 0-90°, and the solar panel tilt mount brackets can be optimally tilted to get the best sunlight in any season to effectively increase the power output. Easy To Assemble: Quickly assembled with stainless steel fasteners and precise holes, it can be easily folded when not in use and carried ...
Metal Panel Sheet Claddings; Aluminium Entrance Frames; Glass Structures; Complementary Items; Lightweight Steel Structures; Contact Us. Mimsa Alüminyum - İstanbul. Adres: BOSB Mermerciler San. Sitesi 4. Cadde No: 7 34520, Beylikdüzü / İstanbul / TÜRKİYE. Telefon: +90 (212) 875 19 08.
Search 1,121 Elektrostal' new & custom home builders to find the best custom home builder for your project. See the top reviewed local custom home builders in Elektrostal', Moscow Oblast, Russia on Houzz.
For large solar projects in Elektrostal', it is recommended to contact a local solar company that can handle the installation and maintenance of the solar panels. Local solar companies are well-versed with regional regulations and climate conditions, ensuring a smooth and efficient process. For smaller projects, you have several options to buy ...
Moscow, Russia. Moscow is the capital and largest city of the Russian Federation. The city stands on the Moskva River in Central Russia, with a population estimated at 13.0 million residents within the city limits, over 18.8 million residents in the urban area, and over 21.5 million residents in the metropolitan area.