- Masting, rigging and sails

- Remember me Not recommended on shared computers
Forgot your password?

Cleaning Dusty Rigging
By gieb8688 October 8, 2013 in Masting, rigging and sails
- Reply to this topic
- Start new topic
Recommended Posts
Does anyone have a good technique for cleaning rigging that has sat collecting dust for many years? I am working on a restoration of the Model Shipways Kate Cory and need to clean her up a bit. Looking for advice on how to clean without destroying the rigging. Any advice or direction to an existing post would be greatly appreciated.
Current Build -
1/78 Sergal HMS Victory Restoration
On The Shelf -
Link to comment
Share on other sites.

How brittle is the rigging?
Be sure to sign up for an epic Nelson/Trafalgar project if you would like to see it made into a TV series http://trafalgar.tv

Use progressively smaller brushes to remove the loose dust cobwebs etc. then vacuum with an empty biro tube pushed through a piece of card and placed over the vacuum hose. The narrow suction can be more focused into crevices without tearing off fixtures and fittings.
Finally, I spray the rigging with matt varnish which turns the remaining dust particles on the rigging transparent and completely transforms the whole thing.
- John Allen , jthemanjack and JerseyCity Frankie

Richard Griffith
Hi Mark, for the strong of heart and steady of hand, try a small blow torch. This is obviously dangerous to the rigging but it has seveal advantages-it removes dust AND fuzz, and is fast. Don't use this on lanyards or tiny lines such as flag hoists. Do practice off model. Keep the torch moving at all times and keep the flame a few inches away.
Yes, I have had to replace a few lines.
I will have to try Overdale's matt varnish spray idea.
Good luck and keep modelling.

SketchupModeller
I've used a clean, EMPTY airbrush before on plastic kits. It seems to work reasonably well and is more controllable and gentler than the compressed air used to clean computers. Start at a low pressure and work up to the highest pressure you feel is safe.
- John Allen and Bob Cleek
Current project: HMS Pandora (1779) CAD build
Thanks everyone for the great ideas! I am working on a cleaning and restoration of the Model Shipways Kate Cory. The ship was built in the late 70's or early 80's so the rigging is pretty fragile. Given the variety of techniques suggested, I should be able to use one or all in getting her cleaned up! My main concern was not to make matters worse. The rigging seems to be in pretty good shape overall, just a bit dusty.
Thanks again,
- 3 months later...

TITANIC is now on social media - follow her:
Twitter - @Titanic_1212
Facebook - TitanicTheShip
- 2 years later...
RONALDwilsonW
Thank you so very much. My wife has a shadow box with a lot of things in it. One for sure is The U.S.S. Constitution, and a N-scale train which needed dusting. You talk about a small brush. Low and behold I had one in my tool box.

Hi Mark, for the strong of heart and steady of hand, try a small blow torch. This is obviously dangerous to the rigging but it has seveal advantages-it removes dust AND fuzz, and is fast. Don't use this on lanyards or tiny lines such as flag hoists. Do practice off model. Keep the torch moving at all times and keep the flame a few inches away. Yes, I have had to replace a few lines. I will have to try Overdale's matt varnish spray idea. Good luck and keep modelling. Duffer
Chantilly, VA
Its not the size of the ship, but the bore of the cannon!
Current Build: Scratch Build Brig Eagle
Completed Build Log: USS Constitution - Mamoli
Completed Build Gallery: USS Constitution - Mamoli
- 3 years later...
Once dust is removed what wood restoration product to get that natural but brilliant shine
Join the conversation
You can post now and register later. If you have an account, sign in now to post with your account.

× Pasted as rich text. Paste as plain text instead
Only 75 emoji are allowed.
× Your link has been automatically embedded. Display as a link instead
× Your previous content has been restored. Clear editor
× You cannot paste images directly. Upload or insert images from URL.
- Insert image from URL
- Submit Reply
Recently Browsing 0 members
- No registered users viewing this page.
Modelshipworld - Advancing Ship Modeling through Research
SSL Secured
Your security is important for us so this Website is SSL-Secured
NRG Mailing Address
Nautical Research Guild 237 South Lincoln Street Westmont IL, 60559-1917
Model Ship World ® and the MSW logo are Registered Trademarks, and belong to the Nautical Research Guild (United States Patent and Trademark Office: No. 6,929,264 & No. 6,929,274, registered Dec. 20, 2022)
Helpful links.
- Articles Database
- NRG Home Page
- NRG Online Store
- Important: Our Guidelines
- Terms of Use
- Buildlog Index
About the NRG
If you enjoy building ship models that are historically accurate as well as beautiful, then The Nautical Research Guild (NRG) is just right for you.
The Guild is a non-profit educational organization whose mission is to “Advance Ship Modeling Through Research”. We provide support to our members in their efforts to raise the quality of their model ships.
The Nautical Research Guild has published our world-renowned quarterly magazine, The Nautical Research Journal, since 1955. The pages of the Journal are full of articles by accomplished ship modelers who show you how they create those exquisite details on their models, and by maritime historians who show you the correct details to build. The Journal is available in both print and digital editions. Go to the NRG web site (www.thenrg.org) to download a complimentary digital copy of the Journal. The NRG also publishes plan sets, books and compilations of back issues of the Journal and the former Ships in Scale and Model Ship Builder magazines.
Our Emblem ®
Nautical Research Guild ® and the NRG logo are Registered Trademarks, and belong to the Nautical Research Guild (United States Patent and Trademark Office: No. 6,999,236 & No. 6,999,237, registered March 14, 2023)
- Existing user? Sign In
- Latest Posts
- All unread content since my last vist
- Unread topics I have posted in
- Create New...

How to Clean a Sailboat Sail – The Right Way

There are some tedious activities that I put off for a long time due to the sheer anticipation of how much time and energy it will take, and cleaning my sailboat sails is definitely one of them. However, once I finally hunkered down and got to work on them, the process was actually pretty straightforward and easy. Luckily, I also found some excellent resources to ensure I was cleaning and handling my sails properly.
So, how do you clean a sailboat sail, the right way? As it turns out, there are a numerous simple and natural solutions for cleaning a sailboat’s sails, and the method will depend on the type of material the sail is made from, and what type of dirt or damage that needs to be removed.
Additionally, I discovered some crucial how not to’s that you will most certainly want to know about so that you don’t accidentally damage or destroy your expensive sailboat sails.
Reasons You Might Want or Need to Clean Your Sails
Firstly, you might be wondering when one is supposed to clean one’s sailboat sails and how regularly. Unlike how a car needs to be serviced roughly every 5,000 miles or so, a sailboat sail only needs to be thoroughly cleaned when its owner notices a certain types of grime, wear, or a nasty nest of spiders (true story.)
Here are some tell-tale signs it is time to lower your sails and scrub-a-dub-dub.
- You Spot Mildew: You will start to notice spots of grey at first, until the mildew grows black, usually in the same recurring place on your sails (often at the bottom near the folded creases of the sails.
- You Spot Lots of Bird Droppings: While some may consider bird droppings to be good luck, I, along with many health advocates, believe it to be quite unsanitary. You’ll want to remove any pelican feces, if not for the appearance, for your health.
- There’s Obvious Dirt, Grime or Grease: I once cruised on a friend’s vessel whose sails were so filthy that they were no longer pearly white, but rather brownish-yellow. It was pretty disgusting, honestly, and a brown sail is more than enough of a sign to know to lower the line and give that sail a deep clean.
- Your Sails Have Been In a Dark Dusty Corner Somewhere : While I would not recommend abandoning your sails in the dark, dusty corners of your storage unit (spiders nests, remember?), I am aware that this kind of thing does happen. However, while you do conveniently have your sails in storage (or grandma’s attic), you may as well give them a good hosing down before you hoist them up on your boat.
- Maybe it was a particularly rough sea, and you know your sails took a good beating, and there’s way too much salt residue clinging to them.
- Your new sailing companion forgot to mention their tendency toward sea-sickness, and they christen your sails with their recent clam chowder.
- Your relaxing wine and cheese cruise was a little too relaxing, leading your brother-in-law to stumble and fall, his full cup of wine soaring to the heavens above him, landing serendipitously upon your crisp, clean sails. (It’s happened.)
- There’s a fight on your sailboat after a little too much wine (there’s that wine again), and your best mate has a better right hook than you expected, and your inebriated senses make you dodge and duck just a hair too slowly and your freshly broken nose creates a beautiful spray of blood across your perfectly pearly sails. (Hey, who am I to judge what happens aboard your private vessel, as long as you have a first aid kit handy…)
The Wrong Ways to Clean a Sailboat Sail
Before we go through the in-depth list of how to properly clean your sails, it is prudent we investigate the wrong ways to clean them as well, so that you can avoid any easy-to-make mistakes.
Here are some questions many sailors, including myself, have initially pondered when gearing up to wash their sails, and the reasons why these methods are unfortunately ill-advised.
Can you Bleach Sails?
A lot of folks want to know whether or not one can use bleach, oxi-clean, or acetone to clean sails. I do not recommend it for specific sail fabrics. While you ‘technically’ can use any of these chemicals, it could come at a cost to your sails. If you can successfully clean your sails without using these very harsh chemicals, I would urge you to do so.
When it comes to mildew, I understand the desire to use bleach. It’s what I use as soon as I notice any of those pesky grey spots sneaking along the edges of my glass shower sliding-door. Thus, I empathize in wanted to sufficiently douse your moldy sail in bleach. However, many sails will be heavily damaged by bleach, and it could even weaken the strength of your sail up to 60%. That certainly does not seem worth it, does it?
If you just can’t fathom getting rid of mold or mildew any other way, then at the very most, you may create a dilution of water with the faintest amount of bleach to clean your sails, but at your own risk of ruining or weakened their fragile fibers. (This may be possible when cleaning Dacron sails, but not when cleaning Nylon or Kevlar sails – they are much too fragile for bleach.)
Can You Put Your Sails in a Washing Machine?
No. This is a poor idea since there is no give or stretch in the type of cloth used to make sails, and the washing machine (depending on the kind you have) may twist and pull at the fibers until they are weakened. And that is assuming the washing machine doesn’t put a tear in the sail entirely, which has happened to me with two different pairs of normal bed sheets. If a washer can easily shred bed sheets, trust that it can shred your expensive sails.
Also, suffice it to say that while you would never want to use a washing machine, you most certainly do not want to use a machine dryer. The intense heat will severely damage the resin in your sails, and when you pull it out, it will likely be crinkled up and misshapen and will be extremely hard to re-shape after that point.
Can I Soak My Sail in a Chlorinated Pool?
Due to the massive size of a pool matching up with the massive size of your sails, it makes sense you might want to just chuck your grungy sails in your chemical pool. In some instances, this might be okay, depending on the fabric of your sails (Dacron, for example). However, much like bleach and oxi-clean, chlorine is a tough chemical. Granted, our bodies can swim in it without our skin withering away – so it’s not as harsh as bleach. However, I still feel confident there are other safer ways of cleaning your sail that hopefully disables any weakening of its fragile material.
However, if you have a Dacron sail and you want to put it in your chlorinated pool for a short period of time, I don’t think it will permanently damage your sail.
To Recondition and Re-Resinate or Not to? That is the Question.
There are some really top-notch professional companies that have perfected chemical engineered cleaning processes to clean sailboat sails. Based off of customer reviews, it also seems that many people have a lot of success with this method.
One company, in particular, located in Pennsylvania, created a cleaning process they call the LaMauney Process. This entails the cleaning of polyester/Dacron fabric sails, followed by a replacement and fortification of the resin in the sail fibres. They do this to strengthen the sail – and they also add some cool features like UV protection and anti-fungal elements.
To learn more about this process, watch this video of Jerry Fultz from Sail Care, Inc.
This may or may not be a great option for cleaning sails; therefore, the jury is split on this one. Some companies are adamant that reconditioning and re-resinating sails does not work and is a bad idea. They argue that if a sail is old, the new resin will wear away after only a few sailing seasons and that the heat involved in this kind of cleaning and refurbishing process can shrink boltropes and leach lines, making the problem worse (rather than better). The biggest argument being that if your sail is so distorted or messed up, the cost of a new sail is going to be a much better value than sending our sail out to be professionally cleaned and re-resinated.
The Right Ways to Clean a Sailboat Sail
Now that you’re well versed in the chemicals and methods that are NOT recommended for the cleaning of your sails, let’s get straight to the best ways to clean your sails (based on mess/problem and the sail fabric). Firstly, make sure you have a space cleaned and prepared that is large enough for your sail. This is your first obstacle. Everything after that is relatively easy.
Allan Stokell of Grampian Marine YouTube Channel also has some excellent cleaning tips and has years and years of experience as well. (His story about how he dries his sail after he washes it is worth listening to.)
Cleaning Based on the Type of Problem
- Dirt, Thick Salt Residue, or Bird Feces – This standard type of grime, which will eventually be found on most sails, can be easily cleaned with a mild detergent or dish soap and a gentle brush (one with soft bristles). You’ll then follow this with a thorough rinse of fresh water and lay the sail out on a surface (preferably one that allows both sides to dry.)
- Oil or Grease Stains – Also removable with soap and warm water. For difficult stains, you can add the tiniest (like a quarter size) of bleach. But again, I must warn you the risk you take in using bleach (especially on nylon and Kevlar sails.) Vinegar can also be used to lift some grease stains (I use a solution of normal dish soap, water, and a little bit of apple cider vinegar to clean the grease and grime off my stovetop and it works serious wonders.) However, there is a caveat. Vinegar can eat through certain materials – make sure your sail can withstand a strong vinegar before you go dousing it. For oil and grease stains, a normal, soft bristled scrub brush will suffice. Rinse with fresh water, lay out to dry.
- Rust & Metal Type Stains – Despite its potential to damage your sail, acetone is excellent at removing this specific type of metallic stain. However, for our purposes, we recommend using a dish soap with water with only a trace amount of acetone (again, baring if you have a nylon or kevlar sail). In this instance, that were are trying to avoid harsh chemicals, you may try SimpleGreen. And if that doesn’t do it, try a white rust stain remover.
- Mold and Mildew – As soon as you spot mildew, you’ll want to instantly isolate the area so that the mold does not continue to spread to the rest of the sail. If you’ve got a Dacron sail or another durable type of sail material, you may use a 1% or less bleach solution (or an extremely watered-down store-bought solution). In the same vein, vinegars are also known to kill fungi and bacteria – but you’d want to use a similar caution when using vinegar on your sails, as you would with bleach. Thus, our third recommendation is Lysol. Lysol is a great anti-fungal spray, and kills spores, and prevent their continued growth. You can spray your mildew with Lysol and wipe away several hours later, and the mold should be gone.
- Blood or Wine – I know the above scenario seemed outlandish; however, it would not be the craziest thing in the world to somehow have blood or deep red wine stains appear on your sails. In this event, you’ll want to soak the particularly stained segment of your sail in a normal detergent. If this doesn’t work than try part water, part cleaning solvent (here is a good one) . If you don’t have a cleaning solvent, and it’s a Dacron sail, you can do ten parts water to one part bleach (but need I remind you one more time to be cautious of its use?)
Prevention is Key: Ways to Prevent Your Sails from Becoming Damaged or Dirty
There is no better way to keep your sailboat sails immaculate than by preventing damage and stains in the first place. Here are some easy to follow, and sometimes rather obvious seeming ways to care for your sails.
- Don’t leave your sails in the sun . The sun’s UV rays will severely damage your sails. You must make sure you have a sufficient protective cover for your sails anytime your boat is going to be docked for extended periods of time in the sun.
- To this effect, avoid exposing your sails to unnecessary heat (like storing them someplace not temperature controlled – like a car trunk or outdoor storage unit). Likewise, be sure not to place them someplace silly like near a hot engine or heater.
- When your sailboat is not in use (during the off season), remove the sails, clean them, and have them properly repaired at least once a year. And store the sails somewhere clean and safe. And never store them before they are 100% dry!
- Roll and fold your sails properly – do not just shove them into a box or bag, this will help prevent a breakdown of your sail’s resin
- Avoid petroleum-based products – the adhesives on laminated sails are liable to break down when you use such products
Key Take-Aways
Ultimately, the longevity of your sails is almost certainly determined by the state of care you give them, part of which involves preventative measures, and after-care for when your sail inevitably encounters dirt, salt, grease, or mildew. As long as you are keenly aware of the fabric your sail is made of, you should aptly be able to discern the best plan of action for cleaning your sails for your particular needs.
It is wise to avoid having to go through the time-intensive process of removing, cleaning, drying, and re-hoisting your sail, to do all you can to prevent damage, stains, and mess to occur on your sails. However, I understand sometimes things happen, and they must be cleaned. But now that you are now armed with the knowledge of how best to do so, you’ll have them spic-and-span in no time.
I am the owner of sailoradvice. I live in Birmingham, UK and love to sail with my wife and three boys throughout the year.
Recent Posts
How To Sail From The Great Lakes To The Ocean
It’s a feat in and of itself to sail to the Great Lakes. Now you want to take it one step further and reach the ocean, notably, the Atlantic Ocean. How do you chart a sailing course to get to the...
Can You Sail from the Great Lakes to the Gulf of Mexico by Boat? 
You have years of boating experience and consider yourself quite an accomplished sailor. Lately, you’ve been interested in challenging yourself and traveling greater distances than ever before. If...

- Forum Listing
- Marketplace
- Advanced Search
- Shipping Discussion
- Model Ships
sailing ship model cleaning

- Add to quote
hello my dad built a model 25 odd years ago and when he crossed the bar - i had it stored in a storage locker - which i now have back at home a friend has offered to clean the model for me -as i have the shakes - ( Parkinson) - i am wary to clean the model myself - my question what can he use for the sails - cloth - and the rigging ? i do have small painters brushes for the general work - image attached shows the model is still in overall good shape - kindest regards
Attachments

I believe you can remove dust from rigging by using a small 'artist's brush' and dampen and run down the rigging. For the sails, probably by a artist hog's hair brush. Stiffer and brush it down... but no water. Failing that... leave outside on the porch for a Force 8! Nice model. Stephen

Computer and model shops sell aerosol cans of compressed air for blowing dust away. Will remove dust but probably won't get dirt out of sails.
Ron - Stephen - thank you for the advice

A glass case for when it is cleaned would make it look fabulous and probably only cost either one arm or one leg.
A custom made glass case would probably be expensive. There are cheap clear plastic sheets to be bought, these can be cut and glued together to make a box. And, here in Norway at least, you can buy profiled wood to cover the glued edges. To get rid of dust on the rigging I use a soft brush and blow with lungs and mouth. I have got Parkinson's as well, first diagnosed as such ten years ago, but I do not shake much. A constant problem when dealing with such things as model rigging is that I forget to pay attention when removing my hands from where a bitterly fought battle to put something small in place was fought. So 90 percent of my accidents resulting in damage to models comes after the really difficult operations are done. And I guess that is typical - it is the automatic moves that fails with Parkinson's sufferers.
ship glass case farmer john - stein - i have already decided to have a case to fit the model made similar to the one in the attached image - thank you for the advice though - - i would like to have the top removable though - to maybe clean the model on a yearly basis - as i stay in a farm environment

If it's under glass it should keep clean. My barograph is many years old and remains clean, apart from where some inky person blobbed ink. Any model will look so much more imposing.
I build models but not sailing ships. https://www.flickr.com/photos/vjc_models I usually clean models with an airbrush spraying water and washing up liquid, then rinse by spraying with clean water. A cheap external mix airbrush can be had for about $10, if you don't have a compressor get can of airbrush propellant. Do the sails first as all the dirty water will drain onto the deck.
When it comes to non-synthetic thread and cloth I would go easy on the water, as those materials generally loosen when wetted, and shrink when dried following this. This particularly so if the thread is not properly waxed, and if not then you might get a rather fluffy rigging, even if the shrinkage does not result in any damage. Of course wood is not insensitive to water either, and one never knows about the strength of old time glue.

Yes, Old time glue may be hide glue which is water soluble even after all these years. I've used water sparingly on restorations and had numerous deck fittings come loose because the were attached with hide glue. easy enough to reattach them but still. Opt first to use a soft brush from the top down, and then mop up the decks last with again a soft brush slightly dampened to clean up the dust and grim on the decks. Once that is done do the same on the hull, from the top down. I always give a quick blow off with compressed air right before putting it in a case. And please secure the cradle to the case base.(I brass pin the cradle to the base) Many a model gets broken when the case is moved and the models slides around inside the case, SNAP goes a spar or bow sprite.
- ?
- 124.7K members
Top Contributors this Month

Here’s How to Clean Your Model Ship | Do-it-Yourself

If you’ve noticed that your model ship is not as vibrant, and detailed as it used to be, then it must be because of dust that has settled on it. You most probably didn’t put it in a display case. But, rest assured, you can clean it by yourself. It isn’t hard, but it can take some time.
Here’s what you will need:
- Baby wipes or cloth
- Small to medium soft bristled paintbrush
- Canvas cleaner with mildew remover
How to proceed:
- Using a small/medium brush, gently brush off any loose dirt, and dust from your model. Follow the brush with compressed air to keep dust from resettling. Be careful here, as many compressed air sources have strong blasts that can damage the model ship. The best way would be to use an airbrush. It’s gentle, plus you can easily adjust the air pressure as per your convenience. You simply have to hook it up, and run it without any paint. It works well at removing bigger dust particles from your ship.
- Use a cloth or baby wipes to wipe down the hull, and the small spaces. Note: Baby wipes have no harsh chemicals, and won’t dry out the wood.
- If your sails have stained or have dirt on them, wet a toothbrush with canvas cleaner, and gently brush a small amount of it into the sails so as to brighten them up. You can also use a Q-tip if required. Yet, my personal recommendation is to avoid using cleaners on sails, and rigging unless they are very dirty. But, that’s totally up to you. Just make sure to use a cleaning agent that goes well with your ship’s material, and coatings.
- To get into all the little details, moisten a Q-tip with a baby wipe, and gently get into the small spaces.
Well done! By now, the appearance of your model ship must have improved. Yet, if you’re still unsatisfied with how it looks, you can repeat any of the steps a couple of times. I’d also highly recommend to buy a display case for your model ship, so as to save time, and not having to thoroughly clean the model ship again. Still unsure or having difficulties about how to do it? I’ll recommend watching this video by an experienced modeller who shows his method of cleaning his model ship.
Also, you might want to check out our catalogue . We offer more than 120 different ship models, ranging from the oldest to the most modern.
Click here to cancel reply.
Your email address will not be published. Required fields are marked *
Save my name, email, and website in this browser for the next time I comment.
Contactez-nous
T: (+230) 2839304 E: [email protected]
Visitez-nous
Visites gratuites de l’atelier 7j/7 Lundi au vendredi : 9h-17h Samedi / Dimanche / Jours fériés : 9h-12h
Historic Marine, The Vale, 3102 , Mauritius
Suivez-nous

The $tingy Sailor
Diy trailerable sailboat restoration and improvement without throwing your budget overboard.
How to Clean Sails at Home
Just like a white shirt is a magnet for spaghetti stains, your sails are magnets for stains, dirt, and mildew. Unlike a white shirt, you shouldn’t bleach or machine wash your sails, it will ruin them. That means don’t clean them in a chlorinated pool, either.
For hundreds of dollars, you can send your sails to a professional cleaning service like SailCare.com . They’ll come back looking great but if they also need ANY repairs (loose stitches, etc.), you’ll be put on the spot to have them repaired and your cost can quickly mount. And if your sails are old, they’ll still be old when they come back. Their cleaning process includes re-impregnating the fabric with resins but that just stabilizes the current shape of the sails for a while, it doesn’t restore them to a like-new shape. But if you’re going to have your sails repaired anyway, this can be a good option to clean them at the same time.
Another options is for you to clean your sails at home. You can restore some of their brightness without causing permanent damage and without it costing you a lot. You only need a large, flat, clean workspace, some basic cleaning supplies that you probably already have, a little elbow grease, and some time.
Tastes great on salads too
The process that I’ll describe below will clean your sail fabric but it won’t do much to remove the corrosion from hardware. If you also want to clean the hardware, do it first and then clean the sailcloth. The second, main cleaning will remove any temporary stains caused by the hardware cleaning process.
You can spend hours hand cleaning each grommet, eyelet, and hank snap but there’s a much easier way using regular household white vinegar.
To clean corroded brass and bronze sail hardware:
- Pour some undiluted, household white vinegar into a shallow bowl and submerge a group of one to three pieces of hardware (and the surrounding sail cloth) for an hour or so at a time for each group. The corrosion will completely dissolve away and the hank snaps will work smoother and easier. Look ma, no brushing!
- While each group of pieces is soaking in vinegar, place the previously soaked pieces in a bucket of clean water to dilute and rinse out the vinegar and remove the blue-green high water mark that can be left on the sailcloth.
- Every hour or so, rotate dirty hardware into the vinegar, clean hardware into the rinse water, and do something else in between rotations.
- When you’re finished cleaning the hardware, then clean the sailcloth like described below.

Sail cleaning 101
Here’s what I do for general sailcloth cleaning:
- Place a clean, plastic, black or dark-colored 40 gallon garbage can where it will receive full sunlight to keep the water warm.
- Fill the garbage can with water (soft water and warm but not hot, if possible).
- Add 2 cups of Oxyclean liquid stain remover and mix well. Do not add bleach or other harsh cleaners, which can damage some sail fabrics, bolt ropes, and thread.
- Completely submerge one sail at a time in the water and let it soak for 24 hours. You don’t need to agitate it. If some of the sail floats up out of the water, just turn the sail in the water from time to time to be sure everything gets plenty of time to soak.
- After 24 hours, remove the sail and spread it out flat on a clean, smooth surface. A deck made with composite planks works great if you have access to one. If your sail is bigger than your work surface, work on a small section at a time.
- While it’s still wet with the soapy water, lightly scrub the sail all over with a soft brush, paying extra attention to the seams, batten pockets, and stains.
- Thoroughly rinse with clean water (soft water if possible).
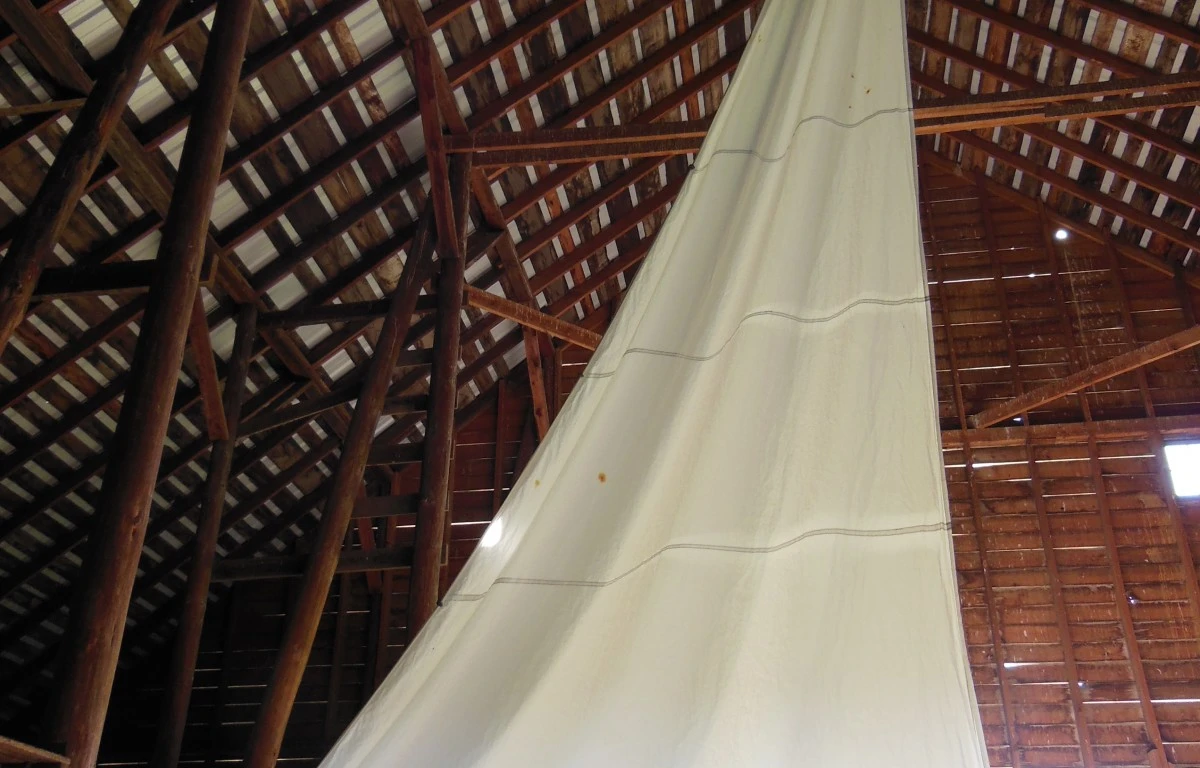
- Hang the sail to dry. If you don’t have a huge barn like in the first picture, you can drape it over outdoor furniture, hang it from a flagpole, or whatever you may have so long as it keeps the sail off the ground and lets air circulate around the fabric until it dries. If you don’t have someplace at home to do this, take the sail to your sailboat on a light wind or windless day and hoist it to dry while you do other things. Just be sure you don’t store the sail while it’s still damp or mildew can set in. Store it loosely in a well ventilated space for at least several days to be sure all the moisture trapped between the layers of material in the corner patches has evaporated.
It’s common for old sails to have small rust stains on them from coming into contact with a rusty anchor or chain laying on the deck. They will be there forever, unfortunately. There is no sure way to remove them after they get set into the cloth.
Not quite clewless
After you are done cleaning your sails and their hardware is a good time to do any necessary repairs. If you’re not comfortable making the repairs yourself, look for a reputable sail loft in your area. Most will give you a quick evaluation and cost estimate.

If you discover that your sails are so old or damaged that they aren’t worth investing in repairs, consider buying new replacements from a quality online sail loft. For more information, read Product Review: Rolly Tasker Sails .
After a thorough cleaning, your sails should look fairly clean. An annual light cleaning can keep them that way for the rest of their useful life and delay or avoid costly replacement.
Subscribe to Blog via Email
Enter your email address to subscribe to this blog and receive notifications of new posts by email.
Email Address:
Share this:
14 thoughts on “ how to clean sails at home ”.
Another great idea, $tingy! It’s going to be my second task this winter after fitting that in-mast radio aerial cable after three years!
Fantastic post, love the pragmatic and easy to understand steps.
Stingy, Have you ever dyed colors into a sail or can it be done? I purchased new sail this year and my old ones are decent enough to keep a hold of, but i was wondering if I could dye some colors in my old head sail. Thanks for your time.
I haven’t done it myself, but I’ve read about others doing it like here: Dyeing Sails .
Good luck and if you decide to try it, let us know how it turns out. $tingy
Very careful use of Oxalic acid will remove rust stains.
Any thoughts on how much Oxyclean you would use if you were using the powder to clean the sail instead of the liquid?
I’d probably try 1 cup first and see how well it works, then increase the amount if necessary.
Wondering if anyone on this blog has an AMF Windflite or how I can find an owners manual. Thanks!
Frustrated by no sail loft or cleaning service answering the phone the day after Memorial Day, i think I’ll try your system. Thank you for the advice!
As we are always away from home in a marina or anchorage, I have used my inflatable dinghy filled with water in place of the plastic garbage can —just used a mild detergent and obviously no bleach -let sit overnight and then next morning drained, filled, rinsed, repeated and then ran the sail up the mast to dry and put away dry late that afternoon …advantage of the dinghy is that i can stomp around like mashing grapes and thus can get more of an agitation action–also if i see a particularly soiled area then I can scrub it on the side of the dinghy and put it back in the water….seemed to work OK …any thoughts?
Sounds like a great routine to me!
Thankyou great advice loved your mast raising video am going to look at spinnaker post next
Great tips about Oxyclean & vinegar. Thanks! Please sign me up to receive your posts. (No link at bottom of web page.)
Grace, I just fixed the link so you should be able to subscribe now. Thanks for pointing it out.
Leave a comment Cancel reply
This site uses Akismet to reduce spam. Learn how your comment data is processed .

- Already have a WordPress.com account? Log in now.
- Subscribe Subscribed
- Copy shortlink
- Report this content
- View post in Reader
- Manage subscriptions
- Collapse this bar
How to Clean Your Sailboat… and Your Sails

Sailing is nice… but when we get back to port it’s time to take care of our boat. Remember to always keep your sailboat clean, it’s the only way to always have it in perfect shape! To clean your sailboat, you’ll need to gather some supplies and follow these steps:
- Rinse off any saltwater or dirt from the exterior of the boat using a hose or pressure washer.
- Scrub the hull and deck with a soft-bristled brush and a mild detergent. Pay special attention to any stains or dirt that may be harder to remove.
- Rinse off the soap and scrubbed-off dirt with the hose or pressure washer.
- Dry the boat thoroughly using a soft cloth or chamois.
- Clean and dry the boat’s interior, including any cushions, curtains, and other fabric surfaces. Use a mild detergent and a soft cloth or brush to remove any dirt or stains .
- Clean and dry any metal surfaces, such as the hardware and fittings, using a metal cleaner and a soft cloth.
- Inspect the boat for any damage or maintenance issues, and make necessary repairs.
By following these steps, you can keep your sailboat clean and in good condition, ensuring that it is ready for your next adventure on the water.

How to clean the sails of your sailboat
To clean the sails of your sailboat , you’ll need to gather a few supplies, including:
- A soft brush or sponge
- Mild detergent or soap
- A bucket of water
- A hose or pressure washer (optional)
Here are the steps to follow:
- Start by brushing off any dirt or debris from the sails using a soft brush or sponge.
- Mix a small amount of mild detergent or soap in a bucket of water.
- Dip the brush or sponge into the soapy water and scrub the sails, paying particular attention to any stains or dirt that may be harder to remove.
- Rinse the sails off with the hose or pressure washer, making sure to remove all the soap and scrubbed-off dirt.
- Dry the sails thoroughly using a soft cloth or chamois.
By following these steps, you can keep your sailboat’s sails clean and in good condition, ensuring that they are ready for your next adventure on the water.

A Complete Guide to Teak Maintenance on Your Sailboat
Quick group strengthens usa presence with acquisition yachting marine service, exploring the functionality of lagoon boom furler for 46 to 51ft catamarans, north sails introduces renew, a sustainable sailcloth for cruising, live your passion, subscribe to our mailing list.
Sailboat Cleaning and Maintenance: A Step-by-Step Guide

Sailboats are a fantastic investment for those who enjoy spending time on the water. Not only are they a lot of fun to use, but they also provide a unique way to explore the world and escape from the stresses of daily life. However, like any other investment, sailboats require regular maintenance and cleaning to ensure they stay in good condition and continue to perform at their best.
In this blog post, we’ll provide a detailed guide on how to clean your sailboat and how to keep it well-maintained. Whether you’re a seasoned sailor or a beginner, these tips will help you keep your sailboat looking and functioning its best.
Table of Contents
A Step-by-Step Guide for Cleaning and Maintaining your sailboat
Step 1: clean the deck.
The first step in cleaning your sailboat is to wash down the deck. This will remove any dirt, grime, or debris that has accumulated over time. To do this, use a mild soap and water solution and a soft-bristled brush to scrub the deck. Be sure to pay extra attention to areas that are prone to buildup, such as around the cleats and in the corners.
Step 2: Clean the Hull
Next, move on to the hull of your sailboat. The hull is one of the most important parts of the boat, and keeping it clean will help maintain its appearance and performance. To clean the hull, use a mild soap and water solution and a soft-bristled brush. Start from the bow of the boat and work your way towards the stern, being sure to scrub in a circular motion to remove any buildup or stains.
Step 3: Clean the Windows and Hatches
The windows and hatches on your sailboat are important features that provide natural light and ventilation. To clean these areas, use a solution of vinegar and water, or a specialized window cleaner. Apply the solution to the surface and use a soft cloth to gently scrub away any dirt or grime. Be sure to rinse thoroughly with clean water to prevent streaks.
Step 4: Clean the Sails
The sails are one of the most important components of your sailboat, and keeping them clean and in good condition is essential for optimal performance. To clean your sails, use a mild soap and water solution and a soft-bristled brush. Scrub the sails in a circular motion to remove any dirt or buildup, being sure to pay extra attention to areas that are prone to staining.
Step 5: Clean the Hardware
The hardware on your sailboat, such as the cleats, winches, and fittings, is important for both appearance and functionality. To clean these areas, use a mild soap and water solution and a soft-bristled brush. Scrub the hardware in a circular motion to remove any dirt or grime, being sure to pay extra attention to areas that are prone to rust.
Step 6: Maintain the Paint
The paint on your sailboat is important for both appearance and protection against the elements. To maintain the paint, wash it down regularly with a mild soap and water solution. If the paint is starting to fade or become discolored, consider applying a fresh coat of paint to keep it looking its best.
Step 7: Protect the Wood
If your sailboat has any wooden components, such as teak decks or trim, it’s important to protect them from the elements. To do this, clean the wood regularly with a mild soap and water solution and apply a protective finish to keep it looking its best.
Step 8: Check and Maintain the Rigging
The rigging on your sailboat is important for more ensuring the safety of your boat and its passengers while out on the water. Regularly inspect the rigging for any signs of wear or damage, such as frayed lines or rust on the hardware. If you notice any issues, have them repaired by a professional immediately. Additionally, be sure to adjust the rigging as needed to ensure it remains tight and secure.
Step 9: Store Your Sailboat Properly
When not in use, it’s important to store your sailboat properly to protect it from the elements and prevent damage. If possible, store your sailboat in a covered area, such as a boathouse or covered slip. If this is not possible, invest in a quality boat cover to protect the exterior from rain, wind, and sun.
By following these steps, you can keep your sailboat looking and functioning its best for years to come. Regular cleaning and maintenance is essential for maintaining the appearance, performance, and safety of your boat, and investing the time and effort to do so will be well worth it in the end. Happy sailing!
Key Takeaways:
- Clean the deck, hull, windows and hatches, sails, and hardware regularly to maintain their appearance and performance.
- Maintain the paint, protect the wood, and inspect and adjust the rigging regularly.
- Store your sailboat properly when not in use to protect it from the elements and prevent damage.
Answers to Frequently Asked Questions About Cleaning your Sailboat
Best thing to clean a boat with.
The best thing to clean a boat with depends on the type of material the boat is made of and the type of dirt or grime you are trying to remove. Here are some common materials and the best cleaning products to use:
- Fiberglass : A mild soap and water solution or a specialized fiberglass cleaner can be used to clean the surface of a fiberglass boat.
- Metal : A solution of vinegar and water can be used to clean metal components on a boat. For rust, use a specialized rust remover.
- Sails : A mild soap and water solution can be used to clean sails. For tough stains, consider using a specialized sail cleaner.
- Teak Wood : Use a mild soap and water solution to clean teak wood. For long-term protection, apply a teak oil or sealant.
- Upholstery : For upholstery, use a mild soap and water solution or a specialized fabric cleaner.
It’s always a good idea to check the manufacturer’s recommendations and test a cleaning solution in an inconspicuous area before using it on the entire boat. Additionally, always use a soft-bristled brush and rinse thoroughly with clean water to prevent streaks or damage to the boat’s surface.
What Is Good For Cleaning Your Vessel That Does Not Harm Lakes Or Rivers
When cleaning your vessel, it’s important to use cleaning products that are environmentally friendly and won’t harm lakes or rivers. Some of the best cleaning products for cleaning your vessel that are eco-friendly and safe for the environment include:
- Biodegradable Soap : Biodegradable soap is a gentle cleaning solution that can be used on all types of boats. It is made from natural ingredients that break down quickly in the environment and won’t harm aquatic life or vegetation.
- Baking Soda : Baking soda can be used as a gentle abrasive cleaner for removing dirt, grime, and stains from the boat’s surface. Simply mix with water to create a paste, and use a soft brush to scrub the surface.
- White Vinegar : White vinegar is a natural, eco-friendly cleaning solution that can be used to clean and deodorize various parts of the boat. Mix with water to create a solution and use a cloth or spray bottle to clean.
- Lemon Juice : Lemon juice is a natural degreaser and can be used to clean grease and oil from the boat’s surface. Simply mix with water and use a cloth to clean.
- Castile Soap : Castile soap is a natural, plant-based soap that can be used for cleaning various parts of the boat. It is gentle and biodegradable, making it a safe and environmentally friendly option.
Remember to always rinse the boat thoroughly with clean water after cleaning to prevent any residual cleaning products from entering the water. Additionally, avoid using cleaning products that contain harsh chemicals, such as bleach or ammonia, as these can harm aquatic life and the ecosystem.
Household Products To Clean Boat
There are many household products that can be used to clean a boat, including:
- White Vinegar : White vinegar is a natural cleaning solution that can be used to clean and deodorize various parts of the boat. Mix with water to create a solution and use a cloth or spray bottle to clean.
- Olive Oil : Olive oil can be used to clean and protect the boat’s exterior, especially if it has a gelcoat finish. Simply apply a small amount of oil to a cloth and use it to polish the surface.
- Cornstarch : Cornstarch can be used to clean and polish fiberglass surfaces. Simply mix with water to create a paste and use a soft brush to scrub the surface.
Remember to always rinse the boat thoroughly with clean water after cleaning to prevent any residual cleaning products from entering the water. Additionally, always test a cleaning solution in an inconspicuous area before using it on the entire boat to avoid any damage or discoloration.
How To Clean A Fiberglass Boat
Cleaning a fiberglass boat requires a gentle approach to avoid damaging the surface. Here is a step-by-step guide on how to clean a fiberglass boat:
- Rinse the Boat : Rinse the boat with a hose or pressure washer to remove any loose dirt or debris. This will help prevent scratches when you wash the boat.
- Mix Cleaning Solution : Mix a cleaning solution using a mild soap and water or a specialized fiberglass cleaner. Avoid using harsh chemicals, such as bleach or ammonia, as they can damage the surface of the fiberglass.
- Apply Cleaning Solution : Apply the cleaning solution to the boat using a soft-bristled brush or sponge. Start from the top and work your way down, paying extra attention to areas with heavy dirt or grime.
- Scrub the Surface : Gently scrub the surface of the boat, working in small sections. Be sure to rinse the brush or sponge frequently to prevent the spread of dirt and grime.
- Rinse the Boat : Rinse the boat thoroughly with clean water to remove all the cleaning solution and dirt. Use a hose or pressure washer for best results.
- Dry the Boat : Allow the boat to air dry or use a clean, dry cloth to remove any water droplets. Avoid using towels or sponges that can leave lint or scratch the surface.
It’s always a good idea to check the manufacturer’s recommendations and test a cleaning solution in an inconspicuous area before using it on the entire boat. Additionally, it’s important to clean your boat regularly to keep it in good condition and prevent damage from build-up of dirt and grime.
Boat Cleaning Hacks
Here are some useful boat cleaning hacks to make the process easier and more efficient:
- Use a Pressure Washer : A pressure washer is a powerful tool that can quickly remove dirt and grime from the boat’s surface. Just be sure to use a low-pressure setting to avoid damaging the fiberglass.
- Duct Tape for Stains : Duct tape can be used to remove stubborn stains from the boat’s surface. Simply wrap the tape around your fingers, sticky side out, and gently rub the stain. Repeat as necessary until the stain is removed.
- Aluminum Foil for Chrome : Aluminum foil can be used to clean chrome parts on the boat. Simply crumple a piece of foil into a ball and use it to scrub the surface. The foil will remove rust and tarnish, leaving the chrome looking shiny and new.
- WD-40 for Rust : WD-40 is a multi-purpose lubricant that can also be used to remove rust from metal parts on the boat. Simply spray the rust with WD-40, let it sit for a few minutes, and then scrub with a wire brush. Repeat as necessary until the rust is removed.
- Use a Car Wax : Car wax can be used to protect the boat’s surface and keep it looking shiny. Simply apply the wax according to the manufacturer’s instructions, and buff with a clean, dry cloth.
These hacks can help make cleaning your boat easier and more efficient. However, it’s still important to use the proper cleaning solutions and techniques to avoid damaging the boat’s surface. And always follow the manufacturer’s recommendations for cleaning and maintenance.
What can I use to clean my sailboat?
To clean your sailboat, you can use a combination of cleaning solutions and tools, such as:
- Mild soap and water : A mixture of mild soap and water is a safe and effective cleaning solution for removing dirt and grime from the boat’s surface.
- Specialized boat cleaner : There are many specialized boat cleaners available that are designed for specific cleaning tasks, such as removing bird droppings, algae, or tough stains.
- White vinegar : White vinegar is a natural cleaning solution that can be used to clean and deodorize various parts of the boat. Simply mix with water to create a solution and use a cloth or spray bottle to clean.
- Lemon juice : Lemon juice is a natural degreaser and can be used to clean grease and oil from the boat’s surface. Simply mix with water and use a cloth to clean.
- Soft-bristled brush : A soft-bristled brush can be used to scrub the boat’s surface without causing damage. Use it to apply the cleaning solution and remove dirt and grime.
- Microfiber cloths : Microfiber cloths are gentle on the boat’s surface and absorb dirt and grime effectively. Use them to clean and dry the boat after rinsing.
- Hose or pressure washer : A hose or pressure washer can be used to rinse the boat thoroughly and remove any remaining cleaning solution or dirt.
It’s important to follow the manufacturer’s recommendations for cleaning and maintenance, and always test a cleaning solution in an inconspicuous area before using it on the entire boat to avoid any damage or discoloration.
How do I clean my sailboat sails at home?
Here are the steps for cleaning your sailboat sails at home:
- Remove the sails from the boat : Before cleaning the sails, remove them from the boat and lay them flat on a clean surface.
- Brush off dirt and debris: Use a soft-bristled brush to remove any dirt and debris from the sails.
- Mix a cleaning solution : Mix a cleaning solution using mild soap and water, or use a specialized sail cleaner.
- Apply the cleaning solution : Using a soft-bristled brush or a spray bottle, apply the cleaning solution to the sails. Scrub the sails thoroughly, paying special attention to any stained or discolored areas.
- Rinse the sails : Rinse the sails thoroughly with a hose or pressure washer to remove any remaining cleaning solution or dirt.
- Dry the sails : Lay the sails flat in a well-ventilated area to air dry. Avoid drying them in direct sunlight, as this can cause the sails to shrink or become discolored.
- Store the sails properly : Once the sails are dry, fold them neatly and store them in a dry, protected area.
It’s important to always follow the manufacturer’s recommendations for cleaning and maintaining your sailboat sails, and to avoid using harsh chemicals or abrasive materials that can damage the sails. Regular cleaning and maintenance will help extend the life of your sails and keep them looking and performing their best.
Can I pressure wash my sailboat?
Yes, you can pressure wash your sailboat, but it’s important to use the proper pressure setting to avoid damaging the boat’s surface.
Fiberglass boats are typically pressure washed using a low-pressure setting of around 1,000-1,500 psi. This will remove dirt and grime without causing damage to the gelcoat. If you’re unsure about the pressure setting to use, consult the boat’s manufacturer or a professional boat cleaner for guidance.
It’s also important to avoid aiming the pressure washer directly at any delicate or sensitive areas, such as seals, electrical components, or fittings. And, always be sure to wear eye protection and avoid using a pressure washer near anyone else.
Finally, be sure to rinse the boat thoroughly after pressure washing to remove any residual soap or cleaning solution that may have been used.
Overall, pressure washing can be an effective tool for cleaning your sailboat, but it’s important to use caution and follow the manufacturer’s recommendations to avoid causing any damage.
Do you wax a sailboat? How often should you wax a sailboat?
Yes, you can wax a sailboat to protect the gelcoat and improve its appearance. Regular waxing can help prevent oxidation and keep the boat looking shiny and new.
The frequency of waxing will depend on several factors, including the type of wax used, the climate, and the amount of time the boat spends in the water. As a general rule, it’s a good idea to wax the boat at least once a year, or more often if the boat is kept in the water for long periods of time or is exposed to harsh elements.
When waxing your sailboat, it’s important to use a high-quality boat wax that is specifically designed for the type of boat you have. Follow the manufacturer’s instructions for application and always test the wax in a small, inconspicuous area before waxing the entire boat.
Waxing your sailboat is a simple task that can help protect and preserve its appearance for many years to come. Just be sure to use the proper tools and materials, and to follow the manufacturer’s recommendations for best results.
Should you wash your boat after every use?
It’s a good idea to wash your boat after every use, especially if it has been exposed to saltwater, dirt, or other contaminants. Regular washing can help prevent the build-up of grime and other substances that can damage the boat’s finish and impact its performance over time.
However, if you only use your boat in freshwater and it is not heavily soiled, you may be able to skip washing after every use.
When washing your boat, be sure to use a mild soap and water solution and a soft-bristled brush or sponge to avoid causing damage to the gelcoat. Rinse the boat thoroughly with fresh water after washing, and avoid washing the boat in direct sunlight, which can cause the gelcoat to dry too quickly and become dull or discolored.
Overall, regular washing is an important part of maintaining your sailboat and helping to protect its appearance and performance. Just be sure to use the proper cleaning materials and techniques, and to rinse the boat thoroughly after washing to avoid any residual soap or cleaning solution.
Do you wax or polish a boat first?
It depends on the condition of the boat and the desired outcome. If your boat has a dull or oxidized finish, it’s best to start by removing the oxidation with a boat cleaner or oxidation remover. Once the oxidation has been removed, you can then apply a coat of boat wax to protect the gelcoat and improve its shine.
If your boat’s gelcoat is in good condition, you can start by polishing it to enhance its shine. A boat polish will help remove any light scratches and imperfections, and will also provide some protection against the elements.
Once the boat has been polished, you can then apply a coat of boat wax for added protection and to help maintain the shine.
It’s important to note that both boat wax and boat polish are designed to work together, and using both can help keep your boat looking its best. Just be sure to follow the manufacturer’s instructions for best results, and to avoid using any abrasive materials or harsh chemicals that can cause damage to the gelcoat.
How do I dry my boat after washing it?
After washing your boat, it’s important to dry it thoroughly to avoid water spots and other damage. Here are some tips for drying your boat:
- Use a soft, absorbent cloth : Use a soft, absorbent cloth, such as a microfiber towel, to gently dry the boat. Start at the bow and work your way to the stern, making sure to dry all surfaces including the deck, hull, and windows.
- Avoid direct sunlight : Try to dry your boat in a shaded area or under a cover to avoid water spots caused by direct sunlight.
- Air dry : If possible, let the boat air dry for a few hours. This will help evaporate any remaining moisture and prevent water spots.
- Use a fan : If you need to dry your boat quickly, you can use a fan to speed up the process. Just be sure to place the fan so that it is blowing air over the boat and not directly onto it.
- Protect delicate areas : If your boat has any delicate areas, such as electronics or canvas, be sure to cover them before washing the boat to protect them from water damage.
By following these tips, you can help ensure that your boat dries thoroughly and without water spots or other damage. Just be sure to avoid using harsh chemicals or abrasive materials, which can cause damage to the gelcoat or other surfaces.
Boat Cleaning Products
There are many different types of boat cleaning products available on the market, each designed to clean specific areas or surfaces of a boat. Here are some of the most common types of boat cleaning products:
- Boat soap : A mild, non-abrasive soap designed specifically for boats. Boat soap is usually formulated with ingredients that are safe for the environment and won’t harm the boat’s finish.
- Boat cleaner : A cleaning solution designed to remove dirt, grime, and other contaminants from the boat’s surface. Some boat cleaners are formulated to target specific types of buildup, such as salt deposits or oxidation.
- Boat wax: A protectant that helps protect the boat’s gelcoat and enhance its shine. Boat wax can be applied to the boat’s surface with a cloth or a foam applicator, and is available in both liquid and paste form.
- Boat polish : A product that is used to enhance the shine of a boat’s gelcoat. Boat polish helps remove light scratches and oxidation, and is typically used after the boat has been cleaned.
- Oxidation remover : A cleaning solution designed to remove stubborn oxidation from a boat’s gelcoat. Oxidation removers are typically used on older boats or boats that have been exposed to harsh weather conditions.
- Teak cleaner: A cleaner specifically designed for cleaning teak decks or other teak surfaces on a boat. Teak cleaners are formulated to remove dirt, grime, and other buildup, while helping to preserve the natural beauty of the wood.
When choosing boat cleaning products, it’s important to consider the type of boat you have and the specific cleaning needs you have. Always be sure to follow the manufacturer’s instructions and to use the products as directed, and avoid using harsh chemicals or abrasives that can damage the boat’s finish.
Emily Smith
Emily Smith is a passionate sailor and travel enthusiast, who has spent the last 8 years exploring the world by boat. From the tranquil waters of the Great Lakes to the roughest oceans, Emily has sailed it all and decided to share the knowledge on Sailingbetter.com blog. With a keen eye for detail and a talent for storytelling, Emily offers readers an insight into the thrilling world of sailing and the beautiful destinations it can take you to. When she's not out on the water, Emily calls Chicago, Illinois home and enjoys sharing her love for sailing with others. Join her on her journey as she continues to discover new horizons and inspire others to live life to the fullest.
Recent Posts
Lagoon vs Leopard Catamaran: Which Sailboat Is Right for You?
Introduction When it comes to cruising on the open waters, catamarans have gained immense popularity for their stability, space, and comfort. Two of the leading catamaran manufacturers, Lagoon and...
How to Determine Sailboat Weight: A Comprehensive Guide
Introduction Sailing is a thrilling and adventurous activity that has captivated humans for centuries. Whether you are a seasoned sailor or a novice looking to set sail for the first time,...
- New Sailboats
- Sailboats 21-30ft
- Sailboats 31-35ft
- Sailboats 36-40ft
- Sailboats Over 40ft
- Sailboats Under 21feet
- used_sailboats
- Apps and Computer Programs
- Communications
- Fishfinders
- Handheld Electronics
- Plotters MFDS Rradar
- Wind, Speed & Depth Instruments
- Anchoring Mooring
- Running Rigging
- Sails Canvas
- Standing Rigging
- Diesel Engines
- Off Grid Energy
- Cleaning Waxing
- DIY Projects
- Repair, Tools & Materials
- Spare Parts
- Tools & Gadgets
- Cabin Comfort
- Ventilation
- Footwear Apparel
- Foul Weather Gear
- Mailport & PS Advisor
- Inside Practical Sailor Blog
- Activate My Web Access
- Reset Password
- Pay My Bill
- Customer Service

- Free Newsletter
- Give a Gift
How to Sell Your Boat

Cal 2-46: A Venerable Lapworth Design Brought Up to Date

Rhumb Lines: Show Highlights from Annapolis

Open Transom Pros and Cons

Leaping Into Lithium

The Importance of Sea State in Weather Planning

Do-it-yourself Electrical System Survey and Inspection

Install a Standalone Sounder Without Drilling

When Should We Retire Dyneema Stays and Running Rigging?

Rethinking MOB Prevention

Top-notch Wind Indicators

The Everlasting Multihull Trampoline

How Dangerous is Your Shore Power?

DIY survey of boat solar and wind turbine systems

What’s Involved in Setting Up a Lithium Battery System?

The Scraper-only Approach to Bottom Paint Removal

Can You Recoat Dyneema?

Gonytia Hot Knife Proves its Mettle

Where Winches Dare to Go

The Day Sailor’s First-Aid Kit

Choosing and Securing Seat Cushions

Cockpit Drains on Race Boats

Rhumb Lines: Livin’ the Wharf Rat Life

Re-sealing the Seams on Waterproof Fabrics

Safer Sailing: Add Leg Loops to Your Harness

Waxing and Polishing Your Boat

Reducing Engine Room Noise

Tricks and Tips to Forming Do-it-yourself Rigging Terminals

Marine Toilet Maintenance Tips

Learning to Live with Plastic Boat Bits
- Boat Maintenance
Quick and Safe Sail Cleaning
Oxiclean and dirt cheap diy formula match specialty cleaners..

It can be a rust stain caused by a loop of chain that spent the winter lying on a sail. Perhaps a bird crawled under the sail cover and built a nest, pooping on the sail for weeks. Laminate sails present a particularly vexing problems, since mildew likes the adhesive that bond the layers, resulting in stain that is sealed between waterproof layers. Some of these just look bad (rust stains), but others can slowly weaken a sail (mildew in the laminate adhesive). But in all cases, overly aggressive cleaning can make things even worse, weakening the sail more than the mildew ever would.
Stains can be removed in three general ways. They can be physically removed, dissolved, or bleached (made invisible). Each requires different chemistry and a different mindset, so it helps to understand the stain.

Photos by Drew Frye
Most stains are linked to moisture. Good ventilation prevents condensation, and consider taking sails home for the off-season. Canvas should be water repellent treated (see PS February 2014 online ). This is the single most effective way to combat lichen mildew on both the cover and the sail under it.
Physical removal requires that the bond be broken. In the case of mildew and algae, this requires that the organism be killed and for some time to pass. Borax, oxygen bleach (sodium percarbonate or sodium perborate), chlorine bleach (sodium hypochlorite), and quaternary amines (benzalkonium chloride and others) are all effective if given a soaking period. The required dose is not very high, so more is not better. Sunlight works on mildew, though very similar looking black algae are not killed by UV (unless the mildew truly grew in the dark, consider that it might actually be algae).
Surfactants-including both organic soaps and detergents, and inorganics such as trisodium phosphate (TSP), baking sodas, and borax-help by breaking static bonds and emulsifying grease. Again, soaking time helps, followed gentle agitation, or more effective and less damaging, little light work with a brush with the sail laid out on a non-abrasive surface. But remember that stains that are between laminate layers or deep in a seam will not be helped by scrubbing.
Dissolving works best on rust, corrosion, and metals stains. The trick is to reduce the pH far enough to dissolve the metal oxide without damaging the cloth. Nylon is vulnerable to strong acids, literally dissolving before your eyes in battery acid, so nothing with a pH of less than 3 should be used. Polyester and other fabrics are less vulnerable, but we like to keep the pH above 3 because nylon thread can always sneak in.
It is always better to soak for longer rather than to use stronger chemicals, since the cloth is not affected by long soaking times at a safe pH, but the stain will slowly vanish. Some products contain chelating agents (EDTA and its relatives) to help dissolve and suspend metal at less acidic pH. The pH values for common cleaning acids such as hydrochloric acid (sold as muriatic acid), oxalic acid (Ospho), acetic acid (vinegar), and lactic acid (CLR brand) can vary by concentration, so if you are going to use an acid cleaner, you may have to dilute it further. Here are the pH levels of common acids used for cleaning (note that the acid concentrations indicated by percentages can vary by product):
Hydrochloric acid (3% acid), diluted with water 20:1, very low pH
Oxalic acid (100% acid), diluted with water 20:1, pH 2-3
Acetic acid (vinegar, about 4-6% acid), used undiluted or diluted with water 10:1, pH 3.3-2.4
Lactic (CLR brand acid is about 15%), diluted with water 10:1 to 20:1, pH 3.5-3.0
Bleaching is a reaction where the reactive chemical (hypochlorous acid in the case of chlorine bleach, peroxide radical in the case of oxygen bleaches) changes the chemical structure of the stain to where it no longer absorbs light, which is what gives it the color. Often, the contamination remains in place, but you simply can’t see it. In the case of laminate sails, there is little hope or removing mildew from between waterproof layers-anything that could do that would leave the sail in ruins. However, we can kill the mildew and then make the remains disappear, which is just as good-the mildew has stopped eating the sail and we don’t have to look at the stain. What is required is an active ingredient that can permeate through the thin laminate without damaging the cloth or adhesive.
What is the most effective ingredient? Oxygen bleach-like Oxiclean-generates an uncharged radical that can permeate through the film faster than the larger hypochlorous or borate ions. Also, it is less aggressive to the fabric than bleach.
While properly diluted bleach (no stronger than laundry recommendations) is safe for polyester, Spectra, and Dyneema, it weakens nylon and should be avoided. Chlorine bleach is Kryptonite to Kevlar and all aramids. In testing, exposure to a 30 percent solution of household bleach for 10 minutes can reduce the strength by 70 percent, destroying the sail. Even worse, residue becomes trapped within the laminate and destroys the Kevlar over time.
Permeation is a slow process. It still takes 15-30 minutes for the active ingredients to reach stains inside laminates, and more time to do their work. Warm water helps. Molecules move faster, reactions are faster, and specific to peroxide-based cleaners, they are more effective the hotter the water is, though most have been formulated with tetraacetylethylenediamine (TTEA), which lower the effective temperature to about 105 F (hot tub temperature). Increasing concentration makes little difference, so it is always better to substitute time for excess concentration. However, there is a practical limit to time. Like epoxies, oxygen bleaches are reactive and after 3-8 hours they become spent. In fact, the active ingredient in oxygen bleaches is not stable in water and any liquid product that claims to include Oxiclean are slightly misrepresenting the facts; they contain enzymes, but no percarbonate or peroxide compounds. They are not stable once dissolved in water.
A final thing to consider is the effect of any residue. Even after rinsing, both laminates and resinated cloth will retain some of the cleaner-it wicks its way deep inside during the soak, and even a vigorous rinsing cannot remove chemicals from behind waterproof layers. First, never exceed recommended concentration. Second, favor cleaners that leave residue that will serve some positive function; borates and BAC-based algaecides, for example, retard mildew growth. Finally, avoid cleaners that contain biodegradable organic components that may become mildew food-most liquid laundry detergents have this failing and actually encourage mildew regrowth.
Soak, scrub, or machine?
A machine is always wrong, no matter how gentle. A cycle is surely equivalent to dozens of hours of flogging and is sure to break down the resins, fatigue Kevlar fibers, and separate laminates. Some services use floors scrubbers, not much different from carpet cleaners with the vacuum turned down. They save time, but they can damage glue on sail numbers and tell tales. You can do the same by hand, and may need to for small spots, but should obviously be gentle. Worst of all, the chemical does not have time to work.
Finally, there is soaking. This takes time, but if the chemicals are properly selected and diluted, soaking is harmless to the cloth and effective. First, rinse the sail and examine for wear. Then spot-treat for rust or grease. Then soak in oxygen bleach. This is a required step for mildew and brightening.
Because the simplest way to dry a sail is to hoist it, we suggest not cleaning sails when the boat is in storage, but rather when they can be put back on the boat. Alternatively, you may have a dry place you can drape the sail. Putting a sail away wet is an excellent way to restart the mildew cycle.
A stain is not going to hurt anything. Despite ubiquitous statements to the contrary, we failed to find any concrete evidence that mildew and light staining/dirt damages sailcloth. On the other hand, stories abound of sails ruined by attempts to make them white again. We watched a guy scrub a sail with bleach until it was so weakened he put the scrub brush right through it. So long as you have killed the mildew (oxygen bleach or borax), simply learn to ignore it. Sails are the main engine of the boat, not a fashion accessory.

What We Tested
For cleaners, we tested CS-530 from Challenge Sail Cloth, Oxiclean Powder, Sail Wash by Wash Safe, Mold and Mildew Cleaner by Iosso, a homemade concoction we call Formula B ( Inside Practical Sailor blog, October 13, 2014 ), and Starbrite Canvas and Sail Cleaner.
How We Tested
Our mainsail became the unfitting home to several families of birds over the years. Those spots needed cleaning. We also recovered some perfectly nasty Sunbrella from the recycle bin, which provided a nice assortment of mildew and rust stains. Finally, we tested a laminated sail with mildew between the layers. We sectioned off each test material (sail or canvas) and cleaned sections with each material, diluting, scrubbing, and soaking according to the directions.
Observations
Our first big project was cleaning the salon cushions of our 20-year-old catamaran. When they were last cleaned we can’t say, but for the 10 years weve had the boat, weve had kids running all over, spilled food and sunscreen, put our feet up, and sweated all over them.
We sectioned them off and went at them with a scrub brush and each of the sail cleaners in sequence, scrubbing vigorously but briefly, allowing to soak for two hours, rinsing liberally with a hose, and then extracting the liquid with the upholstery attachment on a carpet cleaner. Troublesome spots were re-treated. In the end they all came equally clean.
Some spots went deep into the foam. As the stain was removed, more would migrate to the surface, requiring repeated spot cleaning over a 36-hour period. This was not difficult, only time consuming.
And yet at this point the covers were not quite bright. But all is not lost, and you should quit when the canvas is nearly clean. It seems that the oxygen bleach weakens enough bonds that a half-day in the sun can often finish the job to perfection. They need drying time anyway, and the sun will safely finish your work.
We then tackled a sail that had been a birds nest for a few weeks. We tried Formula B and Starbrite Canvas and Sal Cleaner; both removed the surface dirt, but none appreciably affected the underlying stains. We then attacked the stains with CS-530 and Oxiclean, using procedures similar to those described for the cushions.
Winds were very light and on the bow, the sail is full batten and does not flog, so we scrubbed the stains right on the spars, hoisting and lowering as needed for access. In all cases, the stains were greatly reduced within two hours, and then vanished completely after several days exposure to the sun while sailing. Again, the lesson is that UV finishes the job, so quit when you are about 80 percent of the way there.
Finally, we sliced a mildewed section of an old taffeta/Mylar/Kevlar sail into squares and treated them according to the instructions. We did not scrub these, as the material would not withstand it, and the results were less than perfect. But they were far better than surfactant cleaners, without the vigorous scrubbing. Again, sunlight helped, and the final result should satisfy.
Product Summaries by Type
Some of the products contain percarbonate, and by releasing hydrogen peroxide, remove stains chemically. These also contain surfactants. Others contain only surfactants.
Percarbonate-Based
We were impressed by all of these but could not determine real differences in performance between them. All are powders and all require 2-8 hours to work. CS-530 Mold and Mildew Cleaner, Sail Wash, and Iosso Mold and Mildew Cleaner all performed well and are recommended. In our view, however, you can do just as well using Oxiclean Powder, which is cheaper and possibly already in your laundry room.
Bottom line: Percarbonate-based cleaners are safe and effective when used as directed. You don’t have to buy a specialty cleaner to get the job done.
Surfactant based
For a quick cleaning, with allowing soaking time, these perform about the same as percarbonate-based cleaners.
The home-made Formula B (1 quart hot water, 1 tablespoon baking soda, 2 tablespoons washing soda, 2 tablespoons Borax, 2 tablespoons TSP) is an effective mildewcide with some preventative properties. However, it is not going to penetrate within laminates. It requires a little more pre-soak time than the Starbrite product (give it 10 minutes to work), but the results were similar.
Starbrite Canvas and Sail Cleaner is a good solid fabric cleaner, it removed what was on the surface but had limited effect on stains. Because it contains glycol ethers, we are not sure it is suitable for all laminate sailcloths.
Bottom line: Starbrite’s Canvas and Sail Cleaner is great for quick clean-up of surface dirt. For the budget conscious with a little more patience, Formula B is our Budget Buy.
Cleaning Services
We have not used any cleaning services, although we have received feedback over the years from readers. Most of the users were satisfied, some expected something better, and the time required varies. All services will inspect and offer repairs. These may be required before they will risk washing them; the UV covers on some of the sails we tested were so deteriorated they would not have survived the cleaning process without damage. It is also important to be realistic in your expectations; some minor stains may remain, since the measures required to remove them might damage the sail.
Using the much-advertized LaMauney process, Sail Care cleans and re-seals the sail (using resins) to restore some level of crispness. The process does not affect the shape of the sail. They will not process laminate sails. Nylon sails are only washed. Weve gotten mixed reviews from readers, and online comments also reflect varied levels of service. Some rave about the crisp sail they got back, others cite expensive repairs and no improvement.
Another company, Clean Sails uses a soaking process very similar to that described in this article.
Bottom Line: We don’t have enough experience to rate these services. We recommend trying some of the DIY techniques first.
Conclusions
Because stains vary, there can be no single winner. For rust stains, we like CLR. Dilute 20:1 with freshwater, soak for up to 15 minutes, and rinse. For extra measure, you could buy pH strips (at pet or pool stores) to monitor the pH, particularly with nylon. For surface dirt on polyester sails and canvas, we like Formula B; it kills mildew and leaves an inhibiting residue. For mildew and algae stains we like all of the oxygen bleach products, though CS-530 may have a slight edge in soil removal.
Just how clean did the sails and cushions come out? Nearly half of the prospective buyers asked us either when we replace the cushions or where we had the recovering done. They were near perfect and we were stunned. The sails came clean too, after a few weeks in the sun. But we would have accepted a few stains rather than use overly aggressive cleaning methods or chemicals.

RELATED ARTICLES MORE FROM AUTHOR
Leave a reply cancel reply.
Log in to leave a comment
Latest Videos

Island Packet 370: What You Should Know | Boat Review

How To Make Starlink Better On Your Boat | Interview

Catalina 380: What You Should Know | Boat Review
- Privacy Policy
- Do Not Sell My Personal Information
- Online Account Activation
- Privacy Manager
How to Clean Sails on a Sailboat
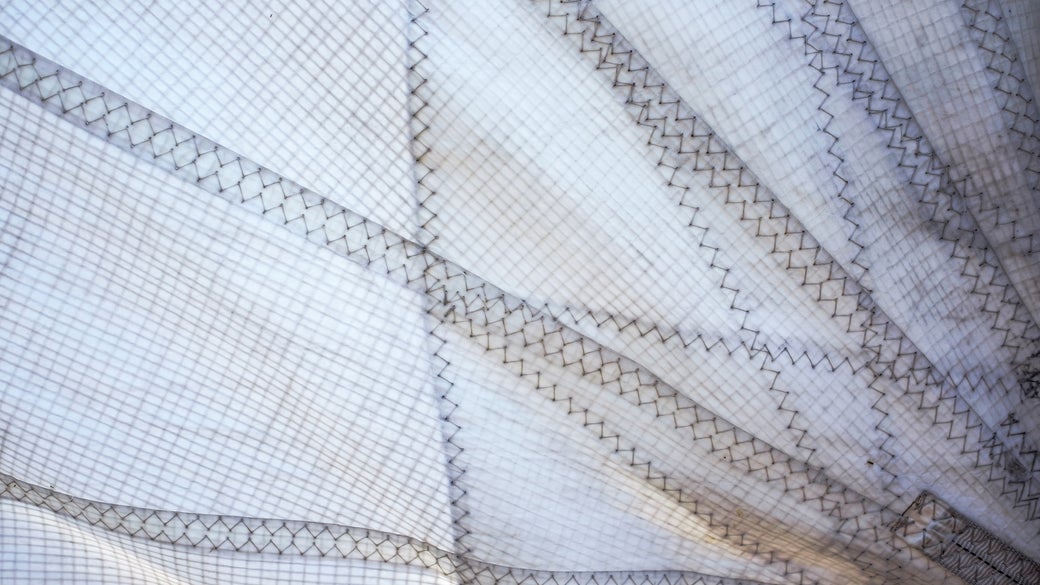
Sailboat sails are magnets for mildew, dirt, and other stains. Learn how to wash and clean sails on a sailboat including dacron without ruining the fabric.

My sailboat sails are made of Dacron, white in color. I have seen small black specks in certain areas, which I believe to be mildew stains. Could you please tell me how best to remove the black specks and also let me know is Dacron is susceptible to fabric damage from the use of mildew cleaners? Thank you.
Short answer here is that Dacron™ is a trademark name for polyester. This material is widely used in such things as tires, fire hoses and curtains as well as clothing. It is also widely used in boating for sails, ropes and even combined with fiberglass for the hulls.
One of the reasons this material is used is it can be easily cleaned with bleach and water solutions.
For the mildew stains I would try:
- Brush the area with a stiff brush to remove as much as possible.
- If the sail has been removed, you can place affected area in a solution of ¼ cup Clorox ® Disinfecting Bleach per gallon of cool water to soak for 5 to 10 minutes. Wash/scrub the area thoroughly and rinse with fresh water. Repeat if necessary. I probably would wear some rubber gloves if prolong contact with the cleaning solution is required.
- Another approach if the sails are not removed, would be to wash/scrub the stains with hot, sudsy water made with ¼ cup Clorox ® Disinfecting Bleach added to 1 gallon of water and a teaspoon of laundry detergent; then rinse and dry. Repeat if necessary. Again, I probably would wear some rubber gloves if prolong contact with the cleaning solution is required.
The page you are navigating to is not available in Spanish.
An important safety message.
Bleach and other disinfectants are not suitable for consumption or injection under any circumstances. People should always read the label for proper usage instructions. Disinfecting surfaces with bleach and other disinfecting products is one of the ways to help stop the spread of COVID-19, according to the Centers for Disease Control. Our products are safe when used as directed. It’s critical that everyone understands the facts in order to keep themselves safe and healthy.
- Join Newsletter & Get 10% Off Your First Order
Join / Login
Rigging tips for building a model ship.
- Updated on: 25th January 2021
- Written by Gary Renshaw
Introduction
Rigging is a significant part of the process of building a model ship. It can be tedious and time-consuming however putting the effort in adds to the beauty of your finished model.
In general, the instructions on rigging provided by the manufacturers of model ship kits are fairly sparse. Whilst there are several specialised and very detailed books on masting and rigging, they are more concerned with matters of historical and technical accuracy than with the sort of advice that might help the beginner to understand the best way of going about what might appear to be quite a daunting task.
Highly recommended is a 3 DVD set available from Modellers Shipyard on Masting and Rigging . This is a comprehensive set which shows all aspects of preparing the masts, spars and yards and the rigging for a period model. For further information call our office or visit our website.
We do strongly recommend “Ship Modelling Simplified” by Mastini – it contains excellent advice on ship modelling in general and has a good section on rigging. Modeller’s Shipyard has produced the following information as an introduction to the Rigging of a model ship. The following points should be noted:
- This is a general guide only and is to be used in conjunction with any instructions and plans provided by the kit manufacturer. In particular, it must be emphasised that any illustrations used in this leaflet are purely for the purpose of example and may not relate to your specific model.
- The approaches described are not the only way of doing things and the order in which the various processes are carried out may be varied, within reason, to suit the individual modeller.
Building a model ship is as much an exercise in using the mind as it is in using your fingers and hands. In this small leaflet, we can’t hope to cover all the problems and queries that may be encountered in the construction of your model. It is necessary to spend as much time thinking about the task at hand as actually doing it. If having thought about it, you still have a problem then contact us. We’ll either be able to advise you ourselves or refer you another modeller in your area who’ll be happy to help you with “hands-on” assistance.
TYPES OF RIGGING
The rigging of a ship can be divided into two main parts:
- “Standing” or “Fixed” rigging, which is used to support the Masts and Bowsprit.
- “Running” rigging, which is used to manipulate spars and sails.
On an “actual” ship any Rigging which didn’t pass through a pulley block was coated with tar to help prevent it rotting. For this reason, standing rigging is often, although not always, black on ship models.
If you do want your standing rigging black, and black cord is not supplied in the kit then you can consider these options:
- You can purchase Black cord.
- The use of black rigging “wax” gives a very authentic tarred look but it is difficult to do well.
- The cord supplied with the kit can be coloured using black dye or “Raven Oil” as used by leatherworkers/saddlers.
- Black felt-tipped “Texta” is an easy way to colour the cord.
- Black “Padawax” shoe colour is also very satisfactory.
When any liquid dye has been used it will be necessary to stretch the cord by hanging it on a clothesline, with weights, to prevent it going slack after installation on the model. It will also probably be necessary to use clear wax to eliminate any furry look in the cord.
STANDING RIGGING
This includes the rigging of the Stays, Backstay, Bowsprit and Gammoning. This is fairly straightforward and should present few difficulties. Work from the centre of the ship out and try to avoid difficult and confined spaces. A Rigging Tool presented in the Tools section of our Catalogue will be helpful when rigging. The various names for the standing rigging are presented below.
- Fore topmast stay
- Fore topgallant stay
- Flying-jib stay
- Fore royal stay
- Fore skysail stay
- Main topmast stay
- Main topgallant stay
- Main royal stay
- Main skysail stay
- Mizzen stay
- Mizzen topmast stay
- Mizzen topgallant stay
- Mizzen royal stay
- Mizzen skysail stay
- Mizzen topmast backstay
- Mizzen royal backstay
- Mizzen skysail backstay
- Main topmast backstay
- Main topgallant backstay
- Main royal backstay
- Main skysail backstay
- Fore topmast backstay
- Fore topgallant backstay
- Fore royal backstay
- Fore skysail backstay
- Bowsprit shrouds (bobstays)

Source: “Ship Modeling Simplified” by Mastini Pages 143 –144
FITTING OF BLOCKS, EYE PINS & CLEATS
Before proceeding further fit all the eye pins and rigging blocks to the bowsprit, masts, yards, and deck – also to the insides of the bulwarks if required. Cleats may be required on the lower masts, deck or bulwarks. Pay particular attention to any area which will be relatively inaccessible once the shrouds and other standing rigging ropes are in place.
It is as well to drill out the holes in the blocks and deadeyes to facilitate the threading of the rigging cord when the time comes.
For the most inaccessible blocks, insert a short piece of thin rigging cord through the hole and glue it to itself forming a loop. Later, when you wish to insert the permanent running rigging you cut the loop, glue the new cord to one end and pull it through the hole using the other end of the pilot cord. No awkward threading
DEADEYES (LOWER) AND CHAIN STRAPS/ DEADEYE STRAPS
In most models, the lower deadeyes are fitted into “deadeye loops” which are inserted into gaps in the outer edge of the “Channel”. Once the complete row of deadeyes are installed a capping strip is fixed along the front.
From the bottom of the deadeye loop either a straight ”Deadeye Strap” or a “Chain Strap” goes to the side of the hull at a lower level. The style of this fitting will depend on the period to which the particular ship belongs and also the price/ quality of the ship being built.

There are several points to keep in mind when setting up these “deadeye assemblies”
The deadeye strap (or chain strap) is rarely, if ever, perpendicular. Rather, it should be at an angle which is an extension of the angle of the shroud which will eventually be attached to the deadeye above it. The diagram on the left of this page should make that mouthful clearer!!
The lower deadeyes, the ones being attached at present, should be placed so that the three holes are positioned with the lowest one being the centre of the three. When at a later stage the upper deadeye is fitted, it is equally important that the centre hole is the highest of the three. Refer to the diagram on the right-hand side of this page.

These together with the “forestays” and “backstays” are the ropes that support the masts. Shrouds, which are the group of ropes to which the ratlines are attached, are made up in pairs with a deadeye at each end of a single rope.
First cut a piece of cord to an appropriate length and with the help of an alligator clip or a small clamp glue one end around a deadeye. This deadeye should then be temporarily connected to the front portside (left hand) lower deadeye using a wire jig. This jig will provide the correct spacing between the upper and the lower deadeye.

The loose end of the rope then goes up, around the mast and down to the position of the lower deadeye immediately behind the first. Using glue, alligator clip and another wire spacer, the upper deadeye is attached to the shroud. At a latter stage, the double thickness of cord immediately above the upper deadeye will be bound with fine thread as shown as shown in some of our diagrams. The “Lanyards”, made of the thinnest rigging cord, are then installed as shown in the adjoining drawing. Because on the “real thing” the lanyards were constantly used to take up tension on the shrouds they were never tarred and should not be black.
Once the first pair of shrouds has been completed, the exercise is repeated on the other (starboard) side, then, back to the port side and so on.
If, when the others have been done there remains a single lower deadeye on each side then the final pair of shrouds goes from one side of the ship to the other with a large seized eye around the masthead. In all of this, it is important to ensure that the deadeyes are in straight rows parallel with the channels and with each other.

SEQUENCE OF SHROUDS

The forestays should now be fitted paying attention to the particular fittings used. Quite commonly “heart deadeyes” and lanyards will be used for tensioning purposes.

These are always rigged with a large seized eye around the masthead as with the “odd” shrouds (if any). As with the shrouds they are rigged with deadeyes and lanyards but the upper deadeye will normally be at a higher level than that of the shroud deadeyes.
The colour of the ratline cord is grey or fawn. The tying of ratlines can be fairly tedious but it is worth going to some trouble to ensure that it is done well. Among the points to keep in mind are:
- They should not be too tight otherwise they will pull the shrouds together.
- They should be parallel to the waterline.
- On the “real thing” the spacing between each row was about 400mm so, on a model at a scale of say 1:50, the gap would be approximately 10mm.
- Avoid tying knots tightly until all the ratlines are in place. This will allow some “fine tuning” before placing a tiny dab of glue on each knot. Placing a sheet of white plain paper behind the shrouds will assist with gaining contrast to make the tying of the ratlines a tad easier on the eyes.

ATTACHING RIGGING LINE TO BELAYING PINS
The adjacent diagram demonstrates clearly the method best used to attach the cord to the belaying pins.
If you have any difficulties determining which belaying pin a rope is intended to go to, a good rule of thumb is that the higher up the mast it starts then the further back it finishes.

ROPE COILS
Plenty of rope coils draped over the belaying pins provide a finishing touch. These can be made from odd lengths of offcuts. If placed into the shapes you require they can be (fixed) permanently by using hair lacquer or nail polish.
WHAT SIZE ROPE TO USE
In the plans or in the instructions there should be a key or description of the size of cord to be used for various purposes. In the unlikely event that no indication is given, then the following can serve as a guide:
Forestays & Anchor ropes – Heavy cord
Shrouds & Backstays – Medium cord
Ratlines & Running Rigging – Lightest cord
RUNNING RIGGING
Once the standing rigging has been completed you can now start the Running Rigging. You will have enlarged the holes in the blocks which are already in place. Do the same with all other blocks as you come to use them.
When threading cord through blocks, you will find that a needle threader (available from sewing shops) will be very handy. Also, a smear of super glue on the end of the cord can stiffen it and make it easier to thread. Work from the centre of the ship out and try to avoid locking yourself into difficult positions. A Rigging Tool presented in the Tools section of our Catalogue will be helpful when rigging.
The various names for the Running Rigging are presented below.
- Fore brace
- Fore lower topsail brace
- Fore upper topsail brace
- Fore lower topgallant brace
- Fore upper topgallant brace
- Fore royal brace
- Fore skysail brace
- Fore yard lift
- Fore topsail yard lift
- Fore topgallant yard lift
- Fore royal yard lift
- Fore skysail yard lift
- Main lower topsail brace
- Main upper topsail brace
- Main lower topgallant brace
- Main upper topgallant brace
- Main royal brace
- Main skysail brace
- Main yard lift
- Main topmast yard lift
- Main topgallant yard lift
- Main royal yard lift
- Main skysail yard lift
- Mizzen yard brace
- Mizzen lower topsail brace
- Mizzen upper topsail brace
- Mizzen lower topgallant brace
- Mizzen upper topgallant brace
- Mizzen royal yard brace
- Mizzen skysail yard brace
- Mizzen topmast yard brace
- Mizzen topgallant yard lift
- Mizzen royal yard lift
- Mizzen skysail yard lift

Source: “Ship Modeling Simplified” by Mastini Pages 145 –146
TYPICAL RUNNING RIGGING APPLICATIONS

NAMES OF MASTS & SPARS
- Fore lower mast
- Fore topmast
- Fore topgallant mast
- Fore royal and fore skysail mast
- Main lower mast
- Main topmast
- Main topgallant mast
- Main royal & main topgallant mast
- Mizzen lower mast
- Mizzen topmast
- Mizzen topgallant mast
- Mizzen royal & mizzen skysail mast
- Fore topsail yard
- Fore upper topsail yard
- Fore lower topgallant yard
- Fore upper topgallant yard
- Fore royal yard
- Fore skysail yard
- Main lower topsail yard
- Main upper topsail yard
- Main lower topgallant yard
- Main topgallant yard
- Main royal yard
- Main skysail yard
- Crossjack yard
- Mizzen lower topsail yard
- Mizzen upper topsail yard
- Mizzen lower topgallant yard
- Mizzen upper topgallant yard
- Mizzen royal yard
- Mizzen skysail yard
- Gaffsail boom
- Flying-jibboom
- Martingale boom, dolphin striker

Source: “Ship Modeling Simplified” by Mastini Pages 142 –143
Learn The Art Of Building A Model Ship
Get started in wooden model ship building today
Join 18,543 other modelers to hear about specials, new products and modeling tips
- Become a Member
- Modeling Hub
- Model Ship Building
- Maritime History
- Affiliate Program
Information
- Terms & Conditions
- Privacy Policy
Copyright © 2023 Modelers Central. ABN: 31 114 830 732
- Claim 10% Off First Order
- Get 5% off ALL orders with a Membership
- Gift Vouchers
- Help & Advice
Modelers Central. 2023, All rights reserved.
- Claim 10% Off Your First Order
- Get 5% Off All Orders With A Membership
Get 10% off
Your first order.
10% off applies only to full-price items. By providing your email address, you agree to our Terms & Privacy Policy
10% off applies only to full-price items. By providing your email address & mobile number, you agree to our Terms & Privacy Policy and consent to receive marketing messages from Modelers Central at the addresses provided. You can unsubscribe at any time by replying STOP.
The Worldwide Leader in Sailmaking
- Sail Care & Repair
- Sailing Gear
- Sail Finder
- Custom Sails
- One Design Sails
- Flying Sails
- New Sail Quote
- 3Di Technology
- Helix Technology
- Sail Design
- NPL RENEW Sustainable Sailcloth
- Sailcloth & Material Guide
- Polo Shirts
- Sweaters & Cardigans
- Sweatshirts & Hoodies
- Accessories
- Mid & Baselayers
- Deckwear & Footwear
- Luggage & Accessories
- Spring Summer '24
- Sailor Jackets
- NS x Slowear
- Sailor Jacket
- Sustainability
- North Sails Blog
- Sail Like A Girl
- Icon Sailor Jacket
- Our Locations
- North SUP Boards
- North Foils
- North Kiteboarding
- North Windsurfing
SAIL FINDER
SAILING GEAR
COLLECTIONS & COLLAB
COLLECTIONS
WE ARE NORTH SAILS
ACTION SPORTS
Popular Search Terms
Collections
Sorry, no results for ""
Sail Washing 101
Sail washing 101, everything you need to know about sail washing by our team of certified service professionals.

The three main benefits to sail washing are:
Cleaner sail, life extension.

Let's Recap!
- Everything except oil stains
- Mold & mildew
- Yes. Like anything that is in contact with salt water, 3Di sails can be rinsed with fresh water and dried before storing.
- Square footage of the sail
- Luff x foot
FEATURED STORIES
North sails portsmouth at your service, crush-ing records in western australia, event spotlight: dutch shoe marathon.
- Refresh page

Home » Blog » Boat maintenance & DIY » Sail cleaning 101 – how to clean sails and tackle common stains
Sail cleaning 101 – how to clean sails and tackle common stains
By Author Fiona McGlynn
Posted on Last updated: August 18, 2023
Regular sail cleaning will help maintain the longevity of your sails and keep them looking their best, but be warned! Use the wrong product or technique and you could do more harm than good. There are horror stories about people poking their fingers through spinnakers that were rinsed in a chlorinated pool .
If you’re concerned about doing damage, one option is to leave the cleaning to the professionals. Drop your sail at your local sail loft where they will clean it for a fee. However, most sail cleaning can be easily done at home or at the marina.
If you’re a die-hard DIYer you might even like to try making your own homemade boat cleaners from scratch.
So, how to clean sails without mishap? I’ve rounded up expert advice and put a few of their techniques to the test.
A quick note that this post contains affiliate links (so if you purchase through a link we’ll earn a small commission). The opinions are our own.
1. Know your sail material
The first step in the sail cleaning process is to know what type of sail material you’re dealing with. Just as you wouldn’t put wool on a hot cycle in the washing machine, different sail cloths have different cleaning requirements.
Using the wrong cleaning agent or method can dramatically reduce the strength of your sail and do irreparable damage. For instance, a properly diluted bleach solution, while safe on Dacron, can destroy Nylon, Kevlar, and other Aramids.
If you own laminate or composite sails (or have any questions about your sail’s construction) reach out to your sailmaker for professional guidance.
Most sailmakers recommend regularly rinsing your sails with fresh water. This will remove dirt, salt, pollution, and pollen. It also helps prevent mildew growth. You can do this with a garden hose.
The key is to thoroughly dry your sails afterward and store them in a well-ventilated area.
If rinsing doesn’t do the trick, try soaking embedded dirt and stains.
- Find a suitable soaking container. A baby pool or dinghy works well for small sails, like a windsurfer sail, or small sections of large sails.
- Fill the container with warm water and a few drops of mild detergent (e.g., dish soap).
- Soak the affected areas. It’s generally safer to soak longer in mild solutions than use more aggressive chemicals and methods.
- Once you’ve finished soaking, rinse liberally with clean water.

4. Scrub (gently)
According to Jim Grant, founder of Sailrite, mechanical cleaning methods cause cloth breakdown which can stretch the sail and can have the same effect as several weeks of hard use. You should never put your sail in the washing machine!
So, be gentle! Place sail on a smooth surface—no gravel parking lots, please—and use a sponge or soft brush with mild detergent, or a specialized sail cleaner, like Starbrite Sail and Canvas cleaner to gently remove dirt.

Properly drying your sails is critical for avoiding mildew growth. If you pack your sails away wet, even slightly damp, you’re risking returning to a mildewy mess.
Sails should be air-dried on a calm day. If you hang your sails to dry and allow them to flog in the wind it will break down the material and shorten its life.
Sun exposure can also be helpful for air-drying, but too much UV causes damage, so don’t leave your sails out for days on end.

6. Tackle stains
Maybe you got a great deal on a set of used sails with an unsightly rust stain. Or stored your beautiful new sails for winter and returned to find a bloom of black mildew—ughh!
For these common stubborn stains, you’ll need to take a more targeted approach.

Mildew stains
Surface mildew stains are common and can be difficult to address but the good news is that this pesky fungus doesn’t harm your sails. According to sailmaker, Precision Sails, mildew may be ugly but it won’t affect sail performance .
How do you get mildew stains out of sails?
Surface mildew on Dacron sails can be cleaned with a properly diluted chlorinated bleach (sodium hypochlorite) solution—use the directions for laundry dilutions on the bottle.
Spray on, let it soak, gently rub with a soft bristle brush, and be sure to rinse off thoroughly.
But beware! Sailmakers warn that you should never use bleach on Kevlar or Nylon as it can seriously damage your sails.
Also, never combine bleach and ammonia as it combines to make a poisonous gas.
Mildew does tend to regrow but you can stay on top of it by regularly wiping down any new growth with white vinegar (being sure to rinse and dry sails afterward).

Rust stains
Unsightly rust stains can be caused by metal attachments or wires that come into contact with the sail.

How do I remove rust from my Dacron sail?
For cleaning rust stains, Practical Sailor found CLR performed well in testing. They suggest diluting CLR 20:1 with fresh water and soaking for up to 15 minutes and rinsing . It’s a good idea to monitor the pH, you’ll want to keep the solution pH above 3 because Nylon sails can be damaged by strong acids. You can check this with pH strips .
I’ve also seen properly diluted Oxalic acid recommended for removing rust stains in various forums and magazines. However, it’s powerful stuff and should be treated with the utmost respect (e.g., wear the appropriate protective gear). You can find it at most hardware stores as it’s used for bleaching wood.

Jim Grant, the founder of Sailrite, recommends 3M General Adhesive Remover or Goo Gone for removing number adhesives. You may need to do two or three rounds of application to remove it all.

Stain removal and setting your expectations
You can lighten sail stains significantly (as you can see in the before and after shots above) but don’t expect to remove them completely.
While you might be able to get improved results with stronger solutions and harsher methods, you’ll be risking damage to the sail material. In the end, sails are functional—we want them to perform well, appearance is secondary.
Given that stains can be so tough (if not impossible) to remove, there are a few things you can do to prevent staining in the first place.
Sail cleaning tips
There are several things you can do to prevent stains and prolong the life of your sail.
Inspect your sails regularly
Inspecting your sails is an important part of sail maintenance and vital to keeping them in good condition.
When we were on ocean passages, we looked over our sails daily! While we were more concerned with chafe and damage, it was also an opportunity to spot developing mildew and rust stains. The sooner you nip these problems in the bud, the better.
Regularly rinse your sails
Regularly rinsing is one of the best ways to maintain the life of the sail. It will prevent the build-up of dirt, salt, pollen, and pollution and reduce the need for more aggressive cleaning down in the future.
Thoroughly air-dry
Putting sails that are even slightly damp into storage is a recipe for mildew. Take the time to properly air-dry your sails.
Store your sails in a dry ventilated place
Consider taking them off the boat if you won’t be using them for a while.
Stay on top of mildew
Mildew will often reoccur in the same place. Treat mildew early and frequently to prevent the problem from getting worse.
Keep your sail cover in good shape
Check your sail cover for leaks, regularly clean it, and treat it with a fabric protectant like 303 Fabric Guard which will help it stay waterproof.
303 Fabric Guard is also a great product for protecting other marine fabrics like cushions, canvas, and boat covers. We used it on our bimini, dodger, and sail cover regularly and it seemed to keep our canvas in beautiful condition.

Consider a fabric protectant
Sailrite recommends 303 Fabric Guard for Dacron sails, though we’ve never tried spraying it directly on our sails. Namely because of the product cost and the square foot area of our sails.

Fiona McGlynn is an award-winning boating writer who created Waterborne as a place to learn about living aboard and traveling the world by sailboat. She has written for boating magazines including BoatUS, SAIL, Cruising World, and Good Old Boat. She’s also a contributing editor at Good Old Boat and BoatUS Magazine. In 2017, Fiona and her husband completed a 3-year, 13,000-mile voyage from Vancouver to Mexico to Australia on their 35-foot sailboat.
Terms and Conditions - Privacy Policy

Step-by-Step Guide: How to Clean a Sail for Optimal Performance
Alex Morgan
Cleaning a sail is an essential maintenance task that helps ensure the longevity and performance of your sailboat. Regular cleaning removes dirt, salt, and other debris that can accumulate on the sail, preventing damage and preserving its quality. By following a few simple steps and using the right tools and materials, you can effectively clean your sail. In this article, we will guide you through the process of cleaning a sail, from the tools and materials you’ll need to the step-by-step procedure. We will also provide additional tips to help you maintain a clean sail and conclude with the importance of keeping your sail in excellent condition. So, let’s dive in and learn how to clean a sail properly.
Key takeaway:
- Cleaning a sail is crucial for maintaining its condition: Regular cleaning helps extend the lifespan of a sail and ensures optimal performance.
- Essential tools and materials: To clean a sail, you will need a sailbrush, mild detergent, bucket, soft cloth or sponge, and a hose or freshwater source.
- Proper preparation is key: Before cleaning, inspect the sail, remove any debris, and identify stains or problem areas.
- Step-by-step cleaning guide: Rinse the sail, prepare the cleaning solution, scrub the sail, rinse thoroughly, and dry the sail.
- Maintaining a clean sail: Additional tips include regular maintenance, storing the sail properly, and addressing any issues promptly.
- Conclusion: By keeping your sail clean and well-maintained, you can ensure its longevity and optimize your sailing experience.
Tools and Materials Needed
To properly clean a sail, you’ll need a few essential tools and materials. These include a sailbrush , mild detergent , bucket , soft cloth or sponge, and a hose or freshwater source. Each of these items plays a unique role in ensuring your sail is sparkling clean and ready for your next adventure on the water. So let’s dive into the world of sail cleaning and discover how these tools and materials can help you achieve a spotless sail. Let’s get started!
1. Sailbrush
When cleaning a sail, a sailbrush is a essential tool. It is designed to remove dirt , stains , and debris from the sail without causing damage. By using a sailbrush, you can ensure a thorough cleaning process and maintain the sail’s optimal performance.
Here is a table that illustrates the tools and materials needed for cleaning a sail, including the sailbrush :
Using a sailbrush in the cleaning process helps remove stubborn stains and dirt particles that may be deeply embedded in the sail’s fabric. The bristles of the brush are firm yet gentle enough to effectively scrub away dirt without causing damage to the sail’s fibers.
To clean the sail, start by rinsing it with water to remove loose debris. Then, make a cleaning solution using mild detergent and water. Dip the sailbrush into the solution and gently scrub the sail in a circular motion, paying extra attention to stained or problem areas . Rinse thoroughly with water to remove any soap residue and pat the sail dry with a soft cloth or sponge.
Using a sailbrush as part of your sail cleaning routine will help keep your sail in excellent condition and maximize its lifespan. Always follow the manufacturer’s instructions and recommendations when cleaning your sail to ensure proper care and maintenance.
2. Mild Detergent
When cleaning a sail, it is important to use mild detergent for effective and safe cleaning. Follow these steps to properly utilize mild detergent :
- Dilute the mild detergent : Begin by mixing a small amount of mild detergent with water in a bucket. The exact amount needed will depend on the size of the sail and the concentration of the detergent.
- Test on a small area : Before applying the mild detergent to the entire sail, test it on a small, inconspicuous area to ensure that it does not cause any damage or discoloration.
- Apply the mild detergent : Gently apply the diluted mild detergent to the sail using a soft cloth or sponge. It is important to work in small sections and avoid excessive scrubbing to prevent any potential fabric damage.
- Clean stains : If there are specific stains or problem areas on the sail, give them extra attention while gently scrubbing with the mild detergent solution.
- Rinse thoroughly : After cleaning, rinse the sail with clean water to remove any residual detergent. This step is crucial in order to prevent any residue from remaining on the sail.
By following these steps and using mild detergent, you can effectively clean your sail without causing any damage or compromising its performance.
When cleaning a sail, a bucket is crucial for storing and mixing the cleaning solution.
Tools and Materials Needed:
- Mild Detergent
- Soft Cloth or Sponge
- Hose or Freshwater Source
The bucket is used to mix mild detergent with water to create the cleaning solution. It should be large enough to fully submerge and rinse the sail. A bucket with a handle makes it easier to carry and control the pouring of the solution.
Pro-tip: Use a dedicated bucket for sail cleaning to prevent cross-contamination and maximize cleanliness and longevity. Avoid using the bucket for other tasks to ensure no residue or chemicals from previous uses come into contact with the sail.
4. Soft Cloth or Sponge
When cleaning a sail, it is important to use a soft cloth or sponge . These soft materials are perfect for effectively removing dirt, grime, and stains from the surface of the sail. It is recommended to select a cloth or sponge that is specifically designed for delicate materials to prevent any potential damage. Carefully scrub the sail using the soft cloth or sponge to lift and eliminate any dirt or stains. Ensure that all areas of the sail, including corners and edges , are reached for a thorough cleaning. To tackle stubborn stains, you can apply a mild detergent to the soft cloth or sponge, which will help enhance the cleaning process. Once you have completed the cleaning, make sure to rinse the sail thoroughly with freshwater in order to eliminate any remaining detergent or dirt. It is essential to follow the care and maintenance instructions provided by the manufacturer, as different sail materials may require specific cleaning methods. By using a soft cloth or sponge, you can effectively preserve the sail’s condition for future use.
5. Hose or Freshwater Source
When cleaning a sail, having a hose or access to a freshwater source nearby is crucial. Here are some reasons why:
1. Water source: It is important to have a hose or access to a freshwater source nearby in order to easily rinse off dirt, debris, and cleaning solution from the sail.
2. Efficient cleaning: A hose with good water pressure can effectively remove stubborn stains or grime, making the cleaning process easier and faster.
3. Thorough rinsing: Having a sufficient water source allows for the complete removal of all cleaning solution and residue from the sail.
4. Preventing damage: Using a hose or freshwater source with the appropriate pressure helps avoid abrasion or damage to the sail fabric during cleaning.
5. Convenience: Having a nearby hose or freshwater source makes cleaning the sail more convenient, eliminating the need to carry buckets of water.
Fact: Incorporating hot water into your cleaning solution can aid in the dissolution of dirt and stains more effectively.
Preparation Before Cleaning
Get your sail ready for a deep clean with this crucial step: preparation before cleaning . We’ll guide you through the important tasks that will ensure optimal results . First, we’ll tackle inspecting the sail to identify any potential issues. Then, we’ll focus on removing debris that could hinder the cleaning process. We’ll help you pinpoint stains and problem areas , so you can give them the attention they need. It’s all about setting the stage for a sparkling sail !
1. Inspect the Sail
To ensure the sail’s condition, it is important to follow these steps when inspecting it:
1. Visually examine the sail for damage like holes , tears , or fraying . Also, check the seams and stitching for loose threads or weak spots .
2. Take a look at the hardware and fittings attached to the sail, such as the grommets or hanks , and ensure that they are secure and in good condition.
3. Inspect the sailcloth for any stains , mildew , or discoloration . These indicators may require attention during the cleaning process.
4. Use your hands to feel the sail and detect any areas with a different texture or stiffness. This could indicate the presence of salt crystals or debris that need to be removed.
5. Evaluate the sail’s overall shape and tension by observing how it hangs or folds. Be on the lookout for any areas that appear distorted or have excessive sagging.
By promptly addressing any identified issues, you can maintain the sail’s performance and prolong its lifespan. Regular inspections, proper cleaning, and maintenance are crucial in keeping your sail in optimal condition for smooth sailing.
Remember, the quality of the sail’s fabric and the care it receives significantly impact its performance and durability.
2. Remove Any Debris
To remove any debris from a sail, follow these steps:
1. Inspect the sail for visible debris such as leaves, dirt, or twigs.
2. Gently brush the sail with a sailbrush to dislodge any loose debris.
3. If the debris is stubborn, lightly dampen a soft cloth or sponge with fresh water and wipe the affected areas.
4. Be careful not to scrub too hard, as it may damage the fabric.
5. Repeat the process until all debris is removed.
By following these steps, you can effectively clean your sail and ensure it is free from any debris that may affect its performance or longevity. Regular maintenance and cleaning are important to keep your sail in optimal condition for your sailing adventures.
3. Identify Stains and Problem Areas
‘Identifying stains and problem areas on a sail is of utmost importance before initiating the cleaning process. Follow the subsequent steps meticulously:
1. Thoroughly examine the sail to spot any visible stains or discoloration.
2. Pay close attention to areas that tend to accumulate dirt, such as edges, corners, and seams.
3. Look out for signs of mildew or mold, which typically manifest as dark spots or patches.
4. Carefully inspect for tears, rips, or frayed edges, as these may necessitate special attention during the cleaning procedure.
5. Take note of specific stains, such as oil or rust , and document their precise locations for future reference.
6. Identify any other problem areas such as loose stitching or hardware that may require repair or replacement.
By diligently following these steps, you will be able to effectively identify and address any stains or problem areas during the cleaning process. This approach guarantees a thorough and efficient cleaning, allowing you to maintain your sail in excellent condition.
Step-by-Step Guide: How to Clean a Sail
Keep your sails in top-notch condition with this step-by-step guide on how to clean a sail. From rinsing to drying, we’ll walk you through each essential task in restoring your sail’s pristine appearance and functionality. Discover the expert tips and tricks to ensure a thorough cleaning process, providing you with a sail that’s ready to catch the wind and take you on your next sailing adventure.
1. Rinse the Sail
When cleaning a sail, it is important to begin by rinsing it . To achieve a thorough rinse, follow these steps:
- Fill a bucket with freshwater or connect a hose to a freshwater source .
- Gently spray the entire sail with water to eliminate any loose dirt or debris.
- Ensure that every section is rinsed, starting from the top and paying close attention to the seams and edges .
- To remove any remaining dirt or grime, use a soft cloth or sponge and apply gentle pressure while wiping.
- Continue rinsing until the water runs clear and there are no visible traces of dirt or detergent.
Rinsing the sail is a crucial step in the cleaning process as it removes surface dirt and prepares the sail for further cleaning. Thorough rinsing guarantees that the sail is free from debris and ready for the subsequent cleaning steps.
2. Prepare the Cleaning Solution
To prepare the cleaning solution for cleaning a sail, follow these steps:
Some suggestions for preparing the cleaning solution for your sail are:
- Follow the manufacturer’s instructions for the detergent to ensure correct and effective use.
- Use warm water instead of hot water to prevent fabric damage.
- Avoid using harsh chemicals or bleach as they can weaken the fabric and cause discoloration.
- Adjust the amount of detergent based on the size and condition of the sail. Use more detergent for heavily soiled sails and less for lightly soiled ones.
- Avoid oversaturating the sail with the cleaning solution to prevent mold and mildew growth.
By following these steps and suggestions, you can effectively prepare the cleaning solution for your sail and ensure a thorough and safe cleaning process.
3. Scrub the Sail
To effectively clean and maintain the longevity of the sail, follow these steps to scrub the sail :
1. Begin by wetting the sail with water to soften any dirt or grime that may be present.
2. You can either apply mild detergent directly to the sail or dilute it in water to create a cleaning solution.
3. Take a soft cloth or sponge and gently scrub the sail in a circular motion , paying close attention to any stains or problem areas that may need extra care.
4. Rinse the sail thoroughly using a hose or freshwater source to remove any detergent and loosened dirt.
5. Make sure to allow the sail to completely dry before folding or storing it away.
Scrubbing the sail is an essential step in removing dirt , stains , and debris, which is crucial for maintaining its good condition and optimizing its performance. Remember to always use a mild detergent and be gentle while scrubbing to avoid damaging the fabric. By regularly cleaning and maintaining your sail, you can ensure that it remains in excellent condition for all your future sailing adventures.
4. Rinse Thoroughly
When cleaning a sail, it is crucial to rinse thoroughly in order to ensure its cleanliness. Follow these steps to properly rinse your sail:
1. Prepare a hose or have access to a freshwater source.
2. Gently spray or pour water over the sail, starting from the top and working your way down.
3. Reach all areas of the sail, including the corners and edges.
4. Pay extra attention to any remaining soap residue or debris and rinse it off completely using the “rinse thoroughly” technique.
5. Continue rinsing until the water runs clear and there are no visible signs of dirt or cleaning solution.
By rinsing thoroughly, you will effectively remove any remaining cleaning solution or dirt particles that may have been loosened during the cleaning process. This important step prevents damage to the sail and ensures it is clean and ready for future use.
Let’s consider the experience of David , an avid sailor. He always understood the significance of rinsing thoroughly after each cleaning. On the other hand, his friend neglected this step, assuming a quick rinse would be sufficient. Over time, David’s friend encountered various issues with his sails, including mildew growth and decreased performance. However, David had no such issues because he recognized the importance of rinsing thoroughly. This experience taught both of them the significance of this step and how it can greatly prolong the lifespan of sails.
5. Dry the Sail
To properly dry the sail after it has been cleaned, it is important to follow these steps:
1. Begin by shaking off any excess water from the sail.
2. Next, hang the sail in a well-ventilated area, taking care to avoid direct sunlight.
3. Ensure that the sail is spread out flat in order to promote even drying.
4. It is crucial to make sure that the sail is not bunched up or folded, as doing so can potentially lead to the development of mildew or damage.
5. Allow the sail to air dry thoroughly before either storing it or using it again.
Additional Tips for Maintaining a Clean Sail
To maintain a clean sail, remember these
1. Inspect the sail regularly for dirt or stains. Promptly address these issues to prevent them from becoming harder to remove.
2. Use a mild detergent designed for sail cleaning. Harsh cleaners can damage the fabric and shorten the sail’s lifespan .
3. Avoid using abrasive brushes or scrubbing vigorously. Instead, gently scrub the sail with a soft brush or sponge to remove dirt or grime.
4. Thoroughly rinse the sail after cleaning to remove all soap residue. Leaving soap on the sail can make it sticky and attract more dirt.
5. Properly store the sail when not in use. Ensure it is completely dry before folding and storing it to prevent mildew and mold growth.
One sailor followed all the necessary steps to maintain a clean sail. During a windy race, seagulls left droppings that stained their sail. Despite their best efforts, the stains were difficult to remove. Seeking advice from experienced sailors, the sailor learned about a specialized sail cleaner that effectively removed bird droppings without damaging the fabric. With these Additional Tips for Maintaining a Clean Sail, the sailor restored their sail to its pristine condition and continued enjoying their time on the water.
Some Facts About How To Clean A Sail:
- ✅ Regular sail cleaning is important for maintaining the longevity and appearance of your sails. (Source: waterbornemag.com)
- ✅ Different sail cloths have different cleaning requirements. (Source: waterbornemag.com)
- ✅ Thoroughly rinse your sails with fresh water to remove dirt, salt, pollution, and pollen. (Source: waterbornemag.com)
- ✅ Soaking the affected areas in warm water with a few drops of mild detergent can help remove embedded dirt and stains. (Source: waterbornemag.com)
- ✅ Scrub gently using a sponge or soft brush with mild detergent or a specialized sail cleaner to gently remove dirt. (Source: waterbornemag.com)
Frequently Asked Questions
How do i clean a sail at home.
To clean a sail at home, you will need a large, flat, clean workspace, basic cleaning supplies, and some time. Fill a garbage can with warm water and add Oxyclean liquid stain remover. Submerge one sail at a time and let it soak for 24 hours, then scrub the sail with a soft brush and rinse with clean water. Hang the sail to dry in a well-ventilated space, ensuring it is completely dry before storing to avoid mildew.
Can I use bleach to clean my sails?
Bleach is not recommended for cleaning sails as it can ruin the fabric. Some sailcloth materials, such as Kevlar and nylon, are sensitive to substances like chlorine bleach. Instead, use mild soap and water or a specialized sail cleaner that is safe for your sail material.
How can I remove mildew stains from my Dacron sail?
To remove mildew stains from a Dacron sail, you can try soaking the affected area in a solution of ¼ cup Clorox Disinfecting Bleach per gallon of cool water for 5 to 10 minutes. After soaking, thoroughly wash and scrub the area, then rinse with fresh water. This process can be repeated if needed. It is important to wear rubber gloves if prolonged contact with the cleaning solution is required.
What should I do if my sail has rust stains?
If your sail has rust stains, you can try spot cleaning them with a 20:1 solution of Multi-use CLR or a similar formula. Apply the solution to the affected area and scrub gently. Rinse thoroughly with fresh water after cleaning. It’s important to note that rust stains on old sails may be permanent and cannot be completely removed.
Should I consider professional sail cleaning services?
If you want to ensure the best results and minimize the risk of damage to your sails, sending them to a professional cleaning service is an option. It can be expensive and may not restore the sails to a like-new shape. It’s important to choose a reputable service with experience in sail cleaning.
What are some tips for maintaining the cleanliness of my sails?
To maintain the cleanliness of your sails, it is recommended to regularly rinse them with fresh water to remove dirt, salt, pollution, and pollen. Thoroughly dry the sails afterward and store them in a well-ventilated area. Regular light cleaning can also help prolong their useful life. Inspect your sails regularly for mildew and rust stains and address them promptly to prevent further damage.
About the author

Leave a Reply Cancel reply
Your email address will not be published. Required fields are marked *
Save my name, email, and website in this browser for the next time I comment.
Latest posts

The history of sailing – from ancient times to modern adventures
History of Sailing Sailing is a time-honored tradition that has evolved over millennia, from its humble beginnings as a means of transportation to a beloved modern-day recreational activity. The history of sailing is a fascinating journey that spans cultures and centuries, rich in innovation and adventure. In this article, we’ll explore the remarkable evolution of…

Sailing Solo: Adventures and Challenges of Single-Handed Sailing
Solo Sailing Sailing has always been a pursuit of freedom, adventure, and self-discovery. While sailing with a crew is a fantastic experience, there’s a unique allure to sailing solo – just you, the wind, and the open sea. Single-handed sailing, as it’s often called, is a journey of self-reliance, resilience, and the ultimate test of…

Sustainable Sailing: Eco-Friendly Practices on the boat
Eco Friendly Sailing Sailing is an exhilarating and timeless way to explore the beauty of the open water, but it’s important to remember that our oceans and environment need our protection. Sustainable sailing, which involves eco-friendly practices and mindful decision-making, allows sailors to enjoy their adventures while minimizing their impact on the environment. In this…

- Advertising
- Shipbuilding
- Coastal/Inland
- Law & Regulations
Danish Pilot Makes a LEGO Model of His DanPilot Boat
March 21, 2024

Pilot boat driver, Espen Andersen’s LEGO model of the boat he sails for DanPilot. Image courtesy DanPilot
Espen Andersen , a pilot boat driver for DanPilot , the independent public enterprise owned by the Danish state, takes his love of maritime and LEGOs to new heights, creating a LEGO model of the pilot boat he sails for Svendborg, Denmark-based company. Andersen has registered the pilot boat for LEGO Ideas, a forum where fans can submit suggestions for upcoming LEGO sets. If the idea is to become a reality and be considered for a new production at LEGO, the pilot boat needs to receive 10,000 votes.
“At DanPilot, many passionate seafarers work on dedicated hobby projects. We want to support our colleagues' commitment and pride in the maritime profession, and obviously we hope that Espen's model of the pilot boat will receive support to get produced as a LEGO set,” said Erik Merkes Nielsen , CEO at DanPilot .
Andersen calls the project "A tribute build to a work life at sea".
“My model is inspired by a Danish pilot boat, but it could just as easily be a pilot boat from any other country. It’s a tribute to a working life at sea for many people around the world,” says Espen Andersen.
The LEGO model isn't just any pilot boat either. It is a model of DanPilot India , the pilot boat that Espen Andersen himself uses on a daily basis to transport pilots safely to and from ships. He therefore knows every detail of the boat and has been able to make the model as realistic as possible.
Espen Andersen's LEGO model is a 1:25 scale model of the real pilot boat. DanPilot India is one of DanPilot's small pilot boats, measuring 15 meters and weighing more than 20 tons. By comparison, the LEGO model of the pilot boat weighs 2.5 kg and is 61.5 cm long. It will take more than 2,500 LEGO bricks to build the pilot boat.
- CLICK HERE to vote to turn the pilot boat into a LEGO set!

Related News
India to prosecute 35 pirates who hijacked ship off somalia.

India will bring in and prosecute 35 Somali pirates its navy captured on a hijacked ship off Somalia, a navy official said…
Houthis Target Vessel in the Red Sea, Yemeni Military Source Says

Yemen's Houthis targeted a fuel tanker, Mado, in the Red Sea with naval missile and Israel's Eilat port and resort region with winged missiles…
Houthi Attacks Must Ease for Salvage of Two Vessels, IMO Head Says

Efforts to limit environmental damage from a cargo vessel that sank after a Houthi missile strike and another abandoned during…
Liquid Hydrogen SOV Concept Unveiled

Louis Dreyfus Armateurs (LDA) has unveiled a concept for a first-of-its kind service operations vessel (SOV) that runs on…
Sponsored Content
Everclean - the next evolution in antifouling.

Greensea IQ’s answer to biofouling delivers better performance through always clean hulls
Streamline Vessel Certificate Management with ABS Wavesight™ Nautical Systems

Maintaining vessel compliance is a crucial aspect of maritime operations. However, it can often become a time-consuming and challenging process due to the numerous certificates and documentation
Crispier and Tastier Food Prepared Sustainably and Cost-efficiently Onboard

We have stepped into a culinary era, where efficiency and sustainability are the new standard and must be included in all modern professional kitchens. Eco-friendly innovations are reshaping how we
Able Seaman
Deck engineer machinist - mixed work schedule, first assistant engineer (rotational 60/30), deck engineer machinist.

Crumbling Great Lakes Ports Infrastructure Makes Port Insurance Even More Critical

Marine Construction & Dredging: Straight Shooting with DCA’s Bill Doyle
Subscribe for Maritime Reporter E-News
Maritime Reporter E-News is the maritime industry's largest circulation and most authoritative ENews Service, delivered to your Email five times per week
Installation
Why laravel, creating a laravel project, environment based configuration, databases and migrations, directory configuration, sail on macos, sail on windows, sail on linux, choosing your sail services, ide support, laravel the full stack framework, laravel the api backend, meet laravel.
Laravel is a web application framework with expressive, elegant syntax. A web framework provides a structure and starting point for creating your application, allowing you to focus on creating something amazing while we sweat the details.
Laravel strives to provide an amazing developer experience while providing powerful features such as thorough dependency injection, an expressive database abstraction layer, queues and scheduled jobs, unit and integration testing, and more.
Whether you are new to PHP web frameworks or have years of experience, Laravel is a framework that can grow with you. We'll help you take your first steps as a web developer or give you a boost as you take your expertise to the next level. We can't wait to see what you build.
[!NOTE] New to Laravel? Check out the Laravel Bootcamp for a hands-on tour of the framework while we walk you through building your first Laravel application.
There are a variety of tools and frameworks available to you when building a web application. However, we believe Laravel is the best choice for building modern, full-stack web applications.
A Progressive Framework
We like to call Laravel a "progressive" framework. By that, we mean that Laravel grows with you. If you're just taking your first steps into web development, Laravel's vast library of documentation, guides, and video tutorials will help you learn the ropes without becoming overwhelmed.
If you're a senior developer, Laravel gives you robust tools for dependency injection , unit testing , queues , real-time events , and more. Laravel is fine-tuned for building professional web applications and ready to handle enterprise work loads.
A Scalable Framework
Laravel is incredibly scalable. Thanks to the scaling-friendly nature of PHP and Laravel's built-in support for fast, distributed cache systems like Redis, horizontal scaling with Laravel is a breeze. In fact, Laravel applications have been easily scaled to handle hundreds of millions of requests per month.
Need extreme scaling? Platforms like Laravel Vapor allow you to run your Laravel application at nearly limitless scale on AWS's latest serverless technology.
A Community Framework
Laravel combines the best packages in the PHP ecosystem to offer the most robust and developer friendly framework available. In addition, thousands of talented developers from around the world have contributed to the framework . Who knows, maybe you'll even become a Laravel contributor.
Before creating your first Laravel project, make sure that your local machine has PHP and Composer installed. If you are developing on macOS, PHP and Composer can be installed in minutes via Laravel Herd . In addition, we recommend installing Node and NPM .
After you have installed PHP and Composer, you may create a new Laravel project via Composer's create-project command:
Or, you may create new Laravel projects by globally installing the Laravel installer via Composer:
Once the project has been created, start Laravel's local development server using Laravel Artisan's serve command:
Once you have started the Artisan development server, your application will be accessible in your web browser at http://localhost:8000 . Next, you're ready to start taking your next steps into the Laravel ecosystem . Of course, you may also want to configure a database .
[!NOTE] If you would like a head start when developing your Laravel application, consider using one of our starter kits . Laravel's starter kits provide backend and frontend authentication scaffolding for your new Laravel application.
Initial Configuration
All of the configuration files for the Laravel framework are stored in the config directory. Each option is documented, so feel free to look through the files and get familiar with the options available to you.
Laravel needs almost no additional configuration out of the box. You are free to get started developing! However, you may wish to review the config/app.php file and its documentation. It contains several options such as timezone and locale that you may wish to change according to your application.
Since many of Laravel's configuration option values may vary depending on whether your application is running on your local machine or on a production web server, many important configuration values are defined using the .env file that exists at the root of your application.
Your .env file should not be committed to your application's source control, since each developer / server using your application could require a different environment configuration. Furthermore, this would be a security risk in the event an intruder gains access to your source control repository, since any sensitive credentials would be exposed.
[!NOTE] For more information about the .env file and environment based configuration, check out the full configuration documentation .
Now that you have created your Laravel application, you probably want to store some data in a database. By default, your application's .env configuration file specifies that Laravel will be interacting with a SQLite database.
During the creation of the project, Laravel created a database/database.sqlite file for you, and ran the necessary migrations to create the application's database tables.
If you prefer to use another database driver such as MySQL or PostgreSQL, you can update your .env configuration file to use the appropriate database. For example, if you wish to use MySQL, update your .env configuration file's DB_* variables like so:
If you choose to use a database other than SQLite, you will need to create the database and run your application's database migrations :
[!NOTE] If you are developing on macOS and need to install MySQL, PostgreSQL, or Redis locally, consider using DBngin .
Laravel should always be served out of the root of the "web directory" configured for your web server. You should not attempt to serve a Laravel application out of a subdirectory of the "web directory". Attempting to do so could expose sensitive files present within your application.
Docker Installation Using Sail
We want it to be as easy as possible to get started with Laravel regardless of your preferred operating system. So, there are a variety of options for developing and running a Laravel project on your local machine. While you may wish to explore these options at a later time, Laravel provides Sail , a built-in solution for running your Laravel project using Docker .
Docker is a tool for running applications and services in small, light-weight "containers" which do not interfere with your local machine's installed software or configuration. This means you don't have to worry about configuring or setting up complicated development tools such as web servers and databases on your local machine. To get started, you only need to install Docker Desktop .
Laravel Sail is a light-weight command-line interface for interacting with Laravel's default Docker configuration. Sail provides a great starting point for building a Laravel application using PHP, MySQL, and Redis without requiring prior Docker experience.
[!NOTE] Already a Docker expert? Don't worry! Everything about Sail can be customized using the docker-compose.yml file included with Laravel.
If you're developing on a Mac and Docker Desktop is already installed, you can use a simple terminal command to create a new Laravel project. For example, to create a new Laravel application in a directory named "example-app", you may run the following command in your terminal:
Of course, you can change "example-app" in this URL to anything you like - just make sure the application name only contains alpha-numeric characters, dashes, and underscores. The Laravel application's directory will be created within the directory you execute the command from.
Sail installation may take several minutes while Sail's application containers are built on your local machine.
After the project has been created, you can navigate to the application directory and start Laravel Sail. Laravel Sail provides a simple command-line interface for interacting with Laravel's default Docker configuration:
Once the application's Docker containers have started, you should run your application's database migrations :
Finally, you can access the application in your web browser at: http://localhost .
[!NOTE] To continue learning more about Laravel Sail, review its complete documentation .
Before we create a new Laravel application on your Windows machine, make sure to install Docker Desktop . Next, you should ensure that Windows Subsystem for Linux 2 (WSL2) is installed and enabled. WSL allows you to run Linux binary executables natively on Windows 10. Information on how to install and enable WSL2 can be found within Microsoft's developer environment documentation .
[!NOTE] After installing and enabling WSL2, you should ensure that Docker Desktop is configured to use the WSL2 backend .
Next, you are ready to create your first Laravel project. Launch Windows Terminal and begin a new terminal session for your WSL2 Linux operating system. Next, you can use a simple terminal command to create a new Laravel project. For example, to create a new Laravel application in a directory named "example-app", you may run the following command in your terminal:
Developing Within WSL2
Of course, you will need to be able to modify the Laravel application files that were created within your WSL2 installation. To accomplish this, we recommend using Microsoft's Visual Studio Code editor and their first-party extension for Remote Development .
Once these tools are installed, you may open any Laravel project by executing the code . command from your application's root directory using Windows Terminal.
If you're developing on Linux and Docker Compose is already installed, you can use a simple terminal command to create a new Laravel project.
First, if you are using Docker Desktop for Linux, you should execute the following command. If you are not using Docker Desktop for Linux, you may skip this step:
Then, to create a new Laravel application in a directory named "example-app", you may run the following command in your terminal:
When creating a new Laravel application via Sail, you may use the with query string variable to choose which services should be configured in your new application's docker-compose.yml file. Available services include mysql , pgsql , mariadb , redis , memcached , meilisearch , typesense , minio , selenium , and mailpit :
If you do not specify which services you would like configured, a default stack of mysql , redis , meilisearch , mailpit , and selenium will be configured.
You may instruct Sail to install a default Devcontainer by adding the devcontainer parameter to the URL:
You are free to use any code editor you wish when developing Laravel applications; however, PhpStorm offers extensive support for Laravel and its ecosystem, including Laravel Pint .
In addition, the community maintained Laravel Idea PhpStorm plugin offers a variety of helpful IDE augmentations, including code generation, Eloquent syntax completion, validation rule completion, and more.
Now that you have created your Laravel project, you may be wondering what to learn next. First, we strongly recommend becoming familiar with how Laravel works by reading the following documentation:
- Request Lifecycle
- Configuration
- Directory Structure
- Service Container
How you want to use Laravel will also dictate the next steps on your journey. There are a variety of ways to use Laravel, and we'll explore two primary use cases for the framework below.
Laravel may serve as a full stack framework. By "full stack" framework we mean that you are going to use Laravel to route requests to your application and render your frontend via Blade templates or a single-page application hybrid technology like Inertia . This is the most common way to use the Laravel framework, and, in our opinion, the most productive way to use Laravel.
If this is how you plan to use Laravel, you may want to check out our documentation on frontend development , routing , views , or the Eloquent ORM . In addition, you might be interested in learning about community packages like Livewire and Inertia . These packages allow you to use Laravel as a full-stack framework while enjoying many of the UI benefits provided by single-page JavaScript applications.
If you are using Laravel as a full stack framework, we also strongly encourage you to learn how to compile your application's CSS and JavaScript using Vite .
[!NOTE] If you want to get a head start building your application, check out one of our official application starter kits .
Laravel may also serve as an API backend to a JavaScript single-page application or mobile application. For example, you might use Laravel as an API backend for your Next.js application. In this context, you may use Laravel to provide authentication and data storage / retrieval for your application, while also taking advantage of Laravel's powerful services such as queues, emails, notifications, and more.
If this is how you plan to use Laravel, you may want to check out our documentation on routing , Laravel Sanctum , and the Eloquent ORM .
[!NOTE] Need a head start scaffolding your Laravel backend and Next.js frontend? Laravel Breeze offers an API stack as well as a Next.js frontend implementation so you can get started in minutes.
Sailor Cole Brauer makes history as the first American woman to race solo around the world
Aboard her 40-foot racing boat First Light , 29-year-old Cole Brauer just became the first American woman to race nonstop around the world by herself.
The New York native pulled into A Coruña, Spain, on Thursday after a treacherous 30,000-mile journey that took 130 days.
She thanked a cheering crowd of family and fans who had been waiting for her on shore.
“This is really cool and so overwhelming in every sense of the word,” she exclaimed, before drinking Champagne from her trophy.
The 5-foot-2 powerhouse placed second out of 16 avid sailors who competed in the Global Solo Challenge, a circumnavigation race that started in A Coruña with participants from 10 countries. The first-of-its-kind event allowed a wide range of boats to set off in successive departures based on performance characteristics. Brauer started on Oct. 29, sailing down the west coast of Africa, over to Australia, and around the tip of South America before returning to Spain.
Brauer is the only woman and the youngest competitor in the event — something she hopes young girls in and out of the sport can draw inspiration from.
“It would be amazing if there was just one girl that saw me and said, ‘Oh, I can do that too,’” Brauer said of her history-making sail.
It’s a grueling race, and more than half of the competitors have dropped out so far. One struck something that caused his boat to flood, and another sailor had to abandon his ship after a mast broke as a severe storm was moving in.
The four-month journey is fraught with danger, including navigating the three “Great Capes” of Africa, Australia and South America. Rounding South America’s Cape Horn, where the Atlantic and Pacific Oceans meet, is often likened to climbing Mount Everest because of its perfect storm of hazards — a sharp rise in the ocean floor and whipping westerly winds push up massive waves. Combined with the frigid waters and stray icebergs, the area is known as a graveyard for ships, according to NASA. Brauer said she was “so unbelievably stoked” when she sailed past Cape Horn in January.
Marco Nannini, organizer of the Global Solo Challenge, said the comparison to scaling Mount Everest doesn’t capture the difficulty of the race. Sailing solo means not just being a skipper but a project manager — steering the boat, fixing equipment, understanding the weather and maintaining one’s physical health.
Nannini cited the relatively minuscule number of people who have sailed around the world solo — 186, according to the International Association of Cape Horners — as evidence of the challenges that competitors face. More than 6,000 people have climbed Mount Everest, according to High Adventure Expeditions .
Brauer stared down 30-foot waves that had enough force to throw her across the boat. In a scare caught on camera, she badly injured her rib near the halfway point of the event. At another point, her team in the U.S. directed Brauer to insert an IV into her own arm due to dehydration from vomiting and diarrhea.
She was able to stay in constant communication with members of her team, most of whom are based in New England, and keep herself entertained with Netflix and video calls with family through Starlink satellites. That’s also how Brauer was able to use Zoom to connect with NBC News for an interview, while she was sailing about 1,000 miles west of the Canary Islands.
While Brauer was technically alone on First Light, she had the company of 450,000 followers on Instagram, where she frequently got candid about life on an unforgiving sea while reflecting on her journey.
“It all makes it worth it when you come out here, you sit on the bow, and you see how beautiful it is,” she said in an Instagram video, before panning the camera to reveal the radiant sunrise.
Brauer grew up on Long Island but didn’t learn to sail until she went to college in Hawaii. She traded in her goal of becoming a doctor for life on the water. But she quickly learned making a career as a sailor is extremely difficult, with professional racers often hesitant to welcome a 100-pound young woman on their team.
Even when she was trying to find sponsors for the Global Solo Challenge, she said a lot of people “wouldn’t touch her with a 10-foot pole” because they saw her as a “liability.”
Brauer’s message to the skeptics and naysayers? “Watch me.”
“I push so much harder when someone’s like, ‘No, you can’t do that,’ or ‘You’re too small,’” Brauer explained.
“The biggest asset is your mental strength, not the physical one,” Nannini said. “Cole is showing everyone that.”
Brauer hopes to continue competing professionally and is already eyeing another around-the-world competition, but not before she gets her hands on a croissant and cappuccino.
“My mouth is watering just thinking about that.”
Emilie Ikeda is an NBC News correspondent.
IMAGES
VIDEO
COMMENTS
7.9k. 34. Location Ave Maria, Florida. #2. Posted July 16, 2019. The only way to do a good job is remove the sails and wash them then re-rig them. There are a number of recipes for washing cloth with nicotine stains on the 'net.
Posted October 9, 2013. Use progressively smaller brushes to remove the loose dust cobwebs etc. then vacuum with an empty biro tube pushed through a piece of card and placed over the vacuum hose. The narrow suction can be more focused into crevices without tearing off fixtures and fittings.
However, there is a caveat. Vinegar can eat through certain materials - make sure your sail can withstand a strong vinegar before you go dousing it. For oil and grease stains, a normal, soft bristled scrub brush will suffice. Rinse with fresh water, lay out to dry.
Opt first to use a soft brush from the top down, and then mop up the decks last with again a soft brush slightly dampened to clean up the dust and grim on the decks. Once that is done do the same on the hull, from the top down. I always give a quick blow off with compressed air right before putting it in a case.
Dilute 20:1 with freshwater, soak for up to 15 minutes, and rinse. For extra measure, you could buy pH strips (at pet or pool stores) to monitor the pH, particularly with nylon. For surface dirt on polyester sails and canvas, we like Formula B; it kills mildew and leaves an inhibiting residue.
Gently remove dust and debris using a soft brush or low setting vacuum cleaner. 3. For stains and mildew, use a mixture of mild detergent and water to gently scrub affected areas with a soft cloth or sponge. 4. Thoroughly rinse the sails with clean water to remove residue from the cleaning solution. 5.
Almost any material used for scale model sail making is, by definition, too thick. With furled sails, though, it's possible to compensate for that problem by reducing the sail's depth - and thus the size of the bundle. A favourite material for furled sails is "silkspan" tissue, subjected to a special (but quite simple) treatment.
If your sails have stained or have dirt on them, wet a toothbrush with canvas cleaner, and gently brush a small amount of it into the sails so as to brighten them up. You can also use a Q-tip if required. Yet, my personal recommendation is to avoid using cleaners on sails, and rigging unless they are very dirty. But, that's totally up to you.
A quick video from our UK workshop, where all ship model restoration is carried out. Here we can see the model maker cleaning the model, the first stage in a...
Sail cleaning 101. Place a clean, plastic, black or dark-colored 40 gallon garbage can where it will receive full sunlight to keep the water warm. Fill the garbage can with water (soft water and warm but not hot, if possible). Add 2 cups of Oxyclean liquid stain remover and mix well.
Install and rig the booms and gaffs. Make the sails based on the actual layout of my ship. De-rig the booms and gaffs, and remove them from the ship. Attach sails to the booms and gaffs as appropriate. Re-install the booms and gaffs, and their rigging. Add the additional rigging for each sail.
A bucket of water. A hose or pressure washer (optional) Here are the steps to follow: Start by brushing off any dirt or debris from the sails using a soft brush or sponge. Mix a small amount of mild detergent or soap in a bucket of water. Dip the brush or sponge into the soapy water and scrub the sails, paying particular attention to any stains ...
Here are the steps for cleaning your sailboat sails at home: Remove the sails from the boat: Before cleaning the sails, remove them from the boat and lay them flat on a clean surface. Brush off dirt and debris: Use a soft-bristled brush to remove any dirt and debris from the sails.
Dilute 20:1 with freshwater, soak for up to 15 minutes, and rinse. For extra measure, you could buy pH strips (at pet or pool stores) to monitor the pH, particularly with nylon. For surface dirt on polyester sails and canvas, we like Formula B; it kills mildew and leaves an inhibiting residue.
Brush the area with a stiff brush to remove as much as possible. If the sail has been removed, you can place affected area in a solution of ¼ cup Clorox ® Disinfecting Bleach per gallon of cool water to soak for 5 to 10 minutes. Wash/scrub the area thoroughly and rinse with fresh water. Repeat if necessary.
For the most inaccessible blocks, insert a short piece of thin rigging cord through the hole and glue it to itself forming a loop. Later, when you wish to insert the permanent running rigging you cut the loop, glue the new cord to one end and pull it through the hole using the other end of the pilot cord.
When sails come in we soak them in a highly concentrated formula overnight and then spray them down to remove any final bits of dirt. Once this is complete we hang the sails to dry for 2-3 days before completing our 10 point inspection. In addition to sails, we also have the ability to wash canvas! Anything from dodgers to biminis to wheel ...
2. Rinse. Most sailmakers recommend regularly rinsing your sails with fresh water. This will remove dirt, salt, pollution, and pollen. It also helps prevent mildew growth. You can do this with a garden hose. The key is to thoroughly dry your sails afterward and store them in a well-ventilated area. 3. Soak.
Every day, hundreds of people are working behind the scenes of the Rijksmuseum to keep the museum running and to maintain the collection. But what happens wh...
To effectively clean and maintain the longevity of the sail, follow these steps to scrub the sail: 1. Begin by wetting the sail with water to soften any dirt or grime that may be present. 2. You can either apply mild detergent directly to the sail or dilute it in water to create a cleaning solution. 3.
Patreon: https://www.patreon.com/user?u=18274359Hello guys how are you?A lot of guys asked me how i did my sails on my Revell 1:225 HMS Victory full build vi...
I take my sails to the loft in Stamford every spring for a cleaning and some love. Replace broken slides, check stitching; the best $500.00 I spend every year. Comment
The best way to clean dust off your model ships depends on how your ship is made and how dirty it is. Use gentle compressed air for light to moderate dusting. Use paintbrushes or Q-tips® to remove heavier dust. Use a cleaning agent (be careful about damaging your model with the wrong cleaner) with a Q-tip® or a soft sponge or cloth to remove ...
I demonstrate the method I use to clean dust off my model ship collection. All of my completed models make an appearance in this video.00:00 - Richelieu02:24...
Espen Andersen's LEGO model is a 1:25 scale model of the real pilot boat. DanPilot India is one of DanPilot's small pilot boats, measuring 15 meters and weighing more than 20 tons.
Sail installation may take several minutes while Sail's application containers are built on your local machine. After the project has been created, you can navigate to the application directory and start Laravel Sail. Laravel Sail provides a simple command-line interface for interacting with Laravel's default Docker configuration:
Brauer stared down 30-foot waves that had enough force to throw her across the boat. In a scare caught on camera, she badly injured her rib near the halfway point of the event.