How to Winterize Your Sailboat

Last Updated by
Daniel Wade
June 15, 2022
We all know how it feels when that first cool breeze of winter comes creeping across the water and strikes your sails. All things must end, and when boating season comes to a close, that means it's time for sailors to winterize and store their sailboats. So, how do you store a sailboat for the winter?
Properly winterizing and storing your sailboat can take a good deal of both preparation and planning. At the most basic level, it simply entails draining all fluids, making minor adjustments and repairs, covering the boat, and then finding a place to store it. There are many different places you may be able to store your sailboat depending on its size. We'll go over all of your different options here for long-term sailboat storage.
Proper winterization can make all the difference when it comes time to pull your boat back out next spring. Winterization ensures that your boat lasts a long time with minimal need for expensive repairs and replaced parts. When you're done with this article, you should know everything you need to know about both winterization and storing your boat for the winter.
Table of contents

What Is Winterization?
For the most part, winterization simply means draining all the fluids from your boat that could freeze in extreme temperatures and damage the engine over the course of the winter. However, most sailors also use the winterization process as an excuse to perform routine maintenance and inspect for general repairs on their sailboats. Sailboats can get pretty grimy and scuffed-up over a full summer of sailing, so keeping up on your boat's appearances and performance before the start of each winter is a great idea.
The Winterization Process Made Simple
Step 1: drain the fuel.
If You Have a Gasoline Engine
This process can go two different ways depending on whether your boat has a diesel engine or a gasoline engine. If your sailboat has a diesel engine, the process of preparing your fuel tank for the winter can be slightly more complicated. If your sailboat has a gasoline engine, all you really have to do is run or drain all the fuel out of the engine and then leave the tank empty.
If You Have a Diesel Engine
If you have a diesel engine, there is a slightly more complicated process that will help to better ensure that your engine isn't injured over the long winter months. First, supplement your fuel tank with a stabilizer. Stabilizer prevents fuel from separating over the winter.
One the stabilizer has been added, top off the fuel tank with fresh diesel fuel. When you are finished with this, you will then want to go through and replace all of the fuel filters. Finally, drain the water separator until it's completely dry.
After this process, run the engine for 10 to 20 minutes so that the stabilizer has a chance to flow through all the fuel in the system. As you are letting the engine run, you can take the opportunity to ensure that there are no leaks in any of the fuel lines.
Step 2: Drain All Water from the System and Replace It with Antifreeze
The first step to this process is to completely drain the fresh water system of your boat. Once you are sure that the system has been completely drained, it's a good idea to clean out all of the tanks to make sure that there is no crud or build-up inside. After that it's time to fill the system up with antifreeze.
Some antifreeze that you'll find at the store comes already mixed with water and some does not. Be sure to check what kind you're buying as antifreeze always needs to be mixed at a 1:1 ratio with water before being added to the system. Every pump and hose in your entire fresh water system needs to be filled with this antifreeze mixture.
Step 3: Remove the Batteries
Your boat batteries will need to be removed before winter storing. As well, you will want to make sure that you are continuing charging maintenance on them at least once a month over the winter. Without performing this routine maintenance, your batteries might be DOA come spring. Once that happens, you'll be out a pretty penny replacing them.
You can use the opportunity provided by removing the batteries to take a glance at all the electrical connections and ensure that there are no problem areas. You should also gather up any and all marine electronics on board and take them inside with you for the winter. These can be damaged or stolen so it's not worth the convenience to store them.
Step 4: Remove All Other Extraneous Supplies
The less you leave on board your sailboat before storage the better. Anything you leave out runs the risk of weathering, damage, or theft. Loose items also have a tendency to get lost or simply become clutter.
You should check to ensure that all safety equipment is in top working order and that none of it is in need of replacement. Take account of all personal flotation devices, fire extinguishers, flares, and dock lines, as well as any other piece of safety equipment you are keeping on your sailboat. Some of these things will have an expiration date you should check every year to make sure that they are always working at their ideal level.
Step 5: Perform Routine Cleaning
Winterization is the perfect excuse to make sure your sailboat is sparkling clean. From the outside in, sailboats can get pretty messy over just the course of a season or two. Performing routine cleaning once a year will ensure that the dirt, grime, and contents of your sailboat never grow out of hand.
Firstly, you'll want to scrub down every surface on both the inside and outside of the boat. Salt and grime build-up on your boat can cause unwanted decay over extended periods of time. The more often you clean this build-up off of your sailboat, the longer it will last you.
Once you are satisfied with the outside and surface of your boat, it's time to get into the really messy bits. Any storage area or cabinet should be cleaned and excised of wanton garbage. Whittle everything down to the bare necessities and then store those necessities in a cool, dry place away from your boat for the winter.
Other parts of your sailboat that should be cleaned include any and all hardware fixtures, as well as and including the mast. Once you are finished with your cleaning, you will want to ensure that everything is properly dried before storage. Any and all water needs to be eliminated from your boat until the spring!
Step 6: Inspect Your Sailboat for Repairs
As we've already suggested, the winterization process is the perfect time to make a periodic inspection of your sailboat for any necessary repairs it may be needing soon. As with any type of vehicle, whether on land or sea, there are many little things that can go wrong with a sailboat. Always being proactive and keeping an eye out for repairs before the need becomes obvious can help ensure minimal damage, as well as minimal repairs costs.
You will want to inspect both the deck and the hull for any blistering or cracking that may be occurring. This will happen naturally and it's a good idea to deal with it as it comes up. Corrosion and grime build-up is another must to be dealt with.
Internally, you'll want to check the lifelines for any signs of corrosion. As well, you should make sure that your mainsheet system, turning blocks, winches, seacocks, and rope clutches are maintaining well. Then you will need to remove all of the tape from the spreader tips and turnbuckles so that you can give them each a quick inspection and be sure they're all working properly.
Finally, you'll need to remove and inspect the mast. You will also want to check the boom and the rigging for any wear they may have sustained over the spring and summer. Should anything need repairing, you've got two full seasons to deal with it!
Step 7: Repair the Sails and Store Them
As with other parts of your sailboat, cleaning your sails is always a good idea before putting them away. However, excessive cleaning can do more harm to your sails than good. For this reason, a simple light spraying and brushing of your sails should suffice.
Once you've managed to wash your sails, you should also be careful when it comes to how you dry them. Dacron and nylon, the materials that sails are generally made of, tend to be harmed by strong sunlight. For this reason, many people prefer to let their sails dry inside, whether in an indoor storage area or a large garage.
You should also make sure that your sails aren't in need of patching. Patching sails is an easy DIY job that you can perform with needles and patches from most boating supply stores. Ensuring that your sails are free from rips and tears is a must come spring.
There's one more thing you should keep in mind before storing your sails. Mice and other rodents tend to have a field day with the fabric that sails are made out of. If rodents get wind of your sails, they will likely be in worse condition come springtime than they are right now!
In order to keep your sails away from the clutches of pesky rodents, there are a couple of steps you can take. For one thing, you can keep them wrapped in plastic. For another thing, you should try to store them in an area that rodents will have a hard time reaching.
Step 8: Drain and Flush the Head
Should your sailboat have a head, it will need to be both drained and then flushed before winter storage. This should be done by pumping out the holding tank thoroughly. Once finished, add new water and then flush it through multiple times.
After several times flushing the tank, close the seacock for water intake, unplug the hose, and then fill the head full of the same 50/50 antifreeze and water mixture you used elsewhere. Be sure that at least some antifreeze makes it into the holding tank. Once you are done, simply replace the hose and then leave the seacock in the closed position.
Step 9: Arrange the Cabin
This step can entail a few different things depending on the specifics of your sailboat. Simply finalize everything and then be sure that there is nothing left over that needs to be taken care of. There are many extraneous parts on a sailboat that may call for special winterization steps.
If you have a stove on your sailboat, you will need to make sure that the propane tank is closed. As well, you should burn the stove for a few minutes to guarantee that there is no leftover propane sitting unburnt in the pipes. Once you are done, seal all the lines and then take all propane tanks off the boat for the winter.
Also be sure to mind any attached cloth and canvas parts on your sailboat. Steps will need to be taken to preserve these from rodents and pests. You can get a lot of use out of mothballs sprinkled around the vicinity near clothes to help keep the pests at bay. Otherwise, you can make use of plastic fabric and couch covers.
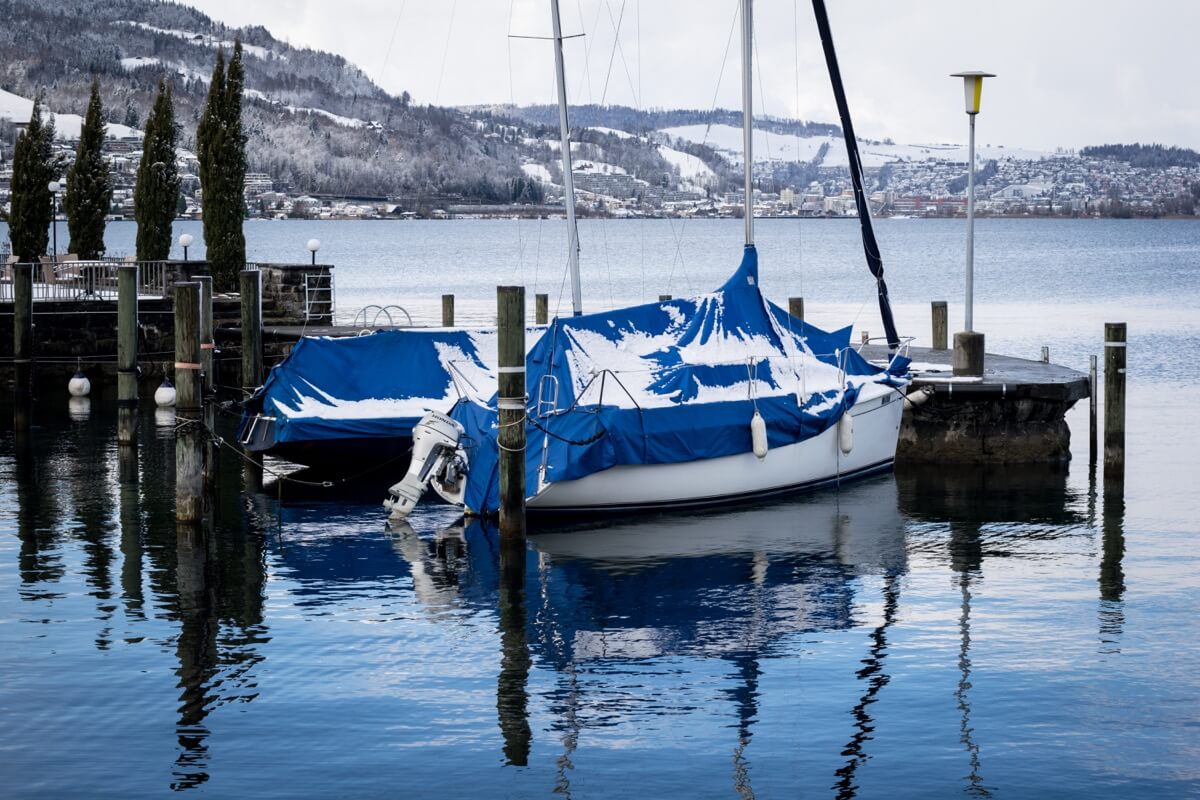
Step 10: Cover Your Boat
Now it's time to cover your sailboat. You will want to cover your sailboat regardless of whether you are storing it inside or outside. However, you may be able to get away with a less heavy-duty covering if you are storing your boat inside.
Special canvas covers are made for outdoor storing of sailboats. You are likely going to want to spring for one of these, as anything less allows for the possibility of unnecessary wear on your boat. If you are storing your boat inside then you can use a simple trailering cover or even just shrink-wrap.
Always Read the Owner's Manual Before Doing Anything!
Whether performing basic winterization, maintenance, or repairs, always be sure that you have read the owner's manual first! Articles like this one can be a lot of help, but they are typically written for the most general of audiences. Your boat may have specific features and needs that invalidate information that you read elsewhere.
Your owner's manual may also have some very helpful tips for winterization and storage. Boat manufacturers will typically take the extra care to include detailed winterization instructions in order to alleviate their own liability for potential damage to their products that may occur in the winter months. Keeping abreast of the specifics of your sailboat is always the number one most important way to make sure your sailboat is being properly taken care of.
Do I Need to Winterize My Boat?
While boat owners oftentimes dread the prospect of winterization, it is incredibly important. The more care you put into winterization, the faster you'll be able to get your sailboat back out on the waters come winter. As well, proper winterization and maintenance ensures the longest possible life for your sailboat.
Should you for some reason choose to opt out of the winterization process, you may be able to find a place that will do it for you. Many boatyards will perform basic winterization for a reasonable (though not small) fee. You can even choose to store your boat at that same boatyard to make everything as simple and easy as possible.
Winterization and proper storage will protect your boat from rain, snow, sun, and extreme temperatures. As well, performing routine maintenance and repairs during the winterization process is a proactive way to ensure the longest life for your boat. Whether these steps are performed by you or someone else, always be sure to get them done.
Where and How Should I Store My Sailboat?
Now we get to the good part, and by that I mean the end. Once the winterization process is complete and routine maintenance has been performed, it's finally time to secure yourself some storage and store your boat away. Of course, there are many different options depending on your wants, needs, and price.
As is typical with these kinds of things, the more money you spend, the more protection your boat is going to get. However, the highest price-point isn't always going to be viable or even necessary for the average boat owner. Here are some of the best options for long-term boat storage that are available for sailboat owners:
Your Own Property
The first and easiest method is to simply find a space on your own property that would be suitable for storing your boat. Not only is this method free but it also allows you to always be sure that your boat is where you think it is and that no one is breaking into it. However, you will need to have both room and shelter for it.
Another problem that can come up when trying to store your boat on your own land is the matter of HOAs, or homeowner's associations, and other local jurisdictions that may impose themselves on your property. Some municipalities do not like homeowners to store boats on their properties as they feel it makes the neighborhood look uncomely. In this case, you are pretty much forced to find another place to store your boat.
Outdoor Storage Facility
This would be any self-storage facility that allows you to store your stuff outside. Outdoor storage can be a good deal cheaper than indoor storage but it means that your boat will be at a higher risk. Be sure to keep this in mind before making your final decision.
With outdoor facilities, the type of paved surface your boat is being stored on may make some difference as far as the overall price point is concerned. Nice, smooth paving may make it easier for you to get your boat and trailer in and out of storage but it might also mean you'll have to pay a little bit more. Know what you're getting yourself into!
If you choose to go with an outdoor facility, you may wish to spring for a heavy-duty cover for your boat. Be aware that your boat will be totally susceptible to any rain and snow that will be occurring over the winter and fall. While winterization will ensure that your pipes don't bust, it doesn't mean that damage won't be done to the surface of your boat.
Indoor Storage Facility
There are many indoor storage facilities with units large enough to store even the most excessive boats and trailers. An indoor facility will provide maximum coverage and protection for your sailboat. However, it will be a more expensive option when compared to outdoor storage or storage on your own property.
Storing your boat at a boatyard is also sometimes referred to as "dry storage" or "rack storage". Sometimes marinas will also have their own boatyards for dry storage. Boatyards are specially-designed facilities that are intended for storing boats on land in a carefully organized facility over the winter. As such, they are typically located fairly close to large bodies of water.
As we've mentioned, a boatyard may be able to provide you with winterization services. Always be sure to make these plans well beforehand so you can be certain you won't have to perform any aspect of winterization yourself. This is another reason why boatyards are a great option for some sailboat owners.
Storing your boat at a marina isn't an option for all climates as it means your boat stays permanently in the water. Obviously, this is going to cause some issues should the water totally freeze over. However, if your climate allows for it, marina storage might be the long-term storage option for you. As well, some marinas in climates where water typically freezes over during the winter may offer dry storage.
Your boat remaining in the water is both the main positive and main drawback of marina storage. Having your boat ready and waiting for next season could be a huge benefit if it doesn't cause extraneous damage. One huge caveat, though, is that marina storage is typically fairly expensive, especially compared to other options.
Finding the Best Option for You and Your Sailboat
As you can see, where and how you store your boat is largely up to you and your needs. There are multiple options for any and all size boats and any and all types of winter. The larger your boat, the more expensive storage will be. The harsher the winter, the more imperative correct winterization is.
Related Articles
I've personally had thousands of questions about sailing and sailboats over the years. As I learn and experience sailing, and the community, I share the answers that work and make sense to me, here on Life of Sailing.
by this author
Repairs and Maintenance
Most Recent

What Does "Sailing By The Lee" Mean?
October 3, 2023

The Best Sailing Schools And Programs: Reviews & Ratings
September 26, 2023
Important Legal Info
Lifeofsailing.com is a participant in the Amazon Services LLC Associates Program, an affiliate advertising program designed to provide a means for sites to earn advertising fees by advertising and linking to Amazon. This site also participates in other affiliate programs and is compensated for referring traffic and business to these companies.
Similar Posts

How To Choose The Right Sailing Instructor
August 16, 2023

Cost To Sail Around The World
May 16, 2023

Small Sailboat Sizes: A Complete Guide
October 30, 2022
Popular Posts

Best Liveaboard Catamaran Sailboats
December 28, 2023

Can a Novice Sail Around the World?
Elizabeth O'Malley

4 Best Electric Outboard Motors

How Long Did It Take The Vikings To Sail To England?

10 Best Sailboat Brands (And Why)
December 20, 2023

7 Best Places To Liveaboard A Sailboat
Get the best sailing content.
Top Rated Posts
Lifeofsailing.com is a participant in the Amazon Services LLC Associates Program, an affiliate advertising program designed to provide a means for sites to earn advertising fees by advertising and linking to Amazon. This site also participates in other affiliate programs and is compensated for referring traffic and business to these companies. (866) 342-SAIL
© 2024 Life of Sailing Email: [email protected] Address: 11816 Inwood Rd #3024 Dallas, TX 75244 Disclaimer Privacy Policy
The Complete Checklist for Winterizing Your Boat (Free PDF)
More than twenty years ago, when I bought my first boat, I didn't have a clue about a lot of things. As the first sailing season was winding down, a friend asked me about my plans for "winterizing" the boat.
I'm sure my dumb look was priceless. As a new boat owner, I'd been more concerned with figuring out which lines went where and how to get in and out of a slip with all my gel coat intact than any thoughts for the winter.
Winterizing a boat means securing every system on the boat against freezing, corrosion, and damage from cold while preparing the boat for layup and disuse.
📋 Download your free boat winterization checklist here
Systems get drained, flushed, and filled with antifreeze; the boat gets covered and protected from snow and ice; and engines and mechanical systems are cleaned, lubricated, and stored so they start up again easily in the spring.
Sounds like a lot of work, right? It can be, but it depends on the size of your boat. A large boat with multiple complex systems will take some time, but a simple day sailor with an outboard can be done in an afternoon.

Interactive Checklist of Winterizing Steps and Supplies
It's not complex, you just need to know what to do for the specific systems on your boat. This is more of a checklist than a detailed step-by-step guide, so you understand what you're getting into and what needs to be done.
- Winterizing your boat includes draining all water from the boat, adding antifreeze to the engine and plumbing systems, and removing all electronics and batteries.
Fill up your fuel tanks and add a fuel stabilizer to prevent the fuel from degrading over the winter. Run the engine for a few minutes to circulate the stabilized fuel throughout the system.
- Clean and dry your sails thoroughly before storing them. Remove any stains or mildew with a sail cleaner. Fold the sails carefully and store them in a dry, cool place.
- Clean the hull and remove any marine growth, such as barnacles or algae. Apply a coat of wax or polish to protect the hull from the elements. Cover the boat with a breathable cover to prevent moisture buildup.

On this page:
Boat winterization checklist, winterizing specific parts of your boat, store the boat.
It's important for boat owners like you to carefully follow a comprehensive winterization checklist and ensure that all necessary steps are taken to properly protect the boat from winter weather damage.
Drain all water from the boat , including the fresh water and holding tanks, as well as the bilge. Be sure to open all faucets and valves to allow all water to drain out.
Add non-toxic Propylene Glycol antifreeze to the engine and plumbing systems to prevent freezing and corrosion. Be sure to follow the manufacturer's instructions for the correct amount to use.
Remove all electronics and batteries from the boat and store them in a dry, cool place. This can help prevent damage from moisture and extreme temperatures.
Clean the hull and remove any marine growth, such as barnacles or algae. Apply a coat of wax or polish to protect the hull from the elements.
Cover the boat with a breathable cover to prevent moisture buildup. Be sure to secure the cover in place to prevent it from coming loose during high winds.
If you plan to leave the boat in the water, install a de-icer to prevent ice from forming around the boat and damaging the hull.
Consider using a dehumidifier or moisture absorber in the cabin to prevent mold and mildew from forming over the winter.
Inspect all safety equipment , such as life jackets, flares, fire extinguishers, and first aid kits. Replace any expired or damaged items.
Check all ropes, lines, and rigging for wear and tear. Replace any damaged or worn out components.
Remove any valuables or items that may be damaged by moisture or extreme temperatures.
Secure the boat to its mooring or trailer and ensure that it is properly supported.
Consider having a professional mechanic or boatyard perform a full winterization service to ensure that your boat is properly prepared for the winter season.
Make sure that you have adequate insurance coverage for your boat over the winter months.
Sailboat winterization checklist
Here's are the specific checks for sailboats:
Clean and dry the sails thoroughly before storing them. Remove any stains or mildew with a sail cleaner. Fold the sails carefully and store them in a dry, cool place.
Remove the mast and store it separately in a dry, cool place. Inspect the mast for any damage or wear and replace any worn or damaged components.
Supplies you may need
Your specific needs for winterizing will vary with the systems on your boat and the type of engine and fuel you have and the type of storage you choose. Quantities will vary with the size and complexity of your systems.
- Non-toxic Propylene Glycol antifreeze - the "Pink Stuff" (water systems, engine, bilge) for -50F protection, or -100F for colder climes (usually green or blue). Do not use Ethylene Glycol or auto-anti-freeze for winterizing. It is highly toxic to you and to marine life.
- Engine oil and filter (engine)
- Fogging oil (engine)
- Fuel stabilizer/biocide (engine)
- Antifreeze Hydrometer or "antifreeze tester" (engine)
- A cover - shrink wrap, tarps, a canvas cover, or indoor storage
- Dehumidifying agent or dehumidifier/heater (cabin)

Do You Have to Use Antifreeze to Winterize a Boat?
The engine and generator.
The task for all engines is similar, though the specific steps vary.
- Rinse and flush the engine with freshwater to remove salt.
- "Fog" the engine with a spray oil.
- Flush antifreeze through the engine.
- Change the oil and oil filter.
- Change fuel filters.
- Close through hulls on intakes and fill strainers with antifreeze.
Inboard engines
Freshwater cooled inboard engines have a few more steps for safety.
- Check antifreeze level in the engine block with a tester and add anti-freeze as needed to maximize cold protection. Make sure you circulate the new mix before re-testing.
- Flush and fill the engine and lines with antifreeze.
You also have to winterize the outboard motor. Here's how:
- With the engine running, disconnect the fuel line and run the engine until it stops. This empties all the fuel from the carburetor.
- Change lower unit oil.
Learn more about what happens to your engine if you don't winterize your boat here .
Marine diesel winterization checklist
If you have a marine diesel engine, it's important to follow this checklist that includes changing the oil and oil filter, adding a fuel stabilizer, and draining all water from the engine.
Check the manufacturer's recommendations for the proper temperature range for your diesel engine . Diesel fuel can begin to gel or solidify at temperatures below 32°F (0°C ), which can cause damage to the engine.
Drain the antifreeze and coolant from the engine and replace it with a non-toxic Propylene Glycol antifreeze to prevent freezing and corrosion. Be sure to follow the manufacturer's instructions for the correct amount to use.
Change the oil and oil filter before storing the boat for the winter. This can help prevent moisture buildup and corrosion in the engine.
Add a fuel stabilizer to the fuel tank to prevent the fuel from degrading over the winter. Be sure to follow the manufacturer's instructions for the correct amount to use.
Run the engine for 10-15 minutes to circulate the stabilized fuel throughout the system.
Drain all water from the engine , including the fresh water and raw water cooling systems, as well as the heat exchanger. Be sure to follow the manufacturer's instructions for the proper method of draining the water.
Replace the raw water impeller to prevent it from becoming brittle over the winter. This can help ensure that the engine is ready to go when boating season starts up again in the spring.
Replace the fuel filter to prevent any contaminants from building up in the fuel system over the winter.
Add a biocide to the fuel tank to prevent algae growth. Be sure to follow the manufacturer's instructions for the correct amount to use.
Fill up the fuel tank to prevent condensation buildup. This can help prevent moisture from building up in the fuel tank over the winter.
Remove the engine's zinc anodes and replace them with new ones before storing the boat for the winter. This can help protect the engine from corrosion.
Cover the engine with a breathable cover to prevent moisture buildup. Be sure to secure the cover in place to prevent it from coming loose during high winds.
Fuel systems
Diesel fuel.
- Add a biocide/stabilizer to the fuel tank.
- Fill the tank after you add the stabilizer.
Most gasoline outboards use a removable tank. This fuel should be disposed of properly or used for some other purpose, so you start with a fresh tank in the spring. (I used to put my leftover dinghy fuel into my car.)
If you have an older boat with a gasoline inboard and a permanent tank installed, you can drain it, or add a stabilizer and fill it.
Plumbing systems
Pressure (fresh) water.
- Flush all tanks and lines.
- Add antifreeze to the water tank.
- Run all fixtures until antifreeze runs out, starting with the fixtures farthest from the pump.
Water heaters
- Drain all water.
- If there is a winterizing bypass, shut it off before winterizing the pressure water system so you don't have to fill the tank with expensive antifreeze.
- Disconnect the electricity or turn off the breaker to prevent accidental startup in the spring while it's empty.
Heads and toilets
- Flush all toilets with fresh water
- Pump out and rinse all holding tanks.
- Using the water intake hose, flush the system through with antifreeze
Refrigeration
- Flush all raw water lines with antifreeze
- Pump or drain the bilge into a proper receptacle.
- Add antifreeze to cover exposed pumps or through hulls
- Run the pump briefly and fill it with antifreeze.
Most boats in seasonal cruising regions are still using Lead-Acid batteries - either flooded (wet) cells, AGM, or Gel. There are minimal differences between lead-acid types when winterizing, but LiFePO~4~ banks require different long term layup care.
- For wet cells, top up all cells as per manufacturer's instructions (usually with distilled water).
- Fully charge all batteries.
- Disconnect electrical connections from the boat.
- If practical for smaller batteries, remove them and store them indoors with a trickle charger.
Lithium (LiFePO~4~)
Consult your manuals for details on longer term layup instructions and periods of disuse. LiFePO~4~ technology is fairly new, and manufacturer recommendations should be followed when available.
- Charge/Discharge to 50% state of charge or the manufacturer's recommended storage voltage.
- Disconnect all connections from the boat.
Air conditioning
- Flush and fill raw water lines with antifreeze.
Water maker
Be sure to read the manual and follow all the steps in order. Sending pressurized antifreeze through your membrane can damage it.
- Pickle membrane with preservative as per manufacturer's instructions.
- Flush raw water intake systems with antifreeze.
- Replace or remove all filters.
Covering, ventilation and moisture
Boat covers.
Boats stored outdoors in places with freezing temperatures should be covered. While a detailed discussion about boat coverings and types of covers is beyond the scope of this article, you should be aware that there are multiple options.
- Canvas covers: Expensive up front, but reusable from season to season and the best environmentally and for the boat.
- Shrink wrapping: An annual expense that you may want to leave to the pros to do. Should be recycled in the spring.
- Tarps and improvised materials: Smaller boats can be covered with tarps and other inexpensive materials, but they are prone to blowing off and coming loose. Tarps are difficult to secure on wet-stored boats since you can’t get lines under the hull easily.
Boat winter covers can cost anywhere between $200 and $800, tarps are roughly $20 to $200, and shrink wraps are $10 to $20 per foot.
Ventilation and moisture
Stagnant air and trapped moisture are the leading causes of mold and mildew growth on boats in the winter.
- Make sure any boat covers have leak-proof ventilation and allow airflow.
- Open all cabinets and storage areas, empty lockers where airflow is restricted.
- Remove mildew prone items such as towels and clothing for the season and store them off the boat.
- Consider chemical desiccants, a fan, a winter cabin heater, and/or a dehumidifier.
- If security permits, leave some windows or a hatch open under the cover.
- Rinse and sails with fresh water and allow to dry prior to flaking.
- Take any sails in need of repairs to a sail loft.
- Consider annual inspection, cleaning, and winter storage with a sailmaker to extend sail life.
The real cost of winterizing your boat on a budget ranges from $1,020 to $2,025, depending on the size of your boat.
You must make arrangements well in advance for a place to store the boat for the winter. Considerations of budget, local climate, and geography will drive this, and each storage method has advantages and disadvantages.
Boat winter storage checklist
Choose a storage location that is dry, cool, and secure. This could be a garage, storage facility, or marina.
Clean and dry the boat thoroughly before storing it. This includes the hull, deck, and all interior spaces.
Choose a boat cover or shrink wrap to protect the boat from the elements. A boat cover can be made from a variety of materials, such as canvas, polyester, or vinyl. Choose a cover that is breathable to prevent moisture buildup.
If you're on a budget, consider using a tarp to cover the boat instead of a custom-made cover. However, be sure to secure the tarp in place to prevent it from coming loose during high winds.
If you have a sailboat, consider using a cheaper and quicker method for winterizing your boat, such as removing the mast and storing it separately .
Install a dehumidifier or moisture absorber in the storage space to prevent mold and mildew from forming over the winter.
Check on the boat periodically throughout the winter to ensure that the cover or shrink wrap is secure and that there are no signs of damage or moisture buildup.
Hard stands/dry storage
Dry storage is most common in colder areas where salt water may freeze. Your boat can't sink on the hard, and it will be available to work on, though you'll need a ladder.
Taking the rig down for the winter is usually not required, but it will afford the opportunity to inspect and service the rig in the off season and reduces windage if you store in a storm prone area.
In-water storage
In-water storage is a good budget alternative, but it needs different steps.
- Keep bilge connected to a battery.
- Keep batteries charged for bilge pumps.
- You may want "Ice Eaters" in the slipe for areas prone to freezing.
Trailered boats are easy and cheap to store if you've got space. Be sure to still cover the boat and winterize systems unless you're storing it indoors.
Indoor storage
Indoor storage removes the need for a cover, but will usually require mast removal. Take care to still winterize systems if your storage building is not heated.

Do I Need to Winterize an Indoor Stored Boat?
You can winterize your boat by doing it yourself for $100, or you may opt for professional winterization services that cost up to $700.
Visit your boat
"Out of sight, out of mind" is a common problem with winter storage. Except for violent storms, most winter storage damage doesn't happen quickly. It's the result of creeping effects, like water seeping in and freezing, mold growing in damp, stagnant spaces, or heavy weights of snow and ice pressing on covers and breaking them.
So make the time in the winter to check your boat now and then. After a snow or big freezing rain storm, check for accumulation on the cover and leaks and incursions. Nip problems in the bud. When you open up a clean boat that smells nice in the spring, you'll forget that cold day in February when you swept the snow off the shrink wrap.
The best prevention in the fall won't help you if something goes wrong and unchecked for the rest of the winter.
If you were not able to do the winterization process, it can lead to costly damage to the boat and its components. Here's what you can do now.
Leave a comment
You may also like, how long does it take to winterize a boat on average.
Winterizing a boat involves a series of steps that are designed to protect your boat from the harsh winter weather and prevent damage to its various systems. It …

How to Winterize Your Sailboat Cheaper & Quicker

The Real Cost to Winterize Your Boat on a Budget
- 2024 BOAT BUYERS GUIDE
- Email Newsletters
- Boat of the Year
- 2024 Freshwater Boat and Gear Buyers Guide
- 2024 Boat Buyers Guide
- 2024 Water Sports Boat Buyers Guide
- 2024 Pontoon Boat Buyers Guide
- Cruising Boats
- Pontoon Boats
- Fishing Boats
- Personal Watercraft
- Water Sports
- Boat Walkthroughs
- What To Look For
- Watersports Favorites Spring 2022
- Boating Lab
- Boating Safety
Cheat Sheet on How to Winterize Your Boat
- By Randy Vance
- Updated: January 21, 2021
Too many boats die silently in their winter beds. But follow these easy tips, and your boat will be ready and eager to go in the spring.
Fuel Treatment
Treat your boat’s fuel with a stabilizer. Pennzoil Fuel Stabilizer, PRI-G and Stabil are ideal products for this job. After adding it to the fuel, run the engine for 10 minutes or so to be sure stabilized fuel circulates throughout the engine. If you don’t stabilize the fuel, carburetors and fuel injectors can be clogged with varnish deposits that ruin fuel systems. Cost if you do: $5 to $10. Cost if you don’t: $250 to $1,200.
Fog the Engine Cylinders
Aerosol fogging solutions coat the inside of the engine to protect it until spring. Each engine manufacturer makes proprietary products they promote as ideal for their engines. Hook “ear muffs” and a garden hose to the engine, start it, and then spray the fogging-solution lubricant directly into the air intake until it’s gone. If you don’t fog the engine cylinders, corrosion can form inside the engine, covering the cylinders, pistons and rings with a patina of abrasive crud. Cost if you do: $5 to $15. Cost if you don’t: $2,500 to $15,000 (or more).
Drain the Engine (for inboards and stern-drives)
Locate and open the petcocks (some engines have bronze plugs similar to bilge plugs) underneath the manifolds and on the sides of the engine block. Remove the water-pump hose from the bottom of the water pump to let it drain completely. If you don’t drain the engine, water in the cooling chambers can freeze, expand and crack the engine block and manifolds. Tip: Newer MerCruiser stern-drives have handy drainage systems with one drain plug near the front of the engine. Outboards self-drain and never require this step. Cost if you do: $0. Cost if you don’t: $5,000 to $20,000.
Change the Oil
Change engine oil to eliminate moisture and prevent corrosion. If you don’t, moisture can cause excessive wear, which can lead to loss of power, poor fuel economy and possible engine failure. Tip: Some mechanics change the oil both in the fall and at spring breakout on the theory that the engine oil needs to be changed at the end of the summer and after suffering the ravages of winter because moisture may again accumulate in the oil. Cost if you do: $30 to $75. Cost if you don’t: $500 (in extra fuel) to $20,000 (engine failure).
Read Next: Complete Guide to Winterizing
Drain the Gear-Case Lubricant (and recycle it)
Clear, amber-colored lubricant means your gear-case seals are in good shape. Milky and sometimes lumpy oil means the seals need to be replaced . Tip: The time to do this is in the fall when marine mechanics are less busy and sometimes willing to offer special prices for winter work. Cost if you do: $10. Cost if you don’t: $2,000 to $6,000.
- More: How-To , Preventative Care , winterizing
More How To

Suzuki Marine Initiates Sustainable, Ethanol-Free Marine Fuels Plan in Florida

Tips for Viewing 4th of July Fireworks From Your Boat

Angler and Rescuers Reunite After One-In-A-Million Offshore Epic

How to Install an Atmos Air Station

Boat Test: 2024 Bass Cat Jaguar STS

Boat Test: 2024 Pursuit DC 306

Boat Test: 2024 Scout 357 LXF
- Digital Edition
- Customer Service
- Privacy Policy
- Cruising World
- Sailing World
- Salt Water Sportsman
- Sport Fishing
- Wakeboarding
Many products featured on this site were editorially chosen. Boating may receive financial compensation for products purchased through this site.
Copyright © 2024 Boating Firecrown . All rights reserved. Reproduction in whole or in part without permission is prohibited.
- THE PRINCESS PASSPORT
- Email Newsletter
- Yacht Walkthroughs
- Destinations
- Electronics
- Boating Safety
How To Winterize A Boat’s Engines and Generator
- By Lenny Rudow
- September 30, 2022

Sure, it’s natural to be a bit depressed when the boating season comes to an end, but keep your chin up and a smile on your face because in a few short months you’ll be ripping away that shrink wrap and prepping for spring again. When that time comes, you’ll want the boat to operate just as smoothly as it did when you put it to bed in the fall, and properly winterizing the engine(s) and generator will ensure that it does.
Whether you’re working on the main propulsion system or a generator (diesel or gasoline), in all cases the boat-winterizing process can be broken down into five steps:
- Stabilize the Fuel System
Change the Fluids
- Drain and/or Winterize the Cooling System
Visually Inspect the Systems
Seal and/or protect any openings to the outside, stabilizing the fuel system.
You’ll want to lay up your boat with full fuel tanks to prevent condensation from forming, however, all fuel has a shelf-life. Over time, varnish and gum can build up in diesel fuel, and gasoline loses octane. If the gas has ethanol in it, the dreaded phase separation can set in too. Adding in a quality fuel stabilizer is key if you want a successful startup come spring. And, after adding it to the tanks be sure to run the engine(s) or generator long enough to allow the treated fuel to work its way all the way through the systems.

Now’s the time to change the engine’s oils (including lower unit or transmission oil) and, in the case of a closed-cooling system, the coolant as well. All of these fluids deteriorate over time, and with use. Old oil builds up acids and contaminants, and the corrosion-fighting additives in coolants and antifreeze wear thin with age. You’ll want to change all these fluids now, not in the spring, to prevent those contaminants from doing any harm over the winter.
Drain or Winterize the Cooling System
Any engine’s cooling system needs to be completely drained of all water and/or have antifreeze added to prevent freeze damage. Fail to take this step, and the results can be catastrophic. Generally speaking, this will include bringing the engine up to operating temperature and then pulling drain plugs and/or replacing water with antifreeze (excepting outboard engines, which drain fully when tilted all the way down). That said, every manufacturer has its own recommendations for how to perform the task. In some cases, failing to have an authorized dealer perform the winterization may even void the warranty. So, we aren’t going to get into specifics here — you’ll need to refer to the owner’s manual for your particular engine or generator to ascertain exactly what needs to be done.
Prior to putting the boat to bed for winter, take the time to inspect hoses, belts, electrical connections and all the other visible exterior parts on the engines and generators. In fact, now’s the time to inspect all the hoses, wires and other items in the engine room that are subject to aging, whether they’re attached to the engines and generators or not. If there’s a problem like a cracking, aged hose, spot it now and you’ll have plenty of time to have it fixed before the spring rolls around. But if you wait until the weather begins warming back up to perform these basic inspections, the boatyards and mechanics will be busy and it could lead to significant launch delays.

Finally, you’ll want to seal exterior openings like exhaust ports and water intakes (most people simply tape plastic over them and/or tape down flapper valves, if present). This will help keep out moisture, but just as important, it will help keep out critters. Nothing is worse than getting ready for a spring shakedown cruise only to discover a nest of wasps or a family of mice has decided to take up residence inside your boat.
Winterize your engines and generator properly and come spring you should be back out on the water in no time. That alone should be enough to keep a smile on your face all winter long.
- More: Boat Maintenance Tips , Engine Maintenance , Gear , How To , Maintenance

Garmin Quatix Upgrade

Dockmate’s Dynamic Positioning Upgrade

Best Father’s Day Gifts For Boaters 2024

Valo’s Foiling PWC

Jarrett Bay Boatworks 64 Reviewed

For Sale: Pershing 70

For Sale: 2000 Hatteras Yachts 70

Meet the Ferretti Yachts Infynito 80
- Digital Edition
- Customer Service
- Privacy Policy
- Email Newsletters
- Cruising World
- Sailing World
- Salt Water Sportsman
- Sport Fishing
- Wakeboarding
- New Sailboats
- Sailboats 21-30ft
- Sailboats 31-35ft
- Sailboats 36-40ft
- Sailboats Over 40ft
- Sailboats Under 21feet
- used_sailboats
- Apps and Computer Programs
- Communications
- Fishfinders
- Handheld Electronics
- Plotters MFDS Rradar
- Wind, Speed & Depth Instruments
- Anchoring Mooring
- Running Rigging
- Sails Canvas
- Standing Rigging
- Diesel Engines
- Off Grid Energy
- Cleaning Waxing
- DIY Projects
- Repair, Tools & Materials
- Spare Parts
- Tools & Gadgets
- Cabin Comfort
- Ventilation
- Footwear Apparel
- Foul Weather Gear
- Mailport & PS Advisor
- Inside Practical Sailor Blog
- Activate My Web Access
- Reset Password
- Customer Service

- Free Newsletter
Marshall Sanderling 18: Used Boat Review

Affordable Cruising Sailboats, Continued

Maine Cat 41 Used Boat Review

CS 30 Used Boat Review

Best Crimpers and Strippers for Fixing Marine Electrical Connectors

Thinking Through a Solar Power Installation

How Does the Gulf Stream Influence our Weather?

Can You Run a Marine Air-Conditioner on Battery Power?

Need a New Headsail Furler? Here’s What’s Involved

Master the Sailing Basics: Never Stop Learning the Little Things

How to Mount Your Camera on Deck: Record Your Adventures with…

Un-Stepping the Mast for America’s Great Loop

Sinking? Check Your Stuffing Box

The Rain Catcher’s Guide

How to Change Your Engine Mounts

Keeping Water Clean and Fresh

Vinyl Boat Lettering DIY Application and Repair

Those Extras you Don’t Need But Love to Have

Three-Model BBQ Test

Alcohol Stoves— Swan Song or Rebirth?

UV Clothing: Is It Worth the Hype?

Preparing Yourself for Solo Sailing

How to Select Crew for a Passage or Delivery

Preparing A Boat to Sail Solo

Dear Readers

Chafe Protection for Dock Lines

Waxing and Polishing Your Boat

Reducing Engine Room Noise

Tricks and Tips to Forming Do-it-yourself Rigging Terminals
- Inside Practical Sailor
Is Your Marine Diesel Winterizing Routine Complete?
Dealing with coolant, fuel, and lubrication are just a start..

Winterizing an inboard engine installation means a lot more than filling the cooling system with antifreeze and stuffing a rag in the exhaust outlet. It means taking care of the exhaust system, the fuel system, the engine controls, and other components of the drive train, such as the shaft and prop. If you want to do these things yourself — none of them is difficult, only time consuming — plan on a long day of work, or perhaps a leisurely weekend.
It’s work that will pay off, however, both in improved understanding of your boat’s propulsion system, and in money saved. At $25 per hour, the simple projects described here will save you about $200. Few special tools are required, and the only skill necessary is a modicum of common sense.
While many items of drive train maintenance can be done as easily in the spring as in the fall, the rush to get the boat back in commission frequently means that some items fall to the bottom of the priority list, and may never get done. Most sailors sadly neglect their boat’s mechanical components, sometimes with somewhat self-righteous claims that sailors don’t really need to know such stuff. Invariably, these are the folks whose auxiliaries die with less than a thousand hours on them, and whose gearboxes and shift linkages fail when they’re docking (When do you think your shift linkage is going to seize — when you’re traveling ahead in a straight line at six knots?)
Fuel System
The first component of the drive system to be attended to is the fuel system. Whether you have a diesel engine or a gas engine, a fuel additive can be used to stabilize the fuel during the storage period, even if it is only a month or so.
Diesel and gasoline stabilizers are not interchangeable. Diesel additives usually have biocides to prevent the growth of system-clogging organisms in the fuel.
As obvious as it may sound, read the instructions before buying a fuel stabilizer. Some require draining the tank before treatment, others require adding fuel to the tank after treatment, and some can just be dumped into a full tank.
In any case, it is important to run the engine for 10 minutes or so after treating the fuel, so that the additive gets into the fuel lines and filters, the carburetor of a gas engine, or the injectors of a diesel engine.
If the boat is already on land when you go through the winterizing process, run a water hose to the raw water intake to provide engine cooling water. Most engine intakes are smaller than the plastic or metal end fitting on the hose. A 6′ length of hose with a female fitting can simply be screwed onto the mainwater hose, and the end of the short hose (with no fitting) jammed into the raw water intake. Someone should keep an eye on the hose while the engine is running just to make sure it doesn’t pop out.
Fuel filters can also be changed at this time. A strainer-type gasoline filter should be cleaned — out of doors — with fresh gasoline to remove sediment, and the bowl of the filter should be drained.
Likewise, it is important to drain the water from a diesel separator, particularly on a boat laid up in a cold climate. Filter elements can be changed at this time.
If filters and separators are taken care of before treating fuel, they will become filled with stabilized fuel when the engine is run.
There are two schools of thought about storing fuel in the tanks when the boat is laid up. In the past, with gasoline systems using copper tanks and copper fuel lines, the practice was usually to drain the system for the winter to prevent the formation of gum. With modern gasoline and stabilizers, this problem is minimized, and the tanks will fare well if left full.
Opinion about the condition of diesel tanks during varies. It is true that during suspended sediment in diesel fuel will settle out on the bottom of the tank. This sediment could perhaps be a problem next season, if you were sailing in very rough conditions with very little fuel in the tank. The sediment could be stirred up, resulting in badly contaminated fuel. That, of course, is why you should have two filters in your diesel fuel system.
At the same time, an empty or almost empty metal fuel tank in a boat laid up in a cold climate can generate a lot of condensation. If you have a black iron diesel fuel tank, the condensation can accelerate corrosion. The safest course is to keep the fuel tank full on any boat having metal tanks.
Fiberglass tanks present another set of problems. Although the typical orthophthalic resin used in building is highly resistant to chemicals, it is not perfectly resistant. Isophthalic resins offer considerably more resistance to attack by chemicals, and are therefore preferable for use in fuel tanks. Unfortunately, relatively few builders use isophthalic resins because of the additional cost. If you have fiberglass fuel tanks, and are unsure of the resin used in their construction, it would be prudent to lay up the boat with the tanks empty.
With the engine still warm from running treated fuel through the system, change the crankcase oil. Unless your engine has a built-in crankcase pump, you’ll have to pump the oil out through the dipstick hole.
You can either use a manual pump such as the Par Handy Boy, or any one of a number of small impeller pumps designed to fit in the chuck of a 1/4” drill. The drill-driven pumps are quicker, and are frequently easier to use in the crowded engine compartment. However, some of them use a rubber impeller which is not designed to run dry, so that they can have a short life if the pump doesn’t prime quickly.
After draining the oil, change the oil filter element if the engine is equipped with a spin-on filter. Fill the engine with fresh oil.
It is particularly important to change the oil when laying up a diesel engine. Most diesel fuel contains sulfur in varying amounts. A byproduct of the combustion of diesel fuel which contains sulfur is sulfuric acid, which over time will do distressing things to the inside of your engine.
If your transmission is lubricated separately from the engine, check the fluid level. Plan on changing transmission fluid every other year, at least, or once a year on a boat whose engine gets more than about 50 hours of use per year. It’s impossible to change engine oil and transmission fluid too frequently.
The engine’s cooling system must also be winterized. With a fresh water cooled engine, check the fluid level in the coolant tank, topping up with a 50-50 mixture of water and antifreeze if necessary.
The next step is basically the same for both raw water and fresh water cooled engines. The raw cooling water must be replaced with a 50-50 mix of water and antifreeze. The method varies depending on whether the engine is decommissioned while the boat is in the water, or after it has been hauled.
If the boat is still in the water, shut off the raw water intake and remove the hose from the intake seacock tailpiece. Fill a clean bucket with a 50-50 antifreeze mixture. Dip the water inlet hose into the bucket of antifreeze.
Now a little coordination is required. You want to start the engine and run it long enough to make sure that the antifreeze mixture has filled the cooling system, including the muffler. You’ll know you’ve done this when the cooling water ejected through the exhaust is the color of your antifreeze mixture.
At the same time, you don’t want to run the engine after you’ve sucked up the entire bucket of antifreeze. You want the raw water system to be full of antifreeze, not empty. It will take two people: one to hold the hose in the bucket, and one to operate the engine and watch the exhaust. Obviously, a positive means of communication between the two persons involved is also required. Your voice may not travel to the helm from belowdecks (“Shut off the engine.” “What?” “Shut off the engine!” “I can’t hear you.” “SHUT OFF THE DAMN ENGINE!“), but it’s guaranteed to travel across the boatyard.
If the engine is laid up with the boat ashore, you can feed the antifreeze mixture directly through the raw water intake on the outside of the hull using the hose you made up for running the engine prior to changing the oil.
Don’t try to save time by running the engine only once to circulate treated fuel, heat up the oil for changing, and suck up antifreeze. You probably need about 10 minutes of engine running for winterizing the fuel system and warming up the oil. Sucking up antifreeze will probably take a minute or less. At about $5 per gallon, you don’t want to waste too much antifreeze.
A gallon of antifreeze -two gallons of 50-50 mix should handle engines up to about 40 horsepower. Then add extra for hoses. The length of run of the raw water discharge hose to the muffler is as much a determinant of the amount of antifreeze used as is the size of the engine.
When you shut down the engine after winterizing, remove the ignition key and spray the inside of the switch with a lubricant like WD-40 or CRC.
Exhaust System
If you have pumped enough antifreeze through your engine so that the discharged cooling water looks exactly like the antifreeze mixture in the bucket, your waterlift muffler should be well protected. If you want to be supercautious, install a drain plug in the muffler and drain it when laying up the engine. Reinstall the plug immediately after draining so you don’t have to worry about it in the spring. The same goes for any other drain plugs in your system that you remove. Reinstall them now, not later.
Shaft and Prop
Haul out time is the proper time to check the condition of the prop, shaft, cutless bearing, and stuffing box. On a boat that is laid up ashore for the winter months, you can save yourself a fair amount of effort in the spring by doing these tasks when your other drive system layup is done.
First, check the prop for damage and corrosion. Pitting of the blades or discoloration may indicate an electrolysis problem which should be tracked down over the winter.
Wiggle the prop shaft in the cutless bearing. There should be no slop, only the yielding of the rubber against the metal shaft. If the rubber bearing is worn, get a replacement now, rather than waiting until spring. Cutless bearing replacement has the nasty habit of becoming a real project, as the bearing shell frequently seizes in the strut, and must be sawn out or punched out.
This is also a good time to check the shaft for wear. Disconnect the shaft flange at the transmission, and pull the shaft out far enough to see the surface of the shaft where it normally sits in the stuffing box and cutless bearing. A shaft which is worn at the stuffing box may be very hard to seal. Tightening the stuffing box to overcome leaking around a worn shaft will only aggravate the problem. Winter is the time to deal with these projects, rather than the spring, when your primary concern is getting the boat back in commission.
If you have a folding prop, check the blades for slop at the pivot pin. Unless the pin fit is tight, wear will increase, not only in the prop blades but at the cutless bearing and stuffing box. A machine shop can bush the hole in the blades for the pivot pin, restoring a tight fit, and you can easily replace the pin if necessary. If you try to get this done in the spring, you’ll find everyone too busy to help you.
Don’t try to check engine and shaft alignment with the boat out of the water. This is particularly true with a flat bottom, fin keel boat. The weight of the hull on the keel can easily affect engine alignment.
In fact, if you have a fin keel boat with the engine sitting in the middle of the boat, it would be prudent to disconnect the shaft before the boat is hauled, to minimize the possibility of damage.
Engine Controls
On a boat used in salt water, there’s a good chance that the shift and throttle controls have ingested a fair amount of salt over the course of the season. You may want to disassemble the control levers, clean them with fresh water, and give them a dose of spray lubricant.
This is particularly true with controls using pot metal or aluminum components. A surprising number of engine controls use galvanically incompatible materials -notably pot metal castings -which turn to powder in a few years of use in salt water if cleaning and lubricating are not done religiously.
On controls mounted in the cockpit well, check the back side of the mechanism to make sure that it is still well greased.
It takes a fair amount of discipline to tackle the jobs associated with laying up an engine system, particularly when your primary interest is putting the boat away for a while, not fussing with it. However, this is true preventive maintenance, and it will pay off with reduced replacement and maintenance costs, as well as more reliable operation of the drive system.
Laying up your engine will give you more practical knowledge about the operation of things mechanical than a lifetime of just turning the key and pushing the levers. Doing it yourself can help you spot potential trouble before it interrupts your sailing season. The first step toward making your boat a better boat is learning what makes it tick, and the best way to learn that is to roll up your sleeves and get busy.
RELATED ARTICLES MORE FROM AUTHOR
Leave a reply cancel reply.
Log in to leave a comment
Latest Videos

Pearson 37 & 37-2 – Behind the Curtain

How To Test a Boat Engine

Hunter Legend 35.5 – Behind the Curtain

Whipping Line On Your Sailboat
Latest sailboat review.

- Privacy Policy
- Do Not Sell My Personal Information
- Online Account Activation
- Privacy Manager
Please verify you are a human
Access to this page has been denied because we believe you are using automation tools to browse the website.
This may happen as a result of the following:
- Javascript is disabled or blocked by an extension (ad blockers for example)
- Your browser does not support cookies
Please make sure that Javascript and cookies are enabled on your browser and that you are not blocking them from loading.
Reference ID: 2c60886b-45b7-11ef-8cd1-33908c5e0ac3
Powered by PerimeterX , Inc.
🚚 FREE US SHIPPING ON ORDERS OVER $30 🚚
How to Fully Winterize Inboard Boat Motors in 4 Steps

It's the end of boating season and time to reluctantly start strapping down those winter boat covers . Then, you'll be moping around winter boat shows to fight the winter boater's blues. Before you get to that, though, there's one crucial thing you have to do:
Winterize your inboard boat motor!
If you've got an inboard or a sterndrive (inboard/ outboard ) boat motor, then winterizing is an absolute must-do. This process prevents gunk from building up, keeps condensation out of the fuel tank and just overall keeps your engine healthy. I've already covered winterizing pontoon boats , which usually have outboard motors.
For those of you with powerboats, here are the steps to winterize your inboard boat motors. I've removed a few steps from the entire boat winterization process here, like removing the battery and keeping it on a trickle charge.
This post focuses specifically on winterizing motors.
1. Prepare Your Inboard Boat Motor for Winterizing
Fill the tank with gas.
Why do you want the tank filled with gas over winter, you might ask? The answer: This decreases the chance of getting air into the tank. Air is bad for the tank because it brings moisture and, with low temperatures over winter, condensation!
If you don't fill up your tank, you'll wind up with water inside, which can cause severe problems for your engine.
Add the fuel stabilizer ( or whatever your boat's Owner's Manual suggests).
I suggest using STAR BRITE EZ-To-Start Fuel Additive (check price on Amazon) . What does fuel stabilizer do?
Stabilizer prevents buildup, while your boat sits for long periods, not only in your fuel lines but also in your fuel injectors and carburetors.
Warm the engine. You can do this one of two ways: Run the engine while the boat's in the water or run the engine with an adaptor or motor muffs and a hose running the water supply.
2. Add Antifreeze and Spraying Fogging Oils
After your motor is cleaned and prepared as described above, the first real winterization step is applying antifreeze. The second step is spraying fogging oils into the engine.
Adding Antifreeze
Adding antifreeze to the engine prevents any water condensation or otherwise from freezing. Freezing can be harmful because it means expansion, causing stress and eventually cracks. The last thing you need is to find a milky consistency in your oil and to have to call your mechanic.
Don't contaminate where you play. Purchase a non-toxic propylene glycol antifreeze (check price on Amazon here) . Avoid ethylene-based antifreeze, as ethylene can release toxins into the water.
Adding Antifreeze to Engine Blocks
You'll want to follow your boat manufacturer's specifications to drain the engine block. Once the engine block is drained of coolant, then you add the propylene glycol antifreeze.
Adding Antifreeze to Sterndrives
When you hear the word sterndrive, it's important to know what it means. Essentially, a sterndrive is an inboard engine with an outboard drive system. So a sterndrive has to be treated like an inboard engine, but with a few additional steps to protect the lower parts.
To drain the lines, leave the sterndrive stored in a down position. Using your fresh water source ( boat hose and faucet), allow your boat's engine to come to temperature. This allows the thermostat to breathe, letting both the coolant and fuel stabilizer circulate through lines, carburetors and injectors.
To make it easy, boaters can purchase DIY kits like this Camco Winterizer Kit (check price on Amazon here) .
Spraying Fogging Oil into the Engine
After applying the antifreeze to your engine , and while it's still warm, the next step is to spray fogging oil into the engine.
Spraying fogging oils into inboard and sterndrive engines is slightly different than spraying it into outboard engines. I suggest the STA-BIL fogging oil (check price on Amazon) . For more information, check out this Gold Eagle's article explaining the product's proper usage.
Continue the process by filling a five-gallon bucket (or the convenient DIY kit mentioned above) with non-toxic antifreeze. Closing the intake seacock, transfer the hose to the bucket.
Letting the boat engine idle, keep watch for the bucket's liquid to reach low levels and the exhaust to discharge the antifreeze. Time it for 30 seconds or until the bucket is nearly dry. Then proceed to fog the carburetor.
Generously spray the fogging oil.
Engines with high horsepower may sputter, and low horsepower engines may even stall out but that's okay. You should see white smoke and, when the antifreeze bucket is finally dry, turn off the engine and re-secure the hose to the seacock.
Alternatively, you can go around removing each individual spark plug. With spark plugs removed, you can then spray fogging oils directly into the engine's combustion chamber.
Featured Boat Care Product
|
|
Check Price on Amazon - Better Boat's motor muffs flush excess fuel, saltwater and contaminants from inboard, outboard and jet engines. It connects to a standard garden hose to flush engines after use or while winterizing.
3. Change the Engine's Oil and Replace Oil Filter
Some boaters tend to leave this task until their spring boat inspection . But I say do it now while your engine is already warm. Draining and changing the oil is easier when it's warm.
Your engine and transmission oil could be contaminated with dirt and particles now, which can harm it during winter if not dealt with properly. Using a continuous water supply with your boat still in the water or using a standard garden hose, start the engine and monitor the fuel filter for leaks.
If a leak is found, turn off the engine and make proper repairs. Check the installed filter once again. Restart the engine. Keep it at an idle RPM and allow it to reach regular temperatures.
The trick here is to not over-cool the engine. It's better to cool it off gradually over time.
When using a combination hose and adaptor, don't run the faucet at a full-on blast. Cut the faucet off so it's a steady flow.
You want to make sure to let the engine run for 15 minutes at a minimum. This will allow the fuel stabilizer to enter the fuel system. But if this proves difficult or you're in a hurry, at least add an oil stabilizer.
4. Do a Final Inspection
Almost there! While your hands are dirty, you might as well follow these routine checks.
Check Exhaust System for Corrosion
Inspect your exhaust system by disassembling it from the water lift muffler. In general, look it over for anything suspicious like corrosion and buildup. Make sure the raw water injection hose hasn't become obstructed in any way.
Inspect Hoses and Hose Clamps
Oftentimes, hoses and hose clamps can become damaged. Check them over to be sure they're not cracked, shredded or rusty. If they are, be sure to replace them now before you forget come spring!
Seal Off Cracks from Air Intake
- Take care of the battery. Remove and keep it indoors at home, or leave it installed and hook it up to a trickle charger.
- Consider pests . Whether you keep your boat on the lift or in storage, plan accordingly with pest controls and repellants .
- Invest in a quality winter boat cover . It may be handy to also invest in a dehumidifier and boat cover support poles . There's more information on covers and poles for winter coverage here .
- Invest in theft prevention. Stay vigilant and stop by to check on your boat every once in a while.
What are you waiting for? If winter is looming, or if you're expecting some unseasonably cold weather in your area, it's time to winterize your inboard boat motor. Come next spring, you'll find your boat in tip-top shape.
After a quick spring boat inspection and some de-winterization steps, all you have to do is grab the cooler and take the family out for some fun on the water.

- choosing a selection results in a full page refresh
Winterizing Your Boat: Step-by-Step Guide
In many areas of the country, you’ll want to winterize a boat before freezing temperatures set in. Deciding on an option for boat storage is only the first step in preparing your pride and joy for its winter slumber. Even if you use your boat all winter long—a practice we most certainly endorse—there are some systems and items aboard that need some extra attention.

How to Winterize a Boat
- Start by prepping your engine; ensure all water has been drained and removed.
- Apply corrosion protection to your engine.
- Consult your owner's manual for specific instructions, and complete fogging, if needed.
- Add a fuel-stabilizing additive to your fuel system; then run the engine.
- Change your engine’s fuel filters and any fuel/water separators in the system.
- Drain your boat's freshwater plumbing systems (sinks, tanks, and heads).
- Add antifreeze to your plumbing systems.
- Ensure water is removed from all additional systems (raw water washdowns, livewells, bilge pump, etc.).
- Remove drain plugs.
- Cover your boat or place it into winter storage.
Ironically, it’s water that poses the most danger to your boat during the off-season. Freeze-damage is the biggest potential problem, but water in and on your boat can also promote winter-time mold and mildew growth, and corrosion. So as you consider all of these tasks, remember that your main goal is to keep out water and moisture to the greatest extent possible.
Be sure to concentrate on these systems during the winterization process:
- Fuel systems
- Plumbing systems
- All other systems that can hold water
Winterization Guide - Specific Engine Types & Other Systems
How to winterize an outboard engine.
Outboard engines are designed to drain all the water from their cooling systems completely, when tilted in the down position. So lesson number-one is to tilt the engine down all the way, and leave it there. Covering it is a good idea, but make sure there’s enough ventilation that condensation doesn’t form.
- Aside from eliminating H2O from the equation, you’ll want to give the engine’s internals some protection from corrosion as it sits.
- Historically, with carbureted outboards and old-tech two-strokes this meant running fogging oil through the engine. Most modern outboards, however, are “fogged” via a much easier process.
- Some manufacturers offer products that can be mixed into a remote fuel can of gasoline, and run through the engine to give it a layer of protection. And some other modern outboards control the process electronically—you simply navigate to a “winterize” mode in the control system, and press the button.
- Each manufacturer’s method is a bit different (and sometimes different models in their line require different steps) so this is the time to consult your owner’s manual.
Many people feel that the very best way to winterize an outboard is simply to use it, and they have a point. It’s not low temperatures that cause issues with outboards, but long periods of inaction. If you live in an area where you can run the engine every few weeks (long enough to allow it to reach normal operating temperature), additional winterization steps usually aren’t necessary.
One final tip: now’s the best time to change your lower unit and/or powerhead oil, visually inspect it to be sure there hasn’t been any water intrusion, and put the boat to bed with fresh fluids for the winter.
How to Winterize a Stern Drive
Stern drives can be a bit more complex than outboards to winterize because you have to worry about getting water out of the engine’s block as well as the drive unit, and may need to run antifreeze through the drive and engine. Again, there are differences between the different makes and models so you’ll want to consult your owner’s manual.
- In most cases you’ll also need to remove block plugs (which allows water to drain from the engine and also helps remove sediments and scale that can gather inside).
- On top of that, you’ll want to make a thorough inspection of exposed hoses, clamps, the bellows, and other parts that may show wear after a long season of use.
- Stern drives will also need that fogging treatment. And remember to bring the engine up to operating temperature before fogging it, to “cook” out any moisture that may remain in the engine.
- What about those ever-important oil changes? Yes, this is the time to take that step with a stern drive, too.
How to Winterize an Inboard Engine
Inboards require a treatment similar to that of stern-drives, though you can eliminate the drive system from the equation. The engine can be drained by opening petcocks or removing plugs, or you can run antifreeze through the system (which is usually the preferred method).
- In some cases, however, inboard boats remain in the water for the winter. In this case, in order to run antifreeze through the system you’ll need to close the intake seacock and remove the intake hose from it.
- Then you’ll want to submerge the end of the hose in a bucket of (environmentally safe) antifreeze and run the engine until the antifreeze comes out the exhaust ports.
- Be sure to bring the engine up to operating temperature before running antifreeze through, because otherwise the thermostat will block the flow to some cooling passages until the engine is up to operating temperature.
- As with other engines: inboards also need a dose of fogging before a winter lay-up, this is the ideal time for an oil change, and a visual inspection should be made to identify any pieces or parts that may be in need to replacement.
How to Winterize the Fuel System
No matter what sort of boat you have, all gasoline fuel systems will need some individual attention.
- First and most important: dose the fuel tanks with a quality fuel-stabilizing additive.
- Winterizing with ethanol blended fuel in your tanks can be disastrous otherwise, as the fuel can undergo phase separation. Long story short, when you go to fire up your boat next spring, it will have water-saturated fuel and you’ll have big problems.
- After putting in the additive, make sure to run the engines so treated fuel makes its way through the entire system.
With ethanol woes (hopefully) put to rest, you’ll also need to change your engine’s fuel filters and any fuel/water separators in the system. The key word here is “change.” Sometimes people remove the fuel/water separator, invert it to pour the water out, and then re-use it. This is a big mistake—water and debris can get into the wrong side of the filter when you pour it out and then get drawn into the system, and damage to the filter’s internal components can occur. So always replace the canister entirely.
How to Winterize a Boat’s Plumbing System
With the power system taken care of, many boat owners will now need to turn their attention to plumbing systems.
- Any freshwater system, including sinks, tanks, and heads need to be completely drained and then have non-toxic antifreeze run through.
- In most cases this means opening all faucets and allowing them to run until the freshwater tank is dry. Then close them back up, and add the antifreeze to the tank.
- Next, open the faucet physically farthest from the tank, wait for antifreeze to come out, then close it up again. Go to the next-farthest one and repeat the process, until all have antifreeze coming through.
If your boat has a hot water heater, be sure to run both hot and cold faucets to make sure antifreeze has worked its way through the heater, too. In some cases, you may be able to bypass the hot water heater and drain it separately.
You’ll also want to pump out holding tanks and pump antifreeze through the head(s) on your boat. And if your boat has a portable MSD, be sure to remove and empty it—forget about this step, and you could have a very smelly surprise waiting for you next spring!
Bilge, Raw Water Washdowns, Livewells, Interior and More
Remember that any piece, part, or pump that holds water also needs to be drained down for the winter. Be sure to run things like raw water washdowns and livewell pumps until they’re dry. If you still hear gurgling and you know there’s water that can’t be drained out, give them a dose of antifreeze, too.
Finally, don’t forget about your boat’s bilges. Drain plugs should be removed (assuming the boat’s on dry land, of course), and you should take a peek belowdecks to make sure the boat’s positioned to drain properly and thoroughly. Now, you’re ready to cover the boat… and start looking forward to the day when you can prepare for the spring boating season and get back out there on the water.
Out of Water Storage
- Pressure wash hull, clean barnacles off props and shafts, rudders, struts and trim tabs.
- Clean all thru-hulls and strainers.
- Open seacocks to allow any water to drain.
- Check the hull for blisters and if you find any that should be attended make a note to tell your service manager.
- Now is a great time to give the hull a good wax job.
- Be sure the batteries are fully charged and switches are turned off.
In Water Storage
- Close all seacocks and check rudder shafts and stuffing boxes for leaks, tighten or repack as necessary.
- Check your battery to make sure it is fully charged, clean terminals, add water if necessary and make sure your charging system is working.
- Check bilge pumps to ensure they are working and that float switches properly activate the pumps and that they are not hindered by debris.
- Monitor your boat regularly to avoid leaks, or animal infestations.
- If your mooring area is likely to freeze be sure to suspend water agitators below it to bring warmer water to the surface so its not iced in.
By following some of the above suggestions, and suggestions given from the links provided, you should be in good shape for the winter. Do not, however, neglect to consult your owner's manuals for manufacturer's recommendations on winterizing your boat and other systems. If you have not done a winterization job before, or don't have an experienced friend to rely on, seek out a professional to do the job for you.
Read Next: Spring Start-Up Checklist
Latest Wave of Boating News & Resources
Inspirational stories, how-to articles, and expert tips for new & experienced boaters

How to Sit and Swim Safely While Boating
Boating is one of the most enjoyable outdoor activities. However, new boaters may not know safety basics like how to sit and swim safely while boating. Let’s review these safety guidelines!

The Top Boat Maintenance Tips for Summer
As the weather warms and the boating season kicks into gear, it's time to bring your vessel out of storage and onto the water. Summer maintenance is the key to your boat's longevity – and the safety of everyone on board.

15 Olympic Athletes to Watch on the Water at the Paris 2024 Olympics
As avid boaters, we’re naturally drawn to the Olympic events taking place on the water. Check out this list of the top Olympic athletes to watch at the 2024 Olympic games in Paris.
Join Our Newsletter!
Get community news, buying bargains, and how-to guides at your fingertips.
Service Locator
- Angler Endorsement
- Boat Towing Coverage
- Mechanical Breakdown
- Insurance Requirements in Mexico
- Agreed Hull Value
- Actual Cash Value
- Liability Only
- Insurance Payment Options
- Claims Information
- Towing Service Agreement
- Membership Plans
- Boat Show Tickets
- BoatUS Boats For Sale
- Membership Payment Options
- Consumer Affairs
- Boat Documentation Requirements
- Installation Instructions
- Shipping & Handling Information
- Contact Boat Lettering
- End User Agreement
- Frequently Asked Questions
- Vessel Documentation
- BoatUS Foundation
- Government Affairs
- Powercruisers
- Buying & Selling Advice
- Maintenance
- Tow Vehicles
- Make & Create
- Makeovers & Refitting
- Accessories
- Electronics
- Skills, Tips, Tools
- Spring Preparation
- Winterization
- Boaters’ Rights
- Environment & Clean Water
- Boat Safety
- Navigational Hazards
- Personal Safety
- Batteries & Onboard Power
- Motors, Engines, Propulsion
- Books & Movies
- Communication & Etiquette
- Contests & Sweepstakes
- Colleges & Tech Schools
- Food, Drink, Entertainment
- New To Boating
- Travel & Destinations
- Watersports
- Anchors & Anchoring
- Boat Handling
- ← How-To DIY
Do I Really Need To Winterize?
Advertisement
If you look at the most recent GEICO | BoatUS Marine Insurance winterizing claims analysis over the last 10 years, the answer is a resounding 'yes'.

Photo: Getty Images/James Pintar
If you're like most people, you probably think the colder states would have the most claims, but the GEICO | BoatUS Marine Insurance claims files show that the Lone Star State of Texas leads the pack with more than seven times the freeze-damage claims as frigid Minnesota. Even balmy Florida has more claims than Minnesota. Why? Likely because boaters in the frozen North know they need to winterize, so their freeze claims almost always involve a problem with how the boat was winterized (something was missed) or the owner waited too long. In the temperate South, our files include many more claims where the boat wasn't winterized at all, or where the boater was depending on a heater to keep the engine from freezing and the electricity went out.
If you live in a temperate state and aren't sure if you should winterize, look at the list below showing which states have the most freeze damage insurance claims over the last 10 years. More than half of them would be considered warm-weather states, and only Hawaii routinely has no claims. The most freeze claims over the past decade were in 2018 because of a severe winter that included snow in Las Vegas, record cold for Los Angeles, and at one point, nearly half the U.S. experiencing temperatures below freezing. There is no way to accurately predict how cold winter will be in your state, so don't get caught off guard this year.
Top 10 States For Winterizing Claims
1. Texas 2. New York 3. New Jersey (tie) 3. Maryland (tie) 5. Virginia 6. Mississippi 7. Georgia 8. North Carolina 9. Washington 10. South Carolina
What Is Winterizing?
Before the mercury dips below freezing, you need to prepare your boat for the coming winter. At its most basic, winterizing means draining any water aboard or replacing it with enough of the right kind of antifreeze to protect against the lowest temperatures your boat might experience. Freshwater expands in volume by about 9% when it freezes and can push outward with a force of tens of thousands of pounds per square inch. That expansion can crack an engine block, damage fiberglass, split hoses, or destroy a refrigeration system overnight. Our analysis of 10 years of freeze claims found that more than three-quarters involved cracks in the engine block or the exhaust manifolds that occurred because water remained in the engine or cooling system during a hard freeze. Not surprisingly, those repairs are expensive and time-consuming.
Visit BoatUS.com/Winterizing to download a copy of our boat winterization guide and checklists, and to read more helpful winterization articles.
Most of those who don't winterize, or don't winterize properly, only find out something is wrong in the spring when brown froth starts spewing through a crack in the side of the engine block, or what looks like chocolate milk appears on the dipstick. Repairing freeze damage takes time and all too often involves a complete engine replacement. By the time the boat is in working order, a good part of the boating season will have been lost. Winterizing most boats takes from an hour to a day. So unless your boating takes places in Hawaii, we recommend winterizing your boat if there will be any time that it could possibly freeze, to minimize the chances that a sudden freeze will put it out of commission next season.
Engines tend to take the brunt of the damage from freezing weather, so they should be your focus. Winterizing engines means draining the water from the engine or replacing it with antifreeze. Mistakes in this step lead to the vast majority of the freeze claims in the our insurance files. Exactly how this is done varies.
How To Winterize Your Boat's Freshwater System
In freshwater-cooled engines, there are actually two systems: a raw-water side that cools the coolant/water mixture (freshwater) in a closed-loop system, which cools the engine. Winterizing the freshwater side simply involves making sure its year-round permanent antifreeze is an adequate mixture to meet the manufacturer's recommendations for your locality — typically a 50/50 mix with water. The preferred technique for the raw water side of inboard engines is circulating special winterizing antifreeze throughout the cooling system. It is far less likely to result in freeze damage as long as the engine is run long enough to circulate the antifreeze to every part of the cooling system.

Photo: Stacey Nedrow-Wigmore
Antifreeze is antifreeze, right? Wrong. Not only are there different kinds, the temperature at which they freeze is different, too. And that's important because, if they do freeze, your boat is likely to be damaged.
Antifreeze for winterizing engines and freshwater systems is not the same as the coolant you put in your engine's heat exchanger (the boat equivalent of a radiator). Ethylene glycol, the chemical used in coolant, is highly toxic, so winterizing antifreeze must be nontoxic because it goes in drinking water systems and may eventually go overboard. The antifreeze you use in your engine and plumbing systems must also have the proper freeze protection to keep your systems safe at the lowest possible temperatures your boat may face.
For drinking water and raw water systems, choose antifreeze that contains propylene glycol, which is safe and doesn't have a taste, and one that has rust inhibitors for engine protection. Most importantly, check the freeze rating, but be aware that the numbers used don't correspond to what you may think. A typical antifreeze labeled for -50 F will only protect PVC water pipes from bursting down to about -10 F and will actually begin freezing at about 15 F. At -50 F, it's a solid chunk of ice, capable of cracking an engine block. Play it safe and use an antifreeze that is rated well below any temperature you're likely to experience.
Most winterizing antifreeze must be used full strength — don't dilute. When pumping antifreeze into your engine or freshwater systems, don't shut down as soon as you see the antifreeze come out of the faucet or engine exhaust. The antifreeze first mixes with the water already in the system and has to displace all of it before the antifreeze can protect fully. It's better to invest in a couple of extra gallons than end up with a cracked block at the beginning of next season.
Sterndrives
There are different types of sterndrives, so check your manual for winterizing specifics. Some inboard/outboard (I/O) engines take in cooling water from a thru-hull in the engine compartment, and some take it in through the outdrive. With I/Os that use a thru-hull, the outdrive will be protected once the engine has had antifreeze run through it because the antifreeze also runs through the outdrive. Other models may require the use of "muffs" to first flush and then run antifreeze through the drive. Afterward, all outdrives should be stored in the down position to prevent water from entering the exhaust hub of the propeller. In cold weather, any accumulated water in the outdrive can freeze, and ice may expand and crack the housing.
Electric Heaters Are No Substitute For Winterizing!
Numerous freeze claims over the years have proven the point again and again: If you're tempted to leave your boat with a heater running this winter rather than winterizing, consider these examples:

An unattended heat lamp totally destroyed this boat. Photo: GEICO | BoatUS Marine Insurance

Failure to winterize caused this engine block to crack. Photo: GEICO | BoatUS Marine Insurance

Heaters are poor substitutes for proper winterizing and can start a fire. Photo: GEICO | BoatUS Marine Insurance
The owner of a 24-foot Bayliner in Portland, Oregon, never got around to winterizing his twin gas engines and instead put a heater in the engine compartment. Like a lot of other people, the owner probably didn't think about the fact that power outages most often occur right when you need electricity most — when the worst winter weather hits. An ice storm came through just before Christmas, downing power lines and cutting off power to the heater long enough to freeze the water in the blocks.
A 27-foot Rinker was "winterized" by placing a space heater in the engine room. The boat, which was afloat in her slip in Alabama, caught fire when the extension cord used to power the heater shorted where it had old damage. The boat was destroyed, and it damaged another boat as well as the dock.
Consult your engine's owners manual or service manual before beginning. Today's engines (especially four-stroke and direct-injected two-stroke outboards) may have special winterizing, flushing, and maintenance instructions; follow them closely. The engine should be flushed according to manufacturer's instructions. Sometimes, this doesn't involve running the engine; newer engines have a garden hose fitting allowing for a quick flush without starting the engine.
Other Chores
While most of the GEICO | BoatUS Marine Insurance freeze claims involve the engine or exhaust manifolds, that's not the only place where freezing water can cause serious damage. Plastic plumbing fittings, pumps, and marine heads can all be cracked by ice. Pipes, valves, and pumps in potable water systems can freeze and split open.
As with engines, winterizing the plumbing systems aboard consists of replacing the water with antifreeze. Simply draining the freshwater system isn't enough, as water will almost certainly have pooled somewhere and will freeze over winter. Running antifreeze through the system will ensure that there is no water in the system to freeze. Keep in mind that engine coolant (ethylene glycol) should never be used in a freshwater system as it is very toxic and cannot be reliably purged from the system in the spring.
Once you've taken care of winterizing, visit your boat every few weeks to make sure lines are secure, drains haven't become clogged, bilges are dry, and so on. Checking the boat is especially important after heavy storms or extended cold spells. If you have friends at the marina, arrange to check each other's boats whenever possible.
One more thing our claims files show: Owners who visit their boats over the winter are far less likely to experience problems come spring, which means you'll likely be on the water sooner.
Winterizing Contracts
BoatUS receives complaints every year from boat owners who thought the marina would winterize their boat but the marina didn't do it or didn't know it was supposed to.
Disputes arise when the marina and the boat owner don't have a well-defined contract that spells out exactly what's to be done. The term "winterizing" doesn't have a universal meaning, and your definition of winterizing and theirs may be completely different. Telling someone to winterize the engines and freshwater system doesn't mean they'll also close the seacocks and winterize the head.
If you're hiring someone to winterize your boat, insist on a written contract that clearly lists every job necessary to protect your boat and has a firm time frame, beginning well before the first typical hard freeze. Include language that specifies not to dewinterize until you authorize it in case something comes up and you won't be using the boat through the next winter.
Pay with a credit card if possible. If the boat didn't get winterized properly per the contract and you have damage, you can dispute the charges with your credit card company, which gives you more leverage. Also, don't assume that the marina will routinely inspect your docklines and bilge unless you specifically pay for the service.
Bottom line: Whatever you expect to be done, spell it out in writing.
Related Articles
The truth about ceramic coatings for boats.
Our editor investigates the marketing claims of consumer-grade ceramic coatings.
Fine-Tune Your Side Scan Fishfinder
Take your side-scanning fishfinder off auto mode, and you’ll be spotting your prey from afar in no time
DIY Boat Foam Decking
Closed-cell foam flooring helps make boating more comfortable. Here’s how to install it on your vessel
Click to explore related articles
Charles Fort
Contributing Editor, BoatUS Magazine
Charles Fort is BoatUS Magazine's West Coast Editor. He often writes local news items for BoatUS Magazine's Waypoints column and contributes to Reports, in-depth tech features in every issue written to help readers avoid accidental damage to their boats. He is a member of the National Association of Marine Surveyors, he's on ABYC tech committees, and has a 100-ton U.S. Coast Guard license. He lives in California.
BoatUS Magazine Is A Benefit Of BoatUS Membership
Membership Benefits Include:
Subscription to the print version of BoatUS Magazine
4% back on purchases from West Marine stores or online at WestMarine.com
Discounts on fuel, transient slips, repairs and more at over 1,200 businesses
Deals on cruises, charters, car rentals, hotel stays and more…
All for only $25/year!
We use cookies to enhance your visit to our website and to improve your experience. By continuing to use our website, you’re agreeing to our cookie policy.
- Articles and Guides
How to Winterize a Boat: Steps, Checklist and Costs
18th oct 2023 by lenny rudow.
As summer draws to a close many boat owners will be asking themselves: do I need to winterize my boat? This is an important question to be asking, because freeze-damage can cause extensive and even catastrophic problems. It can burst pipes in plumbing systems, crack engine parts, and split apart fiberglass. Fortunately, you’ve come to the right place — we’ll lay out the procedures you need to follow and run through a comprehensive winterize boat checklist, so you can rest easy after storing your boat for the season.
Do I Need to Winterize My Boat?
If you live in an area where temperatures may drop below freezing the answer is yes. It’s critical you winterize a boat even if you live in an area with mild winters where sub-freezing temperatures are the exception rather than the norm. That said, a lot depends on the nature of your boat. For small boats that are very simple and have few systems, winterizing it can mean putting on a cover and taking care of the motor. For big luxury center console boats over 40 feet , on the other hand, you’ll have a large number of tanks, pumps, and pipes to deal with. So recognize that while all boat owners need to winterize a boat if they live in a climate that’s not tropical, just what it means to do so can be very different from one boat to another.

Some boaters wait until the last minute to winterize – and some wait just a bit too long.
When Should I Winterize My Boat?
Most boaters winterize their boat when they believe the last trip of the season is behind them. However, some people who live in areas with a mild climate will wait to see if and when freezing weather comes along, so they can get in another adventure or two should the weather remain nicer than expected. Either way, the important thing is to pay attention to the forecast and if there’s a freeze being predicted, have the boat winterized before it happens.
Steps to Winterize a Boat
Remember, every boat is different and the winterization process can vary quite a bit from one to another. That said, here are the critical steps:
Winterize the engine(s)
Winterize the plumbing systems.
- Winterize any pumps or compartments that may hold water
Remove the batteries
Treat the fuel, cover the boat.
This process is a bit different depending on what type of power system your boat has. It can also differ depending on the engine’s manufacturer and model. It’s important enough that we’ve dedicated an entire section to this process, so see How to Winterize a Boat Motor, below. Also check out How to Winterize a Boat Motor a Step By Step Guide .
Winterizing the plumbing system in a boat is similar to winterizing one in a summer home. You’ll need to drain the water out of the system, then add non-toxic antifreeze. Start by opening the faucet farthest from the water tank and let it run until completely drained. Then open each in turn working your way back towards the tank. When the system has run dry, add antifreeze to the tank and run it through the system, shutting off the faucets only after antifreeze has begun coming out. If your boat has a hot water heater, be sure to turn it off before draining the tanks down.
You’ll also need to pump out the boat’s holding tank, then add some antifreeze to be sure any liquid left in the bottom doesn’t freeze. Then be sure to flush the head until antifreeze runs through the lines. If your boat has a self-contained head (a portable marine sanitation device, or MSD), remove it from the boat and properly dispose of any waste in its holding tank, then drain the freshwater reservoir.
Winterize pumps or compartments that may hold water
Livewell pumps, washdown pumps, fishbox macerators, and any other accessories that may have water in their lines or in the pump itself need to be drained and given a dose of antifreeze. In cases where a raw water intake feeds the system, you can remove the intake line at the seacock, submerge it into a five-gallon bucket full of antifreeze, and activate the pump to get the liquid running through. If the pump can’t pull a prime, hold the end of the intake up higher than the pump and pour in some antifreeze to get it started.
Drains should also be checked, as some of their lines could be holding water. These can be blown out with compressed air, then you can pour antifreeze directly into the drain.

Compartments that hold water, like livewells, must be fully drained and the pumps and lines given a dose of antifreeze.
Batteries should be disconnected and removed from the boat. Put them on a trickle-charger or battery maintainer for the off-season. This is also a good time to clean up any dirty or corroded connections.
Fill the boat’s fuel tanks to about 90 percent, to prevent the condensation from forming while allowing enough room for expansion without fuel coming out through the vent. Since the boat will likely be sitting for an extended period of time, you’ll also want to add fuel stabilizer to the tank. This is especially important if your boat is gas-powered and there’s ethanol in the fuel. Note: do this before winterizing the engines, so the stabilized fuel is run through the entire fuel system as well as being in the tank itself.
Your main mission here is to keep out water, so it doesn’t creep into compartments, cracks, and crevices where it can cause freeze damage. A good cover will also keep out the dirt and leaves. But you need to make sure it can vent properly or mold and mildew will form. Standard hardware-store tarps are terrible for this use — it’s best to have a custom canvass cover made for your boat, or have the boat shrink-wrapped by a professional who knows where to add vents and how many to use.

Covers should fit tightly and be secured to prevent flapping in the wind.
How Much Does it Cost to Winterize a Boat
There is no one-size-fits-all answer to this question. Obviously, size matters. But it also depends on the complexity of your boat’s systems and whether you pay a professional to do the job or you spend your own time on it. We can, however, offer a few case-studies to help you get some idea of the burden to bear in case you’re scratching your head, asking yourself “how much does it cost to winterize a boat?”
With a small skiff with no additional systems other than an outboard motor, you need only pay for motor oil, filters, and a cover. Figure on spending a few hundred dollars, maybe a bit more if you buy a custom cover (but then you won’t have to pay for shrink-wrapping in the future). On a midsized boat like a 28-foot pocket cruiser, you’re likely to spend $1,000 or so between supplies and a shrink-wrap job, and custom covers can cost several thousand dollars. Pay to have it done by a pro, and cost will climb by 50 or so percent. On larger boats and yachts the job is generally left to professionals and will run into the thousands of dollars.
How Long Does it Take to Winterize a Boat
Again, this all depends on the size and nature of the vessel. That little skiff won’t take more than a few hours, but the midsized boat will require a full day’s work. And the bigger the boat is the more work that’s involved, so in some cases the process can take several days.
How to Winterize a Boat Motor
This part of the job is so important that if there are any doubts in your mind as to whether you can handle it or not, you should have a professional do the job. That said, there’s a huge difference in complexity between outboard motors and inboards.
How to winterize an outboard motor
Start the process by giving the engine a thorough freshwater flush. Outboard motors are designed to drain completely when tilted down, so you don’t have to worry about the cooling system nor antifreeze. Changing the oil and oil filter, however, is critical. Oil builds up acids over time and you don’t want used oil sitting in the lower unit or the powerhead for months on end. Note: before changing the powerhead oil be sure to run the engine up to operating temperature.
The oil changing process will differ a bit from one outboard to the next so refer to your owner’s manual to get the specifics. That said, whenever you perform an oil change in an outboard be sure to visually inspect the old oil and look for a milky white color. If you see it that means there’s water in the oil, and you have an issue that needs professional attention.
If your outboard will sit for more than a month without use, it also needs to be fogged. The process differs depending on your fuel delivery system, and may include spraying fogging fluid into the carburetor as the engine runs, or may require adding fluid to a remote fuel tank then running it through the EFI system. This is another stage where it’s important to check your owner’s manual and follow the manufacturer’s instructions for your specific make and model.
Also remember to leave the engine in the tilted-down position, and cover it to prevent weathering. Be sure to use a cover that breathes, and make sure it’s secure and doesn’t flap in the wind or it could wear away that pretty finish.
How to winterize an inboard motor
With inboards you still need to do an oil change, but you also have a cooling system that needs to be winterized. This process involves finding drain plugs, adding antifreeze, and running it through the system, and will vary quite a bit from one motor to the next. Again, you’ll need to refer to your owner’s manual and if you find anything doubtful or confusing, farm this job out to a pro.

When the snow starts falling, boats that are properly winterized will be fine but those that aren’t may suffer from all sorts of damage.
Winterize a Boat Checklist
Okay: we’ve covered all the bases for how to winterize a boat. You’ve asked how long does it take to winterize a boat, considered the cost to winterize a boat, and thought about when to winterize your boat. Now, let’s boil the process down to a handy winterize a boat checklist.
- Winterize the engine(s), using the owner’s manual as a reference or paying a professional who’s familiar with your specific power system and its needs.
- Oil and filters have been changed
- Old oil has been visually inspected
- Outboards are tilted down and covered
- Inboard cooling system(s) have been winterized
- Engine has been fogged as per manufacturer’s instructions
Plumbing System
- Freshwater systems including tanks and lines have been drained
- Freshwater systems including tanks and lines have received antifreeze
- Portable heads have been removed and drained
- The head and/or waste tank has been drained
- The head and/or waste tank has received antifreeze
Pumps or Compartments
- Any and all pumps and their lines have been drained
- Any and all pumps have and received antifreeze
- Any compartments with drains have been blown out and received antifreeze
- Remove them from the boat
- Put the batteries on a trickle charger
- Clean any dirty or corroded terminals
- Fuel tanks have been filled to approximately 90 percent
- Fuel tank has been treated with a fuel stabilizer
- Treated fuel has been run through the system
- The boat has been covered or shrink-wrapped
- Proper ventilation has been ensured
- The cover is secure and won’t flap or saw back and forth in the wind

Fail to assure proper ventilation, and mold and mildew will set in. This leaning post cushion was ruined, as a result.
Winterizing a boat may seem like a complex process, but in truth it’s only as complex — or as simple — as the boat and its systems are. But we do have one final word of advice: regardless of what size or type of boat you’re winterizing it’s wise to take the time to give it a thorough cleaning and a thick coat of protective paste wax before you put it away for the winter (see 3 Simple Ways to Keep Your Boat Looking Good as New ). That way, not only will your boat be ready for action as soon as spring returns, it will look sharp, too.
Written By: Lenny Rudow
With over three decades of experience in marine journalism, Lenny Rudow has contributed to dozens of boating and fishing publications and websites. Rudow lives in Annapolis, Maryland, and is currently Angler in Chief at Rudow’s FishTalk ; he is a past president of Boating Writers International (BWI), a graduate of the Westlawn School of Yacht Design, and has won numerous BWI and OWAA writing awards.
More from: Lenny Rudow
Related Articles and Guides

18th Jun 2024
How to Dock a Boat with Joysticks, Single Engines, and Twins: Tips and Technique...

20th May 2024
Essential Boat Safety Tips for Every Type of Watercraft

29th Mar 2024
How to Transport Your Boat Four Different Ways

20th Sep 2023
Painting a Fiberglass Boat: A Detailed Guide
- Explore Rightboat
- Boats for Sale
- Boating Articles
- Buyers Guide
- About RightBoat
- Sell Your Boat
- Boat Selling Advice
- All manufacturers
- All categories
Enter your email to keep up to date with the latest news
Join for free
Sign up now for free and discover how easy it is to keep up to date with THE latest boats for sale. Find your right boat, and tailor your voyage to finding your next boat.
Benefits of becoming a member:
- Set up tailored alerts
- Personalise your experience
- Download full specifications and broker details
- Keep tabs on your favourite boats
Are you a broker? Join as a Broker
Rightboat - join for free.
Do you have an account already? Login
Save this search
Save your search and receive new boats in your email..
You can unsubscribe from your alerts whenever you like. By pressing the button you accept the Legal Terms and conditions
- Toggle Search Form
How To Winterize Your Boat
Getting ready for winter? As you enjoy the season’s final weeks of sea and sunshine, start preparing to winterize your boat.

Whether your boat has an outboard, gas inboard or stern drive engine, the following nine steps will assure quick, easy startups when the snow melts and warm weather returns come spring.
Step 1: Replace engine oil
Moisture and acids in old oil will pit bearings and other engine parts while in storage, so you need to drain it. First warm up the engine, while in water, so more of the dirty oil will drain out and impurities will flush out more easily.
Then use high-quality oil and filters as recommended by your engine’s manufacturer. For 4-stroke outboard motors, change the oil and filter before storing for the winter.
Step 2: Flush and drain cooling water
To prevent damage from expanding water when it freezes, you must drain water from your engine.
For inboard and sterndrive engines: Flush the engine with clean water by using water muffs or a similar device to connect a garden hose to your cooling system. (Never run a water engine without water). Then flush until the engine reaches normal operating temperature.
Next, remove drain plugs. These are usually located in the engine block and manifold. You may also need to remove the water pump hose to drain remaining water.
For outboard engine maintenance: First, make sure all drain holes are open. Then start the engine and clean the cooling system by flushing it with fresh water. (Use water muffs or a similar device connected to a garden hose.) Flush for a few minutes.
Step 3: Stabilize fuel
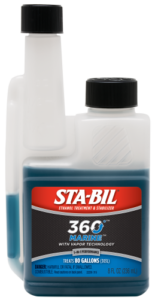
The easiest way to prevent these problems is by adding a high-quality marine fuel stabilizer to prevent fuel deterioration.
Then fill the tank with fresh fuel to prevent corrosion-causing water condensation. Simply run the engine for a few minutes to get treated gas throughout the system—either when your boat’s in the water or while using a fitting designed to run the engine with a garden hose.
Note that draining gasoline does not prevent varnish formation in engines since some fuel is always left behind. In addition, gaskets can dry out and cause leaks in the spring.
Step 4: Protect internal engine components
While in storage, engine oil drains away. This exposes internal engine components to harsh elements in winter and can lead to corrosion and metal-to-metal contact, called cylinder scuffing, come spring.
To prevent these issues, use a fogging oil spray . This type of product is specially formulated to penetrate deep into the engine and coat parts with a protective layer of anti-corrosive compound.
Step 5: Replace gear oil
Drain the lower unit of old gear oil and replace with a fresh supply. When changing the gear oil, be sure to check for moisture. If water comes out first, or if you see milky or lumpy oil, this is an indication your boat is experiencing moisture contamination and will need new seals before next season.
Step 6: Grease and lubricate
Find your engine’s grease fittings (most will be located in the steering mechanism area), then use a quality marine lubricant to protect against rust, corrosion and oxidation. Check your owner’s manual to be sure you don’t miss any important areas that need to be greased before winter storage.
Step 7: Remove valuables
Boatyards receive little traffic in the winter, which makes break-ins easy. Remove all valuables, including expensive electronics. It is also in your best interest to insure your boat , even when it’s not on the water.
Step 8: Clean and wax
Step 9: cover.

For more maintenance tips and how-to’s, visit the boat care section here on the blog and watch our expert videos on YouTube .
Leave a Reply Cancel reply
Does Fogging apple to a fuel injection motor?
No, fogging is not recommended for fuel injected systems. We recommend following the manufacturer’s manual for the winterization process. If there are any questions, please feel free to contact us at [email protected] . Thanks for the question!
Thanks for the tip that a boat motor engine flush is the first thing I should do when preparing my boat for the winter. Because of the lockdown guidelines in my city, I think I wouldn’t be able to use my boat for the rest of this year so I think it would be best to start preparing it for winter storage at around October or early November. I hope that I can finally get to use it again by spring next year.
- Automotive Care
- Cool Rides Online®
- Indoor and Outdoor Living
- Powersports and Recreation
- Press Releases
- Revving Up™
- Small Engine Care

Boating Basics Online is reader-supported. When you buy via our links, we may earn a commission at no cost to you. Learn more
How to Winterize an Outboard Boat Motor in 8 Easy Steps
Written by J. Harvey / Fact checked by S. Numbers

“Winter is coming,” is a common remark among boaters, marking the start of busy preparations for the changing of seasons. Surely everyone wants to winterize an outboard motor before the cold weather arrives. Especially when there is a high chance of snowflakes, you’ll be happy to winterize an outboard motor 2 stroke. The sooner you winterize boat motors, the less likely corrosions can harm them.
These are the answers you can find in this article about how to winterize an outboard boat motor:
- The tools and materials you’ll need in winterizing boat motors
- The step-by-step process of winterizing outboard boat motor
Let’s get on to it!
Table of Contents
2. Materials
Step 1: treatment of the fuel mixture, step 2: plug in the earmuffs and start the engine, step 3: use a fogging agent to suffocate the engine, step 4: fill the combustion chamber with fog, step 5: drain all the oil and replace the o-rings on the drain screw, step 6: fill the gearbox with new oil, step 7: quickly reattach the drain screws, step 8: tuck it away and grease the fittings, last thoughts, here’s what you’ll need to prepare first.

- Gear oil pump
This transfers oil by displacement in gear-like fogging fluids or gear oil, creating a void to aid in the removal of excess liquids and preventing
- Screwdrivers
One of the basic tools in removing the motor’s drain and washer screws and reinstalling them back.
This is a flexible and handy collection of tool kit items for a variety of sizes and kinds of fasteners. It is mainly useful for fitting nuts and bolts.
- Ratchet wrench and extensions
Providing options other than removing your boat’s outboard, the ratchet wrench and its extensions increase the reach of a socket.
- Corrosion guard
This creates a water-resistant coating on either non-painted or painted surfaces.
- Fogging oil
This is an anti-corrosive material that preserves carburetors and cylinders’ interiors, especially because before the engine runs out of gasoline, it runs rough.
- Fuel stabilizer
This keeps normal and ethanol-blended gasoline from oxidizing, as well as avoiding fuel system corrosion, gum, and varnish forms. It can lubricate gasoline injectors and carburetors effectively.
Unlike any automobile gear lubricant, marine gear oil is designed to emulsify water. It keeps water from damaging the working components of a boat motor, providing lubrication and preventing the motor’s lower unit from freezing.
The O-Rings restrict liquid or gas from escaping. It will be inserted into a groove and squeezed between two surfaces in an outboard motor.
- Spark plugs
Marine spark plugs take in electricity on one end and create a spark on the other. When a spark becomes “cold”, it has lower insulation and retains less heat. Deposits form when the plug becomes too cold and ultimately shorts out.
The 8 Easy Step-By-Step Process That You Should Follow

To prevent the mix from turning bad during the winter, use a marine-grade gas stabilizer. One ounce of stabilizer will treat ten gallons.
If your motor has a 3-gallon tank, pour in about half an ounce and slosh it a little to mix it up.
Adding a bit of extra stabilizer than the usual instruction says won’t cause any
Attach a hose to the fluid intake ports on the unit’s bottom and attach a set of flush or earmuffs to them.
Start the engine and turn on the water.
Allow the engine to warm up for approximately 5 minutes before applying the stabilized gas mix to the whole engine.
Note: This is also an excellent opportunity to inspect the impeller’s operation. If the impeller is spewing out water, it is performing its job; otherwise, it has to be replaced.
Take out the engine cover then look for the air intake hole on the carburetor.
Spray the intake with a tiny quantity of fogging oil while the engine is running.
The engine will try to die, but by increasing the throttle, you can keep it going.
Fog the engine until it shuts down.
Note: You’re doing it correctly if white smoke flows out of the exhaust.
Remove the spark plug boots and unscrew them.
Change the spark plugs if their connections seem rusted and spray some fogging oil on the inside of the chamber; otherwise, use the old ones.
Pull the starting string a few times to coat the piston and cylinder with the fogging oil while keeping the spark plugs in position and their boots off.
First, remove the bottom drain cap screw, then the top drain cap screw.
Allow the engine oil to drain freely.
Double check to ensure that you are also draining engine oil from your lower end gears.
Remove the old O-rings out from drain screws.
Replace them with new ones, as this will guarantee that the seal is strong.
All O-rings come in a common flexible range of kits. Ensure they have the basic form or shape you need across your boat motor drain screw and other fittings.
To a quart of marine grade gear oil, attach a pump handle.
The pump’s other end will be threaded into the bottom drain port.
Fill the bottom end with fresh oil until the oil reaches the oil filler level. You can notice that it will be coming back out when it does. Observe the oil draining from the top drain hole when you do the filling correctly.
To begin, tighten the top drain screw. This will keep the fresh oil from leaking out too fast.
Then, hastily screw in the lower drain screw after removing the pump from the lower drain port. Ensure this common source of incorrect maintenance tasks that lead to electric motor risks and failures. Making sure you attach the motor boat drain screw can save more boating memories and secure the safety of your family.
Grease all of the motor’s fittings to prevent it from various risks and failures of malfunctioning. It’s better to use a grease gun to do it with precision, ensuring the flow and pressure of lubricating your boat motor, Especially if your unit has a grease nipple near the steering component from the mounting bracket and a grease nipple within the engine cover for cover latching.
So it doesn’t fail when running in the water, use marine-grade grease.
After it has been oiled, store it in a secure place until next season.
You can appreciate more details on this YouTube video from Boat Parts.
During the process on how to winterize an outboard boat motor, get the focus you need. Double check the engine , fuel systems, plumbing, and any other systems that may retain water.
Include the suggestions from the websites supplied and consider the manufacturer’s instructions for winterizing your boat motor via the owner’s handbook as well. Now, you are in excellent condition for the winter.
There may be cases you encounter unexpected situations in the winterizing process. Feel free to call your experienced buddy to help, or get an expert to do it for you.

“I am James Harvey – founder of Boating Basics Online. It is established with the drive to help out first-time boaters, which are those desiring to explore their way through the water. So if you are new to boating, start from here with me. “
Block Island welcomes new fire engine via ferry
by JOHN PERIK, NBC 10 NEWS

BLOCK ISLAND, R.I. — The Block Island Ferry had a special visitor onboard Friday.
Ladder 1 is Block Island’s newest fire engine, and is equipped with a 100-foot aerial ladder.
The engine traveled to Block Island on the ferry from Point Judith.
Many people on board found it a pleasant surprise.
- MORE NEWS: Lincoln family still rebuilding two weeks after EF-1 tornado
“It’s not something that you see every day,” said one ferry traveler. “All of the kids were just so happy to see the engine, great for the island.”
The engine comes to the island after nearly one year after a severe fire burned down the Harborside Inn .
“I would have liked to have had it a year ago but we got through that,” said Chris Hobe, the Block Island Fire Chief. “It’s been a long time coming about two and a half years from start to finish.”
The plan is to have the new engine ready for service by Sunday, Chief Hobe said.
IMAGES
VIDEO
COMMENTS
For best results, run the engine for a few minutes to lower the oil's viscosity and allow it to pick up impurities. Shut off the engine, change the oil, and replace the filter. Restart the engine and run for about a minute to circulate the fresh oil to internal parts. While it's running, check to make sure the oil filter isn't leaking.
Removing sails and rigging. 1 - 2 hours. Securing the boat's interior/exterior. 1 - 2 hours. Handling the boat's electrical system. 30 minutes - 1 hour. Total estimated time. 4 - 6 hours. If you don't winterize your sailboat, the water inside the boat's systems can freeze and expand, causing pipes and hoses to burst.
Step 1: Drain the Fuel. If You Have a Gasoline Engine. This process can go two different ways depending on whether your boat has a diesel engine or a gasoline engine. If your sailboat has a diesel engine, the process of preparing your fuel tank for the winter can be slightly more complicated.
Disconnect the flush attachment or remove the motor from the flush tank. With the motor upright, let all water drain out of the pick-up. Open drain plugs (if any--see your owner's manual) to empty the powerhead and intermediate housing. Crank the motor a couple of times by hand or "bump" it with the starter to empty the water pump.
You may also be wondering the steps to winterize your outboard motor. Start with the basics: winter boat storage, boat covers, fuel treatments, engine winterization (for both outboards and inboards), battery care, and winterizing your water systems and sanitation. When it comes to winterization of your boat, here's the main factors to consider:
Apply a coat of wax or polish to protect the hull from the elements. Fill up your fuel tanks and add a fuel stabilizer to prevent the fuel from degrading over the winter. Run the engine for a few minutes to circulate the stabilized fuel throughout the system. Cover the boat with a breathable cover to prevent moisture buildup.
Winterizing Boat Engines And Outdrives. Winterization procedures will vary depending on what kind of engine or engines you have — inboard or outboard, gas-powered or diesel, big or small, four-stroke or two-stroke. But the basic principles are the same. For example, winterizing a four-stroke outboard involves carefully flushing with fresh ...
Hook "ear muffs" and a garden hose to the engine, start it, and then spray the fogging-solution lubricant directly into the air intake until it's gone. If you don't fog the engine cylinders, corrosion can form inside the engine, covering the cylinders, pistons and rings with a patina of abrasive crud. Cost if you do: $5 to $15.
Drain or Winterize the Cooling System. Any engine's cooling system needs to be completely drained of all water and/or have antifreeze added to prevent freeze damage. Fail to take this step, and the results can be catastrophic. Generally speaking, this will include bringing the engine up to operating temperature and then pulling drain plugs ...
2. Go below and open all water outlet spigots to drain the onboard freshwater tank(s). When water sputters from the outlets, close them and pour two or three gallons of nontoxic propylene glycol antifreeze (more if you have a hot water heater) into the tank. Note: If you drain.
In any case, it is important to run the engine for 10 minutes or so after treating the fuel, so that the additive gets into the fuel lines and filters, the carburetor of a gas engine, or the injectors of a diesel engine. If the boat is already on land when you go through the winterizing process, run a water hose to the raw water intake to ...
Winterizing. As shadows lengthen and summer draws to a close, the bittersweet time to winterize our boats arrives, in the frigid north, where a hard freeze can last for months, boaters don't need any convincing of this. But even in more temperate locales, care must be taken to protect engines, potable water and other systems against the ...
To winterize the engine with antifreeze, you'll need a five-gallon bucket, and enough antifreeze for your engine and related plumbing (at least two gallons). If your engine takes a lot of antifreeze, you might also need a helper to add antifreeze to the bucket as needed. To circulate antifreeze through the engine:
In this video, we will show you how to winterize your marine diesel engine. For more information on this topic, check out our West Advisor: http://www.westma...
Closing the intake seacock, transfer the hose to the bucket. Letting the boat engine idle, keep watch for the bucket's liquid to reach low levels and the exhaust to discharge the antifreeze. Time it for 30 seconds or until the bucket is nearly dry. Then proceed to fog the carburetor. Generously spray the fogging oil.
How to Winterize a Boat. Start by prepping your engine; ensure all water has been drained and removed. Apply corrosion protection to your engine. Consult your owner's manual for specific instructions, and complete fogging, if needed. Add a fuel-stabilizing additive to your fuel system; then run the engine. Change your engine's fuel filters ...
3. Have someone else start the engine to draw the fresh water through the raw water side of the system. If you're holding the intake hose, make sure it doesn't vacuum itself to the bottom of the bucket. 4. Flush liberally. The exhaust water should run clear. 5. Turn off the engine.
Antifreeze for winterizing engines and freshwater systems is not the same as the coolant you put in your engine's heat exchanger (the boat equivalent of a radiator). Ethylene glycol, the chemical used in coolant, is highly toxic, so winterizing antifreeze must be nontoxic because it goes in drinking water systems and may eventually go overboard.
Steps to Winterize a Boat. Remember, every boat is different and the winterization process can vary quite a bit from one to another. That said, here are the critical steps: Winterize the engine (s) Winterize the plumbing systems. Winterize any pumps or compartments that may hold water. Remove the batteries.
Step 2: Flush and drain cooling water. To prevent damage from expanding water when it freezes, you must drain water from your engine. For inboard and sterndrive engines: Flush the engine with clean water by using water muffs or a similar device to connect a garden hose to your cooling system. (Never run a water engine without water).
This episode was featured on PowerBoat Television.To watch full episodes online, go to www.PowerBoatTV.com
This can shorten the engine's life and leave you with repairs to make in the spring. 2. Change the Gear Oil. The gear oil needs to be changed before winter for the same reason as the crankcase oil: There are contaminants in it. Drain the old gear oil, and replace it with fresh oil before you store the motor. 3.
Step 2: Plug in the earmuffs and start the engine. Step 3: Use a fogging agent to suffocate the engine. Step 4: Fill the combustion chamber with fog. Step 5: Drain all the oil and replace the O-Rings on the drain screw. Step 6: Fill the gearbox with new oil. Step 7: Quickly reattach the drain screws.
BLOCK ISLAND, R.I. — The Block Island Ferry had a special visitor onboard Friday. Ladder 1 is Block Island's newest fire engine, and is equipped with a 100-foot aerial ladder. The engine ...