Sail Rigs And Types - The Only Guide You Need

Last Updated by
Daniel Wade
June 15, 2022
A well-designed sailboat is a thing of pure beauty. Whether you're a proud owner of one, a guest on one, or a shore-side admirer, you'll fall in love with the gliding sails, the excitement of a race, and the eco-friendly nature of these sophisticated yet magnificent vessels. With good sails, great design, and regular maintenance, sails and rigs are an important part of a sailboat.
If you’re thinking about going sailing, one of the first things you have to understand is the variety of modern sail plans. Unlike old sailboats, modern sailboats don't need huge, overlapping headsails and multiple masts just to get moving. In the past, when sailboats were heavy, keels were long, the only way to get the boat moving was with a massive relative sail area. You needed as much square footage as you could just to get your sailboat moving. But with the invention of fiberglass hulls, aluminum or composite masts, high-tensile but low diameter lines and stats, and more efficient sails, sailboats no longer need to plan for such large sail plans.. Still, there are various rig styles, from the common sloop, to the comfortable cat-rig, to the dual masted ketch and schooner, there are various sail types and rigs to choose from. The most important thing is to know the different types of sails and rigs and how they can make your sailing even more enjoyable.
There are different types of sails and rigs. Most sailboats have one mainsail and one headsail. The mainsail is generally fore-and-aft rigged and is triangular shaped. Various conditions and courses require adjustments to the sails on the boats, and, other than the mainsail, most boats can switch out their secondary sail depending on various conditions.. Do you want to sail upwind or go downwind? You cannot hoist just any sail and use it. It's, therefore, of great importance to understand how and when to use each sail type.
In this in-depth article, we'll look at various sail types and rigs, and how to use them to make your sailing more enjoyable.
Table of contents

Different Sail Types
It is perhaps worth noting that a sailboat is only as good as its sails. The very heart of sailing comes in capturing the wind using artfully trimmed sails and turning that into motion. . Ask any good sailor and he'll tell you that knowing how and when to trim the sails efficiently will not only improve the overall performance of your boat but will elevate your sailing experience. In short, sails are the driving force of sailboats.
As such, it's only natural that you should know the different types of sails and how they work. Let's first highlight different sail types before going into the details.
- Jib - triangular staysail
- Spinnaker - huge balloon-shaped downwind sail for light airs
- Genoa - huge jib that overlaps the mainsail
- Gennaker - a combination of a spinnaker and genoa
- Code zero - reaching genoa for light air
- Windseeker - tall, narrow, high-clewed, and lightweight jib
- Drifter - versatile light air genoa made from particularly lightweight cloth
- Storm jib - a smaller jib meant for stormy conditions
- Trysail - This is a smaller front-and-aft sail for heavy weather
The mainsail is the principal sail on a boat. It's generally set aft of the mainmast. Working together with the jib, the mainsail is designed to create the lift that drives the sailboat windward. That being said, the mainsail is a very powerful component that must always be kept under control.
As the largest sail, and the geometric center of effort on the boat, the mainsail is tasked with capturing the bulk of the wind that's required to propel the sailboat. The foot, the term for the bottom of any sail, secures to the boom, which allows you to trim the sail to your heading. The luff, the leading edge of the sail, is attached to the mast. An idealized mainsail would be able to swing through trim range of 180°, the full semi-circle aft of the mast, though in reality, most larger boats don’t support this full range of motion, as a fully eased sail can occasionally be unstable in heavy breeze.
. As fully controlling the shape of the mainsail is crucial to sailing performance, there are many different basic mainsail configurations. For instance, you can get a full-batten mainsail, a regular mainsail with short battens, or a two-plus-two mainsail with two full-length battens. Hyper-high performance boats have even begun experimenting with winged sails which are essentially trimmable airplane wings! Moreover, there are numerous sail controls that change the shape by pulling at different points on the sail, boom, or mast. Reefing, for instance, allows you to shorten the sail vertically, reducing the amount of sail area when the boat is overpowered.
Features of a Mainsail
Several features will affect how a particular sail works and performs. Some features will, of course, affect the cost of the sail while others may affect its longevity. All in all, it's essential to decide the type of mainsail that's right for you and your sailing application.
Sail Battens, the Roach, and the Leech
The most difficult part of the sail to control, but also the most important, are the areas we refer to as the leech and the roach. The roach is the part of the sail that extends backwards past the shortest line between the clew, at the end of the boom, and the top of the mast. It makes up roughly the back third of the sail. The leech is the trailing edge of the sail, the backmost curve of the roach. Together, these two components control the flow of the air off the back of the sail, which greatly affects the overall sail performance. If the air stalls off the backside of the sail, you will find a great loss in performance. Many sail controls, including the boom vang, backstay, main halyard, and even the cunningham, to name a few, focus on keeping this curve perfect.
As for parts of the sail itself, battens control the overall horizontal shape of the sail. Battens are typically made from fiberglass or wood and are built into batten pockets. They're meant to offer support and tension to maintain the sail shape Depending on the sail technology you want to use, you may find that full battens, which extend from luff to leech, or short battens, just on the trailing edge, are the way to go. Fully battened sails tend to be more expensive, but also higher performance.
Fully Battened Mainsails
They're generally popular on racing multihulls as they give you a nice solid sail shape which is crucial at high speeds. In cruising sailboats , fully battened mainsails have a few benefits such as:
- They prevent the mainsail from ragging. This extends the life of the sail, and makes maneuvers and trimming easier for the crew.
- It provides shape and lift in light-air conditions where short-battened mainsails would collapse.
On the other hand, fully-battened mainsails are often heavier, made out of thicker material, and can chafe against the standing rigging with more force when sailing off the wind.
Short Battens
On the other hand, you can choose a mainsail design that relies mostly on short battens, towards the leech of the sail. This tends to work for lighter cloth sails, as the breeze, the headsail, and the rigging help to shape the sail simply by the tension of the rig and the flow of the wind. The battens on the leech help to preserve the shape of the sail in the crucial area where the air is flowing off the back of the sail, keeping you from stalling out the entire rig.
The only potential downside is that these short battens deal with a little bit of chafe and tension in their pockets, and the sail cloth around these areas ought to be reinforced. If your sails do not have sufficient reinforcement here, or you run into any issues related to batten chafe, a good sail maker should be able to help you extend the life of your sails for much less than the price of a new set.
How to Hoist the Mainsail
Here's how to hoist the mainsail, assuming that it relies on a slab reefing system and lazy jacks and doesn't have an in-mast or in-boom furling system.
- Maintain enough speed for steeragewhile heading up into the wind
- Slacken the mainsheet, boom vang, and cunningham
- Make sure that the lazy jacks do not catch the ends on the battens by pulling the lazy jacks forward.
- Ensure that the reefing runs are free to run and the proper reefs are set if necessary.
- Raise the halyard as far as you can depending on pre-set reefs.
- Tension the halyard to a point where a crease begins to form along the front edge
- Re-set the lazy jacks
- Trim the mainsail properly while heading off to your desired course
So what's Right for You?
Your mainsail will depend on how you like sailing your boat and what you expect in terms of convenience and performance. That being said, first consult the options that the boatbuilder or sailmakers suggest for your rig. When choosing among the various options, consider what you want from the sail, how you like to sail, and how much you're willing to spend on the mainsail.
The headsail is principally the front sail in a fore-and-aft rig. They're commonly triangular and are attached to or serve as the boat’s forestay. They include a jib and a genoa.
A jib is a triangular sail that is set ahead of the foremost sail. For large boats, the roto-furling jib has become a common and convenient way to rig and store the jib. Often working in shifts with spinnakers, jibs are the main type of headsails on modern sailboats. Jibs take advantage of Bournoulli’s Principle to break the incoming breeze for the mainsail, greatly increasing the speed and point of any boat. By breaking the incoming wind and channeling it through what we call the ‘slot,’ the horizontal gap between the leech of the jib and the luff of the mainsail, the jib drastically increases the efficiency of your mainsail. It additionally balances the helm on your rudder by pulling the bow down, as the mainsail tends to pull the stern down. .
The main aim of the jib is to increase the sail area for a given mast size. It improves the aerodynamics of the mainsails so that your sailboat can catch more wind and thereby sail faster, especially in light air
Using Jibs on Modern Sailboats
In the modern contexts, jib’s mainly serve increase the performance and overall stability of the mainsail. The jib can also reduce the turbulence of the mainsail on the leeward side.
On Traditional Vessels
Traditional vessels such as schooners have about three jibs. The topmast carried a jib topsail, the main foresail is called the jib, while the innermost jib is known as the staysail. The first two were employed almost exclusively by clipper ships.
How to Rig the Jibs
There are three basic ways to rig the jib.
Track Sheets - A relatively modern approach to the self-tacking jib, this entails placing all the trimming hardware on a sliding track forward of the mast. This means that on each tack, the hardware slides from one side of the boat to the other. This alleviates the need to switch sheets and preserves the trim angle on both sides, though it can be finnicky and introduce friction.
Sheet up the Mast - This is a very popular approach and for a good reason. Hoist the jib sheet up the mast high enough to ensure that there's the right tension through the tack. Whether internally or externally, the sheet returnsto the deck and then back to the cockpit just like the rest of the mast baselines. The fact the hardware doesn't move through the tacks is essential in reducing friction.
Sheet Forward - This method revolves around ensuring that the jib sheet stays under constant pressure so that it does not move through the blocks in the tacks. This is possible if the through-deck block is extremely close to the jib tack. Your only challenge will only be to return the sheet to the cockpit. This is, however, quite challenging and can cause significant friction.
Dual Sheeting - The traditional method, especially on smaller dinghies, though it is not self-tacking. This requires a two ended or two separate sheet system, where one sheet runs to a block on starboard, and the other to port. Whenever you tack or gybe, this means you have to switch which sheet is active and which is slack, which is ok for well crewed boats, but a potential issue on under-crewed boats.
Another important headsail, a genoa is essentially a large jib that usually overlaps the mainsail or extends past the mast, especially when viewed from the other side. In the past, a genoa was known as the overlapping jib and is technically used on twin-mast boats and single-mast sloops such as ketches and yawls. A genoa has a large surface area, which is integral in increasing the speed of the vessel both in moderate and light winds.
Genoas are generally characterized by the percentage they cover. In most cases, sail racing classes stipulate the limit of a genoa size. In other words, genoas are usually classified by coverage.
Top-quality genoa trim is of great importance, especially if the wind is forward of the beam. This is because the wind will first pass over the genoa before the mainsail. As such, a wrongly sheeted genoa can erroneously direct the wind over the mainsail,spelling doom to your sailing escapades. While you can perfectly adjust the shape of a genoa using the mast rake, halyard tension, sheet tension, genoa car positioning, and backstay tension, furling and unfurling a genoa can be very challenging, especially in higher winds.
That being said, here are the crucial steps to always keep in mind.
- Unload and ease the loaded genoa sheet by going to a broad reach
- Do not use the winch; just pull on the furling line
- Keep a very small amount of pressure or tension on the loaded genoa sheet
- Secure the furling line and tighten the genoa sheets
- Get on the proper point of sail
- Have the crew help you and release the lazy genoa sheets
- Maintain a small tension while easing out the furling line
- Pull-on a loaded genoa sheet
- Close or cleat off the rope clutch when the genoa is unfurled
- Trim the genoa
To this end, it's important to note that genoas are popular in some racing classes. This is because they only categorize genoas based on the fore-triangle area covered, which essentially allows a genoa to significantly increase the actual sail area. On the contrary, keep in mind that tacking a genoa is quite a bit harder than a jib, as the overlapping area can get tangled with the mast and shrouds. It's, therefore, important to make sure that the genoa is carefully tended, particularly when tacking.
Downwind Sails
Modern sailboats are a lot easier to maneuver thanks to the fore-and-aft rig. Unfortunately, when sailing downwind they catch less wind, and downwind sails are a great way of reducing this problem. They include the spinnaker and the gennaker.
A spinnaker will, without a doubt, increase your sailing enjoyment. But why are they often buried in the cabin of cruising boats? Well, the first few attempts to rig and set a spinnaker can be difficult without enough help and guidance. Provided a solid background, however, spinnakers are quite straightforward and easy to use and handle with teamwork and enough practice. More importantly, spinnakers can bring a light wind passage to life and can save your engine.
Spinnakers are purposely designed for sailing off the wind; they fill with wind and balloon out in front of your sailboat. Structured with a lightweight fabric such as nylon, the spinnaker is also known as a kite or chute, as they look like parachutes both in structure and appearance.
A perfectly designed spinnaker should have taut leading edges when filled. This mitigates the risk of lifting and collapsing. A spinnaker should have a smooth curve when filled and devoid of depressions and bubbles that might be caused by the inconsistent stretching of the fabric. The idea here is that anything other than a smooth curve may reduce the lift and thereby reduce performance.
Types of Spinnakers
There are two main types of spinnakers: symmetric spinnakers and asymmetric spinnakers.
Asymmetric Spinnakers
Flown from a spinnaker pole or bowsprit fitted to the bow of the boat, asymmetric spinnakers resemble large jibs and have been around since the 19th century. The concept of asymmetric spinnaker revolves around attaching the tack of the spinnaker at the bow and pulling it around during a gybe.
Asymmetric spinnakers have two sheets just like a jib., These sheets are attached at the clew and never interact directly with the spinnaker pole. This is because the other corner of the spinnaker is fixed to the bowsprit. The asymmetric spinnaker works when you pull in one sheet while releasing the other. This makes it a lot easier to gybe but is less suited to sailing directly downwind. There is the loophole of having the asymmetric spinnaker gybed to the side opposite of the boom, so that the boat is sailing ‘wing-on-wing,’ though this is a more advanced maneuver, generally reserved for certain conditions and tactical racing situations.
On the contrary, the asymmetric spinnaker is perfect for fast planing dinghies. This is because such vessels have speeds that generate apparent wind forward. Because asymmetrics, by nature, prefer to sail shallower downwind angles, this apparent wind at high speeds makes the boat think that it is sailing higher than it really is, allowing you to drive a little lower off the breeze than normal. . In essence, the asymmetric spinnaker is vital if you're looking for easy handling.
Symmetric Spinnakers
Symmetric spinnakers are a classic sail type that has been used for centuries for controlling boats by lines known as a guy and a sheet. The guy, which is a windward line, is attached to the tack of the sail and stabilized by a spinnaker pole. The sheet, which is the leeward line, is attached to the clew of the spinnaker and is essential in controlling the shape of the spinnaker sail.
When set correctly, the leading edges of the symmetric spinnaker should be almost parallel to the wind. This is to ensure that the airflow over the leading edge remains attached. Generally, the spinnaker pole should be at the right angles to the apparent wind and requires a lot of care when packing.
The main disadvantage of this rig is the need to gybe the spinnaker pole whenever you gybe the boat. This is a complicated maneuver, and is one of the most common places for spinnakers to rip or get twisted. If, however, you can master this maneuver, you can sail at almost any angle downwind!
How to Use Spinnaker Effectively
If you decide to include the spinnakers to your sailboat, the sailmaker will want to know the type of boat you have, what kind of sailing you do, and where you sail. As such, the spinnaker that you end up with should be an excellent and all-round sail and should perform effectively off the breeze
The type of boat and where you'll be sailing will hugely influence the weight of your spinnaker cloth. In most cases, cruising spinnakers should be very light, so if you've decided to buy a spinnaker, make sure that it's designed per the type of your sailboat and where you will be sailing. Again, you can choose to go for something lighter and easier to set if you'll be sailing alone or with kids who are too young to help.
Setting up Spinnakers
One of the main reasons why sailors distrust spinnakers is because they don't know how to set them up. That being said, a perfectly working spinnaker starts with how you set it up and this revolves around how you carefully pack it and properly hook it up. You can do this by running the luff tapes and ensuring that the sails are not twisted when packed into the bag. If you are using large spinnakers, the best thing to do is make sure that they're set in stops to prevent the spinnakers from filling up with air before you even hoist them fully.
But even with that, you cannot fully set the spinnaker while sailing upwind. Make sure to bear away and have your pole ready to go as you turn downwind. You should then bear away to a reach before hoisting. Just don't hoist the spinnakers from the bow as this can move the weight of the crew and equipment forward.
Used when sailing downwind, a gennaker is asymmetric sail somewhere between a genoa and a spinnaker. It sets itself apart because it gennaker is a free-flying asymmetric spinnaker but it is tacked to the bowsprit like the jib.
Let's put it into perspective. Even though the genoa is a great sail for racing and cruising, sailors realized that it was too small to be used in a race or for downwind sail and this is the main reason why the spinnaker was invented. While the spinnakers are large sails that can be used for downwind sail, they are quite difficult to handle especially if you're sailing shorthanded. As such, this is how a gennaker came to be: it gives you the best of both worlds.
Gennakers are stable and easy to fly and will add to your enjoyment and downwind performance.
The Shape of a Gennaker
As we've just noted, the gennaker is asymmetrical. It doesn't attach to the forestay like the genoa but has a permanent fitting from the mast to bow. It is rigged exactly like a spinnaker but its tack is fastened to the bowsprit. This is fundamentally an essential sail if you're looking for something to bridge the gap between a genoa and a spinnaker.
Setting a Gennaker
When cruising, the gennaker is set with the tack line from the bow, a halyard, and a sheet that's led to the aft quarter. Attach the tack to a furling unit and attach it to a fitting on the hull near the very front of the sailboat. You can then attach the halyard that will help in pulling it up to the top of the mast before attaching it to the clew. The halyard can then run back to the winches to make the controlling of the sail shape easier, just like when using the genoa sail.
In essence, a gennaker is a superb sail that will give you the maximum versatility of achieving the best of both a genoa and a spinnaker, especially when sailing downwind. This is particularly of great importance if you're cruising by autopilot or at night.
Light Air Sails
Even though downwind sails can be used as light air sails, not all light air sails can be used for downwind sailing. In other words, there's a level of difference between downwind sails and light air sails. Light air sails include code zero, windseeker, and drifter reacher.
A cross between an asymmetrical spinnaker and a genoa, a code zero is a highly modern sail type that's generally used when sailing close to the wind in light air. Although the initial idea of code zero was to make a larger genoa, it settled on a narrow and flat spinnaker while upholding the shape of a genoa.
Modern boats come with code zero sails that can be used as soon as the sailboat bears off close-hauled even a little bit. It has a nearly straight luff and is designed to be very flat for close reaching. This sail is designed to give your boat extra performance in light winds, especially in boats that do not have overlapping genoas. It also mitigates the problem of loss of power when you are reaching with a non-overlapping headsail. Really, it is closer to a light air jib that sacrifices a little angle for speed.
In many conditions, a code zero sail can go as high as a sailboat with just a jib. By hoisting a code zero, you'll initially have to foot off about 15 degrees to fill it and get the power that you require to heel and move the boat. The boat will not only speed up but will also allow you to put the bow up while also doing the same course as before you set the zero. In essence, code zero can be an efficient way of giving your boat about 30% more speed and this is exactly why it's a vital inventory item in racing sailboats.
When it comes to furling code zero, the best way to do it is through a top-down furling system as this will ensure that you never get a twist in the system.
Generally used when a full size and heavier sail doesn't stay stable or pressurized, a windseeker is a very light sail that's designed for drifting conditions. This is exactly why they're designed with a forgiving cloth to allow them to handle these challenging conditions.
The windseeker should be tacked at the headstay with two sheets on the clew. To help this sail fill in the doldrums, you can heel the boat to whatever the apparent leeward side is and let gravity help you maintain a good sail shape while reaching.The ideal angle of a windseeker should be about 60 degrees.
Though only used in very specific conditions, the windseeker is so good at this one job that it is worth the investment if you plan on a long cruise. Still, you can substitute most off the breeze sails for this in a pinch, with slightly less performance gain, likely with more sacrifices in angle to the breeze.
Drifter Reacher
Many cruising sailors often get intimidated by the idea of setting and trimming a drifter if it's attached to the rig at only three corners or if it's free-flying. But whether or not a drifter is appropriate for your boat will hugely depend on your boat's rig, as well as other specific details such as your crew's ability to furl and unfurl the drifter and, of course, your intended cruising grounds.
But even with that, the drifter remains a time-honored sail that's handy and very versatile. Unlike other light air sails, the drifter perfectly carries on all points of sails as it allows the boat to sail close-hauled and to tack. It is also very easy to control when it's set and struck. In simpler terms, a drifter is principally a genoa that's built of lightweight fabric such as nylon. Regardless of the material, the drifter is a superb sail if you want to sail off a lee shore without using the genoa.
Generally stronger than other regular sails, stormsails are designed to handle winds of over 45 knots and are great when sailing in stormy conditions. They include a storm jib and a trysail.
If you sail long and far enough, chances are you have or will soon be caught in stormy conditions. Under such conditions, storm jibs can be your insurance and you'll be better off if you have a storm jib that has the following features:
- Robustly constructed using heavyweight sailcloth
- Sized suitably for the boat
- Highly visible even in grey and white seas
That's not all; you should never go out there without a storm jib as this, together with the trysail, is the only sails that will be capable of weathering some of nature's most testing situations.
Storm jibs typically have high clews to give you the flexibility of sheet location. You can raise the sail with a spare halyard until its lead position is closed-hauled in the right position. In essence, storm jib is your insurance policy when out there sailing: you should always have it but always hope that you never have to use it.
Also known as a spencer, a trysail is a small, bright orange, veritably bullet-proof, and triangular sail that's designed to save the boat's mainsail from winds over 45 knots and works in the same way as a storm jib. It is designed to enable you to make progress to windward even in strong and stormy winds.
Trysails generally use the same mast track as the mainsail but you have to introduce the slides into the gate from the head of the trysail.
There are two main types of rigs: the fore-and-aft rig and the square rigg.
Fore-and-aft Rig
This is a sailing rig that chiefly has the sails set along the lines of the keel and not perpendicular to it. It can be divided into three categories: Bermuda rig, Gaff rig, and Lateen rig.
Bermuda Rig - Also known as a Marconi rig, this is the typical configuration of most modern sailboats. It has been used since the 17th century and remains one of the most efficient types of rigs. The rig revolves around setting a triangular sail aft of the mast with the head raised to the top of the mast. The luff should run down the mast and be attached to the entire length.
Gaff Rig - This is the most popular fore-and-aft rig on vessels such as the schooner and barquentine. It revolves around having the sail four-cornered and controlled at its peak. In other words, the head of the mainsail is guided by a gaff.
Lateen Rig - This is a triangular fore-and-aft rig whereby a triangular sail is configured on a long yard that's mounted at a given angle of the mast while running in a fore-and-aft direction. Lateen rig is commonly used in the Indian Ocean and the Mediterranean.
Square Rigged
This is a rig whereby the mainsails are arranged in a horizontal spar so that they're square or vertical to the mast and the keel of the boat. The square rig is highly efficient when sailing downwind and was once very popular with ocean-going sailboats.
Unquestionably, sailing is always pleasurable. Imagine turning off the engine of your boat, hoisting the sails, and filling them with air! This is, without a doubt, a priceless moment that will make your boat keel and jump forward!
But being propelled by the noiseless motion of the wind and against the mighty currents and pounding waves of the seas require that you know various sail types and how to use them not just in propelling your boat but also in ensuring that you enjoy sailing and stay safe. Sails are a gorgeous way of getting forward. They remain the main fascination of sailboats and sea cruising. If anything, sails and boats are inseparable and are your true friends when out there on the water. As such, getting to know different types of sails and how to use them properly is of great importance.
All in all, let's wish you calm seas, fine winds, and a sturdy mast!
Related Articles
I've personally had thousands of questions about sailing and sailboats over the years. As I learn and experience sailing, and the community, I share the answers that work and make sense to me, here on Life of Sailing.
by this author
Learn About Sailboats
Sailboat Parts
Most Recent

What Does "Sailing By The Lee" Mean?
October 3, 2023

The Best Sailing Schools And Programs: Reviews & Ratings
September 26, 2023
Important Legal Info
Lifeofsailing.com is a participant in the Amazon Services LLC Associates Program, an affiliate advertising program designed to provide a means for sites to earn advertising fees by advertising and linking to Amazon. This site also participates in other affiliate programs and is compensated for referring traffic and business to these companies.
Similar Posts

Affordable Sailboats You Can Build at Home
September 13, 2023

Best Small Sailboat Ornaments
September 12, 2023

Discover the Magic of Hydrofoil Sailboats
December 11, 2023
Popular Posts

Best Liveaboard Catamaran Sailboats
December 28, 2023

Can a Novice Sail Around the World?
Elizabeth O'Malley

4 Best Electric Outboard Motors

How Long Did It Take The Vikings To Sail To England?

10 Best Sailboat Brands (And Why)
December 20, 2023

7 Best Places To Liveaboard A Sailboat
Get the best sailing content.
Top Rated Posts
Lifeofsailing.com is a participant in the Amazon Services LLC Associates Program, an affiliate advertising program designed to provide a means for sites to earn advertising fees by advertising and linking to Amazon. This site also participates in other affiliate programs and is compensated for referring traffic and business to these companies. (866) 342-SAIL
© 2024 Life of Sailing Email: [email protected] Address: 11816 Inwood Rd #3024 Dallas, TX 75244 Disclaimer Privacy Policy
How To Rig A Sailboat: Say Goodbye To Riggers
- REPAIRS AND MAINTENANCE
Rigging a sailboat is a crucial task that requires precision and expertise. Did you know that improper rigging can lead to serious accidents on the water? Yes, it’s that important!
The process begins by attaching the mainsail to the mast using the halyard and sail slugs. Next, the mainsheet is clipped to the traveler at the stern, allowing you to control the mainsail’s movement.
For a more comprehensive guide, including tips on rerigging and consulting model-specific resources, keep reading to discover the intricate details of this essential sailing maneuver.

With the right knowledge, you’ll be able to rig your sailboat like a pro, ensuring a safe and enjoyable experience on the open waters.
Read Related Articles:
- Can You Sail In Maine In October
- How To Repair A Tear In A Sail
What Skills Should You Have Before Rigging a Sailboat?
Rigging a sailboat requires some basic sailing knowledge and skillsets to do it properly and safely. While it may look intimidating, breaking the process down into clear steps makes it very manageable for a first-timer with the right preparation. Here’s what you should have under your belt before stepping up to rig things up:
Sailing Know-How
Understand basic sailing concepts – Be familiar with points of sail, parts of a sail, and how sails work to drive a boat. This gives you context for how the rigging supports sail shape and performance.
Learn common sailboat terminology – Know the difference between a mainsail and jib and a halyard vs. sheet . You’ll need to talk the talk during rigging.
Study sailboat anatomy – Identify parts like the mast, boom, shrouds, stays, and spreaders. Rigging connects and tensions all these parts together.
Essential Boat Rigging Skills
Tie useful sailing knots – A good bowline , clove hitch , and figure eight will come in very handy for rigging. Practice makes perfect with these knots.
Operate deck hardware – Be comfortable with cleats, winches, blocks, and especially turnbuckles. These are your tools for proper tensioning.
Hoist and handle sails – Knowing how to hoist, trim, and furl sails makes attaching them much easier.
Safety First Mindset
Assess physical demands – Rigging requires climbing, lifting, and hauling – be sure you have the fitness for it. Use leg muscles, not your back.
Have a plan and go slow – Rushing leads to mistakes and injuries. Do your homework and take it step-by-step.
Use proper gear – Wear gloves, non-slip shoes, and a harness for aloft—no loose clothing or jewelry.
Know personal limits – Don’t overexert yourself. Ask for help if you need it, rather than compromise safety.
Why Should You Learn To Rig Your Own Sailboat?
Taking the time to learn how to rig your own boat pays off tremendously in the long run. Here are some of the key benefits that will motivate you to step up and master this essential sailing skill:
Rigging costs can really add up if you pay a rigger. DIY rigging saves you a chunk of change, especially when it comes time to replace standing rigging.
Gain control
You will have a deep understanding of the system when you rig it yourself. This lets you tweak and modify your setup for best results.
Acquire confidence
It may seem intimidating at first, but the satisfaction you’ll get from successfully rigging under your own steam is huge.
Fix problems quickly
Know how to troubleshoot and fix rigging issues that pop up without waiting or relying on others.
Customize your setup
Tailor your standing and running rigging as you see fit for your boat type, sailing style, and conditions.
Bond with your boat
Getting to know all aspects of your boat through hands-on learning, like rigging, deepens your connection with it.
Teach others
Pass on your DIY rigging knowledge to the crew or the next generation of sailors.
What Are The Basic Parts Of A Sailboat Rig?
The key components that make up a sailboat’s rig provide structural support for the sails and allow you to control and adjust them. Getting familiar with the parts and their functions is an essential first step in rigging.
The Backbone – Mast and Boom
Mast – The vertical spar that the sails attach to. It’s stepped on the keel or deck and supported by the standing rigging. On smaller boats, it’s often one piece. Larger boats have sectioned masts requiring assembly.
Boom – The horizontal spar that the bottom of the mainsail attaches to. Supported by a vang or kicker’s arm. Allows mainsail shape adjustment.
The Muscle – Standing Rigging
Stays – Forward/aft wires that prevent mastbend and provide forward support. Includes backstay, forestay, and inner forestay.
Shrouds – Side to side wires that keep the mast upright. Attached at the chainplates on the hull.
Turnbuckles – Fittings used to tension and adjust standing rigging tension.
The Strings – Running Rigging
Halyards – Ropes used to hoist and lower the sails. Led from the masthead to the cockpit.
Sheets – Ropes used to control the angles of sails. Run from the boom and sail clews to the cockpit.
Reefing lines – Lines used to furl sails to reduce the area in heavy wind partially.
Spreaders – Struts placed in pairs on the mast to support shrouds and control bend.
Spreader roots – Reinforcements on the mast for spreader attachment.
Standing rigging insulators – Plastic fittings that interrupt current flow to reduce electrolysis.
Mast partner – Reinforcement where the mast passes through the deck.
How Do You Step The Mast And Get It Upright?
Stepping the mast is one of the first big tasks when rigging a sailboat. It involves lifting the mast into position and securing it upright on the boat. Here’s a step-by-step guide to properly stepping the stick:
Lift It Up Carefully
- Use a gin pole , mast boom , or halyard to hoist the mast vertically—position support lines to prevent tipping.
- For lighter masts, utilize crew muscle power. Appoint a lift supervisor to coordinate.
- Heavier masts require a crane or boom truck . Hire professionals if unsure.
- Keep the lift angle steady. Pivot base slowly into the step. Don’t let it swing or bang around!
Sit It In The Step
- With the mast heel over the step, carefully lower it into place.
- The step is a metal bracket on the keel or a wooden block on the deck.
- Wedge temporary blocks on each side of the mast base to hold it centered.
Make It Stand Up
- Attach shrouds or forestay loosely to pull the mast forward. Don’t tension yet.
- Add side supports like a gin pole or temporary guys to keep the mast upright.
- Insert wedge blocks in the step and under the mast to secure it vertically.
Safety First!
- Use multiple strong people to handle a mast – it can seriously injure if mishandled.
- Make sure the area is clear of overhead wires.
- Have someone hold the base while stepping to prevent kicking back.
- Wear hardhats, gloves, and steel-toe boots when stepping the mast.
What Is The Right Way To Tension The Standing Rigging?
The standing rigging – the stays and shrouds that support the mast – need to be properly tensioned to stabilize and tune the mast. Here’s how to dial in the tension like a pro:
Start Slowly
- Begin by hand-tightening the rigging turnbuckles several turns.
- Turnbuckles should be opened at least 3 turns to allow tensioning adjustment.
- Don’t crank them down hard at first – leave room for fine tuning.
- Tension symmetrically to keep the mast straight.
Use a Rigging Gauge
- Measure initial tension settings with a Loos PT-2 gauge .
- Place the gauge rod against a taut shroud and record the tension number.
- Consult your boat specs to find target rigging tension values.
- Note port/starboard differences to identify asymmetry.
Gradually Increase Tension
- Using a calibrated rigging wrench, tighten turnbuckles further.
- Add increments of tension while frequently re-measuring.
- Rotate between side stays and shrouds to distribute tension evenly.
- Go up to about 70% of target tension as a starting point.
Fine Tune Under Sail
- Reach full target tension after launching, not on the hard.
- Sail the boat on all points of sail, noting mast bend and slack.
- Make small turnbuckle adjustments until the rig is tuned and mast centered.
- Lock turnbuckle pins with tape or cotter rings to prevent loosening.
You’ll dial in the standing rigging with some care and patience for proper support and performance. Remember – you can always tighten more, but you can’t untighten!
How Do You Attach And Hoist The Sails Onto The Rig?
It’s an exciting moment when it’s time to get the sails up on the mast and see your boat fully dressed for the first time. Here’s how to attach and hoist them like a pro:
Attach the Halyards
- Use a bowline or shackle to secure the head of each sail to its corresponding halyard.
- Run the halyard through the sheave at the top of the mast and down to a winch.
- Try hoisting a bit to test the smooth halyard running before attaching the sail body.
Connect the Tack and Clew
- Shackle or tie each headsail’s tack (front corner) to the bow/deck fittings.
- Clip the mainsail tack to the gooseneck and boom.
- Attach each sail’s clew (aft corner) to the boom or traveler.
Guide the Hoist Carefully
- Have helpers tend the halyard winch and feed the boltrope into the mast track.
- Try to keep the sail flaked neatly, not just crammed onto the deck.
- For asymmetrics, hoist the halyard just enough to pull sail to mid-mast before sheeting in.
Watch for Potential Issues
- Stop hoisting if sail drags, jams, or overrides spreaders – drop and re-hoist.
- Apply stopper knots on halyard ends so sails can’t run away unintentionally.
- Cleat all halyards under load – don’t rely on self-tailing winches alone.
What Rigging Mistakes Should You Avoid?
When rigging a boat, some common mistakes are good to be aware of so you can avoid making them yourself. Being mindful and thorough helps prevent issues down the road. Here are key pitfalls to sidestep:
Shackles and Turnbuckles
- Forgetting to mouse shackles and pins – vibrations can loosen and detach them.
- Not checking the full range of turnbuckle threads – could max out tensioning ability.
- Misaligning threaded turnbuckle barrels – can damage threads, making tensioning difficult.
Standing Rigging
- Over-tensioning – can exceed wire strength limits and cause failure.
- Under-tensioning – leads to excessive mast movement and chafe.
- Not protecting wires at chafe points – wear will lead to breakage.
Halyards and Sheaves
- Poor sheave alignment – creates excessive friction and halyard wear.
- Undertensioning halyards – allows too much stretch while sailing.
- Overtwisting halyards – can result in permanent damage to the core.
- Forgetting a mainsail preventer – boom can swing and cause injury/damage.
- Not wrapping halyard tails – sails can unintentionally get away in strong wind.
- Too little or too much luff tension – leads to poor sail shape.
What Is The Final Step To Get Your Rig Tuned And Ready To Sail?
You’ve stepped the mast, tensioned the standing rigging, hoisted the sails – now it’s time for the final rig tuning to get your boat sailing at optimal performance. Here are the last tweaks:
Set the Rake
- Adjust forestay/backstay tension to dial in the proper mast rake angle.
- Use a rake gauge to measure and match the rake to designer specs.
- Aft rake allows the mast to bend and flatten the mainsail.
- Insufficient rake makes the rig too stiff.
Check for Mast Alignment
- With the rig tensioned, sight up the mast tracks from base to top.
- Verify the mast is straight, not bent off to one side.
- Make small adjustments to turnbuckles to the center.
Tweak Shrouds
- Go sailing in varied wind and sea conditions.
- Observe mast bend and leeward shroud sag.
- Fine tune turnbuckle tension until the rig is tuned.
- Secure turnbuckle pins so they don’t vibrate loose.
Documentation
- Log your final rig measurements for reference.
- Mark turnbuckle positions with tape once dialed in.
- Take photos of the boat fully rigged.
Double check all fittings are secured, halyards are neatly stowed, and sails are ready for hoisting. With that, your rigging work is complete – time to cast off and sail!
How Do You Know When Your Rigging Needs Replacement?
Sailboat rigging takes a beating out on the water and deteriorates over time. Knowing when to replace components is essential for both performance and safety. Here are signs it’s time to overhaul your rigging:
Frayed Wires
- Inspect standing rigging wires closely for broken strands or core protrusions.
- Chafe and corrosion accelerate the damage.
- Replace any wires with 10% or more broken strands.
Visible Damage
- Look for cracked swages , peeling plating , bent terminals, or torn wire insulation .
- Shake standing rigging to listen for any rattling fittings.
- Corrosion weakens parts – replace discolored ones.
Reduced Strength
- Improperly tensioned rigging or noticeable stretch indicates loss of integrity.
- The wire strength is diminishing if you can’t get standard rig tensions without maxing turnbuckles.
- Conduct tension tests with a rigging gauge.
Poor Sail Shape
- Baggy sails , despite proper halyard tension, can mean insufficient rig support.
- Excessive mast bend also indicates a lack of shroud/stay tension.
- Time to replace if sailing performance is compromised.
- Standing rigging has a lifespan of 10-15 years typically.
- Older rigging heading offshore should be replaced as a precaution.
- Monitor closely after 10 years old.
How Much Does It Cost To Rig A Sailboat?
The cost to replace a sailboat’s rigging depends on its size. For boats under 30 feet, expenses range from $2,000-$5,000. Rigging 30-50 footers costs $5,000-$10,000 typically.
Larger sailboats over 50 feet have the highest rigging bills, between $10,000-$20,000, as longer lengths require stronger standing rigging to support the mast. Generally, as a boat’s size increases, so too does the price to replace its rigging.
Rigging a sailboat from bare poles to ready for sailing is a rewarding do-it-yourself project that enhances your skills as a sailor. While it may seem daunting at first, being methodical, patient, and safety-focused will ensure everything comes together smoothly.
Following proper procedures for stepping the mast, tensioning the standing rigging, hoisting the sails, and fine-tuning adjustments will get your boat sailing at peak performance.
Knowing how to inspect and identify when to replace worn rigging keeps your vessel seaworthy for years of great times on the water. With the right guidance, you can confidently rig up and set sail on your own boat.

Jack K. Pride
Jack K. Pride is an accomplished author and a prominent figure in the boating community. With a passion for boats and a deep understanding of the maritime industry, he has been sharing his expertise through his compelling articles on OutedWeb.com.
Known for his insightful and informative writing style, Jack's articles provide valuable insights, tips, and knowledge to boat enthusiasts worldwide. His dedication to the subject matter and commitment to delivering high-quality content makes him a trusted voice in the boating world.
Leave a Reply Cancel Reply
Your email address will not be published. Required fields are marked *
Name *
Email *
Add Comment *
Save my name, email, and website in this browser for the next time I comment.
Post Comment

Fitted Up for Smooth Sailing with the Right Rigging
The word rigging is used in more than one way in the boating world. One way refers to setting up a boat or something on the boat for use. You have probably heard a number of people say, “I’m rigging my boat for night cruising,” or “I’m rigging my electronics so they pull power from a dedicated battery.” A second use of the word is the nautical term used with sailboats. Sailboat rigging is all the wires, lines, rods, rope and supporting structures and equipment. It is mostly used in reference to controlling sails on sailboats, but if you’re one of the people with a very large power boat (shall we say “yacht”), you may have rigging for other purposes, like lowering a lifeboat or a tender used for fishing.
Ready About: All in a Word
Rigging is a generic word that covers a wide range of lines and equipment. For purposes of discussion, rigging used here does mean all the ropes, wires and lines and supporting items and structures on sailboats, including the mast, boom, stays, shrouds and sails. In other words, rigging is the boat’s power system because without it, your sails aren’t going to do much except flap in the wind while the sailboat sits at the dock. That’s no fun!
One of the interesting aspects of sailing is that it has its own jargon. Actually, it is almost like a different language. So let’s “Ready About” and get to work learning a few (not nearly all) of them for better understanding rigging. Following are some of the most common terms used in sailing.
First, keep these two inclusive terms in mind:
- Standing rigging - fixed tension shrouds (forestay, backstay, cap shrouds, etc.) and stays that support the mast and bowsprit; includes terminals and turnbuckles; standing rigging is not acted upon when navigating (think of it as “in place and always on duty”
- Running rigging – lines used to trim the sails (change the sail shape and direction to fit the wind circumstances); includes halyards, downhaul, sheets, mooring ropes, etc.
Just these two descriptions provide a glimpse into the unique vocabulary of sailing. You can’t write a definition without using words that also need definition! However, you can’t really talk seriously about rigging unless there is a general understanding of the most common terms. The different types of lines are described in a following section.
- Architectural rigging – rigging that is not sail related, like cable and tensioners for a railing system
- Boom – the pole (called a spar) that runs along the bottom of the sail so the sailor can control the sail’s position
- Forestay – like a backstay, it is line that is a piece of the standing rigging but runs from the upper mast to the boat’s bow as opposed to the stern; helps to keep the mast upright and makes it possible to pull the mast forward; the most forward stay on the sailboat is also called a headstay
- Headstay – most forward stay on the boat
- Jib – triangular staysail that is set forward of the forwardmost mast; provides more sail area so it can catch the wind; when the jib is large and overlaps the mast, it is called a genoa
- Leech – back (aft) edge of a fore-and-aft sail
- Luff – leading edge of a fore-and-aft sail
- Luffing – sailboat is steered far enough windward or the sheet controlling the sail is far past optimal trim and the sail begins to flap
- Mast – the tall, upright spar or post that rises above the hull from the deck or keel and carries the sail, rigging, spars, booms, etc. (Find service for masts and spars here.)
- Headsail – any sail located forward of the mast
- Mainsail – sail raised from the only (main) mast of a sailboat; may refer to the largest and lowest sail on the main mast on a square-rigged vessel or the largest and lowest sail on a fore-and-aft sailboat and is controlled by a boom (spar)
- Roller furling – a style of storing a sail by rolling the jib around the headstay or rolling the mainsail around the boom or the mast. (Find service for furlers here.)
- Line – you know what rope is, but for rigging, it usually refers to a line that is at least one-inch in size
- Runners – adjustable stays used to control tension on the mast; also called running backstays
- Spar – any pole used to support rigging which includes booms, masts, spinnaker poles and any others
- Spinnaker – lightweight sail used for running or when the wind is coming from the sailboat at an angle (broad reach)
- Spreaders – small spars that extend toward the sides from one or multiple places along the mast; shrouds cross spreader ends to assist the shroud with mast support
- Staysail – fore-and-aft rigged triangular sail set forward of the mast (like a jib) and aft of the headstay
- Turnbuckle – a stretching screw; device has two threaded eye bolts with screws at each end of a frame holding the eye bolts together; used to adjust the tension on a line
- Vang – hydraulic ram or block and tackle that holds the end of the boom down
So many terms, and this is just the beginning. But when you set sail, it’s the rigging that makes it possible to hoist and control the sails and poles and control the boat.
How is Rigging Used?
As you can tell from the definitions, rigging and supporting equipment and supplies need to perform a myriad of duties. The mix of lines on a sailboat look complicated to motor boaters who turn a key or press a button to start their boat engine. Sailboats are arguably more complicated than powerboats in design because factors like placement of the mast pole (e.g. deck-stepped vs keel-stepped) and sail setup make the difference in the boat’s durability and maneuverability in all types of weather and water conditions.
These design features also directly impact the type of rigging needed and optimal rigging configuration. For example, a basic one spreader rig has a mast, spreaders, lower and upper shrouds, forestay and backstay. A line can tighten an upper shroud to pull the mast in the desired direction, i.e. mast towards the shroud while adding a bend in the mast at the spreader with the bend going in the opposite direction. Rigging enables the sailboater to tack or head upwind by keeping the sails full or jibe to head downwind.
Types of Sailboats
A square-rigger sailboat is one in which the sails are held on horizontal spars which are square (perpendicular) to the boat's keel. It requires a different rigging setup compared to a full-rigged sailing vessel which has three or more masts. Today, the sloop rig has become a popular economical recreational sailboat because it has a single mast and a fore and aft sail. It requires fewer wires or simpler standing rigging than a sailboat with more than one mast. There are many types of sailboat designs seen on lakes and coastlines though, and each requires a different rigging setup. Besides the sloop, they include:
- Cutter rig – single mast rigged fore and aft with a mainsail and at least two headsails: yankee (forward sail) and staysail (slightly back sail)
- Ketch rig – usually a 40-foot or larger sailboat, it has two masts which are the main mast and a mizzenmast (smaller than main mast) which is stepped forward of the rudder post; has fore-and-aft (jib) mainsail setup like a sloop
- Yawl rig – similar to a ketch, it has a main and mizzen masts, but the mizzenmast is set behind the rudder post
- Gaff rig – has a spar (gaff) on top of the sail with other sails positioned with mainsail that has the gaff; on smaller gaff rigs, a third small triangular sail may be fitted between the mainsail and the mast and is called a topsail; a gaff sail is a four-sided sail instead of a triangular mainsail
- Cat rig – has a single mast set well forward and has one sail, usually gaff-rigged, and no standing rigging
- Junk rig – though some have a single sail, many of the newer junk rigs have multiple masts of equal size and the sails are fully battened (sail batten is a flexible thin sail insert placed horizontally
- Wingsail rig – has rigid wing (sail) much like an airplane wing with flaps (trailing element); angle between the forward and trailing elements is called camber; has unstayed mast meaning it’s not supported by stays
- Schooner rig – sailboat with (at least) two masts with the foremast shorter than the main mast (most are older boats now and usually seen in events like boat parades)
Positioning the Sailboat
Tacking and jibing are just two actions in which a sailor uses lines to shift sail positions. The boat’s positioning depends on what are called points of sail – close hauled, close reach, beam reach, broad reach and running, each requiring the skilled manipulation of the lines. When the wind pushes on the wrong side of the sail, you are backwinded. The lines holding the sail in place are released to correct the situation. Rigging is how the sailor keeps control of the sailboat no matter how the boat is positioned to the wind.
The rigging is also crucial to boater safety. An accidental jibe is one of the worst events a sailboat may experience. The wind shifts, a sudden wave hits or the boat is steered such that the boat is turned downwind and across the wind (turning across the eye of the wind). This can cause the main boom to suddenly and violently swing to the other side of the boat. Such force can dismast a boat, hurt crew members or cause one boat to crash into another, if close together.
Jibing is certainly likely to stress the rigging and sails. Dismasting is often due to breaking a shroud or stay. According to sailboat racer Tim Powell, there are ways to avoid an accidental jibe, like moving crew weight around, but the best bet for recovery depends on masterful use of rigging. For example, you can drop a spinnaker pole forward a bit between the headstay and shrouds to rebalance the boat or pull the mainsail in while windward and reopening it when upright.
Rigging can also prevent accidental jibes. A line called a “preventer” can be tied to the boom and a stanchion forward of the mast. Some people install a permanent preventer, which are lines that run from the boom on both sides, running forward to blocks at the rail and then running back to the cockpit. The preventer stops the boom from violently swinging across the boat.
Battling the Wind with Rigging
Let’s face it – sailing is really about battling the wind. The shrouds and stays fight to keep everything in place, and the sailor controls the lines at all times. Cordage, the ropes and cords in the sailboat’s rigging, also deliver the most challenging entertainment.
There are so many different lines on a sailboat, and like everything else on the sailboat, there are unique names given to the various lines, cords and wires. The following list is not complete but gives a good idea of the various types of rigging lines.
- Backstay – piece of the standing rigging; line (usually stainless steel) that runs from the upper mast to the transom or rear quarter (stern) to counteract the forestay and jib; used for sail trim (depowering) control and can change the shape of the mainsail and headsail
- Breast line – laterally attached line from the boat to dock that stops the boat from moving away
- Downhaul – rigging line that applies downward force on a sail or spar; usually found on a spinnaker pole
- Guy (aka brace) – line attached to the end of a spar for purposes of control
- Halyard – line that hoists a sail and affects the shape of the sail; originally made of hemp or manila rope but today usually made of polyester
- Jack line or jack stay – strong line of flat webbing or a wire stay running along the sides of a boat and is used for attaching a safety harness; same as a lifeline
- Lacing – line used to attach a sail to a spar
- Lanyard – line attached to a tool
- Lazy guy – line attached to the boom to prevent accidental jibbing
- Lazy jacks – lines running from above the main sail to the boom to assist with lowering the sail.
- Lazy sheet - line leading to a sail but not currently in use; line in use is a working sheet; lines change when tacking
- Leech line – line to tighten the leech (aft edge of a fore and aft sail) of a sail to create the right sail shape
- Luff rope – bolt rope in the luff of a sail and used to attach the sail to the mast
- Mainsheet – line that controls the mainsail
- Marline – small line used for whipping and lashing
- Messenger – small line used to pull a cable or heavier line
- Mooring line – line used to secure a boat to a dock, anchor or mooring
- Outhaul – line used to create tension in the foot of a sail and create and maintain desired sail shape
- Pendant – small line attached to a mooring chain
- Preventer – line run forward from the boom to a secure fitting to prevent the boom from accidentally jibing while running
- Ratlines – small lines tied between shrouds that crew members use as a ladder when climbing aloft
- Reefing line – lines used to pull the reef in a sail (reef means to partially lower a sail)
- Sheet – line attached to the clew of the sail and is used to control the sail’s trim
- Shroud or stay – lines that are part of the standing rigging that have the job of supporting the mast from side to side; usually run from the top of the mast to the boat’s side but there may be shrouds connected partway down the mast
- Small stuff – small lines used when serving and whipping
- Spring line – docking lines that are meant to keep the boat from moving while docked
- Stays – lines fore (forestay) and aft (backstay) that run from the top of the mast to keep it upright and to carry sails; part of the standing rigging that supports the mast; heavy wires, rods or ropes
- Stern line – line running from the boat’s stern while moored to a dock
- Bow line – line running from the boat’s bow while moored to a dock
- Topping lift – line running from the top of the mast to the boom and prevents the boom from failing when the sail is not set
- Trip line – line attached to an anchor end to help free it from the ground
- Vang – rope extending from the peak of a gaff to a rail or mast in order to steady the faff; a boom vang is a line or piston system used to exert downward force on the boom to control the shape of the sail
Yachting Monthly
- Digital edition

Expert advice: sails and rigging
- Katy Stickland
- December 22, 2021
Keeping sails and rigging in tip-top shape are of key importance to sailors. Read our tips and tricks from experts to improve their longevity

Sails and rigging are the engine room of any sailing boat from small dinghies up to giant superyachts. No matter how big or how new your boat, the sails and rigging need to be checked regularly and will need intermittent updating.
Updating of rigging on a yacht in particular will often be a requirement for insurance purposes so any owner will want to be mindful of that and make sure they upgrade often enough for those purposes – usually 10-15 years, but check your policy.
But you don’t need to focus on buying new to make improvements to your boat. Sure brand new sails will give you a performance boost, but there is plenty to be done with your old sails and rigging to improve performance and their longevity.
Tidy up your rigging – Dr Nick Bamford

Keeping lines shorter will help keep a clear cockpit. Credit: Dr Nick Bamford
When changing your standing rigging, look at your running rigging too.
The hi-tech, non-stretch polyester with which we just replaced our old wire and rope halyards has massively reduced the friction and now makes hoisting the mainsail a joy.
And this prompted another review. The advantages of all halyards and reefing lines led back to the cockpit, in terms of ease of operation as well as safety, are well known.
But the price you pay is that mountain of spaghetti cluttering up the cockpit!
I realised that a lot of mine was simply not needed. The lines were the length they were because they always had been! It was time for a rethink.
I treated myself to a £20 butane rope knife and set to work, and the result is a joyfully tidy cockpit.
I do have one other rigging tip, which I discovered when I lost a reefing line in the boom.
While specialist mousing devices are not cheap, curtain wire is! And it works a treat
Carabiner at your boom – Harry Dekkers

Carabiners will make it easier to reef. Credit: Harry Dekkers
How often did you try to hook the reefing eye of the mainsail at the forward end of the boom only to find that it has fallen out before you are able to hoist the halyard?
I have overcome this issue by welding carabiners on the existing ramshorn hooks on both sides of the gooseneck.
Secure every inch of your sails – Jonty Pearce

Sails and rigging advice: Ensure genoas are well secured on their roller reefing forestay before leaving the boat. Credit: Theo Stocker
When wandering around marinas, moorings, and boatyards, I am always dismayed by the number of yachts left with a triangle of genoa unfurled on their roller reefing forestay.
Not only does this engender potential weakness as a result of exposure to damaging solar ultraviolet, but that small handkerchief of unrolled sail can be worried by strong winds until it risks a catastrophic unfurling with consequential ripping and destruction of the flogging material.
It seems that every winter I spot a tattered rag of an unfurled sail that could have been properly protected by secure tight rolling.
My habit is to roll my genoa away with at least two turns of overlying sheet to trap the sail; the sheets are then tightened and securely tailed on the winches. This protects against unwanted unfurling and also provides an extra handhold.
When leaving the boat for any time, those more obsessional than I might back the sheets up with a safety lashing around the sail/sheet combination, as well as tying a preventer onto the roller reefing drum so that any damage to its furling line does not result in the sail unwrapping.
Homemade mast steps – Tony Curphey
Tony’s homemade mast steps are still going strong after two circumnavigations of the world. Credit: Tony Curphey
Mast steps are invaluable when you are cruising. They don’t have to be expensive. Mine cost me about £100, which was the price of a flat aluminium bar and Monel pop rivets. It’s necessary to have a good large pop riveter like the trellis one I have.
I used my small, onboard vice to bend them into shape. Make sure each step is wide enough for your foot with hard shoes on.
Start from the deck and put as few on as possible, spacing them apart as far as you can step up. You can use your bosun’s chair to drill and rivet, using 4x 6.4mm rivets per step.
Finish off with two together at the top so that you can stand on them and work at the very top of the mast.
I finished mine off with gold spray paint to match Nicola Deux ’s 1970s mast.
The mast steps have been there for five years and two circumnavigations, and are as firm and strong as when first fitted.
The mast has 14 steps, but I have long legs.
DIY quick-release soft shackles – Duncan Wells
Soft shackles are just the business these days; easy on the hands, no chafe to worry about and no pin to drop in the drink.
Soft shackles made from Dyneema are lighter and stronger than stainless steel, they are also kinder to your boat and your hands.
But a soft shackle, such as the one above does still present and issue in that getting them undone does require you to pull the inner core to open the loop end and allow the diamond knot through. This is why a quick-release system is a good idea.

Tie off the ends once you have passed your quick release lanyard through the shackle. Credit: Duncan Wells
Pull the inner core of the shackle out so it makes a loop sufficient to get the diamond knot through comfortably.
Then make your hole. Use a fid (a pen or screwdriver will do) to separate the 12-strand rope, pass the lanyard through and tie in a knot. Now set the shackle and smooth the outer core from the diamond knot end to the loop end and nip it up tight.
To release, pull on the lanyard.
Preventing chafe on sails and rigging – Julian and Patricia Morgan

Sewing on anti-chafe covers to lines ahead of a passage. Credit: Patricia and Julian Morgan
Chafe and rubbing damage is an ongoing enemy and it is surprising how quickly small rubs can lead to considerable damage to sheets, sails, halyards, lines and equipment.
On long-distance passages we do a detailed boat inspection, using a checklist, at least twice a day, including looking for signs of chafe.
We have installed tough anti-chafe covers on halyards and reefing lines where damage is likely, for example where ropes pass around sheaves or blocks.
We carry a bag full of short lengths of plastic pipe, which we use to pass over mooring and other lines when wear is likely to be an issue.
We also have plenty of readymade Dyneema soft shackles and loops, and have replaced many of our shackles with Dyneema equivalents, again reducing wear and damage.
Sails are very susceptible to chafe on long passages.
We have to be careful that our mainsail does not rub on our spreaders and shrouds when sailing downwind and have had covers sewn over our batten pockets where chafe has arisen.
We put one reef in the main when running to stop the sail touching the upper intermediate shrouds.
The ideal Genoa sheet attachment – Vyv Cox

Sails and rigging advice: A soft shackle makes an ideal genoa sheet attachment. Credit: Vyv Cox
There are many different ways in which genoa sheets may be attached to the sail, ranging from the simple but inelegant cow hitch, via bowlines or other knots, to some quite sophisticated methods.
In most cases they may be much of a muchness but there is one particular case that complicates the issue, and this is the presence of a baby-stay.
On our boat the combination of a large overlapping genoa and baby-stay has probably led to more sailing foul-ups than anything else on the boat.
Over the years we have tried most common methods of attachment but in every one there is a good chance that the knot or join will catch when tacking.
The only answer, short of going forward to unhitch it is to let the boat’s bow fall away until the sail blows free, not conducive to efficient tacking and doubling the effort of sheeting the sail home on the new tack.
We have tried most types of bearing on the stay itself, large and small diameter plastic tubes in various order, but none was truly satisfactory.
Then, soft shackles came onto the market. This seemed like the perfect solution to the problem, and so it proved.
I spliced loops into the end of each sheet, not quite as easily as it might have been as I was using a welding rod as a fid, and working with rope that was several years old.
Nonetheless, after an afternoon’s work we had a new system to try and the transformation was remarkable.
I cannot claim that the sail never hangs up on tacking but the occasions are pretty rare.
We have now used this same original shackle for 10 years and it continues to give excellent service.
Permanent boom preventer – Helen Melton

A permanent preventer attachment makes sailing easier. Credit: Helen Melton
Our Westerly Ocean 43 has a large, fully battened mainsail.
In light winds, or in anything less than flat seas, we have found it is essential to pin the main into place to curb any unnecessary flogging and hence prevent an accidental crash gybe.
Having a dedicated preventer line and pulley blocks in the cockpit locker ready for such conditions was helpful, but attaching it to the end of the boom in a centre cockpit boat whilst at sea felt like a needlessly hazardous manoeuvre that I wasn’t comfortable with.
We solved the problem by rigging a permanent line along the underside of the boom, one end with a hard eye splice and the other with a snap shackle.
From the relative safety of the mast foot, the preventer can now be secured and winched into place.
Wash your turning blocks with warm water – Graham Walker

Sails and rigging advice: Salt crystals and other debris can prevent turning blocks and clutches from running smoothly. Credit: Graham Walker
Before we set off on our Atlantic passage from Las Palmas, we had an expert rigger do full rig inspection for us.
At the same time he gave us a lot of valuable advice about maintenance.
One thing he recommended was to wash all of our turning blocks and clutches with warm, fresh water to remove all the salt crystals and other debris ingrained in the blocks and their bearings.
We took his advice and used a lot of warm water to wash everything down thoroughly.
It was eye-opening to see how much friction we were able to remove from the system by getting everything really clean.
That then translated directly into less effort on sail handling and sail changes.
Think like a climber – Helen Melton

Using an ascender and climbing hardness has made it easier for the crew of SeaEye to climb the mast. Credit: Helen Melton
After a few years of taxing work winching a crew member, sat in a bosun’s chair, up the mast we rethought how to lighten the load, (literally) and bought ourselves two ascenders and a climbing harness.
Also known as jumars, they clip and lock to a rope – we use the spinnaker halyard on our boat – sliding freely in one direction but clamping firmly when pulled in the opposite direction.
By using them in pairs, one with a foot loop affixed, the climber can alternate taking weight through their harness whilst easily manoeuvring the other upwards, then stepping up on the foot loop.
In an emergency, the mast can be ascended alone without support whilst if crew are available, a second halyard can be used as a safety line.
This brings about an added advantage when descending in that they can be lowered away efficiently on the winch.
A rigger, who has recently worked on our boat, works alone and always uses this technique, mousing his own halyard to be 100% certain of the condition of the line bearing his weight.
It is recommended that you wear a helmet when climbing the mast.
Check furling line fairleads – Harry Dekkers

A worn furling line fairlead can make hauling lines heavy work. Credit: Harry Dekkers
Do you sometimes wonder why your headsail furling line is not running freely? Is it the wind, the furling system itself or is it a problem with the furling line fairlead?
I found out that mine was 50 pert cent worn out, as you can see in the picture.
No wonder it took me a lot of effort.
It is also worth remembering that when unfurling your headsail, always control the furling line because if a strong wind makes the headsail run out too fast, the furling line will be tangled in the furling drum and you will only notice it once you need to furl the sail again
Practice working aloft – Graham Walker

Sails and rigging advice: Make sure every crew member has experience going aloft. Credit: Kate Walker
Who normally goes aloft when the need arises?
Depending on the task and the situation it may not always be appropriate for this to be the most experienced person (possibly the skipper) or the lightest member of the crew.
On a long passage it makes good sense for all members of the crew to have experience going aloft and putting other crew members aloft.
Before our transatlantic we made sure that everyone on board had the opportunity to go aloft and experience working on the mast.
Cost-effective mainsheet horse – Tony Curphey

Tony’s mainsheet horse has stood up well to a circumnavigation of the world. Credit: Tony Curphey
Most of the changes I make to my Nicholson 32 are for economic and simplistic reasons.
When I built the new large stern locker to reduce the volume of my cockpit, I had to move the mainsheet horse.
The new mainsheet horse was very simple and cost only the price of four new long 12mm stainless steel ringbolts.
It is also better than the old one because it’s higher so doesn’t chafe on the top guardrail when sailing off the wind.
I used the original four bolt holes for the new long ringbolts but raised them with hardwood by 5 inches.
A single length of 3-strand pre-stretched 10mm polyester rope (the boltrope from an old sail) was passed through all four ringbolt eyes and the ends tied together.
The sliding part of the horse is a 12mm stainless steel bow shackle, over all four parts of the rope. All ringbolts have equal strain.
The rope horse did a complete circumnavigation via the Southern Ocean with very little sign of wear.
Put chafe guard on your genoa sheet – Graham Walker

Chafe guard will make your sheets last longer. Credit: Graham Walker
When we started sailing longer passages we read about the problem of chafe, particularly on genoa sheets when poled out downwind.
The junction between the jaw on the pole and the section of sheet just behind the bowline seemed to be a particular area of wear.
\We learnt that rigging the pole so as to minimise movement between the jaw and the sheet makes a massive difference.
To try to eliminate any possible chafe we put Dyneema chafe guard on the first 2m of the genoa sheets, covering the area that would be in contact with the pole jaw.
After 12 years we’ve replaced a few metres of chafe guard, but we still have our original genoa sheets.
Enjoyed reading Expert advice: sails and rigging?
A subscription to Yachting Monthly magazine costs around 40% less than the cover price .
Print and digital editions are available through Magazines Direct – where you can also find the latest deals .
YM is packed with information to help you get the most from your time on the water.
- Take your seamanship to the next level with tips, advice and skills from our experts
- Impartial in-depth reviews of the latest yachts and equipment
- Cruising guides to help you reach those dream destinations
Follow us on Facebook , Twitter and Instagram.
Rigging Small Sailboats - Part 1
Rigging small sailboats.
Part 1 - Rigging in General
Introduction
T his is a basic "how-to" guide for rigging modern single masted sailboats up to about 25' in length. Any person building his own small sailboat, buying a new boat, or one who already owns a boat and wants to replace or change the rig on his boat will find this book valuable. We have attempted to write the book so it can be easily understood by both the beginning sailor as well as the "old salts". However, if you are looking for a "how-to-sail" book, or a book on competition "tuning and racing", or a book on "sailing theory," then this is not the book for you. What is here is practical information on basic rigging and how to install it.
R igging means putting the spars and related equipment in position so the boat is ready for sailing. Rigging also means these items as a functional unit once installed in the boat and made operational. Many terms used herein may sound strange to the beginner and appear to have no relation to the part they describe. Also, many of these terms have no similarity or counterparts to terms used on shore. Nevertheless, they are necessary to the business at hand. Important terms that you should know are initially noted in BOLD type and will be defined where they first appear, as well as in the glossary. Don't try to remember them all once, because after you see them a few times, you'll be able to relate the term to the function, and soon it will become second nature.
T he book is arranged in a logical sequence. PART I concerns mainly the definition and function of the various equipment used in rigging. PART II is the practical "how-to" section on rigging sailboats. All illustrations are noted by a "Figure number", the first number listed referring to the chapter. With the basic information presented, we think you will be able to completely outfit and rig your sailboat with ease and confidence. We have purposely limited the scope of this book so as not to overwhelm the beginner, and yet provide useful information to the large majority of small boat sailors; those who sail the modern rigged boats under 25' in length.
Rigs and Sails
E veryone knows what a sailboat is and most people have heard expressions such as "sloop" or "ketch." These words describe the configuration of the sails and masts on the boat, and we refer to this configuration as the RIG. Rigs have names which are defined by the number of masts the boat has; the number, shape, and locations of the sails; and sometimes by the position of the rigging on the boat. Most small sailboats under 25' have a single mast with one or two sails being used under normal sailing conditions.
T he SLOOP rig has one sail forward of the mast, and one sail aft of the mast. The stoop rig generally comes in one of two variations depending on where the FORESTAY (the wire which supports the mast from the forward side) joins to the mast. A MASTHEAD RIG, such as shown in Fig. 2-1, has the forestay connected to the mast at the very top of the mast (or MASTHEAD). A JIBHEAD RIG, as shown in Fig. 2-2, has the forestay connected to the mast at a point somewhat below the top of the mast. So, when we see a single masted sailboat with a sail fore and aft of the mast and with a forestay that goes to the top of the mast, we call it a "masthead rigged sloop"; and when the forestay is below the masthead, we call it a "jibhead rigged sloop".
A boat with a single mast located well forward in the boat and only one sail, which is aft of the mast, is called a CAT RIG (Fig. 2-3). Do not confuse this term with "catamaran," which is a twin hulled boat, but which may also have a "cat rig." Depending on the design, the mast of a cat rigged boat may or may not be supported with wires (called "stays"; see Chapter 4). Figure 2-4 shows a cat rig with a mast not supported with wires, and is referred to as a "freestanding" or "unstayed" mast.
A nother common rig used in small sailboats is the LATEEN RIG illustrated in Fig. 2-5. This rig uses a single mast, somewhat short, and usually unsupported with wires, onto which is attached two poles. A triangular shaped sail is then attached to these two poles, but not to the mast. The lower pole is sometimes not used, but the rig is still called a "lateen." The rigging of a lateen is usually very simple and uncomplicated.
S ails can be considered the "engine" or power plant of the sailboat, while the rigging can be considered the "transmission," or the means by which the power is transferred to the boat to create motion. Therefore, to understand the rigging, it is necessary to know something about the sail configuration, because both work together as a unit.
J ust about all small sailboat sails are triangular in shape, and the terms used in describing one will generally apply to all. Modern sails are most often made of synthetic fabric, usually polyester (Dacron or equivalent). Some Nylon is used but it is considered inferior because it stretches too much in use, except for special sails such as spinnakers (see following). Sails in the past were made from cotton fabric, and may be to this day, but these require more maintenance and care. The sail of Dacron is virtually maintenance-free; just keep them clean and dry, and check occasionally for damage (see Chapter 11).
S ails have names determined by their function and location on the boat. On boats which have only one sail, this sail is always called the MAINSAIL (the "main" sail on the boat). The lateen rig sail, while still a mainsail, is commonly called a "lateen" sail. Sloop rig sailboats have a mainsail also, and this is the sail located on the aft side of the mast. On sloop rigs, the sail forward of the mast is called the JIB, and the main and jib sail when used in combination for normal sailing are called the WORKING SAILS. The boat in Fig. 2-2 is under sail with main and jib working sails.
S ails other than working sails are sometimes used, especially when racing or cruising. Two of the most popular types are the GENOA jib and the SPINNAKER. The Genoa (commonly called "jenny") is actually just an oversize jib used to increase the sail area, and hence the performance of the boat. The boat in Fig. 2-1 is designed to use a Genoa jib. Sailboats under about 16' long seldom use a Genoa. The spinnaker is a parachute shaped sail (hence the nickname, "chute") used forward of the mast in place of the jib when sailing before or with the wind. Because the spinnaker is considered a "competition" item usually associated with larger boats, and requires specialized gear, it is beyond the scope of this book.
ANATOMY OF SAILS
T he common triangular sail is best discussed by referring to parts OF the sail, and parts IN the sail, or the actual components used in the construction of the sail. Our discussion of sail anatomy is comprehensive, but note that not all sails will have all the items mentioned. Fig. 2-6 should be followed in the discussion of sail parts. Now for the parts OF a sail.
T he LUFF of the sail is the forward part, or the part which is considered to meet the wind first. The LEECH is the aftermost part, while the FOOT is the lower edge of the sail. The HEAD of the sail is the topmost corner; the TACK is the forwardmost corner, and the CLEW is the aft corner of the sail. The ROACH refers to the up and outward curve in the leech of the sail. The amount of roach will vary with the sail. The lateen-type sail has little or no roach, while mainsails used on catamaran sailboats have considerable roach. Next, we will describe the parts built IN a sail.
T o the beginner, the most obvious part built into the sail is the INSIGNIA and sometimes a group of numbers. The insignia usually tells graphically what the name of the boat class is, while the number refers to the registration number given to that particular boat in the class organization. Obviously, not all sailboats belong to a class, nor do they all have numbers on the sails.
M ost mainsails have BATTENS built into them. These are semi-rigid thin strips, either of wood or synthetic material such as fiberglass or plastic, used to maintain the shape of the sail when underway. The battens fit into BATTEN POCKETS sewn into the sail. Battens in order to stay in the pocket can be tied in. A better type uses what is called a "lock-sleeve" pocket which makes it impossible for the batten to slip out, but can readily be removed so the sail can be folded. Battens are usually located at almost right angles to the leech, but sometimes one or two battens are located along the foot at right angles on LOOSE FOOTED mainsails and some jibs. A loose footed sail is one that is attached only at the tack and clew points along the foot. The boats in Figs. 2-2, 2-3, 2-4, and 2-5 all have loose footed mainsails. The position and size of the battens is usually determined by the sailmaker or the designer of the boat. Some sails, especially on certain catamarans, use battens which span clear across the sail.
O ther parts built into the sail are primarily those used to attach the sail to the rigging. At the head, tack, and clew, most sails have CRINGLES built in for attaching the sails. These are merely grommets which reinforce the sail at the hole. Most mainsails have extra sail reinforcing at the head of the sail and this is called the HEADBOARD. The strains on the sail at this point are great, and the headboard with a cringle through it distributes the stresses.
S everal methods are used to attach the sails to the mast, boom, or rigging. The jib and Genoa are attached to the forestay in sloop rigs with HANKS or snaps (Figs. 2-7 and 2-8). These are special hooks or rings used to secure the sails to the forestay as well as allowing them to slide up and down. The hanks are usually sewn into the luff of the sail. Probably the simplest method of attaching the mainsail on lateen rigs, or in boats which have free standing masts, is by means of a "sock" sewn right into the sail which slips onto the spars. Two varieties of sock-type sails are shown by Figs. 2-4 and 2-5. The sock-type sail is limited to very small boats, but makes a neat and inexpensive sail. Also used on small sails are loops or line which fasten around the spars.
O n most boats, the mainsail is attached to the aft side of the mast in usually one of two ways. The first method is with TRACK SLIDES, pieces of hardware sewn to the luff of the sail at intervals of several inches, and which slide on a track fastened to the mast. A better and more common method is the use of a BOLT ROPE. This is a piece of rope the length of the luff and sewn right into it. The bolt rope fits into a groove built into the aft side of the mast. On sails which are not loose footed, this same bolt rope and groove can also be used for attaching the foot to the boom. Or, if track slides have been used on the luff, they too can be used on a track fixed to the boom. For details on spars (mast and boom), see the next chapter.
Masts and Booms
M ost people know a SPAR when they see one, and in sailing, the spars are the "sticks" (mast and boom) to which the sails are attached. To BEND the sails means to attach the sails to the spars and rigging. The MAST is the more-or-less vertical member, while the BOOM is the more-or-less horizontal member attached in some manner to the mast, and usually capable of pivoting about the mast. Most sailboats of the type discussed in this book have one of each. One exception is the lateen rig, which often has two booms, with the upper boom correctly referred to as the "yard" (see Fig. 2-5).
S pars on sailboats are usually made either of wood (solid or hollow), or aluminum (extrusions or tubing, both hollow). It is not uncommon nor undesirable to have an aluminum mast and wood boom in combination. Some typical sections through masts and booms are shown in Figs. 3-1 and 3-2, both for wood and aluminum. Masts made from aluminum should be "anodized"; a special coating process which minimizes oxidization. It is also desirable to wax aluminum masts.
O bserve the methods used for sail attachment. The groove-type mast in either wood or aluminum makes the neatest installation besides being the most efficient. Wood booms are usually solid in the size boats being discussed in this book, due to the small relative size required for the boom. On small sails such as used on lateen rigs, the spars are often nothing more than round wood poles or aluminum tubing.
T he base of the mast always fits into some type of receptacle or apparatus which is called the MAST STEP. Many types of mast steps are used depending on the configuration desired. Putting the mast in position on the mast step is called STEPPING the mast (see Fig. 9-1). Some masts go through holes in the deck or cabin top and step onto the hull structure, while others bear directly on the deck or cabin top. The simplest type of mast step is the fixed type such as shown by Figs. 3-3 and 3-4. The mast is fixed in position on the step and no movement of the mast is possible, short of removing the mast. Most masts stepped through the deck use fixed steps. Another type is the rotating mast step shown in Fig. 3-5. This type allows the mast to turn or rotate with the direction of the mainsail for greater sail efficiency.
A convenient type of mast step, as far as ease of stepping the mast is concerned, is the pivoting type such as shown in Fig. 3-6. This type allows the mast to be laid into the step fitting, bolted, and pivoted up in position, as opposed to trying to lift it onto the step, which can be tricky, especially on a windy day or if it is a tall mast. With lightweight aluminum spars, it is desirable to use a mast base stiffener at the step when using the pivoting step in order to provide adequate bearing for the pivot bolt.
M any masts require extra reinforcement, and one method of doing this is by utilizing SPREADERS. These are cross members located on the mast at a predetermined location and jutting out sideways. Spreaders are always arranged in pairs, one on each side of the mast. The spreaders "push out" or spread the SHROUDS (the wires supporting the mast from the sides; see Chapter 4) to help stiffen the mast. While spreaders can be made of wood, it is common on small sailboats to have them made of metal tubing, usually stainless steel or aluminum, even when wood masts are used. Some boats do not have any spreaders, while others may have one, two, or more sets. Since spreaders are a necessary evil, (they get in the way and foul things aloft, not to mention added resistance and weight), it is best to have as few as possible.
T wo types of spreaders are used. One is the fixed-type where the spreader is rigidly mounted to the mast such as shown in Fig. 3-7. The other type is the pivoting or swinging type which is allowed to swing horizontally along a pivot point located on the mast. This type is illustrated in Fig. 3-8. Use the type specified for the boat you have in any case. Where the shrouds pass over or through the spreaders, there should be special fittings or spreader tips which prevent chafing of the shroud by the spreader. Often the spreader tips are adjustable in order to vary the tension of the shrouds. Most spreader tips have an open groove or hole through which the spreader passes. Note that the shrouds are allowed to move or slide on their own against the spreader tip. However, with the open groove type, some means of lashing or taping the shroud to the spreader tip must be provided. The reason for this is that when sailing at an angle of heel, the WINDWARD* shroud will be taut, and the LEEWARD* shroud becomes slack, which could allow the shroud to fall out of the leeward groove if not secured in place.
*WINDWARD - Toward the direction from which the wind is blowing. *LEEWARD - Downwind, or with the direction of the wind.
T wo other types of spreaders which are used for supplemental strengthening of the mast, or to combat localized stresses, are DIAMOND SPREADERS and JUMPER STRUTS (see Fig. 4-4 'a'). Diamond spreaders are cross members in pairs always used in conjunction with DIAMOND STAYS, which are wire rope stays fixed at either end to the mast. The diamond spreader "spreads out" the diamond stays at their mid-length each side of the mast. The term diamond comes from the fact that when the diamond stays and spreaders are in position, they form a shape like a diamond. An exception to this is when more than one diamond spreader pair is used per stay. Diamond spreaders are just like regular spreaders, except that they are usually smaller and shorter in length.
T he jumper strut is usually used only on jibhead rigs to reinforce the upper part of the mast. The jumper strut is located on the forward side of the mast jutting out horizontally forward, and combats the strain of the mainsail pulling aft on the mast. The JUMPER STAY passes through the strut, and is fastened to the mast at each end of the stay. The jumper strut is usually positioned to bisect the length of the jumper stay. Diamond stays and jumper stays are not required on all boats; just on those masts which require additional support.
T he top of the mast is called the MASTHEAD, and depending on the type of rig, the fittings located here will perform various functions. Masthead fittings will also vary depending on whether a wood or aluminum mast is being used. The masthead fitting for wood masts is usually a custom unit made by the builder (see Fig. 3-9). When building a boat using wood spars, it is usually necessary to fabricate a masthead fitting. The designer should provide details for making the masthead fitting. For aluminum masts, the masthead fitting is usually a ready-made unit or "kit"-type assembly to match the mast extrusion, such as illustrated in Figs. 8-4 and 8-5. Obviously a masthead fitting for a masthead rig will be more complex than for a cat or jibhead rig. In any case, the masthead fitting contains at least one SHEAVE (a grooved wheel or pulley) for the main HALYARD, the line used to hoist the sail. With masthead rigs, the masthead fitting has a sheave for the jib halyard as well, and usually incorporates attachment fittings for the stays, and sometimes for the shrouds also. When a sock-type sail is used, and when the mast has no stays, then no masthead fittings are required. In any case, the top of hollow spars should be capped to keep water out. On wood spars this can be a sheet metal cap, and with aluminum spars, the masthead fitting will usually do the job.
O n boats where the stays and shrouds do not go to the masthead, but fasten to the mast at some lower point as in jibhead rigs, other means are used to secure stays and shrouds to the mast. With wood spars, the conventional method used to attach the shroud and forestay is to use TANGS. Tangs are short metal straps usually with a crimp or bend to splay them out from the mast when in position. Another type does the same job, but these are of cast metal. The strap type usually has at least two holes; one for the stay attachment, and the other for fastening the tang to the mast. When aluminum masts are used, tangs bolted together through the mast can also be used for the shrouds, but the forestay usually uses another fitting called a HOUND (see Figs. 3-10 and 3-11). The hound wraps around the mast for bearing and has a fitting to receive the forestay. If used on a boat with a jib, then a JIB HALYARD BLOCK (fitting with a sheave used to lead the halyard and change its direction) is attached to the hound. If the shrouds and forestay land at the same point on the mast, then the tangs for the shrouds can be integral with the hound fitting.
W hen using internal halyards (those which run inside the mast), some type of fitting must be provided for the mast where the halyards exit the mast. Internal halyards can only be used in a hollow mast, and where used, they usually exit at or near the mast base. The simplest fitting is merely a hole through the mast fitted with a FAIRLEAD (a fitting to give a line a "fair lead") to prevent chafing the line (see Fig. 3-12). Another arrangement is to use COAMING PULLEYS or SHEAVE BOXES which not only act as a fairlead, but have sheaves incorporated to change direction of the halyards as well as preventing chafing of the line (see Fig. 3-13). These fittings are usually fitted into the mast near the base. In selecting coaming pulleys and sheave boxes, be sure the sheave of the fitting will protrude far enough into the mast so the halyards will not chafe along the inside mast surface.
T he GOOSENECK is the fitting used to connect the boom to the mast and allow it to move freely, like a universal joint. On the small lateen rig boats the gooseneck is two connected loops which rotate independently (see Fig. 3-14). On conventional rigs, a basic gooseneck is the fixed base type which fastens to the mast. For better sail adjustment, the type of gooseneck which slides on a track or in the mast groove is superior (see Fig. 3-15). Whichever of these types is used, they can be bought as non-swiveling or as a ROLLER REEFING type. The non-swiveling type as shown in Fig. 3-15, does not permit the boom to rotate. The roller reefing type shown in Fig. 3-16, is used so the boom can rotate and allow the sail to be rolled onto the boom in order to reduce sail area when sailing in heavy winds. Goosenecks come in many styles both for wood and aluminum booms with or without the roller reefing feature.
T he CLEW OUTHAUL at the other end of the boom is similar in function to the masthead fitting. It is used to attach the clew of the sail to the boom. Where the mainsail is small, the clew outhaul is sometimes nothing more than a line tied to a cleat. Another method is to use a sheave in the end of the boom in order to gain some leverage so the sail can be pulled taut (see Fig. 3-17). With larger mainsails, the clew outhaul is best a slide fitting located on a length of track, or a type which fits into the boom groove if there is one (see Fig. 3-18). On aluminum booms, and especially when roller reefing is used, a boom outhaul fitting is used which performs the clew outhaul function as well as providing a tang for attaching the hardware used to control the sail .
O ther incidental fittings may often be attached to the spars as well. CLEATS (a fitting used to belay or secure a line, Fig. 3-19) or BOOM BAILS ("U"-shaped straps used to attach blocks to the boom, Fig. 6-2) are commonly used. A BOOM CRUTCH is another item sometimes used, which is not really a part of the boom. The boom crutch holds up the boom when the sails are furled and when hoisting the sail, in order to keep the boom in its proper position.

FIG. 3-19-A CLEAT is a fitting to which a rope may be belayed. This metal cleat is fastened to the side of a mast to belay a halyard, and is a typical example of a cleat.
Click HERE for Part 2
Boat Rigging: Everything You Need to Know
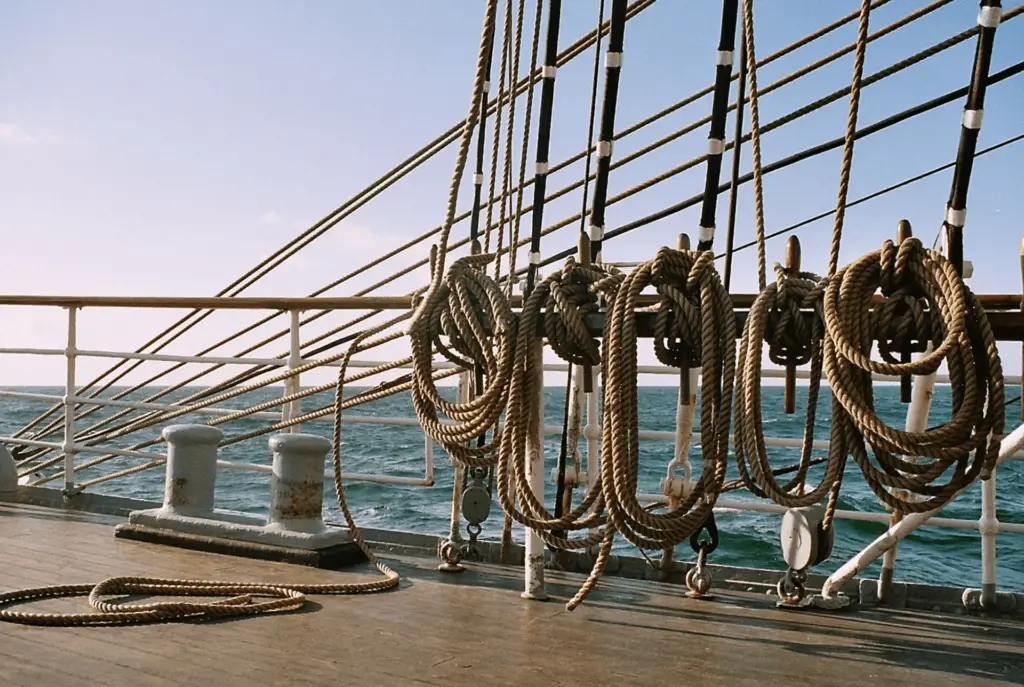
What is a boat rigging?
Boat rigging is the arrangement of ropes , wires, and hardware on a boat that enables it to be controlled and maneuvered.
Table of Contents
How much is a boat rigging?
The price of boat rigging can vary depending on several factors, such as the size and type of boat, the complexity of the rigging system, and the materials used.
Typically, a basic rigging package for a sailboat of 20 feet can range from around $1,000 to $3,000. This may include essentials like shrouds, stays, halyards, and sheets.
What are the parts of a boat rigging?
- First, there are the control lines, which are used to control the sails , rudders, and other equipment on the boat.
These lines are typically made of strong, durable materials like nylon or polyester, and they are connected to winches or cleats to provide the necessary tension.
- Another important component of boat rigging is the standing rigging , which includes the mast, shrouds, and stays that support the mast and keep it stable.
These are typically made of stainless steel wire, and they are crucial for maintaining the integrity and stability of the mast.
- Lastly, there are the running rigging lines, which are used to control the sails.
These lines are attached to the sail and can be adjusted to change the shape and angle of the sail, allowing the boat to harness the wind and move forward.
What are the three types of rigging?
There are three main types of rigging that you may come across when it comes to boats: the Bermuda rig, the gaff rig, and the junk rig.
- The Bermuda rig is perhaps the most common and widely used rigging type.
It consists of a triangular mainsail and one or more headsails, also known as jibs or genoas. The Bermuda rig is known for its versatility and ability to sail close to the wind, making it ideal for racing and cruising boats.
- The gaff rig is a more traditional rigging style that features a four-sided mainsail with a gaff, and a horizontal spar, at the top.
The gaff rig is often found on classic and traditional sailing boats and is known for its aesthetic appeal and nostalgic charm.
- The junk rig is a unique rigging type that originated in Asia.
It features multiple sails mounted on a free-standing mast, with each sail able to be set or furled independently.
The junk rig is known for its simplicity and ease of handling, making it popular among cruisers and those looking for a more relaxed sailing experience.
- Line or Rope of Your Boats (explained)
- Single Handed vs Double Handed Sailing
- Sailboat Specifications 101: Explained For Beginners
- Running Rigging vs. Standing Rigging vs. Jury Rigging
What is included in standing rigging?
The primary component of standing rigging is the mast itself. This vertical structure serves as the backbone of the rigging system and supports the sails.
Attached to the mast are the shrouds and stays. Shrouds are the horizontal wires or ropes that extend from the mast to the sides of the boat.
They provide lateral support to the mast, preventing it from swaying or bending under the force of the wind.
Stays, on the other hand, are the vertical wires or ropes that connect the mast to the bow or stern of the boat.
They provide fore and aft support to the mast, preventing it from tilting forward or backward.
In addition to the mast, shrouds, and stays, standing rigging may also include other components such as turnbuckles, tangs, and chainplates.
Turnbuckles are used to adjust the tension in the rigging, ensuring that it remains taut and secure.
Tangs are metal fittings that attach the rigging wires to the mast or deck.
Chainplates are metal plates that are bolted to the boat’s structure and provide a strong anchor point for the rigging wires.
What is the life expectancy of standing rigging?
The life expectancy of standing rigging can vary depending on a few factors such as the type of wire used, the sailing conditions , and the level of maintenance.
Generally, experts recommend replacing standing rigging every 10-15 years or sooner if there are signs of wear or damage.
What is the difference between standing and running rigging?
- Standing rigging refers to the fixed, non-adjustable components that provide stability and support to the mast.
This includes the mast itself, as well as the shrouds and stays that connect the mast to the boat’s structure. Standing rigging is responsible for keeping the mast in place and preventing excessive movement or swaying.
- On the other hand, running rigging refers to the movable, adjustable components that control the sails and allow for sail shape adjustments.
This includes lines like halyards, sheets, and control lines that are used to hoist, trim, and adjust the sails.
Running rigging is what allows the sailor to control the position and movement of the sails to harness the wind and propel the boat forward.
- In simple terms, standing rigging keeps the mast upright and stable, while running rigging controls the position and shape of the sails.
What are the basic rigging tips?
To help you navigate the waters with confidence, here are some basic rigging tips:
1. Double-check your knots
Before setting sail, take a few extra moments to inspect your knots and ensure they are secure.
A loose or improperly tied knot can lead to disastrous consequences while out on the water.
2. Use the proper tension
Finding the right tension for your rigging lines is crucial for optimal performance.
Too much tension can cause unnecessary strain on your boat’s components, while too little tension can result in a sloppy and inefficient sail shape.
3. Regularly inspect your rigging
Make it a habit to inspect your rigging lines and hardware for any signs of wear or damage.
Look for fraying, rust, or weak spots and replace or repair as needed. Regular maintenance is key to a safe and successful boating experience.
4. Learn from others
Don’t be afraid to seek advice and guidance from experienced sailors or rigging professionals.
They can offer valuable tips and techniques that can improve your skills and ensure a safe rigging process.
5. Practice makes perfect
Rigging is a skill that takes time and practice to master.
Take the opportunity to practice different techniques and experiment with adjustments to find what works best for you and your boat.
Common Boat Rigging Problems and Solutions
Line chafing.
Over time, the friction from rubbing against surfaces can wear down your rigging lines, leading to weak spots or even breaks.
To prevent this, regularly inspect your lines and invest in chafe guards or tape to protect them from rubbing against sharp edges.
Tangled or twisted lines
It can be frustrating when you’re trying to quickly adjust your sails or control lines, only to find them tangled up.
To avoid this, practice proper line management and coiling techniques. Take the time to neatly coil your lines when not in use and avoid leaving them in a messy heap.
Improper tension
Proper tension is essential for optimal performance.
Too much tension can put excessive strain on your rigging and cause damage, while too little tension can result in sloppy sail shape.
Take the time to properly tension your lines according to the manufacturer’s recommendations and make adjustments as needed.
Corrosion and rust
Standing rigging, especially in saltwater environments, is prone to corrosion and rust .
Regularly inspect your rigging for any signs of rust or corrosion and replace any damaged components promptly.
Applying a protective coating or lubricant can also help prevent future corrosion.
- Remember, regular inspections, proper tensioning, and maintenance are key to keeping your rigging in top shape.
Standing Rigging on a Sailboat: Everything You Need to Know
by Emma Sullivan | Aug 14, 2023 | Sailboat Gear and Equipment
Short answer standing rigging on a sailboat:
Standing rigging on a sailboat refers to fixed lines and cables that support the mast and help control its movement. It includes components like shrouds, stays, and forestays. These essential elements ensure stability and proper sail trim while underway.
Understanding the Importance of Standing Rigging on a Sailboat
Sailboats are marvels of engineering and ingenuity, capable of harnessing the power of the wind to transport us across vast oceans and explore far-flung destinations. As sailors, we often focus on the majestic sails, sleek hull designs, and cutting-edge navigation technology that make these vessels so awe-inspiring. However, there is one crucial component that sometimes goes unnoticed but plays a vital role in keeping our sailboats safe and seaworthy – the standing rigging.
The standing rigging refers to the network of wires and cables that support the mast and allow it to bear the tremendous loads exerted by the sails. It acts as the backbone of a sailboat’s rig , providing stability, strength, and balance. Understanding its importance is crucial for anyone who sets foot on a vessel with dreams of cruising or competing.
Firstly, let’s examine why standing rigging is essential for sailboat safety. Imagine being out at sea when suddenly your mast collapses due to faulty rigging . This nightmare scenario can easily be avoided by regularly inspecting your boat’s standing rigging for signs of wear or fatigue. Frayed wires or corroded fittings could weaken the entire structure, making it susceptible to failure under heavy winds or rough seas . By ensuring your standing rigging is in good shape through routine maintenance and inspections by professionals, you can significantly reduce this risk and ensure your own safety onboard.
Moreover, properly tensioned standing rigging is vital for maintaining optimum sailing performance. The tension in each wire within the standing rig allows for efficient transfer of power from sails to keel through mast compression. If your standing rigging is too loose or too tight, it can negatively impact your sail trim and overall boat handling capabilities. A well-tuned rig will provide better control over sail shape adjustments necessary for different wind conditions while maximizing speed potential – something every sailor strives for!
Beyond safety and performance, understanding the importance of standing rigging requires recognizing its impact on the overall balance of your sailboat. The rigging plays a crucial role in maintaining the boat’s equilibrium by counteracting the forces exerted by the sails. Without proper tension and alignment of the standing rig, a sailboat may become unbalanced, resulting in compromised stability. This imbalance can make steering more challenging, increase the risk of broaching, or even lead to capsizing in extreme cases. Therefore, paying close attention to your standing rigging ensures that your boat remains stable and enjoyable to sail.
Lastly, it is worth mentioning that investing in high-quality materials and professional rigging services will prove cost-effective in the long run . While it may be tempting to cut corners or delay necessary upgrades or maintenance, neglecting your standing rigging will only result in more significant expenses down the line. Inadequate rig tension can lead to excessive wear on other components such as sails or mast fittings, increasing their replacement frequency and cost.
In conclusion, understanding and valuing the importance of standing rigging on a sailboat is essential for sailors of all levels. It directly impacts safety at sea, enhances sailing performance, maintains balance and stability, ultimately contributing to an enjoyable experience on board. So next time you set foot on a sailboat or contemplate owning one yourself, don’t forget to give due attention to this often overlooked but vital aspect – your boat’s standing rigging!
Step-by-Step Guide: How to Inspect and Maintain Standing Rigging on a Sailboat
Title: Cracking the Code: A Step-by-Step Guide to Inspecting and Maintaining Standing Rigging on a Sailboat
Introduction: Ahoy, fellow sailors! Whether you’re an experienced seafarer or a sailing enthusiast ready to cast off, understanding how to inspect and maintain your sailboat’s standing rigging is crucial for smooth voyages on the high seas. In this detailed guide, we will unravel the mysteries of standing rigging examination and upkeep, enabling you to confidently navigate through any sailing adventure. So hoist your mainsail, secure your halyards, and let’s dive into the world of rigging maintenance !
1. Understanding Standing Rigging: Before we embark on our inspection journey, let’s clarify what exactly constitutes standing rigging. Embracing technical jargon like professionals often do, this refers to those sturdy wire cables that provide support to the mast and keep everything in place as your vessel slices through the waves. These cables are under constant stress from wind pressure and oceanic forces; therefore, routine inspections are vital.
2. Assemble Your Inspection Arsenal: Essential tools at hand? Check! Embark upon your quest equipped with binoculars (to assess hard-to-reach areas), a multimeter (for electrical testing), tape measure (we love accuracy!), a notepad (to document findings), lubricant spray can (to combat rust), and some good ol’ elbow grease.
3. Visual Inspection Bonanza: Begin by examining every component of your standing rigging thoroughly. Start from bow to stern – nothing should elude your gaze! Look out for signs of fraying wires, corrosion spots – identified by those elusive green spots -, improperly tightened connections or turnbuckles hanging loose like unfortunate pirate hooks. Pay close attention when checking shrouds and stays around their terminal points.
4. Tension Testing Zen: Employing a multimeter capable of measuring tension is vital for this next step. Like tuning an instrument, each cable must be correctly tensioned to ensure optimal performance . Begin at the base of your mast, working your way up one stay or shroud after another, carefully noting the readings. Adjust tensions as needed, using the manufacturer’s guidelines as your North Star.
5. Get Into Detailing Mode: To maintain a seaworthy craft, meticulousness is key! Start by cleaning every inch of standing rigging with fresh water and mild soap to rid it of salt crystals and other corrosive agents that Mother Nature throws our way. Once dry, inspect terminals for any hidden corrosion potential. Remember to apply lubrication around all fittings where metal meets metal – preserving their longevity on this salty adventure.
6. Diving into DIY Replacements: Sometimes, despite our best efforts, some elements may need replacement eventually. Worn-out or damaged fittings demand immediate action! While there are professionals who can lend a helping hand, attempting minor repairs yourself allows you to save time and money in the long run. Just remember safety first – secure your vessel properly before venturing aloft!
7. Periodic Inspections are Pathway to Peace: As the seasons go by and maritime miles accumulate beneath your hull’s keel, remember that rigging inspections should become regular occurrences in your life as a sailor. Incorporating these tasks into your annual maintenance routine will keep you up-to-date on the health of your standing rigging and reduce unexpected surprises during those thrilling offshore adventures.
Conclusion: With this comprehensive guide in tow, inspecting and maintaining standing rigging on a sailboat will no longer bewilder even the most landlocked soul. Armed with knowledge and armed-still-with tools-of-the-trade in hand – embark upon every voyage knowing that smooth sailing is within reach! Remember comrades: vigilance coupled with clever maintenance ensures many marvelous voyages atop Neptune’s watery kingdom!
The Key Components of Standing Rigging on a Sailboat Explained
When it comes to sailing, understanding the key components of standing rigging is crucial. This system of cables and wires plays a vital role in keeping a sailboat’s mast upright and ensuring the safety of everyone on board. So, let’s dive into these essential elements to unravel their importance and how they work together seamlessly.
1. Mast: The mast, often referred to as the backbone of a sailboat, is a tall vertical structure that supports the sails. It provides stability and acts as an attachment point for various components of the standing rigging.
2. Shrouds: Shrouds are strong steel or synthetic cables that extend from the top of the mast down to its sides, creating lateral support. Usually arranged in pairs, they help prevent excessive side-to-side movement and maintain proper alignment while under sail or at anchor .
3. Forestay: Situated at the front of the mast, directly opposite to where you stand while steering, is the forestay. This forward-facing cable keeps the mast from tipping backward due to wind pressure against the sails when sailing upwind. It ensures that your sailboat remains balanced even in gusty conditions.
4. Backstay: The backstay is another essential component that counterbalances the force exerted by the forestay on your sailboat’s mast when sailing upwind or under heavy loads. Most commonly attached at or near the highest part of your boat ‘s stern (aft end), this cable prevents undue bending or breaking caused by fore-aft pressure.
5. Tangs and Turnbuckles: These small yet mighty components connect shrouds and stays to both the hull and mast with ease and allow for easy adjustment and fine-tuning of tensioning within your standing rigging system. Tangs are fittings attached directly to masts or other structural components using bolts or screws, while turnbuckles provide threaded connections allowing for precise adjustments.
6. Spreaders: Installed horizontally on either side of the mast, spreaders play a crucial role in maintaining the integrity and proper angle of shrouds. They prevent excessive bending or twisting forces by creating a wider stance for the shrouds, ensuring even stress distribution.
7. Standing Rigging Lifelines: These lines, typically made of stainless steel wires or synthetic materials like Dyneema, serve as an additional safety measure by helping to prevent crew members from falling overboard while working on deck. Strategically placed along the sides of the sailboat, they offer stability and support during maneuvering or rough seas.
Understanding these key components is vital not only for sailboat owners but also for anyone interested in sailing . Proper maintenance and routine inspections are essential to ensure optimal performance and mitigate any risks associated with deficiencies within your standing rigging system.
So next time you set sail or find yourself gazing out at a beautifully rigged sailboat, take a moment to appreciate the intricate balance and coordination that these key components provide. It’s truly a remarkable collaboration between technology, engineering, and Mother Nature herself – allowing us to glide through the waves with grace and elegance.
Common FAQs about Standing Rigging on a Sailboats Answered
Introduction: Standing rigging is an essential component of sailboats, playing a crucial role in supporting the mast and ensuring optimal performance on the water. However, many sailors are often perplexed by various aspects of standing rigging, leading to a multitude of frequently asked questions. In this comprehensive blog post, we aim to answer some of the most common FAQs about standing rigging on sailboats, providing detailed and professional insights while adding a touch of wit and cleverness.
1. What exactly is standing rigging? Ah, standing rigging – the unsung hero of every sailboat! Standing rigging refers to all the fixed elements that support the mast in an upright position. These elements typically comprise stainless steel wires called shrouds and stays along with associated fittings like turnbuckles and tangs. Think of it as the sturdy backbone that keeps your mast from taking an inconvenient swim!
2. When should I inspect my standing rigging? Regular inspections are crucial for maintaining a safe sailing experience. We recommend inspecting your standing rigging at least once a year or before embarking on any long voyage. Additionally, keep an eye out for any signs indicating potential problems such as excessive rust, wire deformation, or frayed cables. Remember: It’s better to be safe on land than sorry at sea !
3. How do I know when it’s time to replace my standing rigging? While rigorous inspections can highlight any potential issues, there are certain indicators that suggest your standing rigging might need replacement sooner than later:
a) Age: As a general rule of thumb, consider replacing your standing rigging after 10-15 years. b) Visible damage: If you spot visible signs of wear and tear like broken strands or corroded fittings, it’s time for new gear. c) Elongation: In some cases, constant strain can cause wire elongation over time – if this exceeds manufacturer recommendations or 5%, it’s replacement time. d) Performance decline: Have you noticed reduced boat performance or excessive mast movement? Outdated rigging may be the culprit.
4. Can I inspect and replace standing rigging myself? Inspecting your own standing rigging is indeed possible if you possess adequate knowledge and experience. However, replacing it yourself requires specific expertise, so unless you’re a seasoned sailor with professional background in rigging, we highly recommend entrusting this task to certified riggers who can ensure everything is done correctly. After all, your safety should never be compromised!
5. How much does standing rigging replacement cost? Ah, the golden question! While costs can vary depending on factors like the size of your boat, the material used for new rigging (stainless steel or synthetic fibers), and labor expenses – expect to invest anywhere from a few thousand to tens of thousands of dollars for a complete standing rigging replacement. Remember that proper maintenance upfront can help extend the lifespan of your rigging and save you some precious doubloons!
6. Can I switch from stainless steel to synthetic fibers for my standing rigging? Absolutely! Synthetic fiber alternatives like Dyneema® have gained popularity due to their lighter weight, high strength-to-weight ratio, and lower corrosion risk compared to stainless steel. These materials offer enhanced performance capabilities and are a valid consideration when upgrading or replacing your standing rigging system entirely.
7. What’s the typical lifespan of synthetic fiber standing rigging? While longevity depends on various factors such as usage patterns and environmental conditions, well-maintained synthetic fiber standing rigging systems generally last around 10-12 years before requiring replacement – comparable to their stainless steel counterparts.
Conclusion: Standing rigging on sailboats may seem mysterious at first glance, but by answering these common FAQs with informative yet witty explanations, we hope to shed light on this crucial sailing component while bringing a smile to our readers’ faces. Remember, understanding and properly maintaining your standing rigging will ensure safe and enjoyable voyages for years to come. So, stay rig-ready and sail on!
Upgrading Your Standing Rigging: What You Need to Know
In the world of sailing, upgrading your standing rigging is a vital decision that can greatly impact your vessel’s performance and overall safety. The standing rigging, which includes the various wires and cables that hold the mast upright, plays an essential role in ensuring stability and proper sail control. In this blog post, we will delve into everything you need to know about this crucial aspect of sailing.
Firstly, why should you consider upgrading your standing rigging? Over time, wear and tear can take a toll on this crucial component of your boat . Exposure to harsh weather conditions, continuous strain from strong winds or heavy sails, and even galvanic corrosion can all lead to the degradation of your rigging. As a responsible sailor, it is imperative to regularly assess the condition of your standing rigging and determine when an upgrade is necessary.
When it comes to upgrading your standing rigging, there are several key factors you need to consider. One essential aspect is choosing the right materials for your new rigging. Traditionally, stainless steel has been widely used due to its durability and strength. However, recent advancements in composite materials have opened up new possibilities for sailors. High-tech fibers like carbon or aramid offer impressive strength-to-weight ratios while being less susceptible to corrosion than steel.
It is important to consult with an experienced rigger or marine engineer who can guide you in selecting the most suitable material for your specific sailing activities and vessel type. They will take into account factors such as boat size, intended use (racing or cruising), budget constraints, and local climate conditions before recommending the best material for your standing rigging upgrade.
Another crucial consideration in upgrading your standing rigging is determining whether you want to switch from wire rope-based rigging to rod-based systems or composite products. Rods are known for their superior stiffness and excellent fatigue resistance but may require specialized equipment for assembly and maintenance. Composite systems typically combine carbon fiber or fiberglass with a resin matrix, offering versatility and customization options.
Furthermore, when planning to upgrade your standing rigging, it’s essential to conduct a thorough inspection of the mast and fittings. Any signs of wear and tear, cracks, or deformations in the mast or associated hardware should not be overlooked. Reinforcing these components may be necessary before installing new rigging to ensure optimal safety and performance .
During the installation process itself, meticulous attention to detail is crucial. Proper tensioning and alignment of the rigging are vital for achieving optimal sailing performance . Consulting with professionals in the field will ensure that you avoid common pitfalls such as over-tensioning or under-tensioning your rigging, which can potentially compromise its strength and longevity.
Upgrading your standing rigging not only ensures a safer sailing experience but also presents an opportunity to enhance your vessel’s performance capabilities. By optimizing sail control and reducing overall weight aloft, you can achieve faster speeds and improved maneuverability on the water.
In conclusion, upgrading your standing rigging is an investment that should never be taken lightly. It requires careful consideration of multiple factors such as materials, boat specifications, and local conditions. Seeking expert advice throughout this process will help you make informed decisions that align with your sailing goals while ensuring maximum safety and enjoyment on the open seas . So don’t hesitate – take charge of your vessel’s integrity today by embarking on an exhilarating upgrade journey!
Troubleshooting Common Issues with Standing Rigging on a Sailboat
Title: Navigating the High Seas of Standing Rigging: Deconstructing Common Sailboat Troubles
Introduction: Setting sail on a beautiful day, wind in your hair, and salt in the air – there’s nothing quite like the freedom of sailing. But as any experienced sailor knows, with great freedom comes great responsibility; one must always be prepared to tackle common issues that can arise with standing rigging on a sailboat. In this comprehensive guide, we’ll be your navigational chart through the murky waters of troubleshooting these problems.
1. The Tale of Loose Wires: Picture this: you’re out at sea, enjoying the blissful embrace of nature when suddenly you notice an unsettling amount of slack in your boat’s rigging wires. As panic sets in, take a deep breath and remember that loose wires are not an uncommon predicament. Before jumping ship into despair, consider inspecting your turnbuckles for any signs of wear or corrosion. Often, a simple tightening or lubing can solve the issue and restore equilibrium to your rigging system.
2. Strange Groans from Your Mast: As the wind howls through your sails, does it feel like someone is playing an eerie tune on your mast? Fear not! These disconcerting noises can typically be traced back to halyards rubbing against sheaves or pulleys. Be diligent about inspecting these components and ensuring they are properly aligned and lubricated.
3. The Mystery of Shaky Connections: Imagine cruising along peacefully when you notice unsettling vibrations emanating from various connections within your standing rigging system – another nuisance faced by many sailors. Remember to check bolts and fittings for tightness and wear regularly; sometimes a mere tightening can spare you from enduring an inconvenient wobble during every voyage.
4. Elusive Corrosion Castaways: While corrosion may seem like a mythical creature lurking under layers of saltwater incantations, it sadly isn’t. The corrosive effects of the marine environment can take their toll on your rigging, leading to weakened and compromised wires. To avoid this encroaching villain, regularly inspect your rigging for signs of corrosion, paying extra attention to any dissimilar metals in contact with each other. When identified early, you can tackle this issue head-on through diligent cleaning and application of protective coatings.
5. That Perplexing Sag: No one wants a saggy rig! If you notice an unacceptable amount of slack or downward curve in your wire stays or shrouds when under load, it’s time to put on your problem-solving hat. Begin by ensuring that all turnbuckles are suitably tensioned and that the mast rake is properly adjusted. A little fine-tuning may be all it takes to regain the tautness required for smooth sailing .
6. Stay Seals Against Abrasion: Do you find your stay seals battling against wear and tear? It might be time to beef up their defenses! Insulate vulnerable areas with appropriately sized rubber tubing or durable tape like self-amalgamating tape. This extra layer of protection will help prevent damage from chafing lines or abrasive surfaces.
Conclusion: As sailboat enthusiasts know, standing rigging issues can arise unexpectedly and interrupt even the most idyllic voyages at sea. By keeping these troubleshooting considerations in mind while setting sail , you’ll have a handy compass to lead you through the challenges that come with maintaining a well-maintained rig. So next time the wind whispers trouble into your ears while adrift on your beautiful vessel, fear not – armed with knowledge and wit, you’ll conquer those common issues with ease and go back to enjoying the sublime freedom provided by sailing adventures!
Recent Posts

- Sailboat Gear and Equipment
- Sailboat Lifestyle
- Sailboat Maintenance
- Sailboat Racing
- Sailboat Tips and Tricks
- Sailboat Types
- Sailing Adventures
- Sailing Destinations
- Sailing Safety
- Sailing Techniques
The Ultimate Guide to Sail Types and Rigs (with Pictures)
What's that sail for? Generally, I don't know. So I've come up with a system. I'll explain you everything there is to know about sails and rigs in this article.
What are the different types of sails? Most sailboats have one mainsail and one headsail. Typically, the mainsail is a fore-and-aft bermuda rig (triangular shaped). A jib or genoa is used for the headsail. Most sailors use additional sails for different conditions: the spinnaker (a common downwind sail), gennaker, code zero (for upwind use), and stormsail.
Each sail has its own use. Want to go downwind fast? Use a spinnaker. But you can't just raise any sail and go for it. It's important to understand when (and how) to use each sail. Your rigging also impacts what sails you can use.

On this page:
Different sail types, the sail plan of a bermuda sloop, mainsail designs, headsail options, specialty sails, complete overview of sail uses, mast configurations and rig types.
This article is part 1 of my series on sails and rig types. Part 2 is all about the different types of rigging. If you want to learn to identify every boat you see quickly, make sure to read it. It really explains the different sail plans and types of rigging clearly.

Guide to Understanding Sail Rig Types (with Pictures)
First I'll give you a quick and dirty overview of sails in this list below. Then, I'll walk you through the details of each sail type, and the sail plan, which is the godfather of sail type selection so to speak.
Click here if you just want to scroll through a bunch of pictures .
Here's a list of different models of sails: (Don't worry if you don't yet understand some of the words, I'll explain all of them in a bit)
- Jib - triangular staysail
- Genoa - large jib that overlaps the mainsail
- Spinnaker - large balloon-shaped downwind sail for light airs
- Gennaker - crossover between a Genoa and Spinnaker
- Code Zero or Screecher - upwind spinnaker
- Drifter or reacher - a large, powerful, hanked on genoa, but made from lightweight fabric
- Windseeker - tall, narrow, high-clewed, and lightweight jib
- Trysail - smaller front-and-aft mainsail for heavy weather
- Storm jib - small jib for heavy weather
I have a big table below that explains the sail types and uses in detail .
I know, I know ... this list is kind of messy, so to understand each sail, let's place them in a system.
The first important distinction between sail types is the placement . The mainsail is placed aft of the mast, which simply means behind. The headsail is in front of the mast.
Generally, we have three sorts of sails on our boat:
- Mainsail: The large sail behind the mast which is attached to the mast and boom
- Headsail: The small sail in front of the mast, attached to the mast and forestay (ie. jib or genoa)
- Specialty sails: Any special utility sails, like spinnakers - large, balloon-shaped sails for downwind use
The second important distinction we need to make is the functionality . Specialty sails (just a name I came up with) each have different functionalities and are used for very specific conditions. So they're not always up, but most sailors carry one or more of these sails.
They are mostly attached in front of the headsail, or used as a headsail replacement.
The specialty sails can be divided into three different categories:
- downwind sails - like a spinnaker
- light air or reacher sails - like a code zero
- storm sails

The parts of any sail
Whether large or small, each sail consists roughly of the same elements. For clarity's sake I've took an image of a sail from the world wide webs and added the different part names to it:

- Head: Top of the sail
- Tack: Lower front corner of the sail
- Foot: Bottom of the sail
- Luff: Forward edge of the sail
- Leech: Back edge of the sail
- Clew: Bottom back corner of the sail
So now we speak the same language, let's dive into the real nitty gritty.
Basic sail shapes
Roughly speaking, there are actually just two sail shapes, so that's easy enough. You get to choose from:
- square rigged sails
- fore-and-aft rigged sails
I would definitely recommend fore-and-aft rigged sails. Square shaped sails are pretty outdated. The fore-and-aft rig offers unbeatable maneuverability, so that's what most sailing yachts use nowadays.

Square sails were used on Viking longships and are good at sailing downwind. They run from side to side. However, they're pretty useless upwind.
A fore-and-aft sail runs from the front of the mast to the stern. Fore-and-aft literally means 'in front and behind'. Boats with fore-and-aft rigged sails are better at sailing upwind and maneuvering in general. This type of sail was first used on Arabic boats.
As a beginner sailor I confuse the type of sail with rigging all the time. But I should cut myself some slack, because the rigging and sails on a boat are very closely related. They are all part of the sail plan .
A sail plan is made up of:
- Mast configuration - refers to the number of masts and where they are placed
- Sail type - refers to the sail shape and functionality
- Rig type - refers to the way these sails are set up on your boat
There are dozens of sails and hundreds of possible configurations (or sail plans).
For example, depending on your mast configuration, you can have extra headsails (which then are called staysails).
The shape of the sails depends on the rigging, so they overlap a bit. To keep it simple I'll first go over the different sail types based on the most common rig. I'll go over the other rig types later in the article.
Bermuda Sloop: the most common rig
Most modern small and mid-sized sailboats have a Bermuda sloop configuration . The sloop is one-masted and has two sails, which are front-and-aft rigged. This type of rig is also called a Marconi Rig. The Bermuda rig uses a triangular sail, with just one side of the sail attached to the mast.
The mainsail is in use most of the time. It can be reefed down, making it smaller depending on the wind conditions. It can be reefed down completely, which is more common in heavy weather. (If you didn't know already: reefing is skipper terms for rolling or folding down a sail.)
In very strong winds (above 30 knots), most sailors only use the headsail or switch to a trysail.
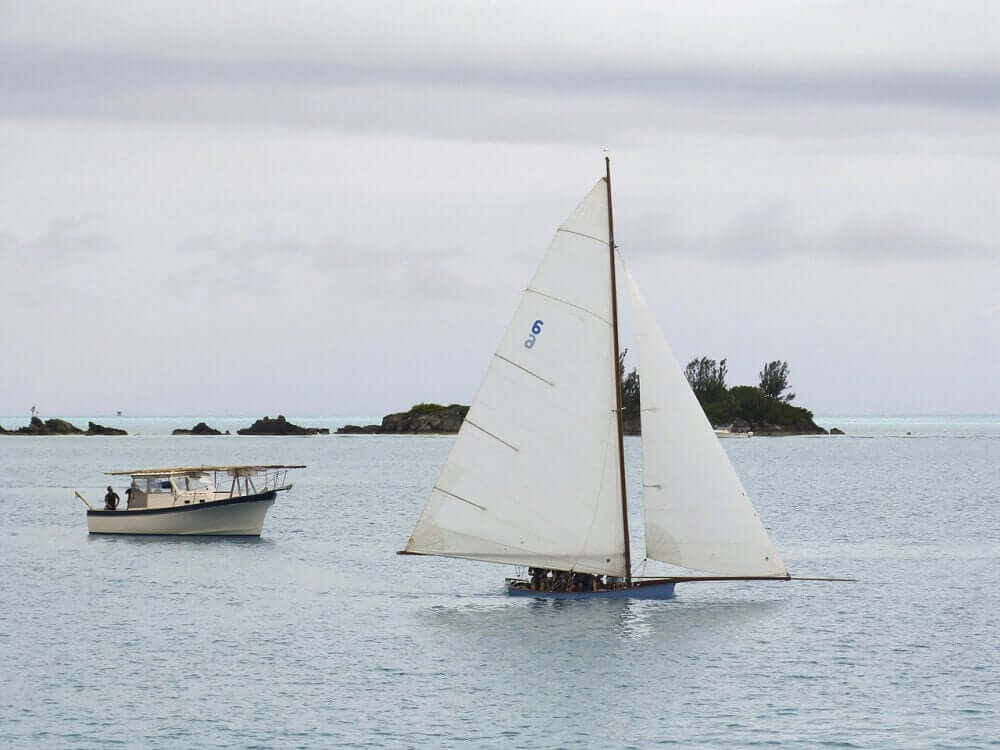
The headsail powers your bow, the mainsail powers your stern (rear). By having two sails, you can steer by using only your sails (in theory - it requires experience). In any case, two sails gives you better handling than one, but is still easy to operate.
Let's get to the actual sails. The mainsail is attached behind the mast and to the boom, running to the stern. There are multiple designs, but they actually don't differ that much. So the following list is a bit boring. Feel free to skip it or quickly glance over it.
- Square Top racing mainsail - has a high performance profile thanks to the square top, optional reef points
- Racing mainsail - made for speed, optional reef points
- Cruising mainsail - low-maintenance, easy to use, made to last. Generally have one or multiple reef points.
- Full-Batten Cruising mainsail - cruising mainsail with better shape control. Eliminates flogging. Full-length battens means the sail is reinforced over the entire length. Generally have one or multiple reef points.
- High Roach mainsail - crossover between square top racing and cruising mainsail, used mostly on cats and multihulls. Generally have one or multiple reef points.
- Mast Furling mainsail - sails specially made to roll up inside the mast - very convenient but less control; of sail shape. Have no reef points
- Boom Furling mainsail - sails specially made to roll up inside the boom. Have no reef points.
The headsail is the front sail in a front-and-aft rig. The sail is fixed on a stay (rope, wire or rod) which runs forward to the deck or bowsprit. It's almost always triangular (Dutch fishermen are known to use rectangular headsail). A triangular headsail is also called a jib .
Headsails can be attached in two ways:
- using roller furlings - the sail rolls around the headstay
- hank on - fixed attachment
Types of jibs:
Typically a sloop carries a regular jib as its headsail. It can also use a genoa.
- A jib is a triangular staysail set in front of the mast. It's the same size as the fore-triangle.
- A genoa is a large jib that overlaps the mainsail.
What's the purpose of a jib sail? A jib is used to improve handling and to increase sail area on a sailboat. This helps to increase speed. The jib gives control over the bow (front) of the ship, making it easier to maneuver the ship. The mainsail gives control over the stern of the ship. The jib is the headsail (frontsail) on a front-and-aft rig.
The size of the jib is generally indicated by a number - J1, 2, 3, and so on. The number tells us the attachment point. The order of attachment points may differ per sailmaker, so sometimes J1 is the largest jib (on the longest stay) and sometimes it's the smallest (on the shortest stay). Typically the J1 jib is the largest - and the J3 jib the smallest.
Most jibs are roller furling jibs: this means they are attached to a stay and can be reefed down single-handedly. If you have a roller furling you can reef down the jib to all three positions and don't need to carry different sizes.

Originally called the 'overlapping jib', the leech of the genoa extends aft of the mast. This increases speed in light and moderate winds. A genoa is larger than the total size of the fore-triangle. How large exactly is indicated by a percentage.
- A number 1 genoa is typically 155% (it used to be 180%)
- A number 2 genoa is typically 125-140%
Genoas are typically made from 1.5US/oz polyester spinnaker cloth, or very light laminate.

This is where it gets pretty interesting. You can use all kinds of sails to increase speed, handling, and performance for different weather conditions.
Some rules of thumb:
- Large sails are typically good for downwind use, small sails are good for upwind use.
- Large sails are good for weak winds (light air), small sails are good for strong winds (storms).
Downwind sails
Thanks to the front-and-aft rig sailboats are easier to maneuver, but they catch less wind as well. Downwind sails are used to offset this by using a large sail surface, pulling a sailboat downwind. They can be hanked on when needed and are typically balloon shaped.
Here are the most common downwind sails:
- Big gennaker
- Small gennaker
A free-flying sail that fills up with air, giving it a balloon shape. Spinnakers are generally colorful, which is why they look like kites. This downwind sail has the largest sail area, and it's capable of moving a boat with very light wind. They are amazing to use on trade wind routes, where they can help you make quick progress.
Spinnakers require special rigging. You need a special pole and track on your mast. You attach the sail at three points: in the mast head using a halyard, on a pole, and on a sheet.
The spinnaker is symmetrical, meaning the luff is as long as its leech. It's designed for broad reaching.

Gennaker or cruising spinnaker
The Gennaker is a cross between the genoa and the spinnaker. It has less downwind performance than the spinnaker. It is a bit smaller, making it slower, but also easier to handle - while it remains very capable. The cruising spinnaker is designed for broad reaching.
The gennaker is a smaller, asymmetric spinnaker that's doesn't require a pole or track on the mast. Like the spinnaker, and unlike the genoa, the gennaker is set flying. Asymmetric means its luff is longer than its leech.
You can get big and small gennakers (roughly 75% and 50% the size of a true spinnaker).
Also called ...
- the cruising spinnaker
- cruising chute
- pole-less spinnaker
- SpinDrifter
... it's all the same sail.

Light air sails
There's a bit of overlap between the downwind sails and light air sails. Downwind sails can be used as light air sails, but not all light air sails can be used downwind.
Here are the most common light air sails:
- Spinnaker and gennaker
Drifter reacher
Code zero reacher.
A drifter (also called a reacher) is a lightweight, larger genoa for use in light winds. It's roughly 150-170% the size of a genoa. It's made from very lightweight laminated spinnaker fabric (1.5US/oz).
Thanks to the extra sail area the sail offers better downwind performance than a genoa. It's generally made from lightweight nylon. Thanks to it's genoa characteristics the sail is easier to use than a cruising spinnaker.
The code zero reacher is officially a type of spinnaker, but it looks a lot like a large genoa. And that's exactly what it is: a hybrid cross between the genoa and the asymmetrical spinnaker (gennaker). The code zero however is designed for close reaching, making it much flatter than the spinnaker. It's about twice the size of a non-overlapping jib.

A windseeker is a small, free-flying staysail for super light air. It's tall and thin. It's freestanding, so it's not attached to the headstay. The tack attaches to a deck pad-eye. Use your spinnakers' halyard to raise it and tension the luff.
It's made from nylon or polyester spinnaker cloth (0.75 to 1.5US/oz).
It's designed to guide light air onto the lee side of the main sail, ensuring a more even, smooth flow of air.
Stormsails are stronger than regular sails, and are designed to handle winds of over 45 knots. You carry them to spare the mainsail. Sails
A storm jib is a small triangular staysail for use in heavy weather. If you participate in offshore racing you need a mandatory orange storm jib. It's part of ISAF's requirements.
A trysail is a storm replacement for the mainsail. It's small, triangular, and it uses a permanently attached pennant. This allows it to be set above the gooseneck. It's recommended to have a separate track on your mast for it - you don't want to fiddle around when you actually really need it to be raised ... now.

Why Use Different Sails At All?
You could just get the largest furling genoa and use it on all positions. So why would you actually use different types of sails?
The main answer to that is efficiency . Some situations require other characteristics.
Having a deeply reefed genoa isn't as efficient as having a small J3. The reef creates too much draft in the sail, which increases heeling. A reefed down mainsail in strong winds also increases heeling. So having dedicated (storm) sails is probably a good thing, especially if you're planning more demanding passages or crossings.
But it's not just strong winds, but also light winds that can cause problems. Heavy sails will just flap around like laundry in very light air. So you need more lightweight fabrics to get you moving.
What Are Sails Made Of?
The most used materials for sails nowadays are:
- Dacron - woven polyester
- woven nylon
- laminated fabrics - increasingly popular
Sails used to be made of linen. As you can imagine, this is terrible material on open seas. Sails were rotting due to UV and saltwater. In the 19th century linen was replaced by cotton.
It was only in the 20th century that sails were made from synthetic fibers, which were much stronger and durable. Up until the 1980s most sails were made from Dacron. Nowadays, laminates using yellow aramids, Black Technora, carbon fiber and Spectra yarns are more and more used.
Laminates are as strong as Dacron, but a lot lighter - which matters with sails weighing up to 100 kg (220 pounds).
By the way: we think that Viking sails were made from wool and leather, which is quite impressive if you ask me.
In this section of the article I give you a quick and dirty summary of different sail plans or rig types which will help you to identify boats quickly. But if you want to really understand it clearly, I really recommend you read part 2 of this series, which is all about different rig types.
You can't simply count the number of masts to identify rig type But you can identify any rig type if you know what to look for. We've created an entire system for recognizing rig types. Let us walk you through it. Read all about sail rig types
As I've said earlier, there are two major rig types: square rigged and fore-and-aft. We can divide the fore-and-aft rigs into three groups:
- Bermuda rig (we have talked about this one the whole time) - has a three-sided mainsail
- Gaff rig - has a four-sided mainsail, the head of the mainsail is guided by a gaff
- Lateen rig - has a three-sided mainsail on a long yard

There are roughly four types of boats:
- one masted boats - sloop, cutter
- two masted boats - ketch, schooner, brig
- three masted - barque
- fully rigged or ship rigged - tall ship
Everything with four masts is called a (tall) ship. I think it's outside the scope of this article, but I have written a comprehensive guide to rigging. I'll leave the three and four-masted rigs for now. If you want to know more, I encourage you to read part 2 of this series.
One-masted rigs
Boats with one mast can have either one sail, two sails, or three or more sails.
The 3 most common one-masted rigs are:
- Cat - one mast, one sail
- Sloop - one mast, two sails
- Cutter - one mast, three or more sails
1. Gaff Cat

2. Gaff Sloop
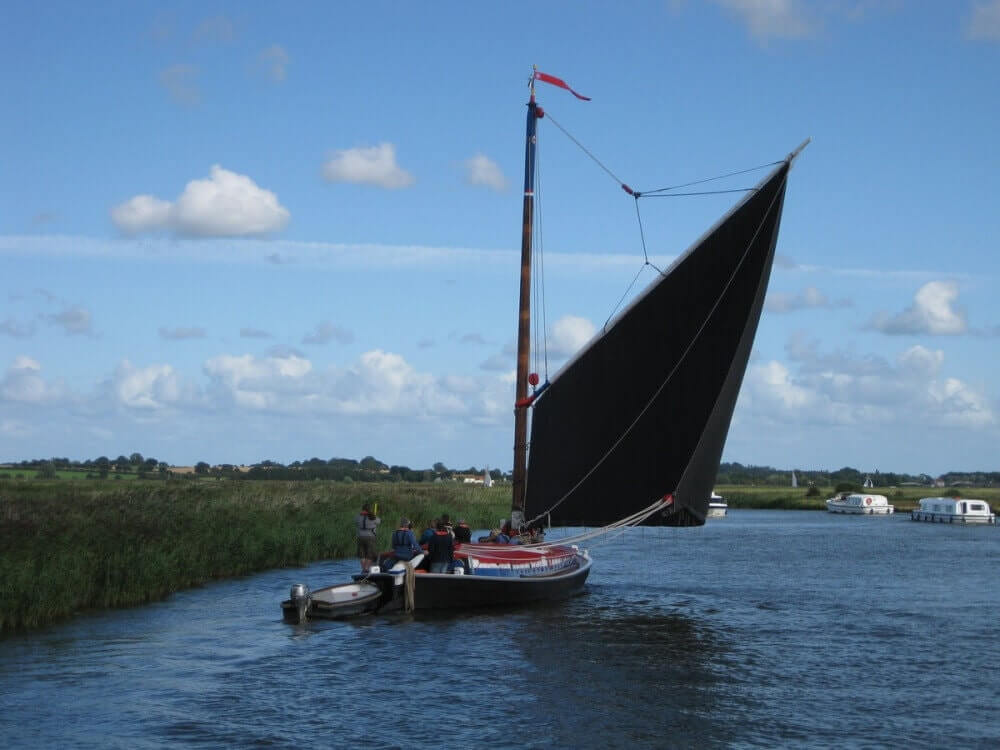
Two-masted rigs
Two-masted boats can have an extra mast in front or behind the main mast. Behind (aft of) the main mast is called a mizzen mast . In front of the main mast is called a foremast .
The 5 most common two-masted rigs are:
- Lugger - two masts (mizzen), with lugsail (cross between gaff rig and lateen rig) on both masts
- Yawl - two masts (mizzen), fore-and-aft rigged on both masts. Main mast much taller than mizzen. Mizzen without mainsail.
- Ketch - two masts (mizzen), fore-and-aft rigged on both masts. Main mast with only slightly smaller mizzen. Mizzen has mainsail.
- Schooner - two masts (foremast), generally gaff rig on both masts. Main mast with only slightly smaller foremast. Sometimes build with three masts, up to seven in the age of sail.
- Brig - two masts (foremast), partially square-rigged. Main mast carries small lateen rigged sail.

4. Schooner

5. Brigantine

This article is part 1 of a series about sails and rig types If you want to read on and learn to identify any sail plans and rig type, we've found a series of questions that will help you do that quickly. Read all about recognizing rig types
Related Questions
What is the difference between a gennaker & spinnaker? Typically, a gennaker is smaller than a spinnaker. Unlike a spinnaker, a gennaker isn't symmetric. It's asymmetric like a genoa. It is however rigged like a spinnaker; it's not attached to the forestay (like a jib or a genoa). It's a downwind sail, and a cross between the genoa and the spinnaker (hence the name).
What is a Yankee sail? A Yankee sail is a jib with a high-cut clew of about 3' above the boom. A higher-clewed jib is good for reaching and is better in high waves, preventing the waves crash into the jibs foot. Yankee jibs are mostly used on traditional sailboats.
How much does a sail weigh? Sails weigh anywhere between 4.5-155 lbs (2-70 kg). The reason is that weight goes up exponentially with size. Small boats carry smaller sails (100 sq. ft.) made from thinner cloth (3.5 oz). Large racing yachts can carry sails of up to 400 sq. ft., made from heavy fabric (14 oz), totaling at 155 lbs (70 kg).
What's the difference between a headsail and a staysail? The headsail is the most forward of the staysails. A boat can only have one headsail, but it can have multiple staysails. Every staysail is attached to a forward running stay. However, not every staysail is located at the bow. A stay can run from the mizzen mast to the main mast as well.
What is a mizzenmast? A mizzenmast is the mast aft of the main mast (behind; at the stern) in a two or three-masted sailing rig. The mizzenmast is shorter than the main mast. It may carry a mainsail, for example with a ketch or lugger. It sometimes doesn't carry a mainsail, for example with a yawl, allowing it to be much shorter.
Special thanks to the following people for letting me use their quality photos: Bill Abbott - True Spinnaker with pole - CC BY-SA 2.0 lotsemann - Volvo Ocean Race Alvimedica and the Code Zero versus SCA and the J1 - CC BY-SA 2.0 Lisa Bat - US Naval Academy Trysail and Storm Jib dry fit - CC BY-SA 2.0 Mike Powell - White gaff cat - CC BY-SA 2.0 Anne Burgess - Lugger The Reaper at Scottish Traditional Boat Festival
Hi, I stumbled upon your page and couldn’t help but notice some mistakes in your description of spinnakers and gennakers. First of all, in the main photo on top of this page the small yacht is sailing a spinnaker, not a gennaker. If you look closely you can see the spinnaker pole standing on the mast, visible between the main and headsail. Further down, the discription of the picture with the two German dinghies is incorrect. They are sailing spinnakers, on a spinnaker pole. In the farthest boat, you can see a small piece of the pole. If needed I can give you the details on the difference between gennakers and spinnakers correctly?
Hi Shawn, I am living in Utrecht I have an old gulf 32 and I am sailing in merkmeer I find your articles very helpful Thanks
Thank you for helping me under stand all the sails there names and what there functions were and how to use them. I am planning to build a trimaran 30’ what would be the best sails to have I plan to be coastal sailing with it. Thank you
Hey Comrade!
Well done with your master piece blogging. Just a small feedback. “The jib gives control over the bow of the ship, making it easier to maneuver the ship. The mainsail gives control over the stern of the ship.” Can you please first tell the different part of a sail boat earlier and then talk about bow and stern later in the paragraph. A reader has no clue on the newly introduced terms. It helps to keep laser focused and not forget main concepts.
Shawn, I am currently reading How to sail around the World” by Hal Roth. Yes, I want to sail around the world. His book is truly grounded in real world experience but like a lot of very knowledgable people discussing their area of expertise, Hal uses a lot of terms that I probably should have known but didn’t, until now. I am now off to read your second article. Thank You for this very enlightening article on Sail types and their uses.
Shawn Buckles
HI CVB, that’s a cool plan. Thanks, I really love to hear that. I’m happy that it was helpful to you and I hope you are of to a great start for your new adventure!
Hi GOWTHAM, thanks for the tip, I sometimes forget I haven’t specified the new term. I’ve added it to the article.
Nice article and video; however, you’re mixing up the spinnaker and the gennaker.
A started out with a question. What distinguishes a brig from a schooner? Which in turn led to follow-up questions: I know there are Bermuda rigs and Latin rig, are there more? Which in turn led to further questions, and further, and further… This site answers them all. Wonderful work. Thank you.
Great post and video! One thing was I was surprised how little you mentioned the Ketch here and not at all in the video or chart, and your sample image is a large ship with many sails. Some may think Ketch’s are uncommon, old fashioned or only for large boats. Actually Ketch’s are quite common for cruisers and live-aboards, especially since they often result in a center cockpit layout which makes for a very nice aft stateroom inside. These are almost exclusively the boats we are looking at, so I was surprised you glossed over them.
Love the article and am finding it quite informative.
While I know it may seem obvious to 99% of your readers, I wish you had defined the terms “upwind” and “downwind.” I’m in the 1% that isn’t sure which one means “with the wind” (or in the direction the wind is blowing) and which one means “against the wind” (or opposite to the way the wind is blowing.)
paul adriaan kleimeer
like in all fields of syntax and terminology the terms are colouual meaning local and then spead as the technology spread so an history lesson gives a floral bouque its colour and in the case of notical terms span culture and history adds an detail that bring reverence to the study simply more memorable.
Hi, I have a small yacht sail which was left in my lock-up over 30 years ago I basically know nothing about sails and wondered if you could spread any light as to the make and use of said sail. Someone said it was probably originally from a Wayfayer wooden yacht but wasn’t sure. Any info would be must appreciated and indeed if would be of any use to your followers? I can provide pics but don’t see how to include them at present
kind regards
Leave a comment
You may also like, 17 sailboat types explained: how to recognize them.
Ever wondered what type of sailboat you're looking at? Identifying sailboats isn't hard, you just have to know what to look for. In this article, I'll help you.

How Much Sailboats Cost On Average (380+ Prices Compared)
Own your first boat within a year on any budget.
A sailboat doesn't have to be expensive if you know what you're doing. If you want to learn how to make your sailing dream reality within a year, leave your email and I'll send you free updates . I don't like spam - I will only send helpful content.
Ready to Own Your First Boat?
Just tell us the best email address to send your tips to:
Log in to Markel
- US Broker Agent
US customer login
Log in to make a payment, view policy documents, download proof of insurance, change your communication and billing preferences, and more.
Log in to access admitted lines for workers compensation, business owners, miscellaneous errors and omissions, accident medical, general liability, commercial property, farm property, and equine mortality.
Markel Online
Log in to access non-admitted lines for contract binding property & casualty, excess, and commercial pollution liability.
MAGIC Personal Lines portal
Log in to access personal lines products including marine, specialty personal property, powersports, bicycle, and event insurance.
Markel Surety
Log in to access Markel's surety products.

Basic tips to rigging a sailboat
Preparing for your first sail it is recommended you take a class to learn about rigging your sailboat. until then, here are some helpful tips to keep in mind when rigging your sailboat., tips to rigging your sails.
The first time you hoist your sails you may want to raise them while you are docked. This will help you focus and practice without worrying about where you are headed. Make sure the bow of your boat is positioned into the wind.
A halyard is a line that pulls a sail up. Each sail has its own halyard for hoisting. Lower your halyards from the mast of the boat and undo them. Make sure that both ends of the halyards are secure – attached to something or in your hand.
The first sail to rig is the mainsail, which is attached to the back of the mast. You will connect a halyard to the head of the sail by knotting it or some sailboats have a plastic stopper to lock it in place. Put the top of the sail in the mast track and pull on the halyard. You may need two people to do this, one to feed the mainsail into the mast and one to pull the halyard. The sail will usually hoist easily by pulling down on the halyard. If it gets caught in something, lower the sail a little to clear it and then raise it again. The mainsail may get harder to hoist when it hits the last two feet. At this point, you’ll need to pull harder on the halyard until it completely stops. Once it is up, tie the halyard around a cleat. Coil up the extra line. Always make sure your head is out of the way of the boom (the part that holds the bottom of the mainsail), as it will swing side to side in the wind.
This is the triangular sail at the bow of the boat. You will rig it before you leave the dock, and it is often raised after you are underway. The tack of the jib or bottom corner attaches to a fitting on the deck with a shackle. You will then connect the jib to the forestay with clips or hanks. Now attach the head of the jib to the jib halyard with a shackle and split ring. Tie each jib sheet to the clew on both sides of the boat with a figure eight stopper knot to secure them in place. You will find that the jib is much simpler to hoist than the mainsail.
We hope these basic tips help you rig your sailboat safely and properly. For further protection on the water, be sure to check out Markel boat insurance. Markel offers specialized boat insurance that protects on (and off) of the water.
Find a licensed Markel Marine agent in your area, and start protecting your boat today!
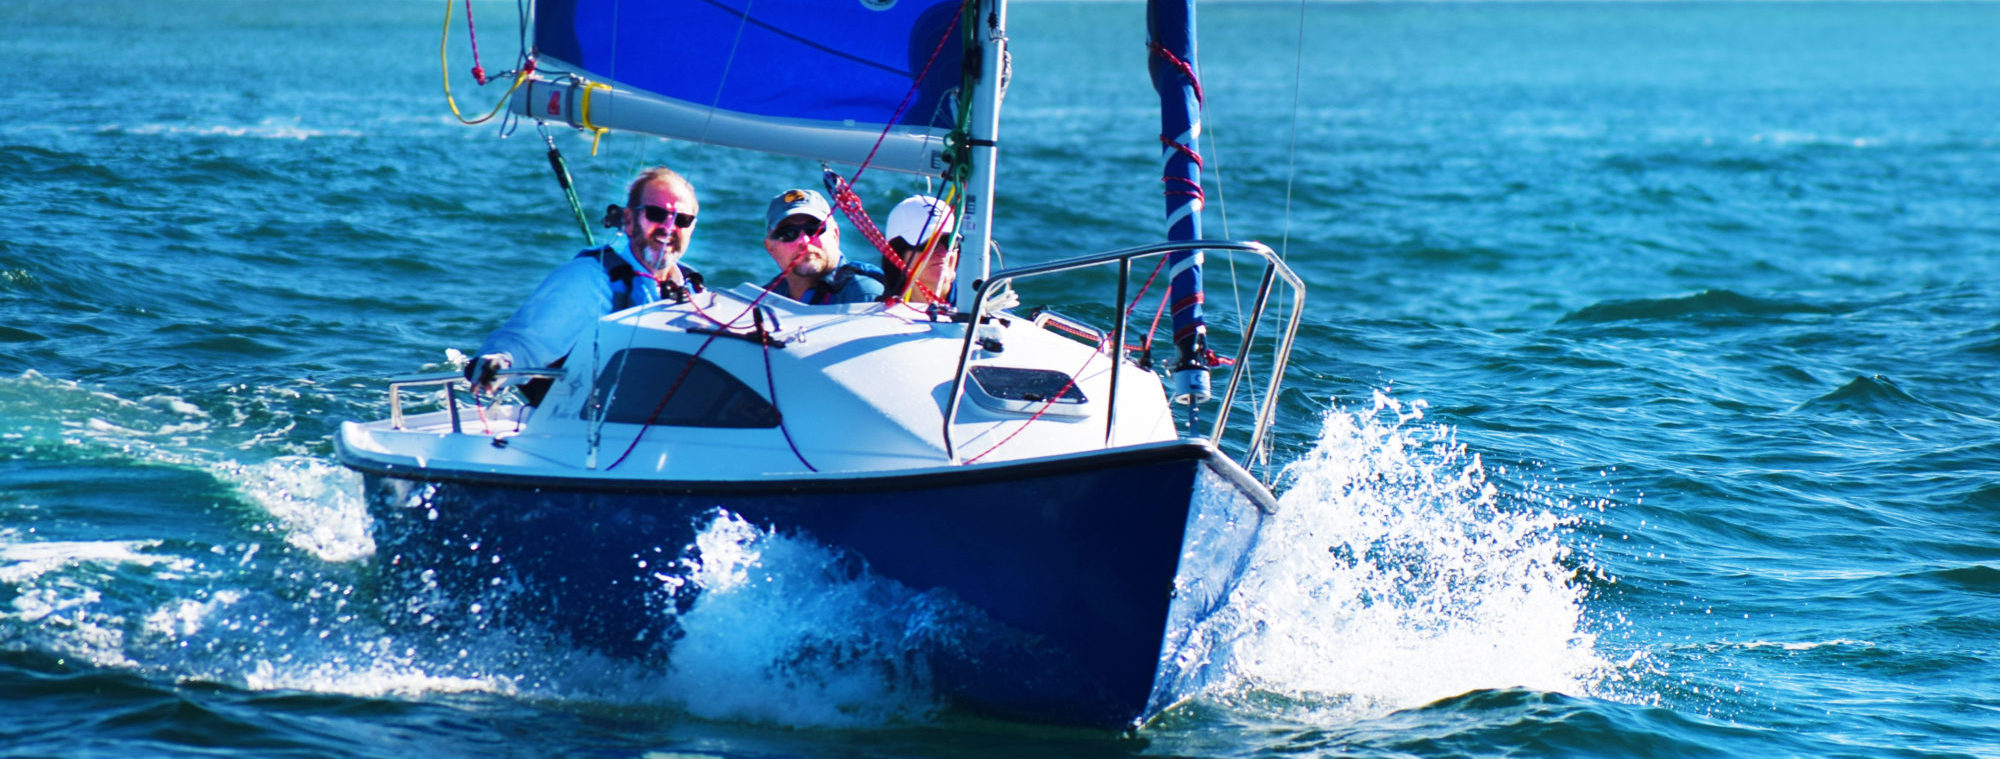
Ventura Sport Boats
Pocket Cruising Sailboats
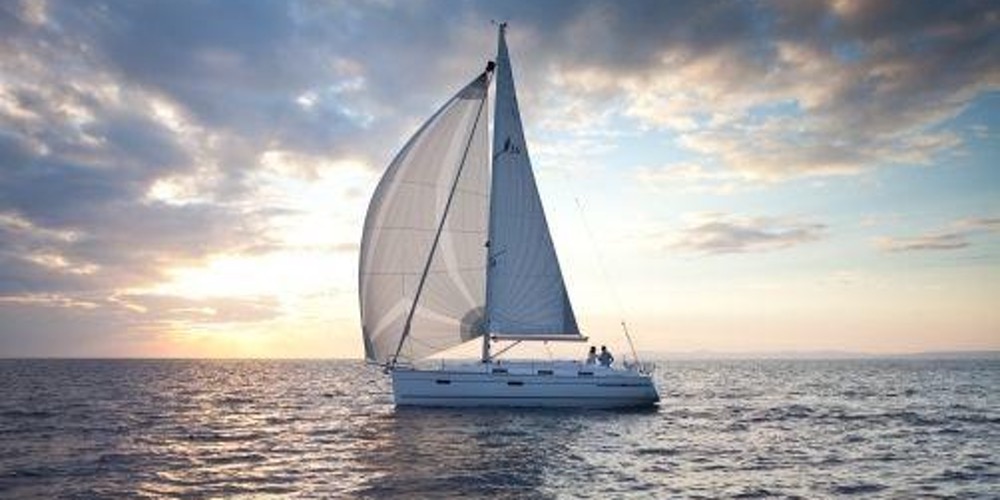
Sailing Basics 101
What every beginning sailor needs to know:.
The process of sailing may look like something that’s fairly effortless but it actually requires an extensive amount of management. Sailboating is a skill that can definitely be learned. In order to master the direction that sails can take you, it’s very important that you start off small. A small but manageable vessel can help you in the process of learning the basics. With enough training, you can control even larger vessels in the future.
Sailing basics for beginners:
There are a number of sailing fundamentals that many beginners start out with during some of their early days out on the water. By mastering some of these basics it’s possible to start building on your knowledge and practicing so that these basics come naturally:
Understanding the physics of sailing:
Being able to picture the physics of the wind on the boat can play a powerful role in sailing. One of the fundamentals of sailing is positioning the sale in the right direction as the wind so that the boat can continually go forward and harness its power. Knowing the way that a sailboat will slide if the wind is not centered in the sail and how to appropriately stabilize a sailing vessel is very important. When you can picture the vessel in your mind as you are sailing along, the fundamentals of sailing become clearer.
The points of a sail:
Being able to recognize the points of a sail and the angle is another element of sailing that you will need to master so that you can harness the full power of the wind. Being able to position the sail correctly according to the points and angle of the sail is a huge aspect of proper navigation and just pointing the vessel where it needs to go.
Knowing how to use a life jacket, how to properly anchor the vessel, what to do if there’s a fire and other emergency procedures should always be covered before you go out on the water. Even something as simple as knowing where the radio is could help to save your life in an emergency.
Navigating:
As soon as you learn the basics of maneuvering a sailboat, navigating will also become one of the basic items included in the fundamentals of sailing. As soon as you get away from the shore, utilizing GPS technology or having a method of navigation remains important.
Basic sailing terms:
In order to probably learn how to sail, it’s very likely that you may spend some time in a classroom setting or listening to an experienced captain. Understanding some of the basic sailing terms can make sure that you have a better understanding of the concepts that someone may be trying to explain to you. Here is some of the basic sailing terminology that you might hear during your instruction:
This is a piece of sailboat terminology that describes the back of the ship.
This describes the front of the ship.
This is the right-hand side of the boat as you are facing the bow while standing in the boat.
Port is the left-hand side of the boat while you are facing the bow and standing inside of it.
This term refers to the main direction that the wind is blowing and making the windward direction means moving with the wind.
This is the direct opposite of the Windward direction and often given as a guide when a boat is moving into the wind.
This is a mechanism beneath the boat that is usually flat and design that of a strong material. The rudder is connected to a mechanical device on the top of the ship that controls its direction back and forth. Smaller sailboats can control this rudder with a direct mechanism whereas larger sailboats have a full-sized wheel. The rudder directs the vessel by displacing water like a paddle.
This is the main component point where the sail is raised.
This is the horizontal pole that extends out from the mast for adjusting the direction of the sail.
This is a maneuver that involves turning the bow of the boat into the wind so that it changes from one side of the boat to the other side.
This is an action in which the stern of the boat will go through the wind changing the wind from one side to the other. Whenever a tack or jib occurs the boom will have to shift in order to catch the wind on the new side.
Sailing gear:
What you need to pack every trip..
In order to be comfortable while you are out on the water, it’s important that you pack the right items to go sailing. There are a number of items that you can take with you on the water that can really improve comfort. Whether you are packing up for a lesson or going out in a vessel for the first time with friends here are some items that you won’t want to forget:
A sailor outfit:
The wind will be a factor in any type of sailing vessel. Having the right water and windproof outfit will help to make sure that you can stay comfortable all day. A sailing outfit covers exposed skin while you are out on the water. This can help by stopping a nasty sunburn from occurring. Make sure that you pick out a comfortable sailor outfit that consists of a windbreaker and waterproof pants. A life jacket is also generally an excellent idea as part of your sailor outfit.
Sailing shoes:
Specific nonslip sailing shoes are a fantastic idea out on the water. There is always a chance that you may have to act quickly especially in high winds. It’s important to have the right shoes on so that you can move quickly across the sailing vessel. This will help keep you from tripping or getting hit by some of the rigging in a high wind situation.
Sailing shorts:
These shorts are actually a set of pants that can zip off and are extremely helpful. Sailing shorts are a great idea on the warmer days. They can also serve swim trunks as well if you wanted to take a dip off the boat.
Sailing gloves:
Until you get more experienced with knots and handling a sailing vessel, it’s a good idea to wear gloves. Rope burn can be quite serious especially if the winds pick up suddenly. When you are handling any of the rigging, wearing specialty gloves could help to save your hands from injury.
Where can a beginner learn to sail?
Learning how to sail could be a skill that you can take with you for your lifetime. The process of learning how to sail is usually best done with someone that has been doing it for years. To receive your basic sailing instructions there are some great ways to proceed:
Sailing School:
A classroom setting and learning the basic fundamentals of sailing before you go out on the water is a great way to learn the basics of sailing. You get the chance to try out a number of things on the water under safe conditions while learning all of the applicable terms you may need to know. Sailing school is one of the safest ways that you can learn to sail and from experienced instructors.
Book one-on-one lessons:
if you would rather learn how to sail a smaller boat, taking one-on-one lessons is usually a much better option. An experienced captain can provide you with the expertise that you need to eventually sail a smaller boat on your own. These types of lessons often take place over many appointments. But can be one of the best ways that you will feel extremely safe out on the water.
Basic instructions from a friend:
If you would rather learn from someone you know, it’s possible to go out and sail with a friend or a family member. Doing this could allow you to pick up some of the basics of sailing comfortably without pressure.
Volunteering with a crew:
Larger sailing vessels often require many people to keep them up and running. Putting a classified ad out and volunteering with a crew on a larger boat could teach you all the basic sailing instructions that you need to use a sailboat in exchange for help in running the sailboat over the day or chartered journey.
Learning the process of sailing can be a skill that can stay with you for life. Sailing is a popular pastime and mastering the process of sailing early on could allow you to try out several different vessels like small catamarans, raising goats and even large sailing yachts. Taking lessons is usually one of the best places to get started when sailing for the first time. With enough time and effort, you can become an experienced sailboating professional, and feel far more at ease knowing that you will never be stranded due to a lack of control or knowledge.

Learn How To Sail A Sunfish Like a Pro: Essential Tips and Techniques
Alex Morgan
Sailing a Sunfish sailboat can be an exhilarating and rewarding experience for water enthusiasts. Whether you’re a beginner or a seasoned sailor, mastering the art of sailing a Sunfish requires knowledge, practice, and a little bit of adventure. In this comprehensive guide, we will take you through the essential steps and techniques involved in sailing a Sunfish.
The Sunfish sailboat is a popular recreational single-handed dinghy known for its simplicity, maneuverability, and versatility. Before getting on the water, it is crucial to understand the key features of the Sunfish sailboat, such as its design, hull construction, and rigging components.
To ensure a safe and enjoyable sailing experience, proper preparation is essential. This includes checking the equipment and safety gear to ensure they are in good condition and preparing the Sunfish sailboat by inspecting the hull, mast, sail, and rudder.
Mastering the basic sailing techniques is the foundation of sailing a Sunfish. This involves rigging the sailboat, understanding wind direction, adjusting sail trim, and effectively steering and controlling the rudder.
For those looking to take their sailing skills to the next level, advanced techniques such as sail positioning and shaping, tacking and jibing, and harnessing the power of the wind will be explored. These skills allow for greater control, speed, and maneuverability while sailing.
Safety should always be a top priority when sailing. We will provide important safety tips and precautions to ensure your well-being on the water, including proper use of personal flotation devices and understanding weather conditions.
We will discuss common mistakes to avoid while sailing a Sunfish, such as improper weight distribution, overestimating wind conditions, and neglecting maintenance and equipment checks.
By following this comprehensive guide, both novice and experienced sailors can enhance their Sunfish sailing skills, gain confidence on the water, and enjoy the thrill of sailing a Sunfish to the fullest. So, get ready to set sail and embark on an exciting journey with your Sunfish sailboat.
Key takeaway:
- Understanding the Sunfish Sailboat: Familiarize yourself with the key features of a Sunfish sailboat to ensure a safe and enjoyable sailing experience.
- Master the basics: Learn how to properly rig the Sunfish sailboat, understand wind direction and sail trim, and control the rudder for basic sailing techniques.
- Advance your skills: Explore sail positioning and shaping, practice tacking and jibing, and harness the power of the wind to enhance your sailing abilities.
Understanding the Sunfish Sailboat
Get ready to embark on an exciting journey into the world of sunfish sailboats ! In this section, we’ll dive deep into understanding the ins and outs of these magnificent vessels. From exploring the key features that make the sunfish sailboat a true marvel, to discovering the secrets of its exceptional performance, we’ll uncover everything you need to know to become a knowledgeable sailor. So buckle up and get ready to set sail with us!
Key Features of a Sunfish Sailboat
The hull of a Sunfish sailboat is fiberglass, making it lightweight and easy to maneuver. It has a triangular lateen sail that can be easily raised and lowered. The mast is aluminum, providing durability and stability. A daggerboard is used for lateral resistance and can be easily raised or lowered to adjust direction. The cockpit is spacious enough for one or two people to sit or move around comfortably. It has a simple rigging system, allowing for quick and easy setup and takedown. The Sunfish sailboat has a self-bailing cockpit, meaning water automatically drains out for enhanced safety. It has a kick-up rudder, which can be lifted out of the water to avoid obstacles or shallow areas. Known for stability and ease of handling, the Sunfish sailboat is suitable for beginners and experienced sailors. It can be easily transported on top of a car or trailer, making it convenient for sailing in different locations.
The Sunfish sailboat was introduced in 1952 by Alex Bryan and Cortlandt Heyniger . They aimed to create a small, affordable, and versatile sailboat for recreational sailing. The design quickly gained popularity, and millions have been sold worldwide since then. Its accessibility, simplicity, and reliability have made it a favorite choice for beginners and seasoned sailors. Over the years, the Sunfish sailboat has undergone minor design modifications but has remained true to its principles of stability, easy handling, and fun on the water. Today, it continues to be a beloved sailboat for individuals and families looking to enjoy the thrill of sailing in a compact and budget-friendly vessel.
Preparing for Sailing
Want to set sail on a Sunfish ? In this section, we’ll cover all the essential steps to get you ready for a smooth sailing experience. From checking your equipment and safety gear to preparing the Sunfish sailboat , we’ve got you covered. So, grab your sunscreen and let’s dive into the preparations that will ensure a fantastic time out on the water!
Checking Equipment and Safety Gear
Checking Equipment and Safety Gear is essential before setting sail on a Sunfish sailboat. Here is a comprehensive list of steps to follow:
1. Inspect life jackets: Ensure enough life jackets onboard for each person in good condition with no tears or damages.
2. Check safety lines: Verify securely attached and in good working condition.
3. Examine anchor and rope: Make sure anchor securely fastened and rope in good condition, free from fraying or knots.
4. Test horn or whistle: Ensure functioning properly and can produce a loud sound to signal for help if needed.
5. Inspect first aid kit: Check fully stocked with essential items such as bandages, antiseptic wipes, and pain relievers.
6. Verify presence of fire extinguisher: Confirm readily available on the boat and within expiry date.
7. Check communication devices: Test VHF radio or other communication devices onboard to ensure proper working order.
8. Ensure navigation lights are functional: Confirm working correctly, especially if planning to sail at night.
9. Check for any leaks: Inspect boat’s hull for any leaks or damages that could affect buoyancy.
10. Examine rigging and sails: Inspect for signs of wear, tear, or damage. Replace or repair as necessary.
True story: Once, while preparing to sail on a Sunfish, a sailor discovered a tear in their life jacket during the equipment check. Thanks to their thorough inspection, they promptly replaced the damaged life jacket and ensured everyone’s safety on the water. Remember, checking equipment and safety gear is crucial for a safe and enjoyable sailing experience.
Preparing the Sunfish Sailboat
To prepare the Sunfish sailboat, follow these steps:
1. Inspect the hull for damage or cracks. Repair or replace damaged parts.
2. Check the mast and boom for wear or damage. Ensure they are securely attached.
3. Attach the main sail to the halyard and raise it up the mast. Properly tension the sail.
4. Attach the boom to the mast and secure the mainsail to the boom using sail ties.
5. Check the daggerboard and rudder to ensure they are securely in place.
6. Attach the rudder to the stern of the boat and ensure it moves freely.
7. Inspect the lines and rigging to ensure they are in good condition and properly rigged.
8. Check the bailer and mast flotation to ensure they are functioning properly.
9. Attach any necessary safety equipment, such as a life jacket or whistle.
10. Double-check that all equipment is secure and properly fastened.
The Sunfish sailboat , known for its simplicity, affordability, and ease of use, can be prepared by following these steps. It was designed by Alcort, Inc. in the United States during the early 1950s and has gained popularity ever since. The design of the Sunfish sailboat has remained largely unchanged, with minor modifications made for better performance. It is a popular choice among sailors of all skill levels due to its lightweight design and stable hull, which make it suitable for racing, recreational sailing, and teaching sailing techniques. With its timeless design and versatility on the water, the Sunfish is a beloved classic in the world of sailboats.
Basic Sailing Techniques
Mastering the art of sailing a Sunfish requires a deep understanding of basic sailing techniques. From rigging the Sunfish sailboat to navigating wind direction and sail trim, and even mastering the art of steering and controlling the rudder , each sub-section in this voyage of discovery will unlock the essential skills needed to glide smoothly across the water. So grab your lifejacket and let’s embark on this thrilling adventure of Sunfish sailing mastery .
Rigging the Sunfish Sailboat
Rigging the Sunfish Sailboat is necessary before sailing. Follow these steps:
- Attach the mast to the mast step at the front of the Sunfish sailboat.
- Secure the sail to the halyard and hoist it up the mast, ensuring proper attachment.
- Connect the boom to the gooseneck at the bottom of the mast.
- Attach the mainsheet to the rear of the boom and thread it through the blocks on the Sunfish.
- Connect the mainsheet to the traveler, a sliding bar at the back of the boat.
- Attach the rudder to the back of the Sunfish, making sure it is securely in place.
- Check all the lines and rigging to ensure proper tightening and securing.
Once the Sunfish sailboat is rigged, you can start your sailing adventure. Always double-check your rigging before going on the water and familiarize yourself with the boat’s operation. Remember that weather conditions can impact sailing, so adjust the sail trim accordingly. Happy sailing!
Understanding Wind Direction and Sail Trim
Understanding wind direction and sail trim is crucial for successful sailing of a Sunfish sailboat. Adjusting the sail trim based on wind direction is key to optimizing the boat’s performance.
To determine wind direction, look for visual cues such as flags, water ripples, or movement of tree branches. It’s important to remember that wind can change direction, so regularly assess its angle relative to your boat.
Once wind direction is identified, adjust the sail trim accordingly. For effective upwind sailing, tightly trim the sail to catch more wind, creating lift and propelling the boat forward. Conversely, when sailing downwind, ease the sail to maximize the catching area and take advantage of the force of the wind pushing from behind.
Sail trim requires continuous monitoring and adjustment as the wind changes. Experimenting with different trim settings will help you find the optimal balance between speed and control .
Understanding wind direction and sail trim improves with practice and experience. Sailing and observing wind behavior will enhance your ability to instinctively trim the sail and enjoy a smooth and exhilarating sailing experience.
Steering and Controlling the Rudder
- 1. Check rudder position: Before steering the Sunfish sailboat, ensure that the rudder is centered, aligned with the boat’s keel, and straight.
- 2. Hold tiller extension: Firmly grasp the tiller extension, a long handle connected to the rudder. Maintain a comfortable grip while allowing for movement and flexibility.
- 3. Understand tiller and rudder relationship: The tiller is connected to the rudder, and any tiller movement directly affects the rudder’s position. Moving the tiller to the right turns the rudder right, and moving the tiller to the left turns the rudder left.
- 4. Adjust rudder angle: To steer the Sunfish sailboat, adjust the rudder angle. Push the tiller extension to the left to turn right, and push it to the right to turn left.
- 5. Maintain balance and stability: When steering and controlling the rudder, maintain balance and stability on the sailboat. Distribute weight evenly, stay centered in the boat, and make subtle adjustments for control.
Practice steering and controlling the rudder in different weather conditions and sailboat speeds to enhance proficiency. Through practice, you will develop a better understanding of effectively maneuvering the Sunfish sailboat.
Advanced Sailing Skills
Mastering the art of sailing a Sunfish requires more than just the basics. In this section, we’ll dive into advanced sailing skills that will take your Sunfish adventures to the next level. Discover the secrets of effective sail positioning and shaping , the art of tacking and jibing with finesse, and how to truly harness the power of the wind . Get ready to elevate your sailing game and navigate the waters with confidence.
Sail Positioning and Shaping
When sailing a Sunfish, proper sail positioning and shaping are key to efficient sailing. Consider the following factors:
– Wind direction: Position the sail perpendicular to the wind for maximum power.
– Sail shape: Adjust the sail’s shape using the cunningham, outhaul, and boomvang control lines.
– Cunningham: Tighten the cunningham to flatten the sail and reduce draft, especially in strong winds or for better upwind performance.
– Outhaul: Adjust the outhaul to control tension on the foot of the sail. Tightening it flattens the sail for increased speed and control in stronger winds.
– Boomvang: Properly adjust the boomvang to control tension on the leech of the sail and achieve optimal sail shape and control.
– Weight distribution: Positioning your body weight correctly on the boat is crucial for stability and performance. Adjust your position to maintain control and balance.
– Foot position: Properly position your feet on the hiking straps to balance and stabilize the boat. This allows for necessary sail adjustments and effective boat control.
– Continuously observe the sail and make necessary adjustments to adapt to changing wind conditions and optimize performance.
Mastering sail positioning and shaping in Sunfish sailing can greatly enhance your sailing experience and improve overall performance on the water.
Tacking and Jibing
– Prepare the Sunfish sailboat for tacking or jibing by trimming the sail and maintaining a steady speed. Begin the maneuver by turning the bow of the boat into the wind and crossing to the other side. Release the sail as the boat turns to make the turn smoother. Change sides on the boat to balance the weight and aid in the turn. Quickly switch the sail to the new side as the boat completes the turn and the wind fills the sail. Pull in the sail and adjust the trim for the desired speed and direction.
For jibing , turn the stern of the boat through the wind to change the direction. Prepare to release the sail as the boat turns and let it swing across. Cross over to the opposite side of the boat for balance during the turn. Guide the sail smoothly to the new side and adjust the trim accordingly. Continuously monitor the wind and make minor adjustments to maintain control and maximize efficiency.
Harnessing the Power of the Wind
Harnessing the Power of the Wind is crucial for successful Sunfish sailing. Here are some key points to consider:
1. Positioning the sail: Properly position the sail to catch the wind and propel the boat forward. Adjust the sail based on the wind direction and intensity.
2. Sail trim: Maintain proper sail trim to optimize wind capture. Adjust the sheet to keep it taut but not too tight. Watch for signs of luffing or flapping, which indicate insufficient use of wind power.
3. Using the telltales: Utilize the telltales on the sail to determine wind flow across its surface. The position and direction of the telltales help gauge proper sail trim. Adjust the sail to maximize wind efficiency.
4. Feathering: Reduce wind resistance and maintain forward momentum in strong winds by angling the sail away from the wind. This technique prevents excessive heeling and maintains control over the boat.
5. Understanding gusts and lulls: Be aware of changes in wind intensity. In gusts, loosen the sail to prevent overpowering. In lulls, adjust the sail to catch any available wind. Adapting to changing wind conditions improves overall sailing performance.
By implementing these techniques, you can effectively harness the power of the wind during your Sunfish sailing adventures. Practice and experience will improve your understanding of wind dynamics and enhance your sailing skills. Enjoy the exhilaration of harnessing nature’s force and explore the open water with confidence.
Safety Tips and Precautions
- Always prioritize safety when sailing a Sunfish by following these safety tips and precautions.
- Check the weather forecast before setting sail to ensure a safe and enjoyable experience.
- Before launching your Sunfish, inspect it for damages or leaks to prevent any potential accidents.
- To stay within the rules and regulations , familiarize yourself with the sailing rules of your location.
- Be mindful of your surroundings and keep an eye out for other boats or obstacles in the water to maintain a safe voyage.
- Keep a whistle or horn on board so you can easily signal for help in case of emergencies.
- Stay hydrated during your sailing trip by bringing enough water for your journey.
- Protect yourself from the sun’s harmful rays by wearing sunscreen and a hat.
Always prioritize safety when sailing a Sunfish and follow these precautions for a pleasant and secure sailing experience.
Common Mistakes to Avoid
- Not wearing a life jacket: Avoid not wearing a life jacket while sailing a Sunfish. Prioritize safety on the water and always wear a properly fitted life jacket to prevent accidents or drowning.
- Ignoring weather conditions: Avoid ignoring weather conditions. Check the weather forecast before sailing. Strong winds, storms, or other adverse conditions can make sailing difficult and dangerous.
- Overlooking proper rigging: Properly rigging the Sunfish is essential for a successful sail. Don’t overlook the rigging process. Ensure the mast, boom, and sail are correctly attached and tensioned for optimal sailing.
- Not understanding the centerboard: The centerboard plays a crucial role in maneuvering the Sunfish. Understand how to use it correctly for control and stability. Learn how to adjust it based on wind and water conditions.
- Forgetting to secure the mainsheet: The mainsheet controls the sail’s position and power. Avoid forgetting to secure it properly to prevent accidental jibes and loss of control.
Some Facts About How To Sail A Sunfish:
- ✅ The Sunfish is a small, one-person sailboat that has been popular for generations. (Source: Our Team)
- ✅ It is a personal-size, beach-launched sailing dinghy with a flat hull and a crab claw sail. (Source: Our Team)
- ✅ The Sunfish was developed by Alcort, Inc. in the 1950s and has since become the most popular fiberglass boat ever designed, with a quarter million sold worldwide. (Source: Our Team)
- ✅ Setting up a Sunfish takes less than 10 minutes and requires no special knowledge or fancy sailor’s knots. (Source: Our Team)
- ✅ There are resources available, such as YouTube videos and sailing classes, to help beginners learn to sail a Sunfish. (Source: Our Team)
Frequently Asked Questions
1. how long does it take to set up a sunfish sailboat.
Setting up a Sunfish takes less than 10 minutes and requires no special knowledge or fancy sailor’s knots.
2. Can a Sunfish sailboat be launched from anywhere?
Yes, a Sunfish sailboat can be launched from the beach, dock, or anywhere with water access.
3. Are there resources available to help beginners learn to sail a Sunfish?
Yes, there are resources available such as YouTube videos and sailing classes that can help beginners learn to sail a Sunfish.
4. What is the sail plan and hull of a sailboat?
The sail plan and hull of a sailboat create lift forces in 3 dimensions as they react to wind and water.
5. How can I achieve balance and control while sailing a Sunfish?
Balancing the forces of the sail and hull is key to maintaining control and speed. Experimentation and practice are necessary to find the best settings and achieve comfort and control while sailing.
6. What are some tips for adjusting the sail’s center of effort and improving control?
Lowering the sail on the mast can help reduce heeling and allow for better control through hiking. Adjusting the gooseneck on the boom can reduce weather helm and improve control. Other controls like the vang, outhaul, and cunningham can further tweak the sail’s center of effort and de-power the sail.
About the author

Leave a Reply Cancel reply
Your email address will not be published. Required fields are marked *
Save my name, email, and website in this browser for the next time I comment.
Latest posts

The history of sailing – from ancient times to modern adventures
History of Sailing Sailing is a time-honored tradition that has evolved over millennia, from its humble beginnings as a means of transportation to a beloved modern-day recreational activity. The history of sailing is a fascinating journey that spans cultures and centuries, rich in innovation and adventure. In this article, we’ll explore the remarkable evolution of…

Sailing Solo: Adventures and Challenges of Single-Handed Sailing
Solo Sailing Sailing has always been a pursuit of freedom, adventure, and self-discovery. While sailing with a crew is a fantastic experience, there’s a unique allure to sailing solo – just you, the wind, and the open sea. Single-handed sailing, as it’s often called, is a journey of self-reliance, resilience, and the ultimate test of…

Sustainable Sailing: Eco-Friendly Practices on the boat
Eco Friendly Sailing Sailing is an exhilarating and timeless way to explore the beauty of the open water, but it’s important to remember that our oceans and environment need our protection. Sustainable sailing, which involves eco-friendly practices and mindful decision-making, allows sailors to enjoy their adventures while minimizing their impact on the environment. In this…
IMAGES
VIDEO
COMMENTS
A beginners guide to sailboat rigging, including standing rigging and running rigging. This animated tutorial is the first in a series and covers sails, line...
PLEASE NOTE: THIS VIDEO HAS BEEN UPDATED WITH ENHANCED GRAPHICS AND IMPROVED SOUND. CHECK IT OUT HERE https://youtu.be/tRgWtPaCQQcA beginners guide to sailbo...
5. Secure the mast using the appropriate rigging and fasteners. Attach the standing rigging, such as shrouds and stays, to the mast and the boat's hull. Fact: The mast of a sailboat is designed to withstand wind resistance and the tension of the rigging for stability and safe sailing. 2.
Gaff ketch - two-masted (mizzen), two mainsails, staysails, fore-and-aft rigged. Full-rigged ship or tall ship - three or more masts, mainsail on each mast, staysails, square-rigged. The first word is the shape and rigging of the mainsail. So this is the way the sail is attached to the mast.
Bermuda Rig - Also known as a Marconi rig, this is the typical configuration of most modern sailboats. It has been used since the 17th century and remains one of the most efficient types of rigs. The rig revolves around setting a triangular sail aft of the mast with the head raised to the top of the mast.
The hull is what most people would consider 'the boat'. It's the part that provides buoyancy and carries everything else: sails, masts, rigging, and so on. Without the hull, there would be no boat. The hull can be divided into different parts: deck, keel, cabin, waterline, bilge, bow, stern, rudder, and many more.
While basic sailboat rigging tasks can be performed by experienced sailors, complex rigging projects or major upgrades are best left to professional riggers. Hiring a professional rigger ensures that the rigging is installed, adjusted, and maintained correctly, minimizing the risk of equipment failure and maximizing the performance of your ...
Learn how to rig your own sailboat, identify rigging parts, step the mast to attach sails, avoid mistakes, tune the rig, and sign that the rig needs replacement.
Rigging is a generic word that covers a wide range of lines and equipment. For purposes of discussion, rigging used here does mean all the ropes, wires and lines and supporting items and structures on sailboats, including the mast, boom, stays, shrouds and sails. In other words, rigging is the boat's power system because without it, your ...
Short answer: rig sails Rig sails refer to the various types of sails used in sailing rigs. They include mainsails, jibs, spinnakers, genoas, and more. Rig sails play a crucial role in harnessing wind power to propel boats and are designed for different wind conditions and sailing purposes. How to Rig Sails: A Step-by-Step Guide.
2. Rigging and Lines. When sailing, understanding the rigging and lines of a sailboat is essential for a successful and safe experience. Here are some key points to consider: - Rigging: The ropes, wires, and fittings used to support and control the sails of a sailboat. It includes the mast, boom, shrouds, and forestay.
Sails and rigging are the engine room of any sailing boat from small dinghies up to giant superyachts. No matter how big or how new your boat, the sails and rigging need to be checked regularly and will need intermittent updating. Updating of rigging on a yacht in particular will often be a requirement for insurance purposes so any owner will ...
Aim the boat at a 45-degree angle to the wind. Sailboats do not generally sail directly into the wind, but rather must sail in a zig-zag course (known as beating). When you first set sail, you will figure out the direction of the wind and aim the boat at about a 45-degree angle away from the direction it is blowing.
The primary sailboat rigging parts include the mast, boom, standing rigging (such as shrouds and stays), running rigging (halyards and sheets), blocks or pulleys, turnbuckles, cleats, winches, and various fittings. Each of these components has its specific purpose in controlling the sails' position and tension. 2.
FAQ 2: What are the basic steps involved in sailing a sailboat? The basic steps of sailing involve gaining specific knowledge and skills. This includes understanding basic sailing terms, familiarizing yourself with the parts of the boat, rigging the boat, learning basic sailing techniques, maneuvering the boat, docking or anchoring, utilizing ...
Rigging Small Sailboats. Part 1 - Rigging in General. Introduction. T his is a basic "how-to" guide for rigging modern single masted sailboats up to about 25' in length. Any person building his own small sailboat, buying a new boat, or one who already owns a boat and wants to replace or change the rig on his boat will find this book valuable.
How much is a boat rigging? The price of boat rigging can vary depending on several factors, such as the size and type of boat, the complexity of the rigging system, and the materials used. Typically, a basic rigging package for a sailboat of 20 feet can range from around $1,000 to $3,000. This may include essentials like shrouds, stays ...
The standing rigging refers to the network of wires and cables that support the mast and allow it to bear the tremendous loads exerted by the sails. It acts as the backbone of a sailboat's rig, providing stability, strength, and balance. Understanding its importance is crucial for anyone who sets foot on a vessel with dreams of cruising or ...
The 5 most common two-masted rigs are: Lugger - two masts (mizzen), with lugsail (cross between gaff rig and lateen rig) on both masts. Yawl - two masts (mizzen), fore-and-aft rigged on both masts. Main mast much taller than mizzen. Mizzen without mainsail. Ketch - two masts (mizzen), fore-and-aft rigged on both masts.
Put the top of the sail in the mast track and pull on the halyard. You may need two people to do this, one to feed the mainsail into the mast and one to pull the halyard. The sail will usually hoist easily by pulling down on the halyard. If it gets caught in something, lower the sail a little to clear it and then raise it again.
6. Stepping the Mast: Lift the mast with sail and boom attached. Align the mast butt over the mast collar. Gently slide the mast through the thwart and into the metal mast step (fi gure 20). Make sure that the sprit halyard cleat is facing the bow while the cleat for the vang cleat is facing the stern (fi gure 21).
Basic sailing terms: ... This will help keep you from tripping or getting hit by some of the rigging in a high wind situation. Sailing shorts: These shorts are actually a set of pants that can zip off and are extremely helpful. Sailing shorts are a great idea on the warmer days. They can also serve swim trunks as well if you wanted to take a ...
Mastering the art of sailing a Sunfish requires a deep understanding of basic sailing techniques. From rigging the Sunfish sailboat to navigating wind direction and sail trim, and even mastering the art of steering and controlling the rudder, each sub-section in this voyage of discovery will unlock the essential skills needed to glide smoothly ...