How To Paint A Sailboat: A Complete Guide

Last Updated by
Daniel Wade
June 15, 2022
Whether you’re new to owning a sailboat or not, you have likely put some thought into painting your boat yourself. It is important to keep your boat well painted as it can save you a lot of money in the long run. It can also save you a lot of money if you choose to paint your boat yourself.
Whether or not this is the first time you have painted your boat, you will still find this article useful. It has lots of tips and tricks for making sure you get the job done and get it done well. Hiring a professional may be easier, but there is a sense of pride and accomplishment in doing it yourself. If you use this article as a reference, you can’t go wrong.
Table of contents

Why is it important to paint your sailboat?
Painting your boat is not just an excuse to put some creative flair into your boat, it is an important process in keeping the boat safe. Safe from salt, safe from barnacles, and safe from damage. The paint acts as a vital protective layer, without it your boat will be vulnerable to all kinds of damage. If you have a wooden hull, this protective layer will keep the wood from rotting. It can also plug any minuscule holes that might allow sea life and salt to make its way into the body of the boat.
There is also, of course, the added benefit of having a boat that looks good . A boat is a point of pride and should be treated as such. Having a glossy looking boat is something to be proud of. Most boats are not painted far above the waterline, so it is even an opportunity to make your boat stand out. Some people also believe that painting a boat brings good luck. Unless of course, you paint it green, green is thought to bring bad luck. Whether or not you believe that is up to you.
What are the benefits of painting your boat yourself?
When it comes to painting your boat there are only two options. Hire a professional boat painting contractor, or bite the bullet and do it yourself. They both have their pros and cons, of course, but there is so much more to be gained by doing it yourself. First of all, painting your boat yourself is just as fun as it is difficult. Learning to paint is a valuable life skill that you won’t regret learning as early on in your sailing career as possible. If you can learn to paint your boat now, you will save yourself a small fortune in the long run.
Hiring a contractor is expensive, to say the least, it may be faster and easier overall, but the extra cost can make it simply not feasible. Or simply unappealing. If this is the first time you are painting your sailboat you will need to make a one-off purchase of all the equipment needed for prepping, painting, and finishing the boat. After these one-off purchases are out of the way, you will only need to buy paint and new rollers the next time. Even if you need to buy all the equipment brand new, it can be cheaper than hiring someone else to do the job for you.
How often do you need to paint your sailboat?
The general rule of thumb for painting your boat is that it will need bottom paint about once a year. This is when you will need to take the boat completely out of the water and give it a fresh new coat. If your boat spends all of its time in the water, it certainly needs painting at least once a year. The saltwater is so corrosive that you shouldn’t let your boat go without a fresh coat of bottom paint for more than 2 years. Even if your boat only spends half its time in the water, and the other half on land, you will find that its best to keep its coat topped up.
The top paint, or the above waterline paint, doesn’t need painting anywhere near as often. It isn’t in direct contact with the seawater so it simply isn’t going to get eroded down as much. The salty sea spray can still be damaging over time so this paint should be re-done every 3 years. It can be more or less frequent depending on use and personal preference. Some people like to do above waterline paint yearly, with the rest of their boat, but it isn’t necessary.
What are the best paints to use for your sailboat?
There are plenty of great brands of paint out there, in various colors and shades, so you won’t struggle for choice. There are some things you might want to look for in your paint . For example, you may have noticed that a lot of boats tend to have red hulls. This isn’t just a fashion statement, and while red is supposed to bring luck this isn’t the main reason either. The reason is that this red/orange paint is perfect for added protection along the bottom of your boat.
This red/orange paint is interestingly chosen because it is, of course, traditional; but mostly because of its copper. The copper is actually what gives the paint its red/orange color.
Copper is perfect for the bottom of your boat for several reasons. First, copper acts as a biocide. It stops worms from making their way into the hull if your boat is wooden. If it is metal or fiberglass, it still has the benefit of stopping barnacles and other sea life from attaching themselves deep into the hull of the boat. Copper is also strong enough to hold up to scraping.
Scraping is when you scrape barnacles and other sea life off the hull of your boat. Scraping is an important part of keeping your boat in good condition. It is important to check with the marina or port authority whether or not you are allowed to scrape. If you scrape without permission you may find yourself on the receiving end of a hefty fine. The reason is that they don’t want you introducing invasive species on to the marina floor. This is mostly a problem when you are coming from somewhere vastly foreign, not sailing from New York to Chicago for example.
How many coats of paint does a sailboat need?
When painting your boat it’s a good idea to think about how many coats of paint you are going to need. There is no exact number that is needed, it is mostly to do with how well protected your boat needs to be and how much time you have on your hands. Every coat takes time and attention to detail.
If you choose to do four coats of paint it is going to be time-consuming but very well protected. That being said, the minimum number of coats is two. One is not enough. If your boat only spends part of the time in the water, two to three coats are plenty.
If you are someone who lives on their boat full-time, or at least most of the time, you may want to do more coats. Three, maybe even four, might be ideal here. The reason is that first, your boat is going to experience way more wear and tear than one that is just an ocean part-timer. And second, taking out your boat (which is also your home) is a giant hassle. It is a tedious process, so doing it as infrequently as possible is probably in your best interest. More coats last longer. When you are sailing from place to place, finding somewhere to take your boat out of the water and perform this maintenance is inconvenient. You want to be doing it as little as possible.
What safety precautions do I need to take when painting my sailboat?
All paint can be toxic when inhaled. Even if it is “non-toxic” paint it is going to be harmful to your lungs. They aren’t meant to inhale anything but air, even non-toxic paint is going to be bad for them. This is why it is important to wear a face mask.
Your mask should be specifically for painting, not surgical masks or other cheap medial masks. They are not going to be strong enough, with a fine enough air filter. Whether you feel the need to wear eyewear is up to you during the painting process.
Before the painting begins, when you are scraping and sanding, it is a good idea to wear some goggles to keep debris and splinters out of your eyes. It is also a good idea to wear gloves. You don’t want to rough your hands up too much, they need protection from not only the paint but splinters and sharp pieces of metal.
Painting a boat can be dangerous work. Without taking the proper safety precautions you are putting yourself at unnecessary risk. This safety equipment costs just a few bucks and is equally important as any of the other tools needed to paint your boat.
What tools do I need to paint a boat?
There is more to painting your boat than just using paint and a brush . You will also need tough sandpaper , potentially an angle grinder or welder , paint, primer , brushes, paint rollers , paint thinner , and solvent. You will need to make sure you have all of these things before you start painting. You can pick any of these items up at a boating goods store.
It is a good idea to bring some buckets with you for filling with water, both for rinsing off your boat and your brushes. All of your safety equipment needs to be brought too.
If this is your first time painting your boat yourself, you may find you need to buy all of these things at once. That can be a lot to stomach when its all in one go, luckily, most of these tools and equipment can be reused. Besides, it is still going to be far cheaper than hiring someone to do it for you. All of this equipment is an investment in your boat.
How to paint a sailboat
Whether this is the first time you have painted your boat or not, you may find some of the tips in this next section useful. Painting your sailboat may be tricky at first, but over time you will get the hang of it. The problem with painting your boat is that it can be a very expensive mistake if you get it wrong.
It is important to read this guide carefully, take your time, and make sure you do the job properly. It may be slow going at first, speed will come over time. Once you have gathered all of your safety equipment and tools you are ready to get started.
The workspace
First of all, you need to ensure you have the right workspace. You cant paint your boat in the water so you are going to need to find somewhere to do your work. This is easy enough if you don’t live on your boat full time, take the boat to your house and do your painting on the driveway. If this isn’t an option because you don’t have space or live on your boat full time, you are going to need to rent somewhere. There are typically places affiliated with the marina that you can use. In some cases, these even come with a majority of the equipment you will need. This, of course, drums up the price a bit, but that’s unavoidable.
Your workspace needs to be well ventilated, or you risk making yourself very sick. Both from paint fumes, rubbing alcohol fumes, and fine matter from when you sand the hull down. This means painting your boat in your garage, if it even fits, is not always the best idea. If you do decide to paint outside, it is important to consider the chance of rain. Of course, your boat is pretty waterproof, but once you begin sanding rain might damage the wood if left to sit there.
Before you do anything else, it is important to look your boat over fully from top to bottom. You are looking for any bumps, scrapes, cracks and general damage. This damage is not going to be noticeable while the boat is in the water, so just before you paint it is one of the only times you get to have a close look. Once you have made note of all this damage, it is time to get to work repairing it. Depending on just how severe this damage is, you may want to get help with this next stage.
All of this damage needs to be repaired before anything else can take place. Painting over these damaged areas is just going to hide the problem temporarily, the next time it comes to painting you will find they are far worse. If you don’t deal with this now, they are going to snowball into complicated and expensive repairs.
After your repairs are done it is time to start sanding. This is very time consuming as you need to do it three times. Per coat. First, take the 600 grit sandpaper and make your way around the boat. It is best to use electrical tape to mark out a section at a time so you don’t keep losing your place. After you have finished with the 600 grit sandpaper, it is time to move on to 800, then 1200. This process is important so you will be painting on as smooth a surface as possible. It is then a good idea to wipe the surfaces of the boat down with a damp cloth to remove any of the dust and flakes of metal/wood. Otherwise, you end up painting over them.
You could wash the boat down with a hose but you want to avoid getting the boat unnecessarily wet now that the hull has lost its protective layer. If you are sanding down a boat with a copper paint bottom, you may find the sanding process difficult. Just do your best, it doesn’t need to be 100% perfect. It is important to get as much of the old paint off as possible. Your new paint won’t adhere to the old paint as well as it would to the boat hull itself.
Putting on a layer of primer is not 100% necessary but it is recommended. The idea is that you want your topcoat to adhere to the boat as well as possible, a layer of primer can help you do that. The primer needs to be painted on evenly all over the boat. If you only feel like doing below the waterline, that is fine too. It will save you a lot of time. Putting on the layer of primer is not the most time-consuming part, it is mostly the sanding down that you will have to do. You will need to sand down using the 600 grit paper, then the 800, then 1200. Just like last time. Your layer of primer needs to be as smooth as possible for the maximum adhesion.
Now comes the paint. It is recommended to do at least two layers of paint. One undercoat and one top. Some people choose to go as far as two layers of primer, two layers of undercoat, and three layers of topcoat. This is going to be very time consuming, remember you will need to sand down three times between each layer of paint. You can paint using a brush if you like but is far easier to use a roller. It is also far easier if you employ someone to help you with this stage. It could be your spouse, child, friend, or anyone. It doesn’t need to be a paid professional. It can take a long time to go through this process. Especially if you are effectively doing 8 layers of paint (including primer).
The fastest way to paint, especially if you are on your own, is to use a sprayer. They are easy to use, with a little practice. If you haven’t used one before you may find that you struggle to get an even coat. You should always paint in vertical stripes, not horizontal. Additionally, it is a good idea to have someone following after you with a small brush doing small touch-up jobs. Any unevenness will need to be sanded down and repainted. The whole painting process can take a week if you aren’t efficient.
Take pictures
It is a good idea to take pictures throughout the whole process. This is for future reference. For example, if you take pictures of the boat when you are assessing it for damage, you can compare them to after you have repaired or sanded the trouble spots down. If you cant see the trouble spots still, great! If you can, it will help you keep an eye on them after you have painted too. It’s a good idea to catalog all of these areas if they start to become regular problems you may want to have your boat looked at by a mechanic. You might also like to have a before and after picture for your blog, or just as a personal memento.
Hopefully, you now have all the theory needed to paint your boat. There is a lot more that goes into painting your boat than simply grabbing some paint and a brush. It takes planning, practice, and attention to detail. If you follow this guide you will have no trouble at all. If this is your first time painting your boat, don’t be disheartened if it takes a lot longer than you expected. Speed will come with time, it is far more important to get the job done right than get it done quickly. If you put the work in you will be painting like a pro in no time at all.
Related Articles
I've personally had thousands of questions about sailing and sailboats over the years. As I learn and experience sailing, and the community, I share the answers that work and make sense to me, here on Life of Sailing.
by this author
Repairs and Maintenance
Most Recent

What Does "Sailing By The Lee" Mean?
October 3, 2023

The Best Sailing Schools And Programs: Reviews & Ratings
September 26, 2023
Important Legal Info
Lifeofsailing.com is a participant in the Amazon Services LLC Associates Program, an affiliate advertising program designed to provide a means for sites to earn advertising fees by advertising and linking to Amazon. This site also participates in other affiliate programs and is compensated for referring traffic and business to these companies.
Similar Posts

How To Choose The Right Sailing Instructor
August 16, 2023

Cost To Sail Around The World
May 16, 2023

Small Sailboat Sizes: A Complete Guide
October 30, 2022
Popular Posts

Best Liveaboard Catamaran Sailboats
December 28, 2023

Can a Novice Sail Around the World?
Elizabeth O'Malley

4 Best Electric Outboard Motors

How Long Did It Take The Vikings To Sail To England?

10 Best Sailboat Brands (And Why)
December 20, 2023

7 Best Places To Liveaboard A Sailboat
Get the best sailing content.
Top Rated Posts
Lifeofsailing.com is a participant in the Amazon Services LLC Associates Program, an affiliate advertising program designed to provide a means for sites to earn advertising fees by advertising and linking to Amazon. This site also participates in other affiliate programs and is compensated for referring traffic and business to these companies. (866) 342-SAIL
© 2024 Life of Sailing Email: [email protected] Address: 11816 Inwood Rd #3024 Dallas, TX 75244 Disclaimer Privacy Policy

Step-by-Step Guide: How to Paint a Sailboat with Acrylics
Alex Morgan
Painting a sailboat with acrylics can be a rewarding and enjoyable artistic endeavor. Whether you are a beginner or an experienced artist, this article will provide you with a comprehensive guide to creating a stunning sailboat painting using acrylic paints.
To begin with, you will need specific materials and tools to ensure a successful painting process. These include acrylic paints in various colors, a set of brushes suitable for acrylic painting, a palette for mixing colors, a canvas or painting surface, a water container for cleaning brushes, a palette knife for texture, and a reference image or sketch of a sailboat.
Before you start painting, it is essential to prepare the surface properly. This involves cleaning the surface to remove any dust or debris, and then applying a layer of primer or gesso to create a smooth and even base for your paint to adhere to.
To achieve the desired result, it is important to understand and practice basic techniques for painting with acrylics. This includes learning how to mix colors to create different shades and tones, how to layer and blend colors to add depth and dimension, and how to create texture and detail in your sailboat painting.
Once you are familiar with the techniques, you can follow a step-by-step guide to painting a sailboat. This includes sketching the sailboat outline, blocking in the background colors, adding base colors to the sailboat, adding details and highlights, and refining the painting to ensure a polished and professional look.
To complete your sailboat painting, don’t forget the finishing touches and sealing the artwork to protect it and enhance its longevity. We will share some tips and tricks to help you master the art of painting a sailboat with acrylics, allowing you to express your creativity and create beautiful marine-inspired artworks. So gather your materials and get ready to set sail on your artistic journey!
Key takeaway:
- Using acrylic paints and appropriate tools is essential for painting a sailboat. Acrylic paints are versatile and easy to work with.
- Properly preparing the surface by cleaning and applying primer or gesso ensures a smooth painting surface.
- Understanding basic techniques such as color mixing, layering, blending, and creating texture and detail is important for painting a realistic sailboat.
- Following a step-by-step guide helps in achieving a well-executed sailboat painting.
- Finishing touches and sealing the painting enhance its longevity and protect it from damage.
- Tips and tricks such as using reference images or sketches and refining the painting contribute to a successful acrylic sailboat painting.
Materials and Tools Needed for Painting a Sailboat
Are you ready to set sail on a creative painting journey? This section has all the juicy details about the materials and tools needed to paint a stunning sailboat with acrylics. We’ll dive into the vibrant world of acrylic paints , the magic touch of different brushes , the perfect palette for mixing colors, the ideal canvas or painting surface, the essential water container and palette knife , and the importance of having a reference image or sketch. Get your creative gears ready, because we’re about to embark on an artistic adventure !
Acrylic Paints
When painting a sailboat with acrylic paints , it is crucial to choose the right type of acrylic paint . Consider the following factors when selecting acrylic paints :
– Quality : Opt for high-quality acrylic paints for vibrant and long-lasting colors.
– Color range : Look for brands that offer a wide range of colors, including various shades of blue for painting the sky, water, and sails of the sailboat.
– Opacity : Consider the opacity of the acrylic paints . Some colors are more opaque, allowing for solid coverage, while others are more transparent, allowing for layering and glazing techniques.
– Drying time : Check the drying time of the acrylic paints . Faster drying paints are great for quickly building layers, while slower drying paints allow for more blending and wet-on-wet techniques.
– Brand reputation : Research and choose acrylic paints from reputable brands known for their quality and consistency.
Pro-tip : Before starting your painting, it’s recommended to do a small color swatch test to see how the colors appear on your chosen canvas or painting surface. This will help you make any necessary adjustments before committing to the final artwork.
When painting a sailboat with acrylics, the right brushes are crucial for achieving desired results. Here is a list of brushes to consider:
1. Round brushes: Perfect for creating fine details like rigging and small waves. They come in various sizes, from small for intricate work to larger for broader strokes.
2. Flat brushes: Ideal for creating straight lines and sharp edges. Great for painting sails, the horizon, or other flat surfaces on the sailboat.
3. Fan brushes: Excellent for creating texture like foliage or water splashes. Can also blend colors and create soft, feathery strokes.
4. Filbert brushes: Versatile brushes for both fine details and broader strokes. Particularly useful for painting the hull and larger areas.
5. Detail brushes: Perfect for adding intricate details and highlights. Allows for precise control in adding fine lines, textures, and highlights.
Fact: Using the right brushes not only makes painting a sailboat easier but also enhances the overall quality of your artwork. Experimenting with different brush shapes and sizes can help achieve different effects and add depth to the painting.
When painting a sailboat with acrylics , a palette is essential for effectively mixing and organizing colors. A palette serves as a flat surface where you can arrange and blend paints.
Canvas or Painting Surface
Choosing the right canvas or painting surface is crucial for a successful sailboat painting with acrylics. The size and material of the canvas are important factors that affect the outcome of the painting.
A larger canvas allows for more details and a grander composition, while a smaller canvas is more manageable and quicker to complete. The most popular canvas materials are cotton , linen , and polyester .
Cotton canvas is affordable and suitable for beginners. Linen canvas , though more expensive, offers a smoother surface and better longevity. Polyester canvas is a synthetic option that is resistant to moisture. Regardless of the material you choose, it is important to prime the canvas with gesso or primer before painting.
This creates a smooth and stable surface for the acrylic paints, resulting in better color vibrancy and a longer-lasting artwork. When selecting a canvas or painting surface, consider your artistic vision and preferences to create a stunning sailboat painting with acrylics.
Water Container and Palette Knife
The sub-topic “ Water Container and Palette Knife ” in the article “ How To Paint A Sailboat With Acrylics ” can be represented in a table format:
Using a water container is essential in acrylic painting to keep your brushes clean and prevent paint from drying. The container should be filled with clean water and changed when dirty to ensure a constant supply of clean water for rinsing and thinning paint.
The palette knife is a versatile tool for mixing colors directly on the palette. Its flat blade is perfect for scraping and lifting paint, allowing for experimentation with color combinations and creation of various textures in artwork. The palette knife can be used to apply paint directly to the canvas for precise and controlled brushwork.
By having a water container and palette knife in your painting toolkit, you’ll be equipped to efficiently and creatively work with acrylic paints, bringing your sailboat painting to life.
Reference Image or Sketch
When painting a sailboat with acrylics, having a reference image or sketch is crucial for accuracy and capturing the essence of the subject. The reference image serves as a visual guide, helping artists understand the structure, proportions, and details of the sailboat.
To create a reference image or sketch, start by selecting a clear and high-resolution photograph of the sailboat. It should showcase the desired angle and composition for the painting. Then, use a pencil or grid method to transfer the main outlines and important features onto your canvas or painting surface.
The reference image or sketch acts as a roadmap throughout the painting process. It helps artists determine the placement of the sailboat, the position of the sails, the shape of the hull, and other details. By referring to the image or sketch, artists can ensure accuracy and achieve a realistic representation of the sailboat.
Remember to use the reference image or sketch as a guideline rather than strictly copying it. Allow yourself to add your own artistic interpretation and style to make the painting unique. Experiment with colors, textures, and brushwork to bring the sailboat to life on your canvas.
With a well-prepared reference image or sketch, artists can confidently paint a sailboat with acrylics, capturing its beauty and spirit in their artwork.
Preparing the Surface for Painting
Preparing the surface is a crucial step in painting a sailboat with acrylics . In this section, we’ll discover the necessary techniques to ensure a smooth and long-lasting finish. First, we’ll explore the importance of cleaning the surface thoroughly. Then, we’ll dive into the significance of applying primer or gesso before starting the actual painting process. These essential steps will set the foundation for a successful sailboat painting adventure. So let’s get our brushes ready and make that canvas shine!
Cleaning the Surface
When preparing to paint a sailboat with acrylics, it is essential to follow these important steps for cleaning the surface:
1. Begin by using a soft brush or cloth to remove any dust or debris from the surface. This step is crucial for ensuring proper adhesion of the paint.
2. In case there are stains or dirt that cannot be removed using a brush, gently clean the area with mild soap and water. It is important to avoid harsh chemicals as they may cause damage.
3. Prior to painting, it is necessary to eliminate any peeling or flaking paint. This can be done by carefully smoothing the surface using sandpaper or a scraper.
4. After the cleaning and preparation process, it is recommended to apply a layer of primer or gesso. This will create a smooth surface, enhancing color saturation and durability.
Remember to take your time and handle the surface gently during the cleaning process to prevent any damage. Properly cleaning and preparing the surface guarantees a beautiful painting that will last for a long time.
Applying Primer or Gesso
Applying primer or gesso is necessary for preparing the surface before painting a sailboat with acrylics . It creates a smooth base for the paint, improving the quality and durability of the artwork.
To apply primer or gesso:
- Clean the surface: Remove dust, dirt, and grease using a soft cloth or brush.
- Choose the right primer or gesso: Use acrylic gesso , which dries quickly and works well with acrylic paints.
- Prepare the primer or gesso: Stir it thoroughly and thin with water if needed, following the manufacturer’s instructions.
- Apply the primer or gesso: Use a brush or palette knife to apply an even layer, covering the entire area to be painted.
- Allow drying time: Let the primer or gesso dry completely, which usually takes 1-2 hours, but may vary based on the product and environment.
Applying primer or gesso creates a strong foundation for your sailboat painting, ensuring vibrant colors and good adherence to the surface. It also prevents unwanted paint absorption into the canvas or other surfaces. Follow the manufacturer’s instructions for best results.
Understanding Basic Techniques for Painting a Sailboat
Discover the vibrant world of sailboat painting as we delve into the fundamental techniques that bring these majestic vessels to life. From mixing colors to layering and blending, and even creating texture and detail, we’ll explore the artistry and skill required to capture the essence of a sailboat on canvas. Get ready to embark on a creative journey as we unlock the secrets of painting a sailboat with acrylics !
Mixing Colors
When mixing colors in acrylic painting, there are techniques to achieve the desired result.
– Start with the primary colors : red, blue, and yellow. These are the foundation for all other colors.
– Use a color wheel to understand color relationships. Opposite colors on the wheel, such as blue and orange, create contrast when mixed.
– Experiment with different color ratios to create shades and tints. Adding more blue to yellow creates a green shade , while adding more yellow to blue creates a green tint .
– Gradually add small amounts of one color to another, mixing and blending until the desired hue is achieved.
– Consider the effect of adding white or black to a color. Adding white creates a lighter shade , while adding black creates a darker shade .
– Take note of the drying time of acrylic paints, as the color may slightly shift once dry. Let the mixed colors dry before making adjustments.
– Clean brushes thoroughly between color mixing to avoid contamination and achieve accurate colors.
By understanding these mixing techniques, you can confidently create a wide range of colors for your sailboat painting. Experiment and explore different combinations to achieve unique and vibrant results.
Layering and Blending
Layering and blending are pivotal techniques in the realm of acrylic painting. Employ the following strategies to attain the desired effect:
– Emphasize layering: Begin by applying thin coats of paint and gradually intensify the color and texture in order to exercise better control over the varying shades and values.
– Master the art of wet-on-wet blending: Meld hues by applying wet paint atop another still wet layer, resulting in seamless transitions and smooth gradients.
– Harness the power of dry brushing: Utilize a minimal amount of paint with a dry brush to fashion texture and highlights, which is ideal for incorporating intricate details.
– Embrace glazing: Introduce translucent layers of paint onto dry layers to yield depth and radiance, thereby permitting subtle variations in color and an atmosphere-like aura.
– Achieve blending with a palette knife: Directly mix and blend colors on the painting surface using a palette knife, imbuing the artwork with texture and dimension.
Experiment with these techniques to ascertain the most effective approach. The combination of layering and blending can augment the depth, dimension, and opulence of your acrylic paintings, thereby enabling you to create captivating sailboat masterpieces.
Creating Texture and Detail
Creating texture and detail is essential when painting a sailboat with acrylics . These techniques enhance the depth and visual interest of the artwork. To achieve texture, it is recommended to utilize methods such as dry brushing , sponging , or palette knife strokes.
Implementing these techniques effectively can add texture not only to the sails , water , but also to the boat as a whole.
One approach to create texture on the sails is by using the dry brush technique. This involves applying a small amount of paint to a dry brush and gently brushing it onto the canvas. By doing so, a rough and textured appearance is achieved, giving the impression of fabric on the sails. To replicate waves and ripples on the water, consider using a palette knife to apply thick, undiluted paint with a scraping motion.
Adding intricate details is crucial in bringing the sailboat to life. Using fine brushes and thin paint, you can incorporate intricate elements such as rigging , ropes , and various features on the boat. Paying close attention to these details will greatly enhance the realism and overall quality of the painting.
Don’t be afraid to experiment with different techniques and brushes in order to achieve the desired textures and details. Remember, practice and patience are key when mastering the art of creating texture and detail in sailboat paintings.
Fun Fact: Incorporating texture and detail in a painting can give the artwork a three-dimensional appearance, captivating viewers.
Step-by-Step Guide to Painting a Sailboat
Master the art of painting a sailboat with acrylics with this step-by-step guide.
We’ll take you through the process, from sketching the sailboat to refining the final touches.
Discover how to block in the background, add base colors, and bring your sailboat to life with details and highlights.
With these expert tips and techniques, you’ll be able to create a stunning sailboat painting that showcases your artistic skills.
Get ready to embark on a creative journey and immerse yourself in the world of sailboat artistry.
Sketching the Sailboat
To begin sketching the sailboat before painting with acrylics, follow these steps:
1. Take a blank canvas or painting surface.
2. Take a look at the reference image or sketch of the sailboat.
3. Recognize the basic shapes and proportions of the sailboat, including the hull , sails , and mast .
4. Use a pencil or charcoal to create a light outline of the sailboat on the canvas. Begin with simple shapes and lines.
5. Pay close attention to the positioning and size of various elements, such as the sails and the angle of the mast.
6. Add more intricate details to the sketch, such as windows, ropes, or flags. It is important to ensure accurate proportions and perspectives.
7. Erase any unnecessary lines or mistakes while refining the sketch. Focus on capturing the overall shape and composition.
8. Once you are satisfied with the sketch, go over the lines with a fine-tipped pen or marker to define them. Alternatively, you can use a dark pencil.
9. Review the sketch to make sure it accurately represents the sailboat and the desired composition.
10. The sketch is now ready to serve as a guide for painting the sailboat with acrylics.
By following these steps, you can create a detailed and accurate sketch of a sailboat before starting the painting process.
Blocking in the Background
Blocking in the background is an important step in painting a sailboat with acrylics. It establishes the composition and sets the tone for the rest of the painting. Here is a step-by-step guide on how to block in the background :
1. Choose the colors for the background based on the atmosphere and mood you desire. Soft blues and greens create a calm and serene scene, while bold and contrasting colors produce a dramatic and vibrant effect.
2. Apply the background colors onto the canvas with a large brush, starting from the top and working your way down. Use broad strokes to cover the entire background area.
3. Block in the basic shapes and forms of any objects or elements that will be part of the background, such as the sky, clouds, trees, or distant land .
4. Focus on capturing the general shapes and colors rather than intricate details. Use loose and expressive brushstrokes at this stage.
5. Blend the colors together where they meet to create a smooth transition. Use a clean, damp brush to softly blend the edges.
6. Step back and assess the overall look and feel of the background. Make necessary adjustments to the colors or shapes to ensure it complements the rest of the painting.
By following these steps, you can effectively block in the background of your sailboat painting and set the stage for the rest of your artwork.
Blocking in the background has been used by artists for centuries to establish the foundation of a painting. It creates depth, atmosphere, and a harmonious composition. Whether it’s a landscape, still life, or sailboat painting, blocking in the background is an essential part of the painting process, allowing artists to develop their vision and bring their artwork to life.
Adding Base Colors to the Sailboat
To effectively add base colors to the sailboat when painting with acrylics, adhere to the following instructions:
1. Begin by preparing your palette with the necessary base colors for the sailboat. This includes utilizing blue for the water, white for the sails, and brown for the wooden parts.
2. Use your brush to apply the first base color to the appropriate areas of the sailboat. For larger areas, employ broad strokes , while smaller details require finer strokes .
3. Layer each base color onto its respective area of the sailboat, ensuring smooth and even coverage. Add additional coats as needed.
4. When necessary, seamlessly blend the base colors together. This can be achieved by gently mixing the colors with either a clean brush or a palette knife, resulting in a gradual gradient .
5. Throughout the painting process, refer to your chosen image or sketch to ensure accurate color placement and shading.
6. Before proceeding to add details and highlights to the sailboat, allow the base colors ample time to dry completely .
By following these steps attentively, you will lay a solid foundation for your sailboat painting by effectively and accurately incorporating the base colors.
Adding Details and Highlights
When adding details and highlights to a sailboat painting with acrylics , consider techniques that enhance the realism and quality of the artwork.
1. Use a smaller brush size .
2. Mix the appropriate colors .
3. Apply thin layers of paint.
4. Focus on light and shadows.
5. Use a dry brush technique for highlights .
6. Add finer details with a fine liner brush .
7. Step back and assess the painting regularly.
Following these guidelines, artists can create depth and dimension in their sailboat paintings while capturing the essence of light and highlighting important elements of the subject.
Refining the Painting
To refine a sailboat painting with acrylics, the first step is to assess the sailboat’s composition and proportions. It is important to adjust as necessary in order to accurately represent the sailboat. Once the basic structure of the sailboat is in place, it is time to refine the details. This can be done by adding fine lines, curves, and shading for depth.
To make the painting more visually appealing, highlights should be added to catch the light, such as on the sail edges and hull. In order to achieve a realistic effect, it is important to blend colors seamlessly. After the sailboat itself is refined, attention should be turned to the background. Evaluate and enhance the background colors to ensure they complement the sailboat. If necessary, improve the water texture and depth to add more dimension to the painting.
To truly bring the painting to life, consider adding additional details like seagulls or waves. After all the refinements have been made, step back and evaluate the final painting. Make any touch-ups or adjustments as necessary to perfect the artwork. The process of refining the painting is crucial for capturing the beauty and intricacies of a sailboat with acrylics. These final touches will truly make the artwork special and bring it to life.
Finishing Touches and Sealing the Painting
To complete the sailboat acrylic painting, follow these steps for the finishing touches and sealing :
1. Remove any masking tape or painter’s tape used to create clean lines.
2. Inspect the painting for touch-ups or additional details. Use small brushes and acrylic paint to carefully add necessary final touches.
3. Allow the painting to dry completely before proceeding to sealing.
4. Use a varnish or sealant specifically made for acrylic paintings. Apply a thin, even coat using a soft brush. Follow the manufacturer’s instructions .
5. Let the varnish dry completely, which typically takes several hours.
6. Inspect the painting for any missed areas during the sealing. Touch up these spots with more varnish .
7. Consider applying a second coat of varnish for extra protection and a glossier or matte finish. Follow the manufacturer’s instructions and let each coat dry completely.
8. Once the painting is fully sealed and dry, you can frame or display it as desired.
By following these steps, you can add the finishing touches and seal your acrylic sailboat painting to protect and enhance its appearance.
Tips and Tricks for Painting a Sailboat with Acrylics
Here are some practical tips and tricks for painting a sailboat with acrylics:
1. Prepare your workspace by covering it with newspaper or a drop cloth to avoid paint splatters or spills.
2. Start by sketching the sailboat outline on your canvas using a pencil as a guideline.
3. Mix your acrylic paints on a palette to achieve the desired colors for the hull, sails, and details.
4. Use a larger brush to paint the background and base colors of the sailboat. Apply thin layers of paint and let each layer dry before adding another.
5. Once the base colors are dry, use a smaller brush to add details like windows , ropes , and flags . Pay attention to the intricate features of the sailboat.
6. Create depth and dimension by adding shadows and highlights . Use lighter shades for areas that catch the light and darker shades for areas in shadow.
7. To add texture to the water surrounding the sailboat, use a palette knife or dry brush technique for a more realistic and dynamic look.
8. Allow the painting to dry completely before adding final touches or varnish to protect it.
By following these tips and tricks, you can create a beautiful sailboat painting with acrylics.
Some Facts About How To Paint A Sailboat With Acrylics:
- ✅ Acrylic paint is commonly used for painting sailboats due to its versatility and quick drying time.
- ✅ Sailboat paintings created with acrylics can capture the vibrant colors of the water and sky.
- ✅ Using different brush techniques and layering, artists can create texture and depth in their sailboat paintings.
- ✅ Acrylic paints are available in a wide range of colors, allowing artists to accurately depict the details of a sailboat.
- ✅ To protect the finished sailboat painting, artists often apply a varnish or sealant to ensure its longevity.
Frequently Asked Questions
Faqs for “how to paint a sailboat with acrylics”, q: how can i cancel my contracts or subscriptions with youtube.
A: To cancel your contracts or subscriptions with YouTube, you can visit the “Verträge hier kündigen” section on YouTube. This section provides information and instructions on how to terminate your agreements with YouTube.
Q: Can I participate in testing new features on YouTube?
A: Yes, you can! YouTube offers an opportunity for users to test new features before they are widely released. Simply go to the “Neue Funktionen testen” section and follow the instructions to opt-in for testing new features on YouTube.
Q: Where can I find the guidelines and safety measures for using YouTube?
A: You can find the guidelines and safety measures for using YouTube in the “Richtlinien & Sicherheit” section. This section provides detailed information on YouTube’s community guidelines, rules against harassment and hate speech, and other safety measures to ensure a positive and secure experience on the platform.
Q: What information does the NetzDG Transparenzbericht on YouTube provide?
A: The NetzDG Transparenzbericht on YouTube offers information about the company’s compliance with the NetzDG law in Germany. It provides transparency reports related to efforts in combating illegal content and hate speech on the platform.
Q: How does YouTube work? Can you provide an overview?
A: YouTube is a video-sharing platform where users can upload, view, and interact with videos. In the “Wie funktioniert YouTube?” section, you can find a comprehensive overview of how YouTube works, including instructions on creating an account, uploading videos, and engaging with other users.
Q: Who owns the copyright for content on YouTube?
A: Google LLC owns the copyright for content on YouTube until 2023, as indicated by the “© 2023 Google LLC” statement. Users should be aware of the terms and conditions regarding copyright ownership when using YouTube.
About the author

Leave a Reply Cancel reply
Your email address will not be published. Required fields are marked *
Save my name, email, and website in this browser for the next time I comment.
Latest posts

The history of sailing – from ancient times to modern adventures
History of Sailing Sailing is a time-honored tradition that has evolved over millennia, from its humble beginnings as a means of transportation to a beloved modern-day recreational activity. The history of sailing is a fascinating journey that spans cultures and centuries, rich in innovation and adventure. In this article, we’ll explore the remarkable evolution of…

Sailing Solo: Adventures and Challenges of Single-Handed Sailing
Solo Sailing Sailing has always been a pursuit of freedom, adventure, and self-discovery. While sailing with a crew is a fantastic experience, there’s a unique allure to sailing solo – just you, the wind, and the open sea. Single-handed sailing, as it’s often called, is a journey of self-reliance, resilience, and the ultimate test of…

Sustainable Sailing: Eco-Friendly Practices on the boat
Eco Friendly Sailing Sailing is an exhilarating and timeless way to explore the beauty of the open water, but it’s important to remember that our oceans and environment need our protection. Sustainable sailing, which involves eco-friendly practices and mindful decision-making, allows sailors to enjoy their adventures while minimizing their impact on the environment. In this…

Boating Basics Online is reader-supported. When you buy via our links, we may earn a commission at no cost to you. Learn more
How to Paint a Sailboat? – A Step-by-Step Guide
Written by J. Harvey / Fact checked by S. Numbers

Painting a sailboat hull not only lets you save money, but it can also be quite gratifying. Plus, learning how to paint a sailboat can be likened to taking that one important step of truly claiming your vessel as your own. I mean, they’re our darlings, right?
This simple guide teaches you how to paint the hull of a boat, including a sailboat’s. Overall, it’s not hard to grasp – just a bit tiring, and plenty of waiting is involved.
Table of Contents
Prepare the Following
Step 1. give the sailboat a thorough cleaning., step 2. start sanding the hull’s surface., step 3. prepare the primer, then apply it., step 4. prepare the paint, then start applying the topcoat and antifouling coat., the importance of painting your sailboat, how often do i need to paint my sailboat, some best paints to use for a sailboat, safety tips for painting.

- Marine-grade paint
- Primer (epoxy recommended) and hardener
- Sandpaper (80-grit, 220-grit, and 400 grit)
- Cleaning cloth
- Masking tape
- Roller (or paint sprayer)
- PPEs such as gloves, a coat, and a respirator
Choose a workspace with good ventilation to avoid exposing yourself to fumes, which have many detrimental but highly avoidable side effects. Painting the boat on its trailer on a clear, dry day and positioning it so the paint won’t get direct sunlight exposure are ideal.
Practical Steps for Painting a Sailboat
This guide works well for fresh paint jobs and even if you’re repainting the boat.

Any dirt, debris, and grease should be taken care of in any sailboat paint job. Check for debris and algae clinging to the hull and the sailboat deck, and just use the brush and cloth to get it off.
Double-check parts of the keel because mud and seaweed tend to stick to it the most. If there are barnacles present, you may have to power wash them or any stubborn green stuff you encounter.
Dip the sponge in a mix of boat soap and water, then start scrubbing any stains. Afterward, give the sailboat a good rinse. Wait for it to dry.

Put on your respirator and coat. Use an 80-grit or 100-grit to roughen the surface and remove any lingering trace of old paint by scrubbing in circular motions.
Then, grab the 220-grit to smoothen the surface more. That said, an 80-grit or 40-grit paired with a sander will do just as well, based on my experience every time I repaint a fiberglass boat .
You’d want the surface to be as even and smooth as possible before applying the first coat.

The epoxy primer helps to ensure that the paint will adhere well, too, so I recommend you don’t skip it. Epoxy also acts as a good sealant and prevents cracking and rust.
Before you apply it, put some masking tape over the areas of the hull that you don’t want the coats to go over. It will ensure even coats, too.
Every epoxy primer and hardener combination is different in one way or another. As such, follow what the manufacturer recommends when mixing. Be mindful of how quickly the mixture hardens.
Once you’re done with that step, use the roller to apply even coats of it over the whole surface of the hull. Depending on the size of your boat, this may take a while and can be tiring, so I suggest you ask for help.
Done? It’s time to wait a day to apply another layer. The next day, you can either apply another coat of primer (up to 4 coats is great) or proceed to the painting part.

Mix the paints according to the instructions.
You need to make sure the primer has dried before painting. I suggest two layers of topcoat followed by two equal coats of antifouling paint. But you can also skip to the antifouling paint immediately – your boat, your choice.
- Be sure to pick a good marine-grade paint like TotalBoat’s Alumipaint AF or Interlux’s Fiberglass Bottomkote Aqua. Better yet, you can just head to your local marine shop and ask for recommendations (trust me, they know their sailboat paint best).
- We’re not exactly doing something artsy here, like making an easy sailboat painting with acrylics. You want coats that can take a beating, so choose marine grade only.
Once you’re ready to work, use a roller or a sprayer to apply the paint. Personally, I’d suggest the latter choice because if you spray paint a boat, you’ll get a sleeker, more attractive finish, although it requires some skills.
Therefore, if you’ve never handled a sprayer, the best way to paint a boat would be with a roller. Here are some tips to ensure the best results:
- Pour the paint into the t
- Slightly dampen the roller with clean water.
- Lightly dip the roller into the paint so that no more than half of it is submerged.
- Run the roller on the paint tray’s ramp a few times to evenly distribute the pigment.
- Run the roller from the top to the bottom of the hull. Make sure you apply even pressure as you do so. Remember: the strokes should be parallel and uniform; under no circumstance should you change the stroke to a different pattern.
- Use a paintbrush to access cavities and holes on the hull that your roller can’t reach.
- Apply the suggested number of coats for each type of paint, taking care to sand with the 400-grit or higher with each However, make sure you confirm that it’s recommended by the paint’s manufacturer.

- The first is aesthetics. How can your gaze possibly not be arrested by an exquisitely painted sailboat sailing in the distance? It’s an automatic postcard image.
- Secondly but just as important (if not more), you’re protecting your baby from damage, barnacles, rot, and other nasty things, extending its life and boosting its value.
- It exercises your creativity. Try out some sailboat paint schemes available on sites like Pinterest, and you’ll know what I’m talking about.
I’ve certainly tried one or two of these ideas myself, but not on a skiff and jon boat that I made from scratch. My wife and buddies were positively mesmerized.
- Much like how videos on YouTube showing easy boat acrylic painting puts my mind at ease, I can say the same for when I’m painting sailboat hulls.
A lot of my friends who love to sail, fish, and paint sailboats on canvas say the same since they’re often more than willing to stop by and lend a helping hand during my paint days. We exchange sailboat painting ideas occasionally, and they like the method I’ve shared here.
As such, painting boats can be a way to relax your mind and help you connect with like-minded people. You may also learn helpful tips regarding sailing and boat maintenance along the way.

You need to paint your boat every year if you let it sit in the water all the time and the vessel shows signs of degradation.
That said, if you paint your sailboat with high-quality products, such as marine-grade paint, the coating can last for as long as 10 years, especially if you’re extra careful with your boat and have proper storage for it.
Besides the two brands I mentioned above, you can also try antifouling paints by Rust-Oleum. I just rotated between TotalBoat, Rust-Oleum, and Interlux because these three provided the best results among the sailboat paints I tested.
Rust-Oleum’s Topside Paint paired with the brand’s fiberglass primer work well with fiberglass hulls. But I can say the same for TotalBoat’s Topside Paint. To me, it’s really just whichever of the three is available on my local marine shop’s shelf. Besides choosing the right paint, you may also ask yourself how much it costs to paint a boat. Is it worth it? Check out this article to get the answer!

If you follow most of the preliminary preparatory steps I’ve shared here, you will be keeping yourself safe from start to finish.
- Wear the PPEs I said above every time you’re sanding and applying epoxy and paint on the surface.
- Read any warning labels on the paint and other chemicals you use, like acetone for drying the paint quickly. Handle it with care always.
- Learn how to dispose of your paint properly. It’d be even better if you learned how to recycle it.
- Beware of accidents that may happen while you’re doing the cleaning and prep work. I mean, I’ve hit my head on a sailboat mast while doing them, so I reckon the chance of such misfortunes happening isn’t zero, even on a paint job.
To recap everything I’ve said regarding how to paint a sailboat:
- Position your boat in a good workplace.
- Clean and sand its hull well using boat soap and water and sandpaper.
- Apply 4 coats of the primer, 2 coats of the topcoat, then 2 antifouling coats, or skip to the antifouling paint coat immediately.
- Decide how you’re going to apply the paint based on the finish you want and your skill in using each tool.
We wish you the best of luck with your painting project. If you want to share your results with us, feel free to reach out via the comment below.

“My intention from the first day establishing Boating Basics Online is to provide as much help as possible for boaters who want to experience a first safe and convenient trip. So feel free to join us and share your beautiful journeys to the sea!”
How to Paint a Boat

Learning how to paint a boat is easy, and if you want to make your boat look like new, you'll be surprised what a fresh layer of paint can do. Proper boat maintenance will go a long way in keeping your pride and joy looking great, but when that boat starts to appear aged, knowing how to paint a boat is the key to making it look like new again. And although painting a boat can be time-consuming and expensive, there’s no better way to improve an older boat’s appearance. While this is a rather complex process, we can boil it all down to these five basic steps.
How to Paint a Boat Step-by-Step:
- Remove all hardware (like rails, cleats, and vents) and/or any teak or wood trim on the boat.
- Repair any surface imperfections like chips, dings, or gouges.
- Prep the surface by washing, de-waxing, and thoroughly sanding it.
- Apply the primer, then the paint.
- Wax the boat from stem to stern to protect the new paint job.
Then, simply keep it clean, and rinse it thoroughly after use in saltwater. Remember, before you paint a boat always read the warning labels on all of the supplies and be sure to use the proper protective equipment.

How to Paint a Fiberglass Boat
Painting fiberglass boats isn’t really much different from painting wood boats, except for the type of paint you’ll use and a few details in the prep and application. We should note that the very best finish can be attained by professionals who spray on the paint, rather than applying it with a brush and roller. However, anyone can do a bang-up job painting a boat if they make sure the surface has been properly prepped, and take care during the application.
Paints for Fiberglass Boats
- Single-Part Enamel Paints – These paints are easiest to apply and are less expensive than some other options. However, they also are subject to UV damage over time and the gloss doesn’t tend to hold up as well over the long haul especially if it isn’t constantly waxed and maintained.
- Single-Part Polyurethane Paints – Urethane paints are also easy to apply, don’t cost nearly as much as two-part polyurethanes, and have a long-lasting gloss.
- Two-Part Polyurethane Paints – These undisputedly look best and last longest. Many people would even argue they can out-shine a boat’s original gel coat. However, they are very expensive and are more labor-intensive, as they require mixing, an epoxy primer, and specific temperature and humidity levels for application.
Whichever of these you choose, job number-one is following the manufacturer’s instructions to a tee. We can’t lay out all the details here because each paint has its own specific requirements. The bottom line, however, is that each has its own instructions that can be quite exacting. And remember that like any paint job, good prep work is the key to success. De-waxing is one of the most important factors, because even a tiny amount of wax will prevent the paint from adhering to the fiberglass. Either acetone or a dedicated wax-stripper can be used but in either case, be sure to do a thorough job.
Tips for Painting a Fiberglass Boat
- Most people will use a standard “roll and tip” method for painting large surface areas of a boat. This requires two people and both rollers and brushes. As one person rolls out the paint, another follows behind with a brush and lightly strokes across the paint to brush out the roller pattern.
- One important tip for creating the best surface is to apply multiple, thin, consistent coats, as opposed to one or two thick ones. Three coats of paint is generally considered best.
- Another important tip to keep in mind: be sure to allow the proper amount of cure-time between coats (again following the manufacturer’s recommendations). And if the work takes place outdoors keep an eye on the weather to ensure the temperature and humidity will be acceptable and consistent throughout the entire timeframe.

How to Paint a Boat Bottom
Painting a boat bottom is a completely different experience than painting the boat’s upper hull and topsides. In this case you’ll want an anti-fouling paint that prevents marine growth, and there are countless versions to choose from. Read Antifouling Paints: Which Paint is Best For Your Boat to learn more about some of the different options.
Here’s the good news: learning how to paint a boat bottom is much easier than it is for the rest of the boat, because bottom paint tends to be simpler to apply.
- If the bottom is fresh gel coat, the same sort of prep work (de-waxing and sanding) is necessary.
- If you’re applying over old bottom paint, you can skip the de-waxing process and simply sand or power wash away any old or loose paint. Also, you won’t need to roll and tip; most people skip the tip part of this equation since the bottom will be underwater anyway, and simply roll the paint right on.
- There is, however, one additional factor to applying bottom paint to a boat: you may need to properly time the boat’s launch. Some paints have a minimum dry time but a maximum time as well, and will need to be launched within a certain window.
How to Paint a Boat Hull
Painting a boat’s hullsides is usually a lot easier than painting the topsides, simply because you’re dealing with a large, smooth surface area. There will only be minimal hardware to remove (in this case you may want to simply protect it with masking tape, though this rarely provides as good a final finish), and you won’t have to worry about angled surface areas or tight corners.
There is one variable to note, however, about painting a boat hull. You will be working on a more or less vertical surface, and if you apply the paint too thickly, drips and runs will result. So it’s very important to apply the pint evenly and thinly.

How to Paint a Boat with Non-Skid
Molded fiberglass non-skid and non-slip surfaces can’t be painted the same way as the rest of your boat. It’s impossible to sand or apply paint between the tiny imprints, and even if you did paint it, it would wear unevenly as people walk across the top of the pattern without ever touching between the raised surfaces. But that doesn’t mean you can’t make that old non-skid look like new again.
- The best way to paint non-skid is to apply a textured compound. There are several on the market designed specifically to paint a boat deck. They have some sort of grit or tiny rubberized pellets mixed in with the paint, to give the boat’s deck a fresh look but still maintain its non-slip properties.
- Once again, each has its own set of specific application instructions, prep work is key, and several coats are usually necessary.
- On additional variable you need to know about is the roller; since these paints have solids mixed in, you usually need to use a roller brush specifically designed to spread them.
Yes, painting a boat is a big, time-consuming job. Sure, it requires some expense. But remember, there’s no better way to make an older boat look new again than to give it a fresh paint job.
Editor's Note: Remember that many paints, primers, and wax strippers emit chemical fumes, and sanding can also create potentially harmful conditions for both you and the environment. Before you paint a boat always read the warning labels on all of the supplies and be sure to use the proper protective equipment.
Learn More in our Boat Maintenance Guide
Looking for more on boat maintenance and upkeep? Read...
- Antifouling Paints: Which Paint is Best for Your Boat?
- Boat Storage: What Are My Options?
- How to Winterize a Boat
- Spring Start-Up Checklist

Join Our Newsletter!
Get community news, buying bargains, and how-to guides at your fingertips.
- How to paint a boat: A step-by-step guide
Painting your boat not only enhances its visual appeal but also protects it from the damaging effects of saltwater, sunlight, and other elements. Whether you have a sailboat, powerboat, or kayak, the principles of boat painting remain largely the same.
Assessing your boat's condition
Before you begin, evaluate your boat's current condition. Inspect the hull for any damage, scratches, or rust that may need to be addressed before painting. Make a list of necessary repairs and tackle them first.
Gathering the right tools and materials
To paint your boat successfully, you'll need a range of tools and materials, including paintbrushes, rollers, sandpaper, masking tape, drop cloths, and, most importantly, the appropriate marine paint.
Preparing the boat surface
Proper preparation is the key to a successful paint job. Start by cleaning the boat's surface thoroughly to remove dirt, grease, and old paint. Sand the surface to create a smooth and clean canvas for the new paint to adhere to.
Applying primer
Priming is a crucial step to ensure good paint adhesion and durability. Apply a marine-grade primer that is compatible with the paint you've chosen. Allow it to dry thoroughly as per the manufacturer's instructions.
Read our top notch articles on topics such as sailing, sailing tips and destinations in our Magazine .
A man taking care of his ship.
Choosing the right paint
Selecting the right type of marine paint is essential. There are different types of boat paint available, such as antifouling paint, topside paint, and bottom paint. Choose the one that suits your boat's needs and your intended use.
Applying the paint
Start by applying the paint to the boat's surface using a paintbrush or roller. Use long, even strokes, working from one end to the other. Be mindful of the weather conditions, as extreme temperatures and humidity can affect the paint's drying process.
Applying additional coats
For best results, you may need to apply multiple coats of paint. Follow the manufacturer's recommendations for drying times between coats. Applying multiple thin coats is often better than one thick coat.
Drying and curing
Allow the paint to dry completely before launching your boat into the water. The curing time can vary depending on the type of paint and environmental conditions. Follow the paint manufacturer's instructions for specific guidance.
Final touches and cleanup
After the paint has dried, remove any masking tape and clean your tools and equipment. Inspect your boat's finish for any imperfections, and make any necessary touch-ups.
Painting a boat requires careful planning, preparation, and attention to detail, but the results can be incredibly rewarding. Not only will your boat look like new, but it will also be better protected against the elements, ensuring many more enjoyable days on the water.
Whether you're a DIY enthusiast or a boat owner looking to maintain your vessel's beauty and functionality, this step-by-step guide on how to paint a boat will help you achieve a professional and long-lasting finish. So, roll up your sleeves, gather your materials, and give your boat the makeover it deserves. Happy painting!
So what are you waiting for? Take a look at our range of charter boats and head to some of our favourite sailing destinations .

Ridetheducksofseattle is reader-supported. When you buy through our links, we may earn an affiliate commission. Learn more
How to Paint a Sailboat? Expert Tips and Techniques
Written by Anthony Roberts / Fact checked by Jonathan Larson

Some folks don’t like their sailing vessel’s color, so they may want to learn how to paint a sailboat DIY style. Or maybe the boat needs a retouch for a brand-new and more vibrant look while on the sea.
Regardless of the reason, this easy-to-follow sailboat painting guide will help you splash colors and breathe life into your sailing vessel. The steps are straightforward, although patience is essential.
Let’s start.
Table of Contents
Step 1. Clean and sand the sailboat.
Step 2. apply primer on the sailboat’s hull., step 3. get the paint ready., step 4. apply the paint., sailboat maintenance tips , ways to paint a sailboat.
Painting a sailboat is like coloring any object. It requires preparation, elbow grease, and commitment to complete the job.
Things you’ll need:

- Marine-grade sailboat hull paint
- Paint roller, brush, and paint tray
- Primer and hardener
- Mask, gloves, goggles, and coat
- Soap and sponge
- Scrubbing brush
- Water hose (or power washer)
- Cleaning cloth
- Masking tape
We understand painting a sailboat can be intimidating for beginners. It can be a fun experience (though tiring), too. So, we prepared a four-step process to make this activity as easy to follow as possible.

Surface preparation is crucial in any paint job. You’ll want a clean, contaminant-free, and smooth surface to ensure the paint adheres to the hull. Here’s how to get your sailboat ready for a paint job.
- Wear your protective gear.
- Check for any signs of damage and repair them accordingly.
- Spray your sailboat clean using a power washer or a hose until the hull is free of dirt, grease, barnacles, etc.
When encountering stubborn objects, scrape them off with a scrubbing brush.
- Create a soapy solution and moisten the sponge. Scrub the boat with the cleaning agent to remove stains.
- Rinse thoroughly.
- Once dry, roughen the boat with 80- to 100-grit sandpaper. Finish the job with 220-grit sandpaper to smoothen the surface.
Pro Tip: Use an orbital sander with a 40- to 80-grit sanding disc for better results.

A paint primer is crucial for any painting project, whether by hand or machine. This initial coat gives the boat paint something to “cling” to, ensuring it lasts longer than a primer-less surface.
- Remove all the hardware from the vessel.
- Cover sailboat trims and other elements you wish to leave unpainted. The tape’s straight edge also guarantees more uniform coats.
- Combine the epoxy polymer and hardener following the brand’s instructions.
- Pour the mixture into the paint tray and run the roller to coat it with the priming solution.
- Apply the primer on the sailboat’s hull, covering every square inch.
- Leave the primer to dry for about a day.
- Repeat the primer application three more times, allowing each coat to dry for a day before applying the next layer.
- Lightly sand the primed surface with 300- to 400-grit sandpaper until the boat is smooth.
- Dip a clean rag into a solvent, such as mineral spirits and xylene, and wipe the boat again.
Pro Tip: Use a small paintbrush to apply primer on corners and other areas the paint roller cannot reach.

You can either retouch your boat with acrylic paint or a marine-grade variant.
- Acrylic is water-based. Therefore, applying it on a boat might not provide adequate waterproofing, which can result in premature peeling.
However, acrylic paint has the advantage of drying quickly and containing less toxins. To mitigate its drawbacks, you can apply a waterproof coating as the final layer.
- Marine-grade paint is usually the preferred choice, as it’s waterproof, UV-resistant, and salt-resistant.
That said, marine-grade paint is not for easy sailboat painting since it’s a lot harder to apply and requires meticulous handling. In addition, it’s also pricier than acrylic paint.
In either case, please follow the paint manufacturer’s instructions on preparing and mixing the pigment.

You’re ready to apply paint colors to your sailboat. This step might vary a bit depending on the paint manufacturer. Hence, we highly recommend reading the painting instructions.
- Hose down the area you’re working to settle the dust.
- Pour the boat paint into the tray and lightly dampen the roller with water.
- Immerse half the roller into the paint can and run it several times on the tray for even distribution.
- Paint the sailboat’s hull, ensuring firm and even pressure. Maintain uniform strokes.
- Dip the paintbrush into the paint and remove excess pigment. Paint areas the roller cannot reach.
- Leave the paint to dry following the manufacturer’s recommended curing time.
- Smoothen the surface with 400-grit sandpaper (you can use finer-grit sandpaper). However, you might want to check the paint manufacturer’s guidelines if this step is necessary.
- Apply a second and third paint coating, ensuring the recommended drying time between applications.
Pro Tip: Apply two layers of top coat and antifouling paint to make your DIY sailboat paint job last longer.

Maintaining a sailboat is crucial because it prolongs its lifespan and boosts its resale value. After all, nobody would want to buy a barnacle-ridden, stain-filled watercraft.
- Wash and clean your sailboat periodically with mild, boat paint-friendly cleaners to avoid removing the paint’s protective coating.
- Use soft water when cleaning the sailboat because hard water can strip pigments off the hull.
- Apply a marine-grade UV protectant or sealer after every wash to leave the sailboat looking pristine and brand-new.
- Repaint a boat with marine-grade pigments at least once annually, especially if you don’t take it out of the water and notice telltale signs of damage or deterioration.
- Choose a sailboat paint to meet your needs. For example, gelcoat paints are ideal for creating a mirror-like finish but require frequent reapplication. Meanwhile, polyester-based topcoat paints can produce gelcoat-like finish but last longer.
Learning how to paint a sailboat offers many benefits beyond extending your watercraft’s lifespan, allowing you to enjoy more leisurely cruises with your loved ones. Painting a boat can be relaxing and rewarding, too. It unleashes creativity and empowers you to be more productive.
However, painting a sailboat takes time, although the process is easy. And if you are a busy bee, you’re better off handing this task to the pros. The results might even be better, except nothing can bring more joy than a project you complete with your hands.

I am passionate about water sports and technical fields, so combining both makes me interested in making contents about boat accessories. With my partner, we went on many trips and sports games together, which led us to think about how we can spread our joys and passions to many people.
- View Full Site
- Advertising
- Cookie Policy
- Privacy Statement
- Terms of Service
- Cars, Trucks & Boats
- Boating & Sailing
- Boat Repairs
How to Paint a Boat Hull
- Written by Doityourself Staff on Dec 22, 2009 To ensure our content is always up-to-date with current information, best practices, and professional advice, articles are routinely reviewed by industry experts with years of hands-on experience. Reviewed by H.R. Helm on Jun 01, 2021
- 6-30 hours •
- Intermediate •
A poorly painted boat hull will easily strip away. If foreign materials in the sea don't get to it, simple water pressure will eventually destroy a poor paint job. Even worse, improper painting can actually result in not just discoloration of the hull, but actual weakening of the hull. Knowing how to paint a boat hull isn't just a great way to give the vessel a vibrant appearance, it can also extend the lifespan of your boat.
Painting a boat hull requires a lot of time and effort. Here are some helpful steps that will enable you to effectively paint your hull.
Step 1 - Protect Your Skin
Throughout the preparation and painting process, wear gloves to reduce the contact between your skin and the substances you'll be using. This not only is a neat way to limit messes, but also protects your skin from any irritants or allergens that may be in the materials.
Step 2 - Prepare

Even though you will be using specialized boat or marine paint for this job, you'll still need to prepare the hull's surface for it to stick properly. In this case, that means a layer of industrial solvent.
Dip a sponge into the industrial solvent and apply it to the boat hull surface. In addition to prepping the surface for paint, this step also removes any wax that may be present from your regular boat maintenance.
Step 3 - Sand
After applying the solvent, it’s time to clean the boat hull further by using an oscillating power sander. This device strips away previous traces of paint from your boat hull. Be thorough with your sanding, as painting on an improperly sanded boat hull will result in paint discoloration or removal.
Follow all manufacturer instructions when using the power sander. It's a dangerous heavy duty piece of machinery.
Step 4 - Repair
Before applying the paint, make any necessary repairs to the hull. Apply epoxy glue to any holes or abrasions and smooth it out carefully to prevent any epoxy lumps from forming on the hull. Lumps will make it harder for you to paint the boat hull.
Step 5 - Apply the Primer

Once the boat hull is fully repaired, it’s time to apply the primer by using a roller. Roll the primer over the boat hull as evenly as possible.
After priming, sand the boat hull for a second time. Apply another layer of primer after sanding. This back and forth of sanding and priming create a fortified foundation for your paint job.
Step 6 - Paint
Once you've created a strong base with your repeated sanding and priming, it's time to paint. Use a roller and paintbrush to color your boat hull with marine paint. Brush the hull carefully, especially on areas where bubbles form up. When the painting job is done, let your boat hull dry for several hours.
Step 7 - Finishing Touches
Apply thinner layers of paint in order to smooth out your newly painted boat hull. Continue applying paint until you’ve achieved a thoroughly smooth, even paint job.
- Weekend Projects
Related Posts
Popular articles.

- our experts
- terms of use
- privacy policy
- cookie policy
DoItYourself.com®, founded in 1995, is the leading independent home improvement and repair website. We welcome your comments and suggestions. All information is provided "AS IS." Website operating problems contact [email protected] . Questions of a Do It Yourself nature should be submitted to our " DoItYourself.com Community Forums ". Copyright© 1995-2024 MH Sub I, LLC dba Internet Brands. All rights reserved. You may freely link to this site, and use it for non-commercial use subject to our terms of use . View our Privacy Policy here .
You are using an outdated browser. Please upgrade your browser or activate Google Chrome Frame to improve your experience.
- Account details
No products in the cart.
Boat Owner’s Guide: How To Prepare and Paint a Boat
- Blog Boat Owner’s Guide: How To Prepare and Paint a Boat
Boats are exposed to a variety of elements and objects — water and all the vegetation and organisms that come with it, UV rays of the sun, extreme temperatures, sand, trailers, docks and more. It’s no surprise the paint on boats begins to crack and fade over time. When this happens, a fresh coat of paint can make a world of difference, but only if it’s done properly.
With the exposure to all these elements and objects, boats end up with peeling paint and dents. Simply painting over this uneven, damaged surface will leave you with an ugly paint job that is susceptible to peeling — and an expensive bill to fix it. They key to getting your boat like new is in the preparation. According to Sailing World, 75 percent of a successful paint job is the preparation . That means taking time to inspect your boat for problem areas, scrape off peeling paint, sanding, feathering, filling and priming — all before you apply your first coat of paint.
What you’ll need to get started:
- Protective glasses
- Tack cloth/rag
- Putty knife
- Dewaxing solvent
- Epoxy filler
- Random-orbital sander or finishing sander
- 80- to 120-grit sandpaper
- Paint roller
- Topside boat paint
- Boat bottom paint

How to Prepare a Boat’s Hull for Painting
If you’ve been wondering how to prepare a boat for painting, there’s no short answer. The reality is the actual painting of your boat takes the least amount of time — the preparation is the time-consuming part. However, with the right preparation, your coat of paint will last several years and make your boat look like new. So how do you paint a boat hull?
How to Choose an Environment to Prepare and Paint Your Boat
The preparation and painting of your boat begins with choosing a place to prep and paint. While the location may not seem like a big deal, this process is an investment of time and money, and the environment you choose can have a significant impact on the result. Here are a few of our recommendations for determining the perfect location.
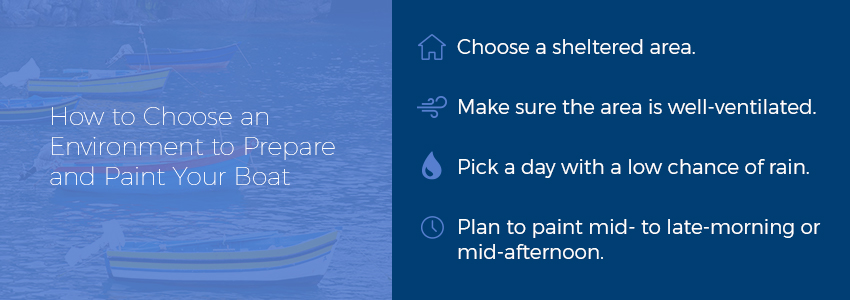
- Choose a sheltered area.
The ideal location for both preparing and painting your boat is under some sort of shelter. A shed is the best option, but you can also create your own shelter from tarps or plastic sheeting if a shed or other structure isn’t available. The ultimate goal is to have an area free of any windblown debris. Protection from the elements, including the sun, is another perk of prepping and painting your boat in a sheltered area.
- Make sure the area is well-ventilated.
The ideal location for both preparing and painting your boat is under some shelter. A shed is the best option, but you can also create your shelter from tarps or plastic sheeting if a shed or other structure isn’t available. The ultimate goal is to have an area free of any windblown debris. Protection from the elements, including the sun, is another perk of prepping and painting your boat in a sheltered area.
- Pick a day with a low chance of rain.
While protection from the elements and debris is ideal, it’s also important to balance that protection with ventilation. Even before you begin priming and painting your boat, you’ll be sanding and using solvents, both of which require a well-ventilated area to keep you safe from sawdust and fumes.
- Plan to paint mid- to late-morning or mid-afternoon.
Moisture isn’t just present on a rainy day, but also in the dew in mornings and evenings. Avoid painting first thing in the morning or last thing in the evening for these reasons. It’s also wise to avoid high noon, when the sun is at its peak for heat. Both of these extremes will impact paint drying time, so it’s best to plan accordingly and paint mid- to late-morning or in mid-afternoon — after the dew has evaporated. Save noontime for your lunch break.
How to Prepare a Boat for Painting

While getting a fresh coat of paint on your boat is the ultimate goal, the preparation is going to take the longest amount of time. If you skimp on the prep work, it will show in your paint job. Here’s how to do it right:
- Clean the boat.
The very first step is to thoroughly clean your boat. This is easiest to do shortly after you remove the boat from the water, when it’s still wet. To ensure you get a deep clean, you should use a combination of a pressure washer or high-pressure hose, scraper and rags.
Make sure you remove everything from the surface of your boat, including barnacles and other hard growth that may have attached to your boat. You want to start with a clean slate — anything like slime, dirt, sand or hard growth that is stuck on your boat will get in the way of a smooth paint job.
- Remove the hardware.
We know removing every single piece of hardware possible is time-consuming, but it’s the only way to ensure the best possible paint job. This includes any aluminum siding on your boat. If there are pieces of hardware you absolutely cannot remove, you can carefully cover them with painter’s tape.
If you’re wondering why you can’t just mask and paint around all the hardware, the answer is that the paint will often be on the piece of hardware and the boat. Over time, that paint will be much more likely to crack, welcoming in water and debris, which results in flaking and peeling paint and creates more work for you in the end. Do yourself a favor and dedicate the time to removing the hardware up front to avoid problems down the road.
- Strip the wax coating.
Almost all boats have a wax finish on them. Primer or paint won’t adhere to wax, so you must remove it before you apply to prevent headaches. If you aren’t sure whether or not your boat has a wax finish, usually simply running a finger along the surface of the boat will give you the answer.
Boat solvents, with the help of rough sponges, can help you get rid of any bit of wax that is on your boat. It may take a few rounds of scrubbing — you’re only finished when there’s absolutely no waxy feeling left on your boat.
- Tape off an area to paint.
Marking off the area you’re going to prime and paint is just as important as choosing the right kind of tape. If you pick the wrong tape, you’ll be spending a lot of time removing the tape and/or the residue it leaves behind. Invest in a “long-mask” tape, like 3M’s 2090 Scotch Blue Painter’s Tape, which can handle the UV rays, but also can be left on a surface for several days.
- Mark trouble spots with tape.
Once you have marked the area you’re going to paint first, it’s time to inspect that area for trouble spots. What exactly is a “trouble spot”? Look for dents, dings and places where the paint is chipped and/or peeling. Mark them all with a small piece of tape so when you’re finished, you can see all of the trouble areas that need to be addressed.
- Scrape off peeling paint.
Peeling paint isn’t going to help your new paint job. Air and water have already made their way between the paint and the surface of the boat, which means it will continue to peel even with a fresh coat of primer and paint on top of it. To ensure an even, well-adhered coat of fresh primer and paint, remove all peeling paint. If you’re applying a different type of paint than the old paint, you’ll need to scrape and sand off all the pre-existing paint.
The best way to do this is to scrape the paint off with a sharp putty knife, making sure you keep the edge of the knife parallel to the surface. Cutting into the surface will result in creating new dents, and ultimately, more work.
Once you’ve scraped off all of the peeling paint, it’s time to sand and feather the edges around those areas to get the surface as smooth as possible. Put on your mask and protective glasses to avoid inhaling toxic paint chips and sawdust. Use a random-orbit or finishing sander, like our Mirka Pneumatic Random Orbital Finishing Sander , but never a belt sander, which is sure to do more damage than good. You’ll want a rough sandpaper to get the job done — somewhere between 80- and 100-grit.Once you’ve scraped off all of the peeling paint, it’s time to sand and feather the edges around those areas to get the surface as smooth as possible. Put on your mask and protective glasses to avoid inhaling toxic paint chips and sawdust. Use a random-orbit or finishing sander, like our Mirka Pneumatic Random Orbital Finishing Sander , but never a belt sander, which is sure to do more damage than good. You’ll want a rough sandpaper to get the job done — somewhere between 80- and 100-grit.
The particular type of sandpaper you choose depends on the boat’s material. We recommend Mirka Abranet sandpaper , which relies on flexible fabrics with breathable, net-mesh designs. Breathable means this sheet provides dust-free sanding for materials ranging from aluminum to carbon steel. If you’re working with wood, Mirka Bulldog Gold Proflex Sandpaper has aluminum oxide grain, which gives you a good cut and excellent scratch pattern.
How to Prime a Boat
Once you’ve prepared the surface and have a clean, smooth surface free of peeling paint, you’re ready to prime the boat. While our directions are for two coats of primer, please note you may need to repeat filling and sanding a few times, depending on the number of dents and low spots you have.
- Wipe surface with a tack cloth.
Regardless of whether you use dust-free sandpaper and/or a vacuum to collect the dust, you still want to follow your sanding and feathering with a tack cloth. This cloth has just enough of a tacky finish on it to remove any remaining loose particles, leaving you with a flawless finish.
- Apply the first coat of primer.
Once you’ve wiped down the entire area with a tack cloth, it’s time to apply your first coat of primer. Resist the urge to apply a thick coat — instead, paint on just enough to cover the surface of the area you’re going to paint. Let the primer dry. Make sure you follow the manufacturer’s instructions for drying time and time between coats. Don’t panic if you can see uneven spots on the surface — we’ll address that in the next step.
- Fill low spots with epoxy.
Inevitably, you’ll notice uneven spots on the surface — maybe left over from dents or peeling paint you tried to sand out. Once the primer has dried, it’s time to touch up these low spots with epoxy. Using your putty knife, apply the epoxy and do your best to evenly spread it over the low areas, creating a surface that’s as even as possible. Then, let the epoxy cure.
- Lightly sand.
Once the epoxy has cured, you want to lightly sand the area with a higher-grit sandpaper, something close to 320-grit, to get a completely smooth surface. We recommend using Mirka Waterproof Sanding Sheets , specifically designed for wet sanding — just in case the epoxy isn’t 100 percent cured, this sandpaper will still get the job done without worrying about creating a mess.
- Wipe with a tack cloth.
Once you’ve sanded the epoxy, wipe the entire area down with a tack cloth. You should reveal a smooth surface, free of low spots and dents. If you discover the area is completely smooth, move on to the next step. If you still see some low spots that could be improved, fill them with epoxy and repeat until you have a smooth surface.
- Apply a final coat of primer.
When you finally have a smooth surface, apply your final coat of primer and remove the tape while the primer is still wet. Let it dry — again, making sure you follow the manufacturer’s instructions for drying time and time between priming and painting. This final coat of primer should even out the color over the already seamless surface, proving your preparation is complete and you are finally ready to paint your boat.
How to Paint a Boat
The preparation is officially complete once the final coat of primer has dried. Now, it’s time for the final set of steps to complete your project — painting your boat.
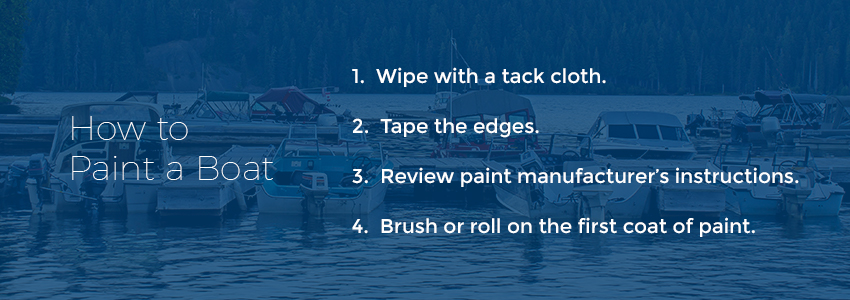
Once your primer has dried, wipe the entire surface down with a tack cloth, removing any loose dust or dirt that has accumulated.
- Tape the edges.
Once you’ve wiped down the entire area, tape the waterline and along the top edge of the topside. Again, be sure to use long-mask tape. In addition to taping the waterline, consider covering the boat bottom or antifouling area.
- Review paint manufacturer’s instructions.
Since there are different types of topside boat paints, it’s important to remember to consult the manufacturer’s instructions before you begin painting. Some paints require thinner or have other specific mixing instructions. You want to make sure you’re following every piece of advice the manufacturer gives you before you begin to apply the first coat of paint.
- Brush or roll on the first coat of paint.
Once you’re certain you have read the manufacturer’s instructions and have mixed the paint accordingly, it’s time to apply your first coat. The majority of topside paints can be rolled or brushed on, but again, the deciding factor should be whatever the manufacturer recommends. Begin by rolling or brushing perpendicular to the waterline, making sure to take shorter strokes and covering only a small area at a time. Then, brush or roll parallel to the waterline to finish. Let the paint dry and apply additional coats per the manufacturer’s instructions.
- Remove the tape.
Before the final coat of paint is dry, remove the tape. Waiting until the final coat is dry puts you at a higher risk of peeling paint along with the tape, causing you to have to start some of the preparing and painting processes all over again.
Painting the Deck and Bottom of the Boat
While there are a lot of similarities when it comes to preparing and painting the deck and bottom of your boat, there are also some notable differences.
The deck of your boat is likely a combination of fiberglass and non-skid surfaces. On the deck, it may not be possible to remove several pieces of hardware. In that case, you should meticulously tape off all the hardware and cover upholstery and electronics. Aside from that, the preparation and painting are very much the same, except for the non-skid surfaces. When these areas are damaged, you have two options — stick an entirely new non-skid surface over them, or paint them with a paint that contains a non-skid compound.

The bottom of your boat has maximum exposure to the water and all the growth and organisms living in it — so the paint selection for the bottom of your boat is different. What is bottom paint on a boat? Bottom paints contain a biocide, often in the form of copper, that is meant to continuously slowly fade away to expose more of the biocide, which prevents barnacles and other marine growth. For more information on bottom painting a boat, visit our how-to guide for painting the bottom of a boat.
Paint Your Boat Propellers and Running Gear
We’ve covered the topsides, deck and bottom of a boat, but should you paint your boat propellers and running gear? While the appearance of your propeller and running gear may not be a high priority, the performance is a top priority.
If you’ve been wondering how to keep marine growth from fouling your propellers, painting it just might be the answer. Applying a foul release coating to these areas can improve performance and protect your boat propellers by preventing the buildup of weeds, barnacles and more by creating a super-smooth hydrophobic surface marine life can’t latch onto.
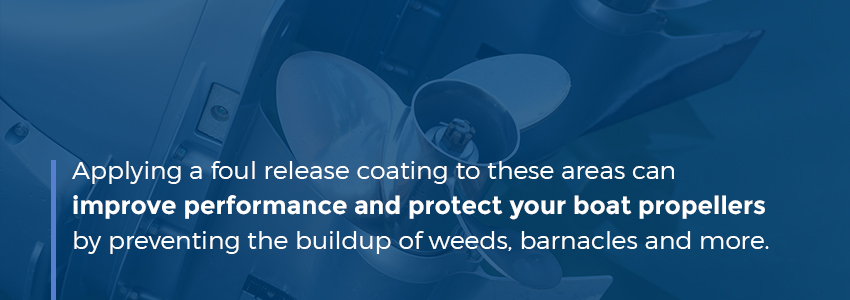
By painting a foul release coating onto your propeller and running gear, you can expect to:
- Improve acceleration and maintenance of speed. The ultra-smooth surface creates less friction, which decreases drag and resistance, resulting in more knots.
- Decrease fuel consumption. Even the slightest buildup on your propeller and running gear causes more fuel to be used to compensate for the loss in speed and engine power.
- Reduce cavitation. An unhindered surface causes less disruption in the propulsion, and therefore causes fewer air bubbles.
- Eliminate the need for biocide and produce fewer CO2 emissions. Poisonous biocides aren’t necessary with this slippery surface, and the reduction in drag also means fewer CO2 emissions are produced.
Different Types of Topside Boat Paints
As a whole, topside paints are similar. Meant for use above the waterline, they’re durable, resistant to moisture, can endure hull expansion and contraction and resist UV rays. The differences between the types of topside boat paints are in how well they rank in each of these areas.
- Two-part polyurethane paints outperform every other topside paint when it comes to hardness, scratch and UV ray resistance and gloss and color retention. Why not stop here? Because it comes with a price tag to match. In addition to being the most expensive topside paint, it also requires very specific primer and application equipment.
- One-part polyurethane paints are perfect for do-it-yourselfers. While they don’t quite have the performance of two-part polyurethane, they’re easy to apply and provide a beautiful shiny gloss finish. They’re affordable, safer to mix and apply and easy to touch up.
- Alkyd marine enamel paints are very popular because they’re easy to apply, glossy and affordable. They require fewer coats, but will require a fresh coat each year, as they aren’t as durable. Their oil base makes them a great match for wood, and they’re easy to touch up.
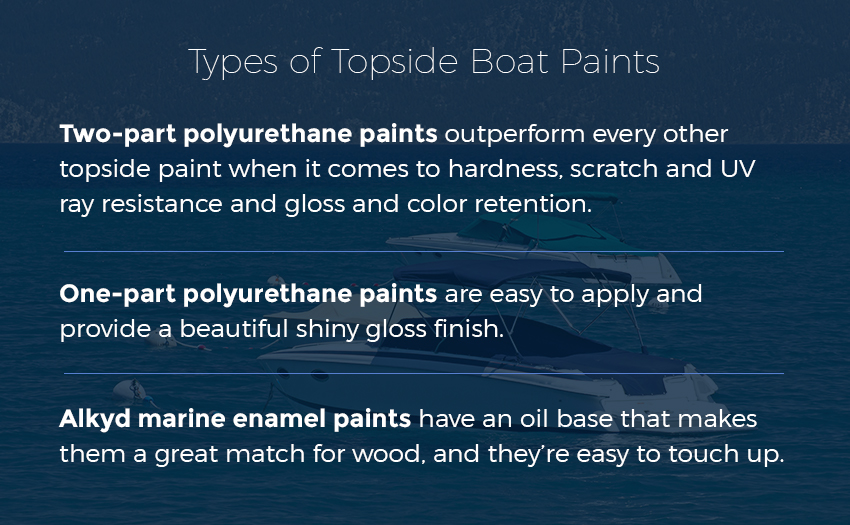
It’s important to remember that regardless of which type of topside boat paint you choose, you’ll need to check compatibility with the paint that’s currently on your topside. Two-part polyurethane paints, for example, can only be painted over other two-part paints. If you’re unsure what topside paint is currently on your boat, you can do a solvent test to check or strip the entire topside before painting.
National Abrasives, Inc.
At National Abrasives, we’re here to help you prepare your boat for painting, so it looks like new. Our random-orbital finishing sanders and Mirka specialty sandpapers will get every part of your boat ultra-smooth as you prepare to paint it. Take advantage of our bulk discounts free shipping and excellent customer service to make sure you always have what you need to prepare and paint your boat for the next season. Contact us to discuss your boat preparation needs, and we’ll recommend the products that will work best for you.
- PO Box 315, Lewisberry PA 17339
- 717.697.6776 | 800.459.8008
- [email protected]
VISIT OUR HEADQUARTERS
- 941 Mt Airy Rd, Lewisberry, PA 17339
- Open M-R 8am - 4PM Friday 8am-2pm
Shop Securely Online
- Request Credit Application
How to Paint Your Boat: A Step-by-Step Guide to Paint a Boat
Ahmed m. aly.
- June 27, 2023

Boating is a good leisure hobby that allows you to be amidst nature. You can use your boating time to enjoy the beauty of nature and engage in various activities like fishing and meditation. Whether you own a simple bass boat or a larger vessel with a superstructure, one thing remains common; your boat will eventually lose its shine and require a fresh coat of paint. This is where knowing how to paint your boat becomes essential.
In this article, we’ll discuss the different aspects of painting a boat. We’ll cover the advantages of taking on the project yourself, the various types of paints suitable for boat painting, and a step-by-step process to assist you in achieving a professional-looking finish with regular maintenance. Let’s get started!
Is Painting Your Boat Worth it?
Many of you might have painted a door or a portion of the wall of your home. But is it possible to entirely paint your boat on a DIY basis? Well, you must first understand that boat painting is more complex than a door or wall.
Secondly, the work involved depends on the size and complexity of the boat. It requires many working hours, material, and patience. If you are inclined to invest your time and have the patience to learn and do it, then you can successfully attempt it.
You have to do the boat painting at regular intervals. If you leave the boat without maintenance for a very long period, only a professional can bring it back to its original shine, which can be costly.

The Three Parts of a Boat Paint Job
- The first part is removing all the possible hardware and protecting the remaining hardware with painter’s tape.
- The second part is preparing the surfaces for painting, which involves getting rid of the existing coating of the paint and creating a profile or texture required for good adherence.
- The third part is applying the recommended primer and paint.
The second part is the most challenging and laborious, and you have to understand the work involved before deciding whether to do the boat painting on a DIY basis and whether it is worth it.
However, there is one solution. You can offload the surface preparation job to a wet abrasive blasting expert and do the remaining work yourself (parts one and three). Wet abrasive blasting is an effective, fast, and environmentally friendly solution for preparing the boat surfaces for painting.
The wet abrasive blasting can create the required texture or profile on the surfaces for good adherence to painting. Wet abrasive blasting is possible on wood, aluminum, and fiberglass. The advantage is it can reach and remove the old paint from all the nooks and corners of the intricate inner boat surfaces. You can enquire with your local contractor; they usually have portable wet abrasive blasting units.
Types of Coats / Paints Available to Paint Your Boat
The paints used for boat painting are called marine paint, and they are manufactured suitable for the marine environment and to protect your boats from salt water and lake water.
Marine paints give corrosion and abrasion resistance to the painted surfaces and maintain hydrodynamic properties. Some marine paints also have anti-fouling and self-cleaning properties.
Different paints are available in the market, like simple enamel paints, single and two-step polyurethane, etc. Polyurethane paints last longer than enamel paints. Ensure the selected primer and paint are compatible.
Paints for the Topsides of the Boat
The topside includes surfaces above the waterline, such as, hull, deck, and the inside from the gunwale. Marine paints used for boat top painting should resist UV (Ultraviolet) rays since they are exposed to the sun and susceptible to UV damage.
Paints for Bottom Side of the Boat
This refers to the portion below the waterline. Marine paints used for boat bottom painting should resist aquatic and marine growth.
Types of Paints Suitable for Different Boat Types
Your boat may be of wood, aluminum, or fiberglass. Let us briefly discuss the paints suitable for painting these boats.

Aluminum Boats
Marine grade aluminum paint for boats can be used for touching up or restoration. The advantage of aluminum paint is it dries fast, and some aluminum paints do not need a primer.
Aluminum paint can be used on all the areas of the boat (boat bottom painting and top painting). Read the manufacturer’s directions for applying this paint.
Wooden Boats
If you have a wooden boat, it is better to stick to the traditional oil-based paints recommended for marine applications.
Spending money on expensive two-part paint may not be worth it since a wooden boat swells and flexes typically along the seams, and the paint, whether oil-based or two-part, has the same life. Make sure to read the manufacturer’s directions for applying the paint.
Fiberglass Boats
Fiberglass boats can be painted with enamel paint, one or two-part polyurethane paints, gel coat, etc. This can be “rolled and tipped” or sprayed onto the boat’s fiberglass surface.
Ensure the paint is recommended for marine use and read the manufacturer’s directions for applying the paint. Some manufacturers offer acrylic latex paint for painting fiberglass boats.
One-part Enamel Paints
These paints do not involve mixing different ingredients; they are economical and easier to use than high-end paints. Conversely, they are susceptible to UV damage over time and need additional caution, like periodic cleaning and waxing.
Polyurethane Paints
These can be one part or two parts. Polyurethane is the most prevalent form of one-part paint because its long-lasting gloss is less expensive than two-part polyurethane paint, and it has a better and long-lasting gloss finish than enamel paints.
Two-part polyurethane paints cost more than the other paints discussed above, but they look better and last longer.
Apart from the high cost, a two-part polyurethane paint needs additional labor (for mixing) and an epoxy primer, and the painting has to be done at the recommended ambient temperature and humidity.
Interesting Read: Different Types of Boats | Your Guide to Boat Types
Step-by-Step Process of Painting Your Boat

Your boat may be of wood, fiberglass, or aluminum, but the method and steps of painting will be more or less the same.
Professionals use spray painting techniques to get a good quality painting. If you have the facility, you can do spray painting. However, you can achieve a fairly good painted surface using a roller and brush, provided the surface preparation is good.
Normally, a team of two persons does the boat painting, the first person does the painting using a roller, and the second person follows the first with a painting brush and evenly removes the roller pattern using light strokes.
Steps to Paint Your Boat
Step 1. wash the boat.
Wash the complete boat with soap water followed by clean water to remove all the dirt, marine growth, sand, etc. You can use high-pressure water if available.
Step 2. Collect the Paining Materials
Collect all the painting materials, such as, primer, paint, sander with discs, emery paper, rollers and brushes for painting, safety gear, etc. If you have yet to learn how to use a sander, take the help of a professional and learn how to use it.
Read all the instructions on the primer containers, and paint and follow the safety guidelines like wearing a respirator, safety glasses, and recommended clothes during sanding and painting.
Step 3. Repair Leakage Points
Inspect all the areas of the boat, including the superstructure and make a list of leakage points (the leakage may be through a fastener, fitting, damaged joints, corroded parts, etc.) and attend to them before boat painting.
Mark the chipped and cracked areas and rectify them. You can use the services of your experienced friend or a professional to help you.
Step 4. Protect Boat’s Hardware
Take out as much of the hardware items (bow rails, cleats, fasteners, beadings, etc.) from the boat, and the remaining are to be protected using painter’s tape. All the corroded fittings and fasteners are to be replaced.
Do not think stainless steel is rust-proof; it has higher corrosion resistance, but seawater can corrode it over time. All the rubber beadings are to be replaced.
Step 5. Surface Preparation
The next step is surface preparation. You have to get rid of the old paint and prepare the surface for the new paint, this process is called surface preparation or prep work.
Use the painter’s tape to cover the areas that are to be protected and to mark boundaries. Use a sander with 80,120, 220, and 320 grit sandpaper to remove the paint and the glassy surface and create an even and smooth surface profile/texture.
The surface preparation includes intricate inside parts, like decks, cabins, cockpits, fly-bridges, and other parts. This is a complex process and takes your time and needs patience.
Step 6. Remove Protection Tapes
Remove the tape. Wash the sanded surfaces with pressure water and a sponge and allow them to dry.
Step 7. Clean the Surface
Clean the surface using a quick evaporating cleaner and a clean microfiber cloth.
Step 8. Preparations for Painting
Cover the areas and parts of the boat that are not to be painted (with painter’s tape).
Step 9. Apply Primer Coat
Pour sufficient primer into the painting pan for one or two-hour paintings (depending on your capacity). Dip a roller into the primer to start painting, and you can make horizontal or vertical strokes with the roller. After painting about three feet, take a brush and remove the roller lines to make the painting even and smooth.
This method is called the roll and tip method. Use the roller again to paint the next 3 feet, and use the brush to smoothen. Ensure the painting looks even, continuous, and smooth. Continue this process till you cover all the surfaces (you can take the help of your friend for brushwork).
Allow the primer to dry overnight. Use the sander with 320 grit sandpaper to remove the glassy finish, and do not sand off the primer layer. Do another coat of primer and repeat the process.
Sanding with 320 or higher grit sandpaper between coats of primer and paint help remove paint bubbles, spots, etc.
Step 10. Post Primer Cleaning
Use a microfiber cloth and fast-evaporating solvent to clean the surface.
Step 11. Apply Remaining Coats
If necessary, remove the selected paint, mix the constituents, and pour the paint into the pan. As discussed above, use a roller and paintbrush to paint the surface.
Ensure the coating thickness is thin. Allow the paint to dry overnight. Sand the painted surface with 400 or higher grit to remove the glassy finish. Continue the above painting process to do the second and third coats of paint.
Step 12. Final Finishing
Use the wet sanding process with higher grit sandpaper (800 or 1000) to make the painted surface slightly dull (this will remove any visible brush lines), and then do the buffing with a buffing wheel and 1000 and 2000 grit buffing compound.
You can also wax the painted surfaces to make them shine.
The above process can be used for the top portion of boat painting, but it also applies to painting other parts of the boat. Let us discuss a few points about painting the boat hull, the inner surfaces, the boat bottom painting, and painting bass boats.
How to Paint Your Boat’s Hull?
The hull is a large and smooth surface area without much hardware to remove. You may want to protect it with masking tape . Y ou will find it easier to paint a hull than the top sides of a boat. There are no angled surfaces or tight corners.
The boat’s hull is a near-vertical surface, and multiple thin coats are preferred for painting it since the paint from a thick coat of paint can drip and spoil the painting.
If the gelcoat on the hull is severely oxidized and has a chalky look, the oxidized outer layer will have to be removed. When done sanding, run your hand along the hull and feel for dips and grooves. You can even stretch a thin batten along the hull to double-check the smoothness of the hull.
Repair any surface imperfections like chips, dings, or gouges . Once you’ve filled all the dips and dents, allow the filler to dry.
Painting the Inner Non-Skid Surfaces of a Boat
Painting the inner non-skid or nonslip surfaces differs from painting the outer surfaces since sanding all the tiny nooks and corners of the inner boat may not be possible.
The inner boat surface may have raised patterns with space in between. Also, the wear on the inner parts of the boat will be uneven since people walk on the top of a pattern, and the space between the two patterns is left untouched.
You can select a textured compound for nonslip and non-skid painting that have minute rubberized pellets mixed in the paint.
This paint looks good and also gives an anti-slip surface. Also, you must select a special painting roller since this paint has solid particles.
How to Paint Your Boat’s Bottom?

Unlike the top of your boat, the bottom is susceptible to the growth of barnacles and other marine organisms. This means you’ll need to use anti-fouling paint when repainting a boat to keep them at bay.
You have a wide variety to choose from but choose the one that is environmentally friendly and does not harm marine life. You will find bottom boat painting is more straightforward than painting the hull and other parts.
Painting a Bass Boat
Bass fishing is a leisure activity in parts of North America to catch bass species fishes using a fishing rod, and the boat used for bass fishing is called a bass boat.
A bass boat is a small boat designed and equipped mainly for bass fishing in lakes, rivers, and wetlands. Modern bass boats are propelled by a motor equipped with an elevated front deck and a swivel chair for convenient movement around the boat during bass fishing.
Bass boats may be made of aluminum alloy or fiberglass. The small size of a bass boat allows you to propel it with oars in times of emergency.
The small size of a bass boat makes it convenient for DIY painting, and you can paint a bass boat by following the same step-by-step process discussed above.
Tips for Boat Painting and Boat Maintenance
- Paint your boat on a dry, cool day or under the shade. There should not be high temperatures and high humidity.
- One important tip for creating the best surface is to apply multiple, thin, consistent coats instead of one or two thick ones. Three coats of paint are generally considered the best.
- Follow the paint manufacturer’s instructions, allow sufficient curing time between coats, and keep an eye on ambient temperature and humidity, especially if you are painting in the open. Ensure that the temperature is between 55 and 75 F and humidity is below 80 percent to provide optimal curing.
- Adhere to the drying time specified by the paint manufacturer before taking the repainted boat into the water.
- Avoid breathing in sanding dust and paint, and solvent fumes.
- Make it a habit to rinse the boat after use in saltwater.
Preserving the longevity of your boat requires diligent maintenance, including regular painting. Whether you own a small bass boat or a larger one, investing time and effort into learning how to paint your boat will undoubtedly pay off in the long run.
By understanding the different types of paints suitable for boats and following a step-by-step guide, boat owners can achieve a professional-looking finish through regular maintenance.
So, take the reins and breathe new life into your boat with a fresh coat of paint that can enhance its appearance and longevity.
References:
- BoatworksToday YouTube Channel.
- PowerBoat Television YouTube Channel.

Boat Collisions: How to Avoid Collisions with Another Boat
Boating can be a fun and relaxing activity that many individuals enjoy. Whether cruising along the coastline, fishing with friends,

What is a Jet Boat? Propulsion System, Types, Pros and Cons
Jet boats are thrilling, high-speed watercraft making waves in the boating industry. Unlike conventional boats, a jet boat uses powerful

How to Steer a Boat: Mastering the Art of Boat Steering
If you’re ready to embark on a boating adventure and take hold of the helm, it’s time to dive into
Workshop Insider Newsletter
Be a workshop insider get our latest collection of news and announcements delivered to your inbox..., latest articles.
- September 12, 2023
The Ultimate Guide to Pipeliner Welding Hoods: Features, Benefits, Buying Guide, and Best Practices
- Welding Helmets Buying Guides
- September 11, 2023
- September 10, 2023
J-B Weld Removal: How to Remove JB Weld from Metal, Plastic, Skin, and More!
- Mechanical Engineering , Welding Technology
- August 19, 2023
- August 17, 2023
What are Bellows on a Boat: Everything You Need to Know
- August 16, 2023
- Privacy Policy
- Terms of Use
- Affiliate Disclosure
- Forums New posts Unanswered threads Register Top Posts Email
- What's new New posts New Posts (legacy) Latest activity New media
- Media New media New comments
- Boat Info Downloads Weekly Quiz Topic FAQ 10000boatnames.com
- Classifieds Sell Your Boat Used Gear for Sale
- Parts General Marine Parts Hunter Beneteau Catalina MacGregor Oday
- Help Terms of Use Monday Mail Subscribe Monday Mail Unsubscribe
I Want to Paint My Hull BLACK - Advice?
- Thread starter JoelHoover
- Start date Jul 18, 2012
- Forums for All Owners
- Ask All Sailors

Florida sail
Joel, I can tell yo that a dark hull will definitely raise the inside temperature during the summer (don't ask me how I know).
Forrest15112
Stone's fan?
Joel - Aside from the temperature issues, I know from painting experience that is is going to be difficult to hide any imperfections in the hull. White (or lighter colors) is not only the easiest to keep clean, but it also hides imperfections on prep very well. Something to consider. - Rob

Scott T-Bird
I'd take a look around and see if there are many dark blue hulls, which seem to be popular. If there aren't any, I would guess that color is a problem. I think the further north you go along the east coast, the more you see color on the hulls. I'd be interested in what you find out ... I like dark blue or even burgandy and could see doing the same kind of project.

Don S/V ILLusion
If you lived here (in Florida) or a similar climate, it would be hot - but you don't so it won't... My experience in a similar climate in RI was that the temperature issue is a myth. As others said, dark colors magnify hull imperfections but from a short distance, the appearance of a dark hull always looks great. Just don't get too lost at night trying to find the boat in a dark anchorage!!

frank balcer
My previous Pearson 30 had a DARK green imron painted hull. During raft ups with other boats on trips you could always feel that my interior was way much hotter than the other folks boats, especially in the late afternoon when the sun started getting lower......
Black hull Nobody mentioned chalking: the fading of dark colors. Thats why I recently painted my boat white. White dosent chalk or fade. My opinion is to avoid future problems paint the boat the color it originally was

Merlin Clark
Joel, I painted mine forrest green. I haven't noticed that much change in temps from the white to the dark color, when it's hot down here it's just friggin' hot. I did not research this with a thermometer just by being on the boat. I don't have a lot of freeboard either so that may make a difference. And I don't seal the boat up, the beckson ports are always open and I have a cowl forward and gaps at the slide/crib boards. I like ventilation. The dark colors do show any imperfections so I would suggest painting it like you would a car, using a good primer and sanding it down to find any problem areas. Use a good 2 part paint, I used a 1 part poly and it didn't flow as well as 2 part jobs I've seen. And it's not as durable. Also, if you are rolling and tipping, that second person on the tipping brush can be the difference between "yeah, it's painted" and "wow! what a paint job"! Mine has some flaws but I don't regret the change in color at all. Any new videos?

I have not done this, but I have read about it, and thats having a vinyl covering put on it, similar to the vinyl wraps they put on cars. You dont have to do pictures or graphics like racing boats, you can do just straight color. I know that its cheaper than a paint job, but the vinyl only lasts 2-5 years. But its easy to change colors then.
Black Hull ... stay away from whales looking for a mate! http://www.soloatlantic.co.uk/soloatlantic/index.php?option=com_content&task=view&id=6&Itemid=30

It seems that here in Australia the darker colours are harder to keep looking great over time. I see dark blue hulls that are faded badly. But our sun is very harsh with UV count that is dangerous. Maybe that is the cause?

Volksfolks62
I re gel coated my seaward in a dark blue (was white)and to be honest haven't noticed a difference in inside temps at all ....if its hot outside and the cabin is sealed up ...it's hot inside period .I live in Alabama so we know hot .My reasoning on doing mine in blue was the same as yours ...its plain out sexy! Now ..same with a black car ...she gets dirty easier ,but it's so worth it to me .my vote is go for the black !
Do folks who think dark hulls create heat own white cars?

bffatcat said: Nobody mentioned chalking: the fading of dark colors. Thats why I recently painted my boat white. White dosent chalk or fade. My opinion is to avoid future problems paint the boat the color it originally was Click to expand
Attachments

I have had dark painted hulls for 20+ years in SoCal. Heat won't be a big problem in Long Beach. Dark hulls do show absolutely every little scratch and nick, and you will certainly get some. Black is going to be the most difficult color to get just right. But when you do get it all done, it will look so much better that I don't think you will regret it.
Dark hulls do show absolutely every little scratch and nick Click to expand

Painted my transom black. It's impossible to keep looking good. Salt water dries white, diluted salt water after cleaning smears white, rain water running down it leaves white streaks, any tiny amount of wax after a polishing leaves white dust.... T.S. Beryl damaged my hull, before I leave the yard the entire transom will be white again.

And, stay away from starting line! That black bow it the ONLY boat that is clearly identifiable as over early. Have seen dark hulled J Boats with white painted bows for that reason. LOL
- This site uses cookies to help personalise content, tailor your experience and to keep you logged in if you register. By continuing to use this site, you are consenting to our use of cookies. Accept Learn more…
RetireFearless
Cost To Paint The Hull Of A Sailboat
Are you looking to repaint your sailboat’s hull? Many factors impact the cost of hull painting. So, how much does it cost to paint the hull of a sailboat?

March 16, 2023
This article may contain affiliate links where we earn a commission from qualifying purchases.
Whether you’re a first-time boat owner or you’ve been sailing for years, one of the most important decisions you’ll make is how to paint your hull. It’s not a decision to take lightly - the wrong color or coatings can be costly and time-consuming mistakes. So, what’s the right way to go about it?
If you are painting the sailboat hull yourself, the equipment cost will be your primary expense, which will typically amount to around $600. If you factor in your time at $20, the cost can go up to $800. In comparison, having the hull painted by a professional can cost about $1,000.
Paint is an important part of a sailboat. It protects the hull from weather and adds to the aesthetics of the vessel. However, you should not consider a figure only by the size of your boat. Various factors affect the cost heavily. These include the type of paint, boat location, number of coats required, design complexity, etc.
As sailing experts, our community members have had their sailboat hulls painted several times over the last decade. So, we’ve put together this guide to help you understand the cost of painting a sailboat hull.

Table of Contents
How Much Does it Cost to Paint the Hull of a Boat?
Diy hull painting.
Painting a sailboat hull yourself can be a gratifying experience. Not only will you save money on the project, but you’ll also get to add your personal touch to your boat. However, it’s important to understand the costs before you start painting.
The cost of paint and other materials will vary depending on the size of your boat and the type of paint you choose. For example, if you have a large boat, you’ll need to purchase more paint than someone with a smaller vessel. Additionally, high-quality paints will cost more than lower-quality options. However, keep in mind that using higher quality materials will result in a better-finished product.
Let’s say you have a 30-foot sailboat with a hull that needs painting. How much will it cost you to do the job yourself? First, you’ll need to purchase the paint (about $200 for a good quality marine paint ), plus primer (if needed), brushes, and other supplies. You’ll also need to allow for the cost of renting a scaffold or ladder if you don’t have one.
In addition to the cost of paint and other materials, you’ll also need to factor in the cost of your time. Painting a sailboat hull is a big job, and it will take several days to complete. If you’re not experienced in painting, it’s essential to factor in the time it will take you to learn the necessary skills.
Assuming you’re doing the job right and taking your time, it takes about 20 hours to complete the job. If you value your time at $20 per hour, that’s an additional $400. So all told, you’re looking at the cost of around $600 to $800 to paint your sailboat hull yourself. Of course, this is just a rough figure - your actual costs may be lower or higher depending on the size and condition of your boat, the type of paint you use, and other factors.
Hiring an Expert for Hull Painting
It can cost anywhere from $500 to $3,000 to paint a sailboat hull, depending on the size of the boat and the type of paint used. If you hire a professional painter, they will typically charge by the hour or square foot. The average cost per hour is around $50.
We will take the same boat size as an example for DIY painting. A 30-foot boat would require about 20 hours of work, which would come out to a total cost of $1,000.
The type of paint you use will also affect the overall cost. There are two main types of paint: one-part and two-part polyurethane. One-part polyurethane is less expensive but doesn’t last as long, while two-part polyurethane is more expensive but will last longer.
It’s best to consult with a professional painter to get accurate pricing for painting your sailboat’s hull. They will be able to give you a tailored estimate based on the size of your boat and the type of paint you want to use.
Types of Paint
The type of paint can affect your hull painting cost heavily. Below, we take a look at the different types of paints.
Aluminum Boat Paint
Aluminum boat paint is a type of paint specifically designed for use on aluminum boats. Unlike most other types of paint, it can withstand harsh conditions in open water, including saltwater and UV exposure.
Aluminum boat paint is available in various colors and finishes to choose the perfect look for your boat. It is important to note that aluminum boat paint is not compatible with all types of primer and topcoats, so be sure to consult with a professional before beginning your project. With proper care and maintenance, your aluminum boat will look great for years to come.
Topside Boat Paint
Topside boat paint is a type of marine paint used on the exposed upper surfaces of a boat, such as the hull, sides, and deck. Unlike bottom paint, topside paint is not designed to be submerged in water. Instead, it must be able to withstand the harsh conditions of the elements, including UV rays, salt water, and wind.
Topside paint is typically made from high-quality oil- or latex-based paint with added UV protection. It can be applied with a brush, roller, or spray gun and is usually available in a variety of colors. When choosing a topside paint, it is important to select one that is specifically designed for use on boats. Using standard exterior paint will not provide the same level of protection or durability.
Fiberglass Coatings
Fiberglass paint is a type of paint specifically designed for use on fiberglass surfaces. It usually comes in a spray can and dries to a hard, glossy finish. Fiberglass paint is more durable than regular paint, and it resists fading and chipping. When choosing a fiberglass paint, select one compatible with the type of fiberglass you are painting. For example, if you are painting a boat hull, you will need marine-grade fiberglass paint.
The key to success with fiberglass paint is appropriately preparing the surface before painting. This means sanding down any rough edges and cleaning the surface thoroughly. Once the surface is prepped, you can apply the paint just like any other type of paint. Just be sure to use a brush specifically designed for fiberglass surfaces to avoid damaging the finish.
Wood Boat Paint
Wood boat paint is a type of paint specifically designed for use on wooden boats. It is usually made from a mix of oil and resin, which helps to protect the wood from water damage and rot. Wood boat paint can be applied to both the exterior and interior of a boat, and it is important to choose a paint specifically designed for maritime use.
There are several different types of wood boat paint available on the market, and it is vital to select the right one for your particular boat. Some factors to consider include the type of wood your boat is made from, the climate you live in, and the amount of sunlight exposure your boat will receive. It is best to consult with a professional before selecting a wood boat paint.
Bottom Boat Paints
Bottom boat paints are coatings applied to the bottom of a boat to protect it from the elements. The most common type of bottom paint is anti-fouling paint, which helps prevent the growth of barnacles and other aquatic creatures on the hull. Bottom paints can also protect from UV rays, saltwater, and oxidation.
Different formulas are available for different boats, so choosing the right one for your vessel is crucial. In general, bottom boat paints should be applied every two years or as needed. Most manufacturers will provide specific instructions on applying the paint and how often it needs to be reapplied.
What Factors Influence the Cost of Painting the Hull of a Sailboat?
The following factors influence the cost of painting a sailboat’s hull:
- The size of the sailboat hull
- The type of paint used
- The location of the boat
- The complexity of the design
- The number of coats required
- Prep work that needs to be done before painting can begin
- Whether or not a professional painter is doing the job
- How long the job will take to complete
The size of the hull is perhaps the most critical factor, as a larger surface area will require more paint and take more time to complete. The type of paint used is also significant, as different grades and quality of paints are available on the market. The boat’s location can also play a role, as some locations may be more expensive to have work done - if the boat is in a dry dock or on land, it will be easier to access and work on than if it is in the water.
The complexity of the design is also something to consider, as a more intricate design will likely take more time to complete. Finally, the number of coats required is also a key factor, as more coats will obviously require more paint and take longer to apply. All of these factors must be considered when estimating the cost of painting a sailboat hull.
Prep work that needs to be done before painting can begin, whether or not a professional painter is doing the job, and how long the job will take to complete are essential factors that influence the cost of painting a sailboat hull. This can include stripping old paint from the hull, which is time-consuming and expensive.
If you are considering having your sailboat hull painted, be sure to take all of these factors into account to get an accurate estimate of the total cost.
Maintaining the Finish on Your Boat’s Hull
Your boat’s hull is its most important feature - it’s what keeps you afloat! So it’s important to keep the finish in good condition and cut down costs of repair and repainting. Here are a few tips for maintaining the finish on your boat’s hull:
- Wash the hull regularly with fresh water and mild soap. This will help remove any dirt or grime that could cause the finish to become dull.
- Apply a good quality wax regularly. This will help protect the finish from sun damage and other environmental factors.
- Be careful when docking or mooring your boat. Bumps and scrapes can damage the finish, so it’s important to use soft lines or fenders to protect the hull.
By following these simple tips, you can help to keep your boat’s hull looking like new for years to come!
Recent Articles

What Size Sailboat Can One Person Handle?

How To Tie A Sailboat To A Mooring Ball Ring

What Is The Ideal Wind Speed When Sailing?

How To Use a Sailboat Winch

Things You Need To Liveaboard a Sailboat

Types of Sailboat Keels
I'm Michael Moris. I've been sailing my whole life, and it has taken me to places I never imagined. From the Caribbean to Europe, from New Zealand to South America - there's nowhere that hasn't felt like home when you're on a boat!
Trending Articles

How Far Is Havana From Miami By Boat?

Yachting Vs Sailing

Who Is Sailing Doodles?
Subscribe To Our Newsletter
Thank you! You're signed up for our free newsletter!
Oops! Something went wrong while submitting the form
About Our Team
We are a publishing team of licensed Nursing Home Administrators, Nurses, Assisted Living Directors, Health Professionals, Gardeners, and individuals with vast experience with senior living and activities.

©2024 Retire Fearless. All rights reserved.
We can be reached via email at [email protected]
Retirefearless.com is a participant in the Amazon Services LLC Associates Program, an affiliate advertising program designed to provide a means for sites to earn advertising fees by advertising and linking to Amazon. This site also participates in other affiliate programs such as CJ, ClickBank and more, and is compensated for referring traffic and business to these companies.
Facebook Pinterest

A Trusted Source For Boating Information Since 2019
Should you paint or re-gelcoat a boat hull.
- Post Written By: Boater Jer
- Published: May 2, 2021
- Updated: July 8, 2022

Disclaimer: You might notice that we recommend products in some articles. We may earn a commission for referring you if you click the link and buy a product.
We only recommend products we’ve tried/tested/own (that’s why you won’t find thousands of affiliate links on my site). If you have experience with one of the products we’ve mentioned, please share your experiences in the comments at the end.
Advertisement

A regularly waxed gelcoat can last for up to 15 years on the boat. This figure can vary based on how well you take care of your boat’s hull. If you’re having trouble deciding whether to re-gelcoat or paint the hull, here’s a fantastic guide for you (and your boat).
It is safe to paint the hull if the gelcoat is in good condition. A good condition gelcoat is one, which still retains gloss and does not show white chalky powder on the surface. If the gelcoat lacks these signs, then re-gelcoat the boat’s bottom, or else I recommend painting at least.
This article talks about whether you should paint or re-gelcoat your hull. We will also cover the steps to re-gelcoat and paint the hull. So keep reading this article until the end for more information!
Re-gelcoat The Hull
Let’s see when you should re-gelcoat the hull along with the quick steps for the same, before getting started, inspect the gelcoat.
If it’s still in good condition, it shows no sign of wear, tear, damage, cracks, etc., there is no need to re-gelcoat. In such a case, follow the steps below to get the job done at the earliest.

- Clean the gelcoat surface.
- Apply an epoxy primer on the surface.
- Sand the primer until you think it’s sufficient.
- Clean the sanding residue and finally apply the topcoat. You can also paint the surface if you feel so.
If there is a crack(s) (no matter the size) or the gel coat’s surface is somewhat chalky, then you MUST do the repairs. For this, follow these quick steps:
- Clean the gelcoat to prepare the surface. Make sure that there are no residues of oil, wax, dirt, etc.
- Now scrub the surface with the soap water, and don’t forget to rinse the soap residue. If the water does not separate while flowing down the surface, that means you’ve cleaned the surface correctly.
- Carefully inspect the surface for any damages such as cracks, dents, etc. Fix the issues on the surface (if any) before proceeding any further.
- Now it’s time for sanding. You may use 320 to 400-grit sandpaper. Unfortunately, the sanding will leave some residue again, so wipe them off to get a clean, beautiful surface.
- Apply the gelcoat. 2-3 layers might be sufficient.
Painting The Hull

If you don’t want to gelcoat the bottom of the boat, you may paint it alternatively. Leaving the hull’s surface unprotected will let organisms spread all over the surface, which will hinder the boat’s speed, handling, and overall performance. Furthermore, it can cause minor to severe damages to the surface over time, which is troublesome in the long run.
The painting will, without a doubt, increase the lifespan of the boat drastically. If your boat stays in the water for a long time, painting the hull is strongly recommended.
Gelcoat Vs. Paint- A Strong Debate
In some cases, gelcoat proves to be better than paint and vice versa. We will now take a look at a few points in the form of an interesting debate.
Gelcoat can effectively protect your boat’s bottom against UV and harmful chemical reactions that might take place on its surface. Since the bottom part of the boat is exposed to several kinds of chemical reactions taking place in the water, the gelcoat layer will give you a huge advantage. On the other hand, paint is practical and offers protection against such issues, but to a minimal extent, comparatively.
Repairing Cost And Other Requirements
Gelcoat application can be expensive as compared to paint. But the longevity of the gelcoat still makes it cheaper than paint and worth every penny. Please remember that gelcoat will be expensive only if you’re re-coating the surface from scratch. Minor repair/patchworks, on the other hand, will be cheap. Furthermore, gelcoat application can be tiring, requiring a lot of patience, skills, and of course, all the materials to prep and apply.
Paint, on the other hand, does not demand as much time, skills, or money. So if you can’t invest much time, we recommend you to go for the paint. Furthermore, if you’re impatient and lack the required skills to gelcoat the surface, then painting the bottom of the boat is the best way to stay on the safe side rather than messing up everything.

The major disadvantage of the paint here is that you will have to repaint the surface every year. Although paint can last for about 8 to 10 years, for the sake of the boat’s longevity, paint it once every year or two. The painted surface can fade sooner than expected, even though it can still offer protection at the same time. Gelcoat, on the other hand, will retain its shine for years.
Self-Leveling
Unfortunately, gelcoat IS NOT self-leveling. If you’re working with the gelcoat for the first time, or if you’re still a newbie, there is a reasonably high chance that you will fail to level the gelcoat properly. To overcome this issue, you can use sandpaper to level up the gelcoat. Paint, on the other hand, does not need to be leveled up. No hassle, quick and straightforward!
Comparison Table For Gelcoat And Paint
You might want to take a look at the comparison between gelcoat and paint to get a better idea of whether to re-gelcoat or paint the boat’s bottom.
The Last Few Knots
We will now try to settle the debate on gelcoat or paint. Remember that it’s the hull we’re talking about here. Since the hull will be in contact with water the entire time, extra safety measures are essential. Therefore, gelcoat is a better option. But when do you need to do it?
When To Re-Gelcoat The Hull?
Here are a few conditions and situations in which you should opt for the reapplication of gelcoat instead of painting your boat’s bottom.
- If you can afford to re-gelcoat the entire hull from scratch, then go for it. Remember that in addition to the gel coat’s cost, you will also have to spend on repair work (if any) on the hull’s surface.
- Re-gelcoat in the case where you have enough skills, time, and patience. Since this work requires heavy labor, go for it only if you can do so. Hiring someone to get the work done will further increase the total cost of repair work.
- To re-gelcoat, you will need a well ventilated open space and do the repairs on a clear day. If you lack these things, then maybe you should drop the idea to re-gelcoat the boat.
- If you leave the boat in the water for a long time (or maybe regularly), then we strongly recommend that you re-gelcoat the hull. Paint won’t be as useful in this case.
- Re-gelcoat your boat’s bottom if the old gelcoat is all worn out, and there’s no way to revive it.
When to Paint The Hull?
The following situations favor painting your boat’s bottom instead of reapplication of gelcoat.
- If you’re low on budget and can’t afford to spend on the gelcoat and then on repairs, then paint the boat. But remember that you’ll need to repeat the process in a year or two.
- Opt for paint if you don’t want to spend the whole day repairing the boat. Paint the bottom of the boat and let it dry.
- Painting does not need as well-ventilated or open space as a gel coating might require. Just try to avoid doing it on a rainy day, as the air will be full of moisture from high humidity.
- If you will take your boat in water occasionally or rarely, then painting is recommended.
- You can paint the boat’s bottom over the old gelcoat if the gelcoat is in good condition. It will give an added layer of protection to your hull and revive shine for a while.
- If you’re not getting your desired color options in the gelcoat, then you can paint your favorite color on the bottom of the boat.
We have covered all the points necessary to help you decide whether to re-gelcoat or paint the boat. It’s totally up to you what to choose, and now that you’ve learned enough, it’s time for you to act. Good Luck!

- https://www.sailmagazine.com/diy/how-to-prepare-your-boat-for-painting-a-gelcoat
- https://www.boatdesign.net/threads/wanting-to-apply-new-gel-coat-over-old-gel-coat.51852/
- https://findanyanswer.com/how-much-does-it-cost-to-get-a-boat-gel-coat
- https://www.myyachtmanagement.com/news/2018/gelcoat-finish-vs-marine-paint-for-your-yachts-hull#:~:text=Painted%20hulls%20are%20especially%20resistant,less%20durable%20than%20gelcoat%20finish.&text=It%20dries%20to%20a%20glossy,additional%20clear%20glossy%20top%20coat .
- https://www.thehulltruth.com/boating-forum/251438-gel-coat-vs-paint.html

Crab Island by Pontoon: A Fun Watery Boating Guide Destination in 2024

Upgrade Your Boating Experience: Adding a Third Pontoon Made Easy!

How Long Does It Take A Canoe To Go… (Canoe Calculator Here)

In-Depth Review of the Pelican Sentinel 100X Fishing Kayak: Pros, Cons, and Performance

How To Put A Kayak In The Water – The Ultimate Guide For New Kayakers

Best Cruising Catamarans For Couples
- PowerDolphin Wizard Water Surface Drone – Best Surface Drone?
- Aluminum vs. Fiberglass Bass Boats
- Sailor’s Superstition: Why Are Green Boats Unlucky?
- How To Make A V-hull Boat More Stable – Increasing Watercraft Stability
fakerolex.to

Share this post with your friends
Subscribe to our newsletter.
Join us in our love for all things water. And Adventure.

AQUAROBOTMAN Magic Jet Sea Scooter – Almost Too Much Fun
Advertisement In the world full of anxieties and worries, water sports have proven to be one of the best cures for the human mind. People like to go in the water to swim, dive, or snorkel around to find relief from the perplexing life we all face if only to gain peace of mind. And

How Long Can You Leave Gas In A Boat?
Advertisement Gas is yet another essential item in a boat. Gasoline is essential for any combustion engine, whether it’s an outboard or an inboard. So, how long can you leave gas in a boat? Leaving gas in the boat can be dangerous. Luckily, there’s a specific time limit to which leaving gas in a boat

Marine Speakers Vs. Regular Speakers: What’s The Difference?
Advertisement So, you want to know about marine speakers vs. regular speakers? You’re in the right place. Owning a boat can enhance your life, but what can improve your boating experience? The answer is adding a stereo system. However, you may be wondering if a regular car stereo will do you good or should be

Can One Person Sail A Catamaran? 10 Tips For Solo Sailing
Advertisement A catamaran features two equal-sized parallel hulls. It offers outstanding stability from the geometrical point of view. Though a catamaran is primarily used as a fishing boat, its fantastic stability has expanded its uses over time. It’s also used in recreational activities. A lot of people ask whether you can sail a catamaran solo?

Can A Catamaran Cross The Atlantic Ocean? 7 PoInts To Consider Before Adventure!
Advertisement Can A Catamaran Cross The Atlantic Ocean? Catamarans come in many sizes and for different uses, from personal watercraft to yachts and even ferries. However, can a catamaran cross the Atlantic Ocean with those two hulls? That’s the question we intend to answer, and the results might surprise you! Catamarans are suitable for long-distance

Everything You Need To Know About Boat Anchors (A Quick Read)
Most people enjoy being on boats. The smell of the water, the feel of the wind in your hair, and being around people you enjoy. It can make for a fun day. But at the end of the day, when you pull the boat back to shore, you will have to make sure that your boat stays in place. This is the job of the boat anchor.

Boat Information By Type
© 2023 Boating.Guide, A Hyperwave Media Group Ltd. Publication.
Privacy Overview
- International edition
- Australia edition
- Europe edition

Dozens of Rohingya refugees rescued from overturned boat in Indian Ocean
Soaked survivors clung to hull overnight before being taken to safety by Indonesian rescue team
Dozens of Rohingya refugees have been rescued from the Indian Ocean off the coast of Indonesia after spending the night balanced on the hull of their overturned boat.
Seventy-five people were pulled from the stricken vessel, which was spotted on Thursday by an Indonesian search and rescue ship.
Survivors said the boat had capsized on Wednesday. Men, women and children, weak and soaked from the night’s rain, wept as the rescue operation got under way and they were taken onboard a rubber dinghy to the rescue boat.
There were contradictory reports about whether anyone had died, with survivors saying many who had been onboard when their boat left Bangladesh were still unaccounted for, but authorities said everyone had been rescued.
Samira, 17, who was among the refugees from the Kutupalong camp in Bangladesh, who had been travelling to Malaysia, said there had been 146 people onboard, raising the prospect that 71 could be missing at sea.
She said the boat began foundering three days previously and capsized on Wednesday, adding that her nephew was among those unaccounted for. “All of us are very sad,” she said. “We are very hungry and weak.”
When fishing vessels reached the scene on Wednesday, desperate refugees clambered on to one of the boats, overloading it and causing it also to capsize. It was not immediately clear what happened to its crew.
After Indonesian authorities were informed by the fishers about the refugees’ plight, an official search and rescue team set off from Banda Aceh city on Wednesday evening. They reached the area of the accident early the next morning and initially could not find the capsized boat.

When they came upon it at midday, they found the refugees on its hull. They rescued 42 men, 18 women and nine children and took some to a temporary shelter in the Aceh Besar district and others to a local hospital.
Amiruddin, a tribal fishing community leader in Aceh Barat district, said those rescued indicated that the boat was sailing east when it started leaking and strong currents pushed it toward the west of Aceh.
About 740,000 Rohingya had earlier fled to Bangladesh to escape a brutal counterinsurgency campaign by security forces in their homeland of Myanmar.
However, thousands have since been trying to flee Bangladesh’s overcrowded camps for neighbouring countries, with Indonesia experiencing an increase in refugees since November, which prompted it to call on the international community for help. Some Rohingya arriving in Aceh face hostility from fellow Muslims .
Indonesia, like Thailand and Malaysia, is not a signatory to the 1951 UN refugee convention outlining refugees’ legal protections, and so is not obliged to accept refugees. However, these countries have so far provided temporary shelter to refugees in distress.
Last year, nearly 4,500 Rohingya, two-thirds of them women and children, fled Myanmar and the refugee camps of neighbouring Bangladesh by boat, the UN refugee agency reported. Of those, 569 died or went missing while crossing the Bay of Bengal and Andaman Sea, the highest death toll since 2014.
Returning safely to Myanmar is virtually impossible because the military that attacked them overthrew Myanmar’s democratically elected government in 2021. No country has offered the Rohingya any large-scale resettlement opportunities.
- Asia Pacific
- South and central Asia

Fears grow for hundreds of Rohingya refugees adrift for two weeks

About 180 Rohingya refugees feared dead after boat goes missing

Activists appeal for rescue of Rohingya refugees stranded at sea in leaking boat

Genocide case against Myanmar over Rohingya atrocities cleared to proceed

Myanmar junta takes place of Aung San Suu Kyi at Rohingya hearing

Thousands homeless as fire sweeps through Rohingya refugee camp

Rohingya sue Facebook for £150bn over Myanmar genocide

Prominent Rohingya leader shot dead in Bangladesh refugee camp

Hundreds of people missing after Rohingya refugee camp fire

India detains Rohingya refugees and threatens to deport them to Myanmar
Most viewed.
IMAGES
VIDEO
COMMENTS
After you have finished with the 600 grit sandpaper, it is time to move on to 800, then 1200. This process is important so you will be painting on as smooth a surface as possible. It is then a good idea to wipe the surfaces of the boat down with a damp cloth to remove any of the dust and flakes of metal/wood.
The frequency of painting a sailboat depends on the type of paint used and the amount of time the boat spends in the water. Bottom paint, which protects the hull, should be applied annually. On the other hand, top paint, which adds color and gloss to the boat, can be done every 3 years.
Particularly useful for painting the hull and larger areas. 5. Detail brushes: Perfect for adding intricate details and highlights. Allows for precise control in adding fine lines, textures, and highlights. Fact: Using the right brushes not only makes painting a sailboat easier but also enhances the overall quality of your artwork ...
After months of fairing and prep work, it's finally time to paint the hull of my sailboat. I'll be using International Perfection Pro. A paint that can be ap...
Practical Steps for Painting a Sailboat. Step 1. Give the sailboat a thorough cleaning. Step 2. Start sanding the hull's surface. Step 3. Prepare the primer, then apply it. Step 4. Prepare the paint, then start applying the topcoat and antifouling coat.
Prep the surface by washing, de-waxing, and thoroughly sanding it. Apply the primer, then the paint. Wax the boat from stem to stern to protect the new paint job. Then, simply keep it clean, and rinse it thoroughly after use in saltwater. Remember, before you paint a boat always read the warning labels on all of the supplies and be sure to use ...
Learn how to paint the bottom of your boat. Having a clean hull is crucial for your boat's performance, maneuverability, and fuel usage. These are the steps ...
With a faired and smooth hull you can lay on the recommended coats of primer or topcoat, sanding between coats with a fine sandpaper (320- to 400-grit) and getting some practice with the roll-and-tip method. Finally, after all that prep work, you can grab your painting partner, open up the cans of the good stuff, and get going on the final laps ...
Before you begin, evaluate your boat's current condition. Inspect the hull for any damage, scratches, or rust that may need to be addressed before painting. Make a list of necessary repairs and tackle them first. ... There are different types of boat paint available, such as antifouling paint, topside paint, and bottom paint. Choose the one ...
David Singer at Rocky Point Boat Worx discusses how he preps a boat for a fresh coat of paint using the roll and tip method. After that the paint and top coa...
Pour the boat paint into the tray and lightly dampen the roller with water. Immerse half the roller into the paint can and run it several times on the tray for even distribution. Paint the sailboat's hull, ensuring firm and even pressure. Maintain uniform strokes. Dip the paintbrush into the paint and remove excess pigment.
Step 6 - Paint. Once you've created a strong base with your repeated sanding and priming, it's time to paint. Use a roller and paintbrush to color your boat hull with marine paint. Brush the hull carefully, especially on areas where bubbles form up. When the painting job is done, let your boat hull dry for several hours.
How to Prepare a Boat's Hull for Painting. If you've been wondering how to prepare a boat for painting, there's no short answer. The reality is the actual painting of your boat takes the least amount of time — the preparation is the time-consuming part. However, with the right preparation, your coat of paint will last several years and ...
Oct 10, 2011. 619. Tartan 34C Toms River, New Jersey. Sep 26, 2017. #1. I know this has been asked before but, I will be painting my hull in the spring. I have a painter that has used the roll and tip method. The yard does not allow spray. I will use Interlux, and want to change the hull color from light blue to emerald green.
Get this FULL SERIES here: https://www.offcenterharbor.com/yt-boat-paint-2204/Get a grip on how to paint a boat — before you head off to the marine paint sto...
The boat's hull is a near-vertical surface, and multiple thin coats are preferred for painting it since the paint from a thick coat of paint can drip and spoil the painting. If the gelcoat on the hull is severely oxidized and has a chalky look, the oxidized outer layer will have to be removed.
Before painting your hull dark, carefully seek out other Newport 28 (or any other Newport built boat) owners who have painted their hulls dark. ... My opinion is to avoid future problems paint the boat the color it originally was . Merlin Clark. Oct 26, 2005 2,057 - - Satellite Beach, FL. Jul 18, 2012 #10 Joel, I painted mine forrest green. I ...
We need a nice, crisp line at the waterline. The lower hull is painted red. This requires a good mask at the waterline to give a nice crisp lower edge to the white stripe. Finally, we will put on the black. Technically the Bluenose used a 'midnight blue', but it basically looks black. I'm just going to use black.
Hiring an Expert for Hull Painting. It can cost anywhere from $500 to $3,000 to paint a sailboat hull, depending on the size of the boat and the type of paint used. If you hire a professional painter, they will typically charge by the hour or square foot. The average cost per hour is around $50.
Proper preparation of your hull is the most important part of your topside paint job. It won't last or look good if you don't take all the steps necessary to...
A regularly waxed gelcoat can last for up to 15 years on the boat. This figure can vary based on how well you take care of your boat's hull. If you're having trouble deciding whether to re-gelcoat or paint the hull, here's a fantastic guide for you (and your boat). It is safe to paint the hull if the gelcoat is in good condition.
Rohingya refugees crowded on to the hull of their boat. Indonesian authorities rescued 75 people but survivors said many others were missing. Photograph: Zainal Abidin/EPA